rust_xlsxwriter
rust_xlsxwriter is a Rust library for writing Excel files in the XLSX format.

Sample code to generate the Excel file shown above.
The rust_xlsxwriter library can be used to write text, numbers, dates and
formulas to multiple worksheets in a new Excel 2007+ XLSX file. It has a focus
on performance and on fidelity with the file format created by Excel. It cannot
be used to modify an existing file.
Introduction
rust_xlsxwriter is a Rust library that can be used to write text, numbers,
dates and formulas to multiple worksheets in an Excel 2007+ XLSX file.
It is a port of the XlsxWriter Python module by the same author, who also actively maintains a C version libxlsxwriter and a Perl version Excel::Writer::XLSX. The Rust version is also intended to try address some limitations and frequently requested features of the previous versions, such as the separation of formatting and data writing.
The overall focus of rust_xlsxwriter is on performance, on testing, on
documentation, and on fidelity with the file format created by Excel.
Getting started
Rust_xlsxwriter is a library and doesn't need to be installed. All that is
required is to add it the Cargo.toml file for your project. To demonstrate we
will start with a small sample application.
Create a sample application
Create a new rust command-line application as follows:
$ cargo new hello-xlsx
This will create a directory like the following:
hello-xlsx/
├── Cargo.toml
└── src
    └── main.rs
Change to the new hello-xlsx directory and add the rust_xlsxwriter dependency:
$ cd hello-xlsx
$ cargo add rust_xlsxwriter
Modify the src/main.rs file so it looks like this:
// SPDX-License-Identifier: MIT OR Apache-2.0
//
// Copyright 2022-2026, John McNamara, jmcnamara@cpan.org

//! Create a simple Hello World style Excel spreadsheet using the
//! `rust_xlsxwriter` library.

use rust_xlsxwriter::{Workbook, XlsxError};

fn main() -> Result<(), XlsxError> {
    // Create a new Excel file object.
    let mut workbook = Workbook::new();

    // Add a worksheet to the workbook.
    let worksheet = workbook.add_worksheet();

    // Write a string to cell (0, 0) = A1.
    worksheet.write(0, 0, "Hello")?;

    // Write a number to cell (1, 0) = A2.
    worksheet.write(1, 0, 12345)?;

    // Save the file to disk.
    workbook.save("hello.xlsx")?;

    Ok(())
}
Then run the application as follows:
$ cargo run
This will create an output file called hello.xlsx which should look
something like this:

Tutorial
Once you have the "hello world" application from the previous section working you can try something more ambitious such as creating a spreadsheet to summarize some monthly expenses like the following:
// SPDX-License-Identifier: MIT OR Apache-2.0
//
// Copyright 2022-2026, John McNamara, jmcnamara@cpan.org

//! A simple program to write some data to an Excel spreadsheet using
//! `rust_xlsxwriter`. Part 3 of a tutorial.

use rust_xlsxwriter::{ExcelDateTime, Format, Formula, Workbook, XlsxError};

fn main() -> Result<(), XlsxError> {
    // Some sample data we want to write to a spreadsheet.
    let expenses = vec![
        ("Rent", 2000, "2022-09-01"),
        ("Gas", 200, "2022-09-05"),
        ("Food", 500, "2022-09-21"),
        ("Gym", 100, "2022-09-28"),
    ];

    // Create a new Excel file object.
    let mut workbook = Workbook::new();

    // Add a bold format to use to highlight cells.
    let bold = Format::new().set_bold();

    // Add a number format for cells with money values.
    let money_format = Format::new().set_num_format("$#,##0");

    // Add a number format for cells with dates.
    let date_format = Format::new().set_num_format("d mmm yyyy");

    // Add a worksheet to the workbook.
    let worksheet = workbook.add_worksheet();

    // Write some column headers.
    worksheet.write_with_format(0, 0, "Item", &bold)?;
    worksheet.write_with_format(0, 1, "Cost", &bold)?;
    worksheet.write_with_format(0, 2, "Date", &bold)?;

    // Adjust the date column width for clarity.
    worksheet.set_column_width(2, 15)?;

    // Iterate over the data and write it out row by row.
    let mut row = 1;
    for expense in &expenses {
        worksheet.write(row, 0, expense.0)?;
        worksheet.write_with_format(row, 1, expense.1, &money_format)?;

        let date = ExcelDateTime::parse_from_str(expense.2)?;
        worksheet.write_with_format(row, 2, &date, &date_format)?;

        row += 1;
    }

    // Write a total using a formula.
    worksheet.write_with_format(row, 0, "Total", &bold)?;
    worksheet.write_with_format(row, 1, Formula::new("=SUM(B2:B5)"), &money_format)?;

    // Save the file to disk.
    workbook.save("tutorial3.xlsx")?;

    Ok(())
}
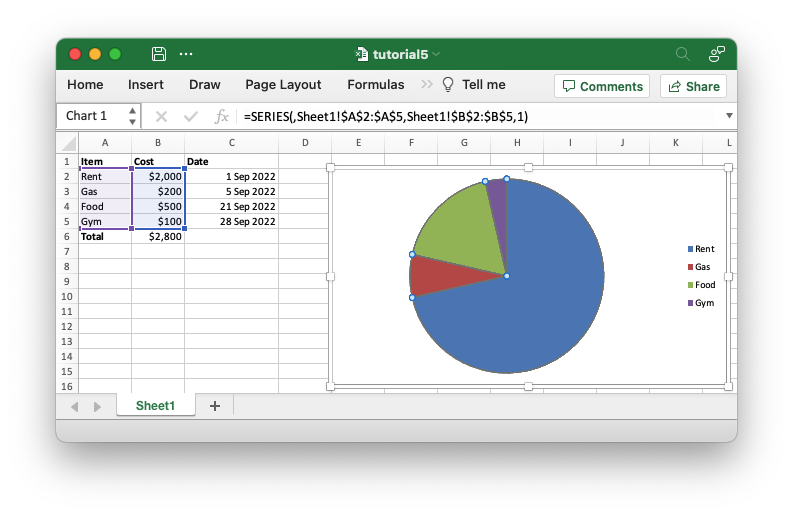
And convert it to a worksheet like this:
Reading ahead
The tutorial presents a simple direct approach so as not to confuse the reader with information that isn't required for an initial understanding. If there is more advanced information that might be interesting at a later stage it will be highlighted in a "Reading ahead" section like this:
Reading ahead:
Some more advanced information.
Adding data to a worksheet
To add some sample expense data to a worksheet we could start with a simple program like the following:
// SPDX-License-Identifier: MIT OR Apache-2.0
//
// Copyright 2022-2026, John McNamara, jmcnamara@cpan.org

//! A simple program to write some data to an Excel spreadsheet using
//! `rust_xlsxwriter`. Part 1 of a tutorial.

use rust_xlsxwriter::{Formula, Workbook, XlsxError};

fn main() -> Result<(), XlsxError> {
    // Some sample data we want to write to a spreadsheet.
    let expenses = vec![("Rent", 2000), ("Gas", 200), ("Food", 500), ("Gym", 100)];

    // Create a new Excel file object.
    let mut workbook = Workbook::new();

    // Add a worksheet to the workbook.
    let worksheet = workbook.add_worksheet();

    // Iterate over the data and write it out row by row.
    let mut row = 0;
    for expense in &expenses {
        worksheet.write(row, 0, expense.0)?;
        worksheet.write(row, 1, expense.1)?;
        row += 1;
    }

    // Write a total using a formula.
    worksheet.write(row, 0, "Total")?;
    worksheet.write(row, 1, Formula::new("=SUM(B1:B4)"))?;

    // Save the file to disk.
    workbook.save("tutorial1.xlsx")?;

    Ok(())
}
If we run this program we should get a spreadsheet that looks like this:
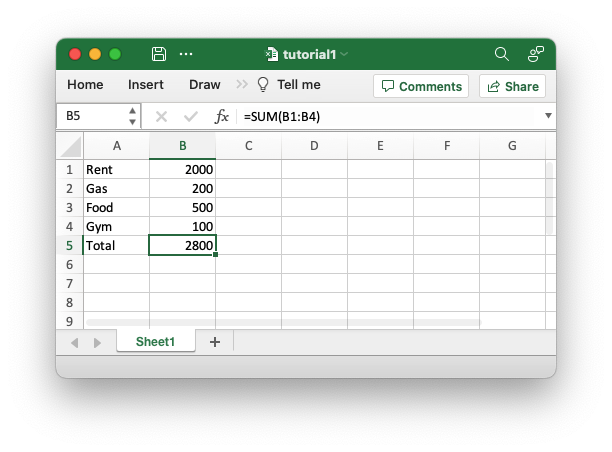
This is a simple program but it demonstrates some of the steps that would apply to any rust_xlsxwriter program.
The first step is to create a new workbook object using the
Workbook constructor Workbook::new():
// SPDX-License-Identifier: MIT OR Apache-2.0
//
// Copyright 2022-2026, John McNamara, jmcnamara@cpan.org

//! A simple program to write some data to an Excel spreadsheet using
//! `rust_xlsxwriter`. Part 1 of a tutorial.

use rust_xlsxwriter::{Formula, Workbook, XlsxError};

fn main() -> Result<(), XlsxError> {
    // Some sample data we want to write to a spreadsheet.
    let expenses = vec![("Rent", 2000), ("Gas", 200), ("Food", 500), ("Gym", 100)];

    // Create a new Excel file object.
    let mut workbook = Workbook::new();

    // Add a worksheet to the workbook.
    let worksheet = workbook.add_worksheet();

    // Iterate over the data and write it out row by row.
    let mut row = 0;
    for expense in &expenses {
        worksheet.write(row, 0, expense.0)?;
        worksheet.write(row, 1, expense.1)?;
        row += 1;
    }

    // Write a total using a formula.
    worksheet.write(row, 0, "Total")?;
    worksheet.write(row, 1, Formula::new("=SUM(B1:B4)"))?;

    // Save the file to disk.
    workbook.save("tutorial1.xlsx")?;

    Ok(())
}Note, rust_xlsxwriter can only create new files. It cannot read or modify
existing files.
The workbook object is then used to add a new worksheet via the
add_worksheet() method:
// SPDX-License-Identifier: MIT OR Apache-2.0
//
// Copyright 2022-2026, John McNamara, jmcnamara@cpan.org

//! A simple program to write some data to an Excel spreadsheet using
//! `rust_xlsxwriter`. Part 1 of a tutorial.

use rust_xlsxwriter::{Formula, Workbook, XlsxError};

fn main() -> Result<(), XlsxError> {
    // Some sample data we want to write to a spreadsheet.
    let expenses = vec![("Rent", 2000), ("Gas", 200), ("Food", 500), ("Gym", 100)];

    // Create a new Excel file object.
    let mut workbook = Workbook::new();

    // Add a worksheet to the workbook.
    let worksheet = workbook.add_worksheet();

    // Iterate over the data and write it out row by row.
    let mut row = 0;
    for expense in &expenses {
        worksheet.write(row, 0, expense.0)?;
        worksheet.write(row, 1, expense.1)?;
        row += 1;
    }

    // Write a total using a formula.
    worksheet.write(row, 0, "Total")?;
    worksheet.write(row, 1, Formula::new("=SUM(B1:B4)"))?;

    // Save the file to disk.
    workbook.save("tutorial1.xlsx")?;

    Ok(())
}
The worksheet will have a standard Excel name, in this case "Sheet1". You can
specify the worksheet name using the Worksheet::set_name() method.
We then iterate over the data and use the
Worksheet::write() method which converts common Rust
types to the equivalent Excel types and writes them to the specified row, col
location in the worksheet:
// SPDX-License-Identifier: MIT OR Apache-2.0
//
// Copyright 2022-2026, John McNamara, jmcnamara@cpan.org

//! A simple program to write some data to an Excel spreadsheet using
//! `rust_xlsxwriter`. Part 1 of a tutorial.

use rust_xlsxwriter::{Formula, Workbook, XlsxError};

fn main() -> Result<(), XlsxError> {
    // Some sample data we want to write to a spreadsheet.
    let expenses = vec![("Rent", 2000), ("Gas", 200), ("Food", 500), ("Gym", 100)];

    // Create a new Excel file object.
    let mut workbook = Workbook::new();

    // Add a worksheet to the workbook.
    let worksheet = workbook.add_worksheet();

    // Iterate over the data and write it out row by row.
    let mut row = 0;
    for expense in &expenses {
        worksheet.write(row, 0, expense.0)?;
        worksheet.write(row, 1, expense.1)?;
        row += 1;
    }

    // Write a total using a formula.
    worksheet.write(row, 0, "Total")?;
    worksheet.write(row, 1, Formula::new("=SUM(B1:B4)"))?;

    // Save the file to disk.
    workbook.save("tutorial1.xlsx")?;

    Ok(())
}
Reading ahead:
There are other type specific write methods such as
Worksheet::write_string()andWorksheet::write_number(). However, these aren't generally required and thanks to Rust's monomorphization the performance of the genericwrite()method is just as fast.There are also worksheet methods for writing arrays of data or arrays of arrays of data that can be useful in cases where you don't need to add specific formatting:
Throughout rust_xlsxwriter rows and columns are zero indexed. So, for example,
the first cell in a worksheet, A1, is (0, 0).
To calculate the total of the items in the second column we add a
Formula like this:
// SPDX-License-Identifier: MIT OR Apache-2.0
//
// Copyright 2022-2026, John McNamara, jmcnamara@cpan.org

//! A simple program to write some data to an Excel spreadsheet using
//! `rust_xlsxwriter`. Part 1 of a tutorial.

use rust_xlsxwriter::{Formula, Workbook, XlsxError};

fn main() -> Result<(), XlsxError> {
    // Some sample data we want to write to a spreadsheet.
    let expenses = vec![("Rent", 2000), ("Gas", 200), ("Food", 500), ("Gym", 100)];

    // Create a new Excel file object.
    let mut workbook = Workbook::new();

    // Add a worksheet to the workbook.
    let worksheet = workbook.add_worksheet();

    // Iterate over the data and write it out row by row.
    let mut row = 0;
    for expense in &expenses {
        worksheet.write(row, 0, expense.0)?;
        worksheet.write(row, 1, expense.1)?;
        row += 1;
    }

    // Write a total using a formula.
    worksheet.write(row, 0, "Total")?;
    worksheet.write(row, 1, Formula::new("=SUM(B1:B4)"))?;

    // Save the file to disk.
    workbook.save("tutorial1.xlsx")?;

    Ok(())
}
Finally, we save and close the Excel file via the Workbook::save() method
which will generate the spreadsheet shown in the image above.:
// SPDX-License-Identifier: MIT OR Apache-2.0
//
// Copyright 2022-2026, John McNamara, jmcnamara@cpan.org

//! A simple program to write some data to an Excel spreadsheet using
//! `rust_xlsxwriter`. Part 1 of a tutorial.

use rust_xlsxwriter::{Formula, Workbook, XlsxError};

fn main() -> Result<(), XlsxError> {
    // Some sample data we want to write to a spreadsheet.
    let expenses = vec![("Rent", 2000), ("Gas", 200), ("Food", 500), ("Gym", 100)];

    // Create a new Excel file object.
    let mut workbook = Workbook::new();

    // Add a worksheet to the workbook.
    let worksheet = workbook.add_worksheet();

    // Iterate over the data and write it out row by row.
    let mut row = 0;
    for expense in &expenses {
        worksheet.write(row, 0, expense.0)?;
        worksheet.write(row, 1, expense.1)?;
        row += 1;
    }

    // Write a total using a formula.
    worksheet.write(row, 0, "Total")?;
    worksheet.write(row, 1, Formula::new("=SUM(B1:B4)"))?;

    // Save the file to disk.
    workbook.save("tutorial1.xlsx")?;

    Ok(())
}
Reading ahead:
The
Workbook::save()method takes astd::pathargument which can be aPath,PathBufor a filename string. It is also possible to save to a byte vector usingWorkbook::save_to_buffer().
Adding some formatting
The previous example converted the required data into an Excel file but it looked a little bare. In order to make the information clearer we can add some simple formatting, like this:

The differences here are that we have added "Item" and "Cost" column headers in a bold font, we have formatted the currency in the second column and we have made the "Total" string bold.
To do this programmatically we can extend our code as follows:
// SPDX-License-Identifier: MIT OR Apache-2.0
//
// Copyright 2022-2026, John McNamara, jmcnamara@cpan.org

//! A simple program to write some data to an Excel spreadsheet using
//! `rust_xlsxwriter`. Part 2 of a tutorial.

use rust_xlsxwriter::{Format, Formula, Workbook, XlsxError};

fn main() -> Result<(), XlsxError> {
    // Some sample data we want to write to a spreadsheet.
    let expenses = vec![("Rent", 2000), ("Gas", 200), ("Food", 500), ("Gym", 100)];

    // Create a new Excel file object.
    let mut workbook = Workbook::new();

    // Add a bold format to use to highlight cells.
    let bold = Format::new().set_bold();

    // Add a number format for cells with money values.
    let money_format = Format::new().set_num_format("$#,##0");

    // Add a worksheet to the workbook.
    let worksheet = workbook.add_worksheet();

    // Write some column headers.
    worksheet.write_with_format(0, 0, "Item", &bold)?;
    worksheet.write_with_format(0, 1, "Cost", &bold)?;

    // Iterate over the data and write it out row by row.
    let mut row = 1;
    for expense in &expenses {
        worksheet.write(row, 0, expense.0)?;
        worksheet.write_with_format(row, 1, expense.1, &money_format)?;
        row += 1;
    }

    // Write a total using a formula.
    worksheet.write_with_format(row, 0, "Total", &bold)?;
    worksheet.write_with_format(row, 1, Formula::new("=SUM(B2:B5)"), &money_format)?;

    // Save the file to disk.
    workbook.save("tutorial2.xlsx")?;

    Ok(())
}
The main difference between this and the previous program is that we have added two Format objects that we can use to format cells in the spreadsheet.
Format objects represent all of the formatting properties that can be applied to a cell in Excel such as fonts, number formatting, colors and borders. This is explained in more detail in the Format struct documentation.
For now we will avoid getting into the details of Format and just use a limited amount of the its functionality to add some simple formatting:
// SPDX-License-Identifier: MIT OR Apache-2.0
//
// Copyright 2022-2026, John McNamara, jmcnamara@cpan.org

//! A simple program to write some data to an Excel spreadsheet using
//! `rust_xlsxwriter`. Part 2 of a tutorial.

use rust_xlsxwriter::{Format, Formula, Workbook, XlsxError};

fn main() -> Result<(), XlsxError> {
    // Some sample data we want to write to a spreadsheet.
    let expenses = vec![("Rent", 2000), ("Gas", 200), ("Food", 500), ("Gym", 100)];

    // Create a new Excel file object.
    let mut workbook = Workbook::new();

    // Add a bold format to use to highlight cells.
    let bold = Format::new().set_bold();

    // Add a number format for cells with money values.
    let money_format = Format::new().set_num_format("$#,##0");

    // Add a worksheet to the workbook.
    let worksheet = workbook.add_worksheet();

    // Write some column headers.
    worksheet.write_with_format(0, 0, "Item", &bold)?;
    worksheet.write_with_format(0, 1, "Cost", &bold)?;

    // Iterate over the data and write it out row by row.
    let mut row = 1;
    for expense in &expenses {
        worksheet.write(row, 0, expense.0)?;
        worksheet.write_with_format(row, 1, expense.1, &money_format)?;
        row += 1;
    }

    // Write a total using a formula.
    worksheet.write_with_format(row, 0, "Total", &bold)?;
    worksheet.write_with_format(row, 1, Formula::new("=SUM(B2:B5)"), &money_format)?;

    // Save the file to disk.
    workbook.save("tutorial2.xlsx")?;

    Ok(())
}
We can use these formats with the Worksheet::write_with_format() method which
writes data and formatting together, like this examples from the code:
// SPDX-License-Identifier: MIT OR Apache-2.0
//
// Copyright 2022-2026, John McNamara, jmcnamara@cpan.org

//! A simple program to write some data to an Excel spreadsheet using
//! `rust_xlsxwriter`. Part 2 of a tutorial.

use rust_xlsxwriter::{Format, Formula, Workbook, XlsxError};

fn main() -> Result<(), XlsxError> {
    // Some sample data we want to write to a spreadsheet.
    let expenses = vec![("Rent", 2000), ("Gas", 200), ("Food", 500), ("Gym", 100)];

    // Create a new Excel file object.
    let mut workbook = Workbook::new();

    // Add a bold format to use to highlight cells.
    let bold = Format::new().set_bold();

    // Add a number format for cells with money values.
    let money_format = Format::new().set_num_format("$#,##0");

    // Add a worksheet to the workbook.
    let worksheet = workbook.add_worksheet();

    // Write some column headers.
    worksheet.write_with_format(0, 0, "Item", &bold)?;
    worksheet.write_with_format(0, 1, "Cost", &bold)?;

    // Iterate over the data and write it out row by row.
    let mut row = 1;
    for expense in &expenses {
        worksheet.write(row, 0, expense.0)?;
        worksheet.write_with_format(row, 1, expense.1, &money_format)?;
        row += 1;
    }

    // Write a total using a formula.
    worksheet.write_with_format(row, 0, "Total", &bold)?;
    worksheet.write_with_format(row, 1, Formula::new("=SUM(B2:B5)"), &money_format)?;

    // Save the file to disk.
    workbook.save("tutorial2.xlsx")?;

    Ok(())
}
Adding dates and more formatting
Let's extend the program a little bit more to add some dates to the data:
// SPDX-License-Identifier: MIT OR Apache-2.0
//
// Copyright 2022-2026, John McNamara, jmcnamara@cpan.org

//! A simple program to write some data to an Excel spreadsheet using
//! `rust_xlsxwriter`. Part 3 of a tutorial.

use rust_xlsxwriter::{ExcelDateTime, Format, Formula, Workbook, XlsxError};

fn main() -> Result<(), XlsxError> {
    // Some sample data we want to write to a spreadsheet.
    let expenses = vec![
        ("Rent", 2000, "2022-09-01"),
        ("Gas", 200, "2022-09-05"),
        ("Food", 500, "2022-09-21"),
        ("Gym", 100, "2022-09-28"),
    ];

    // Create a new Excel file object.
    let mut workbook = Workbook::new();

    // Add a bold format to use to highlight cells.
    let bold = Format::new().set_bold();

    // Add a number format for cells with money values.
    let money_format = Format::new().set_num_format("$#,##0");

    // Add a number format for cells with dates.
    let date_format = Format::new().set_num_format("d mmm yyyy");

    // Add a worksheet to the workbook.
    let worksheet = workbook.add_worksheet();

    // Write some column headers.
    worksheet.write_with_format(0, 0, "Item", &bold)?;
    worksheet.write_with_format(0, 1, "Cost", &bold)?;
    worksheet.write_with_format(0, 2, "Date", &bold)?;

    // Adjust the date column width for clarity.
    worksheet.set_column_width(2, 15)?;

    // Iterate over the data and write it out row by row.
    let mut row = 1;
    for expense in &expenses {
        worksheet.write(row, 0, expense.0)?;
        worksheet.write_with_format(row, 1, expense.1, &money_format)?;

        let date = ExcelDateTime::parse_from_str(expense.2)?;
        worksheet.write_with_format(row, 2, &date, &date_format)?;

        row += 1;
    }

    // Write a total using a formula.
    worksheet.write_with_format(row, 0, "Total", &bold)?;
    worksheet.write_with_format(row, 1, Formula::new("=SUM(B2:B5)"), &money_format)?;

    // Save the file to disk.
    workbook.save("tutorial3.xlsx")?;

    Ok(())
}
The corresponding spreadsheet will look like this:
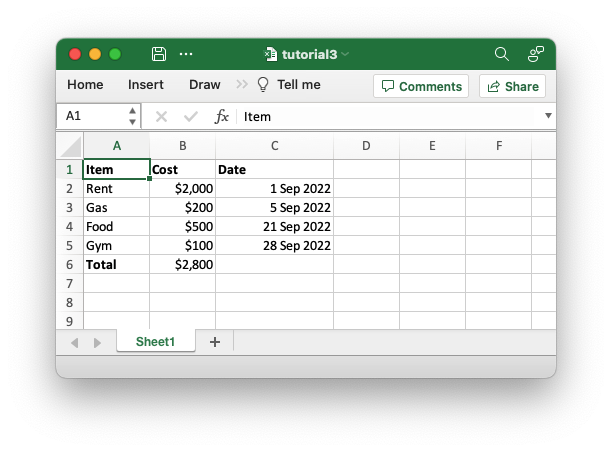
The differences here are that we have added a "Date" column with formatting and made that column a little wider to accommodate the dates.
To do this we can extend our program as follows:
// SPDX-License-Identifier: MIT OR Apache-2.0
//
// Copyright 2022-2026, John McNamara, jmcnamara@cpan.org

//! A simple program to write some data to an Excel spreadsheet using
//! `rust_xlsxwriter`. Part 3 of a tutorial.

use rust_xlsxwriter::{ExcelDateTime, Format, Formula, Workbook, XlsxError};

fn main() -> Result<(), XlsxError> {
    // Some sample data we want to write to a spreadsheet.
    let expenses = vec![
        ("Rent", 2000, "2022-09-01"),
        ("Gas", 200, "2022-09-05"),
        ("Food", 500, "2022-09-21"),
        ("Gym", 100, "2022-09-28"),
    ];

    // Create a new Excel file object.
    let mut workbook = Workbook::new();

    // Add a bold format to use to highlight cells.
    let bold = Format::new().set_bold();

    // Add a number format for cells with money values.
    let money_format = Format::new().set_num_format("$#,##0");

    // Add a number format for cells with dates.
    let date_format = Format::new().set_num_format("d mmm yyyy");

    // Add a worksheet to the workbook.
    let worksheet = workbook.add_worksheet();

    // Write some column headers.
    worksheet.write_with_format(0, 0, "Item", &bold)?;
    worksheet.write_with_format(0, 1, "Cost", &bold)?;
    worksheet.write_with_format(0, 2, "Date", &bold)?;

    // Adjust the date column width for clarity.
    worksheet.set_column_width(2, 15)?;

    // Iterate over the data and write it out row by row.
    let mut row = 1;
    for expense in &expenses {
        worksheet.write(row, 0, expense.0)?;
        worksheet.write_with_format(row, 1, expense.1, &money_format)?;

        let date = ExcelDateTime::parse_from_str(expense.2)?;
        worksheet.write_with_format(row, 2, &date, &date_format)?;

        row += 1;
    }

    // Write a total using a formula.
    worksheet.write_with_format(row, 0, "Total", &bold)?;
    worksheet.write_with_format(row, 1, Formula::new("=SUM(B2:B5)"), &money_format)?;

    // Save the file to disk.
    workbook.save("tutorial3.xlsx")?;

    Ok(())
}
Dates and times in Excel are floating point numbers that have a format applied
to display them in the desired way. In order to handle dates and times with
rust_xlsxwriter we create them using a ExcelDateTime instance and format
them with an Excel number format.
Reading ahead:
If you enable the
chronofeature inrust_xlsxwriteryou can also usechrono::NaiveDateTime,chrono::NaiveDateorchrono::NaiveTimeinstances.
In the example above we create the ExcelDateTime instance from the date
strings in our input data and then add a number format it so that it appears
correctly in Excel:
// SPDX-License-Identifier: MIT OR Apache-2.0
//
// Copyright 2022-2026, John McNamara, jmcnamara@cpan.org

//! A simple program to write some data to an Excel spreadsheet using
//! `rust_xlsxwriter`. Part 3 of a tutorial.

use rust_xlsxwriter::{ExcelDateTime, Format, Formula, Workbook, XlsxError};

fn main() -> Result<(), XlsxError> {
    // Some sample data we want to write to a spreadsheet.
    let expenses = vec![
        ("Rent", 2000, "2022-09-01"),
        ("Gas", 200, "2022-09-05"),
        ("Food", 500, "2022-09-21"),
        ("Gym", 100, "2022-09-28"),
    ];

    // Create a new Excel file object.
    let mut workbook = Workbook::new();

    // Add a bold format to use to highlight cells.
    let bold = Format::new().set_bold();

    // Add a number format for cells with money values.
    let money_format = Format::new().set_num_format("$#,##0");

    // Add a number format for cells with dates.
    let date_format = Format::new().set_num_format("d mmm yyyy");

    // Add a worksheet to the workbook.
    let worksheet = workbook.add_worksheet();

    // Write some column headers.
    worksheet.write_with_format(0, 0, "Item", &bold)?;
    worksheet.write_with_format(0, 1, "Cost", &bold)?;
    worksheet.write_with_format(0, 2, "Date", &bold)?;

    // Adjust the date column width for clarity.
    worksheet.set_column_width(2, 15)?;

    // Iterate over the data and write it out row by row.
    let mut row = 1;
    for expense in &expenses {
        worksheet.write(row, 0, expense.0)?;
        worksheet.write_with_format(row, 1, expense.1, &money_format)?;

        let date = ExcelDateTime::parse_from_str(expense.2)?;
        worksheet.write_with_format(row, 2, &date, &date_format)?;

        row += 1;
    }

    // Write a total using a formula.
    worksheet.write_with_format(row, 0, "Total", &bold)?;
    worksheet.write_with_format(row, 1, Formula::new("=SUM(B2:B5)"), &money_format)?;

    // Save the file to disk.
    workbook.save("tutorial3.xlsx")?;

    Ok(())
}
Another addition to our program is the make the "Date" column wider for clarity
using the Worksheet::set_column_width() method.
Adding a chart
To extend our example a little further let's add a Pie chart to show the relative sizes of the outgoing expenses to get a spreadsheet that will look like this:
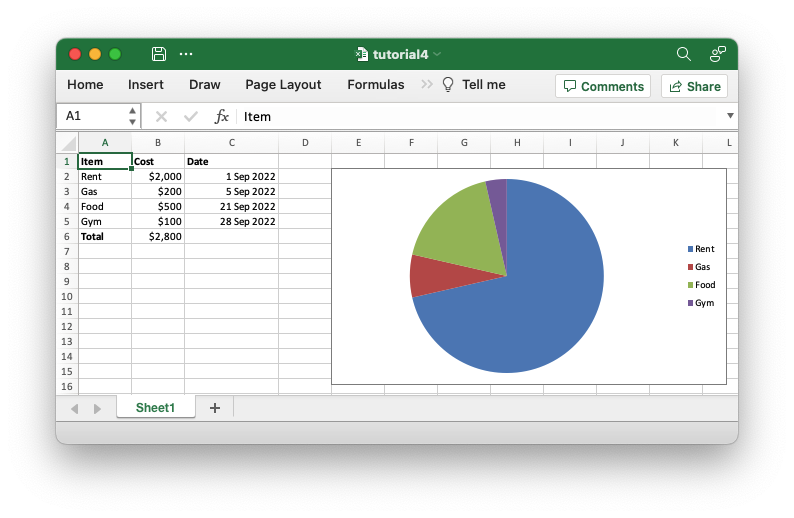
We use the Chart struct to represent the chart.
The Chart struct has a lot of configuration options and sub-structs to
replicate Excel's chart features but as an initial demonstration we will just
add the data series to which the chart refers. Here is the updated code with the
chart addition at the end.
// SPDX-License-Identifier: MIT OR Apache-2.0
//
// Copyright 2022-2026, John McNamara, jmcnamara@cpan.org

//! A simple program to write some data to an Excel spreadsheet using
//! `rust_xlsxwriter`. Part 4 of a tutorial.

use rust_xlsxwriter::{Chart, ExcelDateTime, Format, Formula, Workbook, XlsxError};

fn main() -> Result<(), XlsxError> {
    // Some sample data we want to write to a spreadsheet.
    let expenses = vec![
        ("Rent", 2000, "2022-09-01"),
        ("Gas", 200, "2022-09-05"),
        ("Food", 500, "2022-09-21"),
        ("Gym", 100, "2022-09-28"),
    ];

    // Create a new Excel file object.
    let mut workbook = Workbook::new();

    // Add a bold format to use to highlight cells.
    let bold = Format::new().set_bold();

    // Add a number format for cells with money values.
    let money_format = Format::new().set_num_format("$#,##0");

    // Add a number format for cells with dates.
    let date_format = Format::new().set_num_format("d mmm yyyy");

    // Add a worksheet to the workbook.
    let worksheet = workbook.add_worksheet();

    // Write some column headers.
    worksheet.write_with_format(0, 0, "Item", &bold)?;
    worksheet.write_with_format(0, 1, "Cost", &bold)?;
    worksheet.write_with_format(0, 2, "Date", &bold)?;

    // Adjust the date column width for clarity.
    worksheet.set_column_width(2, 15)?;

    // Iterate over the data and write it out row by row.
    let mut last_row = 1;
    for expense in &expenses {
        worksheet.write(last_row, 0, expense.0)?;
        worksheet.write_with_format(last_row, 1, expense.1, &money_format)?;

        let date = ExcelDateTime::parse_from_str(expense.2)?;
        worksheet.write_with_format(last_row, 2, &date, &date_format)?;

        last_row += 1;
    }

    // Write a total using a formula.
    worksheet.write_with_format(last_row, 0, "Total", &bold)?;
    worksheet.write_with_format(last_row, 1, Formula::new("=SUM(B2:B5)"), &money_format)?;

    // Add a chart to display the expenses.
    let mut chart = Chart::new_pie();

    // Configure the data series for the chart.
    chart
        .add_series()
        .set_categories("Sheet1!$A$2:$A$5")
        .set_values("Sheet1!$B$2:$B$5");

    // Add the chart to the worksheet.
    worksheet.insert_chart(1, 4, &chart)?;

    // Save the file to disk.
    workbook.save("tutorial4.xlsx")?;

    Ok(())
}
See the documentation for Chart for more information.
Making the code more programmatic
The previous example worked as expected but it contains some hard-coded cell
ranges like set_values("Sheet1!$B$2:$B$5") and Formula::new("=SUM(B2:B5)").
If our example changed to have a different number of data items then we would
have to manually change the code to adjust for the new ranges.
Fortunately, these hard-coded values are only used for the sake of a tutorial and
rust_xlsxwriter provides APIs to handle these more programmatically.
Let's start by looking at the chart ranges:
// SPDX-License-Identifier: MIT OR Apache-2.0
//
// Copyright 2022-2026, John McNamara, jmcnamara@cpan.org

//! A simple program to write some data to an Excel spreadsheet using
//! `rust_xlsxwriter`. Part 4 of a tutorial.

use rust_xlsxwriter::{Chart, ExcelDateTime, Format, Formula, Workbook, XlsxError};

fn main() -> Result<(), XlsxError> {
    // Some sample data we want to write to a spreadsheet.
    let expenses = vec![
        ("Rent", 2000, "2022-09-01"),
        ("Gas", 200, "2022-09-05"),
        ("Food", 500, "2022-09-21"),
        ("Gym", 100, "2022-09-28"),
    ];

    // Create a new Excel file object.
    let mut workbook = Workbook::new();

    // Add a bold format to use to highlight cells.
    let bold = Format::new().set_bold();

    // Add a number format for cells with money values.
    let money_format = Format::new().set_num_format("$#,##0");

    // Add a number format for cells with dates.
    let date_format = Format::new().set_num_format("d mmm yyyy");

    // Add a worksheet to the workbook.
    let worksheet = workbook.add_worksheet();

    // Write some column headers.
    worksheet.write_with_format(0, 0, "Item", &bold)?;
    worksheet.write_with_format(0, 1, "Cost", &bold)?;
    worksheet.write_with_format(0, 2, "Date", &bold)?;

    // Adjust the date column width for clarity.
    worksheet.set_column_width(2, 15)?;

    // Iterate over the data and write it out row by row.
    let mut last_row = 1;
    for expense in &expenses {
        worksheet.write(last_row, 0, expense.0)?;
        worksheet.write_with_format(last_row, 1, expense.1, &money_format)?;

        let date = ExcelDateTime::parse_from_str(expense.2)?;
        worksheet.write_with_format(last_row, 2, &date, &date_format)?;

        last_row += 1;
    }

    // Write a total using a formula.
    worksheet.write_with_format(last_row, 0, "Total", &bold)?;
    worksheet.write_with_format(last_row, 1, Formula::new("=SUM(B2:B5)"), &money_format)?;

    // Add a chart to display the expenses.
    let mut chart = Chart::new_pie();

    // Configure the data series for the chart.
    chart
        .add_series()
        .set_categories("Sheet1!$A$2:$A$5")
        .set_values("Sheet1!$B$2:$B$5");

    // Add the chart to the worksheet.
    worksheet.insert_chart(1, 4, &chart)?;

    // Save the file to disk.
    workbook.save("tutorial4.xlsx")?;

    Ok(())
}
In general rust_xlsxwriter always numeric APIs for any ranges in Excel but
sometimes also provides a secondary string based option. The previous
example uses the secondary string based API for demonstration purposes but for
real applications you would set the chart ranges we can using 5-tuple values
like this:
// SPDX-License-Identifier: MIT OR Apache-2.0
//
// Copyright 2022-2026, John McNamara, jmcnamara@cpan.org

//! A simple program to write some data to an Excel spreadsheet using
//! `rust_xlsxwriter`. Part 5 of a tutorial.

use rust_xlsxwriter::{cell_range, Chart, ExcelDateTime, Format, Formula, Workbook, XlsxError};

fn main() -> Result<(), XlsxError> {
    // Some sample data we want to write to a spreadsheet.
    let expenses = vec![
        ("Rent", 2000, "2022-09-01"),
        ("Gas", 200, "2022-09-05"),
        ("Food", 500, "2022-09-21"),
        ("Gym", 100, "2022-09-28"),
    ];

    // Create a new Excel file object.
    let mut workbook = Workbook::new();

    // Add a bold format to use to highlight cells.
    let bold = Format::new().set_bold();

    // Add a number format for cells with money values.
    let money_format = Format::new().set_num_format("$#,##0");

    // Add a number format for cells with dates.
    let date_format = Format::new().set_num_format("d mmm yyyy");

    // Add a worksheet to the workbook.
    let worksheet = workbook.add_worksheet();

    // Write some column headers.
    worksheet.write_with_format(0, 0, "Item", &bold)?;
    worksheet.write_with_format(0, 1, "Cost", &bold)?;
    worksheet.write_with_format(0, 2, "Date", &bold)?;

    // Adjust the date column width for clarity.
    worksheet.set_column_width(2, 15)?;

    // Iterate over the data and write it out row by row.
    let mut row = 1;
    for expense in &expenses {
        worksheet.write(row, 0, expense.0)?;
        worksheet.write_with_format(row, 1, expense.1, &money_format)?;

        let date = ExcelDateTime::parse_from_str(expense.2)?;
        worksheet.write_with_format(row, 2, &date, &date_format)?;

        row += 1;
    }

    // For clarity, define some variables to use in the formula and chart
    // ranges. Row and column numbers are all zero-indexed.
    let first_row = 1; // Skip the header row.
    let last_row = first_row + (expenses.len() as u32) - 1;
    let item_col = 0;
    let cost_col = 1;

    // Write a total using a formula.
    worksheet.write_with_format(row, 0, "Total", &bold)?;

    let range = cell_range(first_row, cost_col, last_row, cost_col);
    let formula = format!("=SUM({range})");
    worksheet.write_with_format(row, 1, Formula::new(formula), &money_format)?;

    // Add a chart to display the expenses.
    let mut chart = Chart::new_pie();

    // Configure the data series for the chart.
    chart
        .add_series()
        .set_categories(("Sheet1", first_row, item_col, last_row, item_col))
        .set_values(("Sheet1", first_row, cost_col, last_row, cost_col));

    // Add the chart to the worksheet.
    worksheet.insert_chart(1, 4, &chart)?;

    // Save the file to disk.
    workbook.save("tutorial5.xlsx")?;

    Ok(())
}
Where the range values are set or calculated in the code:
// SPDX-License-Identifier: MIT OR Apache-2.0
//
// Copyright 2022-2026, John McNamara, jmcnamara@cpan.org

//! A simple program to write some data to an Excel spreadsheet using
//! `rust_xlsxwriter`. Part 5 of a tutorial.

use rust_xlsxwriter::{cell_range, Chart, ExcelDateTime, Format, Formula, Workbook, XlsxError};

fn main() -> Result<(), XlsxError> {
    // Some sample data we want to write to a spreadsheet.
    let expenses = vec![
        ("Rent", 2000, "2022-09-01"),
        ("Gas", 200, "2022-09-05"),
        ("Food", 500, "2022-09-21"),
        ("Gym", 100, "2022-09-28"),
    ];

    // Create a new Excel file object.
    let mut workbook = Workbook::new();

    // Add a bold format to use to highlight cells.
    let bold = Format::new().set_bold();

    // Add a number format for cells with money values.
    let money_format = Format::new().set_num_format("$#,##0");

    // Add a number format for cells with dates.
    let date_format = Format::new().set_num_format("d mmm yyyy");

    // Add a worksheet to the workbook.
    let worksheet = workbook.add_worksheet();

    // Write some column headers.
    worksheet.write_with_format(0, 0, "Item", &bold)?;
    worksheet.write_with_format(0, 1, "Cost", &bold)?;
    worksheet.write_with_format(0, 2, "Date", &bold)?;

    // Adjust the date column width for clarity.
    worksheet.set_column_width(2, 15)?;

    // Iterate over the data and write it out row by row.
    let mut row = 1;
    for expense in &expenses {
        worksheet.write(row, 0, expense.0)?;
        worksheet.write_with_format(row, 1, expense.1, &money_format)?;

        let date = ExcelDateTime::parse_from_str(expense.2)?;
        worksheet.write_with_format(row, 2, &date, &date_format)?;

        row += 1;
    }

    // For clarity, define some variables to use in the formula and chart
    // ranges. Row and column numbers are all zero-indexed.
    let first_row = 1; // Skip the header row.
    let last_row = first_row + (expenses.len() as u32) - 1;
    let item_col = 0;
    let cost_col = 1;

    // Write a total using a formula.
    worksheet.write_with_format(row, 0, "Total", &bold)?;

    let range = cell_range(first_row, cost_col, last_row, cost_col);
    let formula = format!("=SUM({range})");
    worksheet.write_with_format(row, 1, Formula::new(formula), &money_format)?;

    // Add a chart to display the expenses.
    let mut chart = Chart::new_pie();

    // Configure the data series for the chart.
    chart
        .add_series()
        .set_categories(("Sheet1", first_row, item_col, last_row, item_col))
        .set_values(("Sheet1", first_row, cost_col, last_row, cost_col));

    // Add the chart to the worksheet.
    worksheet.insert_chart(1, 4, &chart)?;

    // Save the file to disk.
    workbook.save("tutorial5.xlsx")?;

    Ok(())
}
This allows the range to change dynamically if we add new elements to our data
vector and also ensures that the worksheet name is quoted properly, if required.
The other section of the code that has a hard-coded string is the formula
"=SUM(B2:B5)". There isn't a single API change that can be applied to ranges
in formulas but rust_xlsxwriter provides several utility functions that can
convert numbers to string ranges. For example the
cell_range() function which takes zero indexed
numbers and converts them to a string range like B2:B5:
// SPDX-License-Identifier: MIT OR Apache-2.0
//
// Copyright 2022-2026, John McNamara, jmcnamara@cpan.org

//! A simple program to write some data to an Excel spreadsheet using
//! `rust_xlsxwriter`. Part 5 of a tutorial.

use rust_xlsxwriter::{cell_range, Chart, ExcelDateTime, Format, Formula, Workbook, XlsxError};

fn main() -> Result<(), XlsxError> {
    // Some sample data we want to write to a spreadsheet.
    let expenses = vec![
        ("Rent", 2000, "2022-09-01"),
        ("Gas", 200, "2022-09-05"),
        ("Food", 500, "2022-09-21"),
        ("Gym", 100, "2022-09-28"),
    ];

    // Create a new Excel file object.
    let mut workbook = Workbook::new();

    // Add a bold format to use to highlight cells.
    let bold = Format::new().set_bold();

    // Add a number format for cells with money values.
    let money_format = Format::new().set_num_format("$#,##0");

    // Add a number format for cells with dates.
    let date_format = Format::new().set_num_format("d mmm yyyy");

    // Add a worksheet to the workbook.
    let worksheet = workbook.add_worksheet();

    // Write some column headers.
    worksheet.write_with_format(0, 0, "Item", &bold)?;
    worksheet.write_with_format(0, 1, "Cost", &bold)?;
    worksheet.write_with_format(0, 2, "Date", &bold)?;

    // Adjust the date column width for clarity.
    worksheet.set_column_width(2, 15)?;

    // Iterate over the data and write it out row by row.
    let mut row = 1;
    for expense in &expenses {
        worksheet.write(row, 0, expense.0)?;
        worksheet.write_with_format(row, 1, expense.1, &money_format)?;

        let date = ExcelDateTime::parse_from_str(expense.2)?;
        worksheet.write_with_format(row, 2, &date, &date_format)?;

        row += 1;
    }

    // For clarity, define some variables to use in the formula and chart
    // ranges. Row and column numbers are all zero-indexed.
    let first_row = 1; // Skip the header row.
    let last_row = first_row + (expenses.len() as u32) - 1;
    let item_col = 0;
    let cost_col = 1;

    // Write a total using a formula.
    worksheet.write_with_format(row, 0, "Total", &bold)?;

    let range = cell_range(first_row, cost_col, last_row, cost_col);
    let formula = format!("=SUM({range})");
    worksheet.write_with_format(row, 1, Formula::new(formula), &money_format)?;

    // Add a chart to display the expenses.
    let mut chart = Chart::new_pie();

    // Configure the data series for the chart.
    chart
        .add_series()
        .set_categories(("Sheet1", first_row, item_col, last_row, item_col))
        .set_values(("Sheet1", first_row, cost_col, last_row, cost_col));

    // Add the chart to the worksheet.
    worksheet.insert_chart(1, 4, &chart)?;

    // Save the file to disk.
    workbook.save("tutorial5.xlsx")?;

    Ok(())
}
Reading ahead:
The
cell_range()function and other similar functions are detailed elsewhere in the documentation:
column_number_to_name()- Convert a zero indexed column cell reference to a string like"A".column_name_to_number()- Convert a column string such as"A"to a zero indexed column reference.row_col_to_cell()- Convert zero indexed row and column cell numbers to aA1style string.row_col_to_cell_absolute()- Convert zero indexed row and column cell numbers to an absolute$A$1style range string.cell_range()- Convert zero indexed row and col cell numbers to aA1:B1style range string.cell_range_absolute()- Convert zero indexed row and col cell numbers to an absolute$A$1:$B$1
Adding these improvements our application changes to the following:
// SPDX-License-Identifier: MIT OR Apache-2.0
//
// Copyright 2022-2026, John McNamara, jmcnamara@cpan.org

//! A simple program to write some data to an Excel spreadsheet using
//! `rust_xlsxwriter`. Part 5 of a tutorial.

use rust_xlsxwriter::{cell_range, Chart, ExcelDateTime, Format, Formula, Workbook, XlsxError};

fn main() -> Result<(), XlsxError> {
    // Some sample data we want to write to a spreadsheet.
    let expenses = vec![
        ("Rent", 2000, "2022-09-01"),
        ("Gas", 200, "2022-09-05"),
        ("Food", 500, "2022-09-21"),
        ("Gym", 100, "2022-09-28"),
    ];

    // Create a new Excel file object.
    let mut workbook = Workbook::new();

    // Add a bold format to use to highlight cells.
    let bold = Format::new().set_bold();

    // Add a number format for cells with money values.
    let money_format = Format::new().set_num_format("$#,##0");

    // Add a number format for cells with dates.
    let date_format = Format::new().set_num_format("d mmm yyyy");

    // Add a worksheet to the workbook.
    let worksheet = workbook.add_worksheet();

    // Write some column headers.
    worksheet.write_with_format(0, 0, "Item", &bold)?;
    worksheet.write_with_format(0, 1, "Cost", &bold)?;
    worksheet.write_with_format(0, 2, "Date", &bold)?;

    // Adjust the date column width for clarity.
    worksheet.set_column_width(2, 15)?;

    // Iterate over the data and write it out row by row.
    let mut row = 1;
    for expense in &expenses {
        worksheet.write(row, 0, expense.0)?;
        worksheet.write_with_format(row, 1, expense.1, &money_format)?;

        let date = ExcelDateTime::parse_from_str(expense.2)?;
        worksheet.write_with_format(row, 2, &date, &date_format)?;

        row += 1;
    }

    // For clarity, define some variables to use in the formula and chart
    // ranges. Row and column numbers are all zero-indexed.
    let first_row = 1; // Skip the header row.
    let last_row = first_row + (expenses.len() as u32) - 1;
    let item_col = 0;
    let cost_col = 1;

    // Write a total using a formula.
    worksheet.write_with_format(row, 0, "Total", &bold)?;

    let range = cell_range(first_row, cost_col, last_row, cost_col);
    let formula = format!("=SUM({range})");
    worksheet.write_with_format(row, 1, Formula::new(formula), &money_format)?;

    // Add a chart to display the expenses.
    let mut chart = Chart::new_pie();

    // Configure the data series for the chart.
    chart
        .add_series()
        .set_categories(("Sheet1", first_row, item_col, last_row, item_col))
        .set_values(("Sheet1", first_row, cost_col, last_row, cost_col));

    // Add the chart to the worksheet.
    worksheet.insert_chart(1, 4, &chart)?;

    // Save the file to disk.
    workbook.save("tutorial5.xlsx")?;

    Ok(())
}
This gives the same output to the previous version but it is now future proof for any changes to our input data:

The Workbook struct
The Workbook struct represents an Excel file in it's entirety. It is the
starting point for creating a new Excel xlsx file.
// SPDX-License-Identifier: MIT OR Apache-2.0
//
// Copyright 2022-2026, John McNamara, jmcnamara@cpan.org

//! The following example demonstrates creating a simple workbook, with one
//! unused worksheet.

use rust_xlsxwriter::{Workbook, XlsxError};

fn main() -> Result<(), XlsxError> {
    let mut workbook = Workbook::new();

    let _worksheet = workbook.add_worksheet();

    workbook.save("workbook.xlsx")?;

    Ok(())
}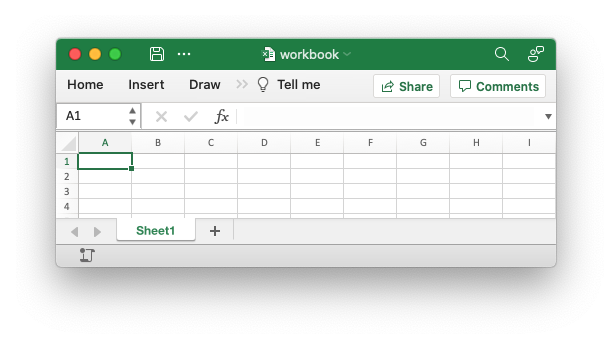
For more details on the Workbook APIs see the docs.rs docs for Workbook.
Creating and saving an xlsx file
Creating a Workbook struct instance to represent an Excel xlsx file is done
via the Workbook::new() method:
// SPDX-License-Identifier: MIT OR Apache-2.0
//
// Copyright 2022-2026, John McNamara, jmcnamara@cpan.org

//! The following example demonstrates creating a simple workbook, with one
//! unused worksheet.

use rust_xlsxwriter::{Workbook, XlsxError};

fn main() -> Result<(), XlsxError> {
    let mut workbook = Workbook::new();

    let _worksheet = workbook.add_worksheet();

    workbook.save("workbook.xlsx")?;

    Ok(())
}
Once you are finished writing data via a worksheet you can save it with the Workbook::save() method:
// SPDX-License-Identifier: MIT OR Apache-2.0
//
// Copyright 2022-2026, John McNamara, jmcnamara@cpan.org

//! The following example demonstrates creating a simple workbook, with one
//! unused worksheet.

use rust_xlsxwriter::{Workbook, XlsxError};

fn main() -> Result<(), XlsxError> {
    let mut workbook = Workbook::new();

    let _worksheet = workbook.add_worksheet();

    workbook.save("workbook.xlsx")?;

    Ok(())
}
This will you a simple output file like the following.

The save() method takes a std::path or path/filename string. You can also
save the xlsx file data to a Vec<u8> buffer via the
Workbook::save_to_buffer() method:
// SPDX-License-Identifier: MIT OR Apache-2.0
//
// Copyright 2022-2026, John McNamara, jmcnamara@cpan.org

//! The following example demonstrates creating a simple workbook to a Vec<u8>
//! buffer.

use rust_xlsxwriter::{Workbook, XlsxError};

fn main() -> Result<(), XlsxError> {
    let mut workbook = Workbook::new();

    let worksheet = workbook.add_worksheet();
    worksheet.write_string(0, 0, "Hello")?;

    let buf = workbook.save_to_buffer()?;

    println!("File size: {}", buf.len());

    Ok(())
}
This can be useful if you intend to stream the data.
Checksum of a saved file
A common issue that occurs with rust_xlsxwriter, but also with Excel, is that
running the same program twice doesn't generate the same file, byte for byte.
This can cause issues with applications that do checksumming for testing
purposes.
For example consider the following simple rust_xlsxwriter program:
// SPDX-License-Identifier: MIT OR Apache-2.0
//
// Copyright 2022-2026, John McNamara, jmcnamara@cpan.org

//! Create a simple workbook to demonstrate the changing checksum due to the
//! changing creation date.

use rust_xlsxwriter::{Workbook, XlsxError};

fn main() -> Result<(), XlsxError> {
    let mut workbook = Workbook::new();
    let worksheet = workbook.add_worksheet();

    worksheet.write_string(0, 0, "Hello")?;

    workbook.save("properties.xlsx")?;

    Ok(())
}
If we run this several times, with a small delay, we will get different checksums as shown below:
$ cargo run --example doc_properties_checksum1

$ sum properties.xlsx
62457 6 properties.xlsx

$ sleep 2

$ cargo run --example doc_properties_checksum1

$ sum properties.xlsx
56692 6 properties.xlsx # Different to previous.
This is due to a file creation datetime that is included in the file and which changes each time a new file is created.
The relevant section of the docProps/core.xml sub-file in the xlsx format
looks like this:
<?xml version="1.0" encoding="UTF-8" standalone="yes"?>
<cp:coreProperties>
  <dc:creator/>
  <cp:lastModifiedBy/>
  <dcterms:created xsi:type="dcterms:W3CDTF">2023-01-08T00:23:58Z</dcterms:created>
  <dcterms:modified xsi:type="dcterms:W3CDTF">2023-01-08T00:23:58Z</dcterms:modified>
</cp:coreProperties>
If required this can be avoided by setting a constant creation date in the document properties metadata:
// SPDX-License-Identifier: MIT OR Apache-2.0
//
// Copyright 2022-2026, John McNamara, jmcnamara@cpan.org

//! Create a simple workbook to demonstrate a constant checksum due to the a
//! constant creation date.

use rust_xlsxwriter::{DocProperties, ExcelDateTime, Workbook, XlsxError};

fn main() -> Result<(), XlsxError> {
    let mut workbook = Workbook::new();

    // Create a file creation date for the file.
    let date = ExcelDateTime::from_ymd(2023, 1, 1)?;

    // Add it to the document metadata.
    let properties = DocProperties::new().set_creation_datetime(&date);
    workbook.set_properties(&properties);

    let worksheet = workbook.add_worksheet();
    worksheet.write_string(0, 0, "Hello")?;

    workbook.save("properties.xlsx")?;

    Ok(())
}
Then we will get the same checksum for the same output every time:
$ cargo run --example doc_properties_checksum2

$ sum properties.xlsx
8914 6 properties.xlsx

$ sleep 2

$ cargo run --example doc_properties_checksum2

$ sum properties.xlsx
8914 6 properties.xlsx # Same as previous
For more details see DocProperties and workbook::set_properties().
The Worksheet struct
The Worksheet struct struct represents an Excel worksheet. It handles operations such as writing data to cells or formatting worksheet layout.

// SPDX-License-Identifier: MIT OR Apache-2.0
//
// Copyright 2022-2026, John McNamara, jmcnamara@cpan.org

//! A simple, getting started, example of some of the features of the
//! `rust_xlsxwriter` library.

use rust_xlsxwriter::*;

fn main() -> Result<(), XlsxError> {
    // Create a new Excel file object.
    let mut workbook = Workbook::new();

    // Create some formats to use in the worksheet.
    let bold_format = Format::new().set_bold();
    let decimal_format = Format::new().set_num_format("0.000");
    let date_format = Format::new().set_num_format("yyyy-mm-dd");
    let merge_format = Format::new()
        .set_border(FormatBorder::Thin)
        .set_align(FormatAlign::Center);

    // Add a worksheet to the workbook.
    let worksheet = workbook.add_worksheet();

    // Set the column width for clarity.
    worksheet.set_column_width(0, 22)?;

    // Write a string without formatting.
    worksheet.write(0, 0, "Hello")?;

    // Write a string with the bold format defined above.
    worksheet.write_with_format(1, 0, "World", &bold_format)?;

    // Write some numbers.
    worksheet.write(2, 0, 1)?;
    worksheet.write(3, 0, 2.34)?;

    // Write a number with formatting.
    worksheet.write_with_format(4, 0, 3.00, &decimal_format)?;

    // Write a formula.
    worksheet.write(5, 0, Formula::new("=SIN(PI()/4)"))?;

    // Write a date.
    let date = ExcelDateTime::from_ymd(2023, 1, 25)?;
    worksheet.write_with_format(6, 0, &date, &date_format)?;

    // Write some links.
    worksheet.write(7, 0, Url::new("https://www.rust-lang.org"))?;
    worksheet.write(8, 0, Url::new("https://www.rust-lang.org").set_text("Rust"))?;

    // Write some merged cells.
    worksheet.merge_range(9, 0, 9, 1, "Merged cells", &merge_format)?;

    // Insert an image.
    let image = Image::new("examples/rust_logo.png")?;
    worksheet.insert_image(1, 2, &image)?;

    // Save the file to disk.
    workbook.save("demo.xlsx")?;

    Ok(())
}
For more details on the Worksheet APIs see the docs.rs docs for Worksheet.
Creating worksheets
There are two ways of creating a worksheet object with rust_xlsxwriter: via the
Workbook::add_worksheet() method and via the Worksheet::new() constructor.
The first method ties the worksheet to the workbook object that will automatically write it when the file is saved, whereas the second method creates a worksheet that is independent of a workbook. The second method has certain advantages in keeping the worksheet free of the workbook borrow checking until needed, as explained below.
Working with add_worksheet() and the borrow checker
Due to borrow checking rules you can only have one active reference to a
worksheet object created by Workbook::add_worksheet() since that method
always returns a mutable reference to an element of an internal vector.
For a workbook with multiple worksheets this restriction is generally workable if you can create and use the worksheets sequentially since you will only need to have one reference at any one time.
However, if you can’t structure your code to work sequentially then you can get
a reference to a previously created worksheet using
Workbook::worksheet_from_index(). The standard borrow checking rules still
apply so you will have to give up ownership of any other worksheet reference
prior to calling this method.
For example:
// SPDX-License-Identifier: MIT OR Apache-2.0
//
// Copyright 2022-2026, John McNamara, jmcnamara@cpan.org

//! The following example demonstrates getting worksheet reference by index.

use rust_xlsxwriter::{Workbook, XlsxError};

fn main() -> Result<(), XlsxError> {
    let mut workbook = Workbook::new();

    // Start with a reference to worksheet1.
    let mut worksheet1 = workbook.add_worksheet();
    worksheet1.write_string(0, 0, "Hello")?;

    // If we don't try to use the workbook1 reference again we can switch to
    // using a reference to worksheet2.
    let mut worksheet2 = workbook.add_worksheet();
    worksheet2.write_string(0, 0, "Hello")?;

    // Stop using worksheet2 and move back to worksheet1.
    worksheet1 = workbook.worksheet_from_index(0)?;
    worksheet1.write_string(1, 0, "Sheet1")?;

    // Stop using worksheet1 and move back to worksheet2.
    worksheet2 = workbook.worksheet_from_index(1)?;
    worksheet2.write_string(1, 0, "Sheet2")?;

    workbook.save("workbook.xlsx")?;

    Ok(())
}
You can also use Workbook::worksheet_from_name() to do something similar
using the worksheet names:
// SPDX-License-Identifier: MIT OR Apache-2.0
//
// Copyright 2022-2026, John McNamara, jmcnamara@cpan.org

//! The following example demonstrates getting worksheet reference by name.

use rust_xlsxwriter::{Workbook, XlsxError};

fn main() -> Result<(), XlsxError> {
    let mut workbook = Workbook::new();

    // Start with a reference to worksheet1.
    let mut worksheet1 = workbook.add_worksheet();
    let name1 = worksheet1.name(); // "Sheet1"
    worksheet1.write_string(0, 0, "Hello")?;

    // If we don't try to use the workbook1 reference again we can switch to
    // using a reference to worksheet2.
    let mut worksheet2 = workbook.add_worksheet().set_name("Data")?;
    let name2 = worksheet2.name();
    worksheet2.write_string(0, 0, "Hello")?;

    // Stop using worksheet2 and move back to worksheet1.
    worksheet1 = workbook.worksheet_from_name(&name1)?;
    worksheet1.write_string(1, 0, "Sheet1")?;

    // Stop using worksheet1 and move back to worksheet2.
    worksheet2 = workbook.worksheet_from_name(&name2)?;
    worksheet2.write_string(1, 0, "Sheet2")?;

    workbook.save("workbook.xlsx")?;

    Ok(())
}
Additionally can use Workbook::worksheets_mut() to get a reference to the the
vector that holds the worksheets. This can be used, for instance, to iterate
over all the worksheets in a workbook:
// SPDX-License-Identifier: MIT OR Apache-2.0
//
// Copyright 2022-2026, John McNamara, jmcnamara@cpan.org

//! The following example demonstrates operating on the vector of all the
//! worksheets in a workbook.

use rust_xlsxwriter::{Workbook, XlsxError};

fn main() -> Result<(), XlsxError> {
    let mut workbook = Workbook::new();

    // Add three worksheets to the workbook.
    let _worksheet1 = workbook.add_worksheet();
    let _worksheet2 = workbook.add_worksheet();
    let _worksheet3 = workbook.add_worksheet();

    // Write the same data to all three worksheets.
    for worksheet in workbook.worksheets_mut() {
        worksheet.write_string(0, 0, "Hello")?;
        worksheet.write_number(1, 0, 12345)?;
    }

    // If you are careful you can use standard slice operations.
    workbook.worksheets_mut().swap(0, 1);

    workbook.save("workbook.xlsx")?;

    Ok(())
}
If you are careful you can use standard slice operations.
// SPDX-License-Identifier: MIT OR Apache-2.0
//
// Copyright 2022-2026, John McNamara, jmcnamara@cpan.org

//! The following example demonstrates operating on the vector of all the
//! worksheets in a workbook.

use rust_xlsxwriter::{Workbook, XlsxError};

fn main() -> Result<(), XlsxError> {
    let mut workbook = Workbook::new();

    // Add three worksheets to the workbook.
    let _worksheet1 = workbook.add_worksheet();
    let _worksheet2 = workbook.add_worksheet();
    let _worksheet3 = workbook.add_worksheet();

    // Write the same data to all three worksheets.
    for worksheet in workbook.worksheets_mut() {
        worksheet.write_string(0, 0, "Hello")?;
        worksheet.write_number(1, 0, 12345)?;
    }

    // If you are careful you can use standard slice operations.
    workbook.worksheets_mut().swap(0, 1);

    workbook.save("workbook.xlsx")?;

    Ok(())
}
Combining the two previous examples would give an output file like the following:
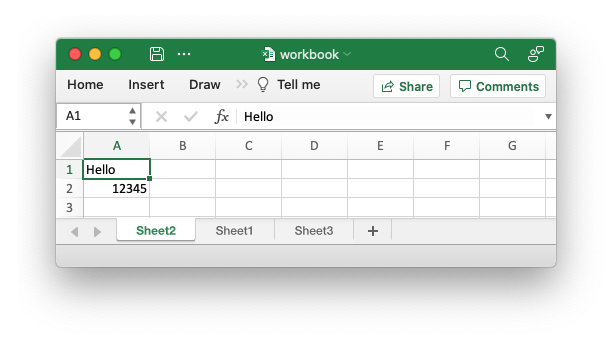
All three worksheets in the output file have the same data and Sheet2 and
Sheet1 have swapped position, as can be seen from the image.
Working with Worksheet::new() and the borrow checker
As outlined in the introduction to this section it is also possible to create a
Worksheet object via Worksheet::new(), as you would expect. Since this type
of Worksheet instance isn't tied to a Workbook it isn't subject to the
additional borrow checking rules that entails.
As such you can create and work with several Worksheet instances and then add
them to the Workbook when you are finished via the Workbook::push_worksheet()
method:
// SPDX-License-Identifier: MIT OR Apache-2.0
//
// Copyright 2022-2026, John McNamara, jmcnamara@cpan.org

//! The following example demonstrates creating new worksheet objects and then
//! adding them to a workbook.

use rust_xlsxwriter::{Workbook, Worksheet, XlsxError};

fn main() -> Result<(), XlsxError> {
    // Create a new workbook.
    let mut workbook = Workbook::new();

    // Create new worksheets.
    let mut worksheet1 = Worksheet::new();
    let mut worksheet2 = Worksheet::new();

    // Use the first workbook.
    worksheet1.write_string(0, 0, "Hello")?;
    worksheet1.write_string(1, 0, "Sheet1")?;

    // Use the second workbook.
    worksheet2.write_string(0, 0, "Hello")?;
    worksheet2.write_string(1, 0, "Sheet2")?;

    // Add the worksheets to the workbook.
    workbook.push_worksheet(worksheet1);
    workbook.push_worksheet(worksheet2);

    // Save the workbook.
    workbook.save("worksheets.xlsx")?;

    Ok(())
}
Using add_worksheet() versus Worksheet::new()
Since there are two ways of doing, effectively, the same thing you will probably wonder which is best.
The author mainly uses add_worksheet() and most of the library and
documentation examples are structured to work with that method. In addition, the
Excel xlsx file format has very tight coupling between it's sub-components and
it is possible that some future rust_xlsxwriter functionality will require
Worksheets and other Workbook objects to be registered with a parent Workbook
in order for them to work. However, there aren't currently any features like
that, and the author will seek to avoid them as much as possible.
One common use case that works better with Worksheet::new() and
Workbook::push_worksheet() is creating worksheets to run in a
parallelized/async mode. However, it is worth noting that there isn't a
guaranteed performance benefit from creating and working with worksheets in
parallelized/async mode since the main overhead comes from writing the
worksheets which will occur after the worksheets are joined back to the main
workbook save() thread. In addition rust_xlsxwriter already parallelizes the
writing of worksheets as much as possible.
So if the Worksheet::new() and Workbook::push_worksheet() methodology seems
more natural to you then you should use it.
Page Setup
The sections below look at the sections of the Excel Page Setup dialog and the equivalent rust_xlsxwriter methods.
For more, general, information about the page setup options in Excel see the Microsoft documentation on Page Setup.
Page Setup - Page
The page Setup "Page" dialog looks like this:
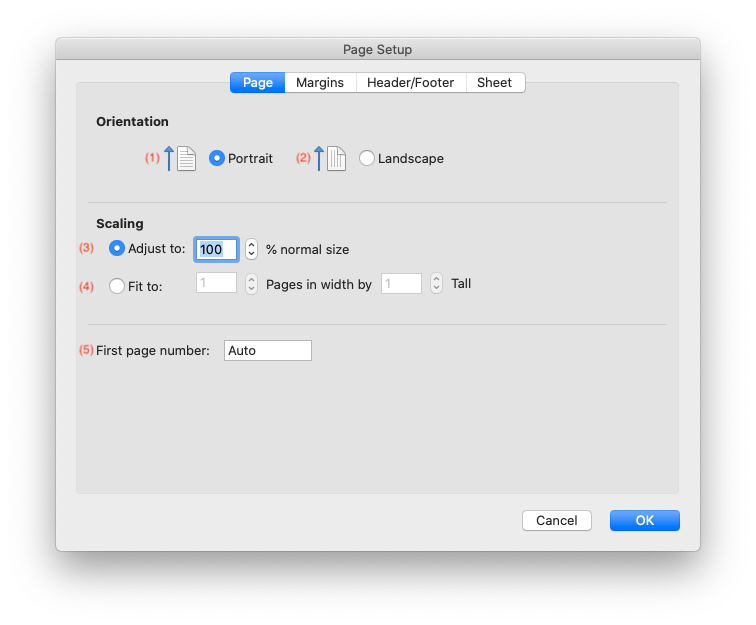
The equivalent rust_xlsxwriter methods are:
Worksheet::set_portrait()Worksheet::set_landscape()Worksheet::set_print_scale()Worksheet::set_print_fit_to_pages()Worksheet::set_print_first_page_number()
Note, for Worksheet::set_print_fit_to_pages() a common requirement is to fit
the printed output to n pages wide but have the height be as long as
necessary. To achieve this set the height to 0:
// SPDX-License-Identifier: MIT OR Apache-2.0
//
// Copyright 2022-2026, John McNamara, jmcnamara@cpan.org

//! The following example demonstrates setting the scale of the worksheet to fit
//! a defined number of pages vertically and horizontally. This example shows a
//! common use case which is to fit the printed output to 1 page wide but have
//! the height be as long as necessary.

use rust_xlsxwriter::{Workbook, XlsxError};

fn main() -> Result<(), XlsxError> {
    let mut workbook = Workbook::new();

    // Add a worksheet to the workbook.
    let worksheet = workbook.add_worksheet();

    // Set the printed output to fit 1 page wide and as long as necessary.
    worksheet.set_print_fit_to_pages(1, 0);

    workbook.save("worksheet.xlsx")?;

    Ok(())
}
Page Setup - Margins
The page Setup "Margins" dialog looks like this:
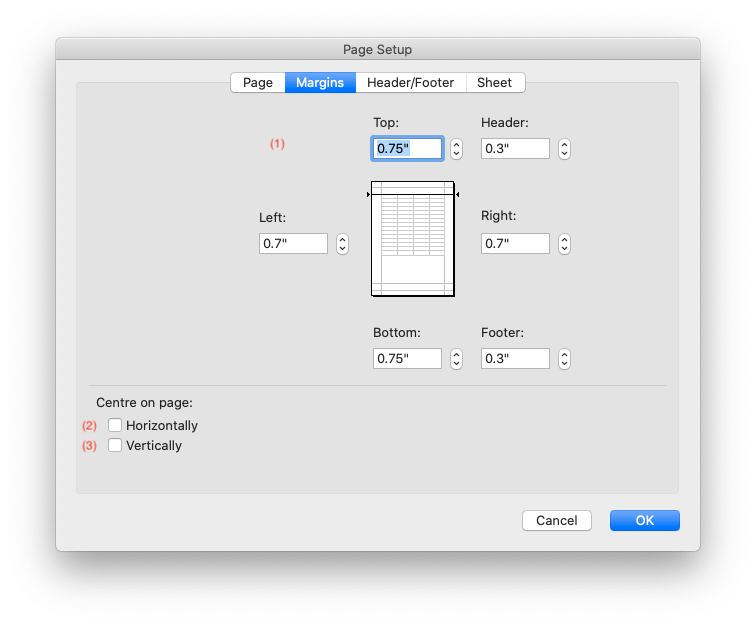
The equivalent rust_xlsxwriter methods are:
Worksheet::set_margins()Worksheet::set_print_center_horizontally()Worksheet::set_print_center_vertically()
Page Setup - Header/Footer
The page Setup "Header/Footer" dialog looks like this:
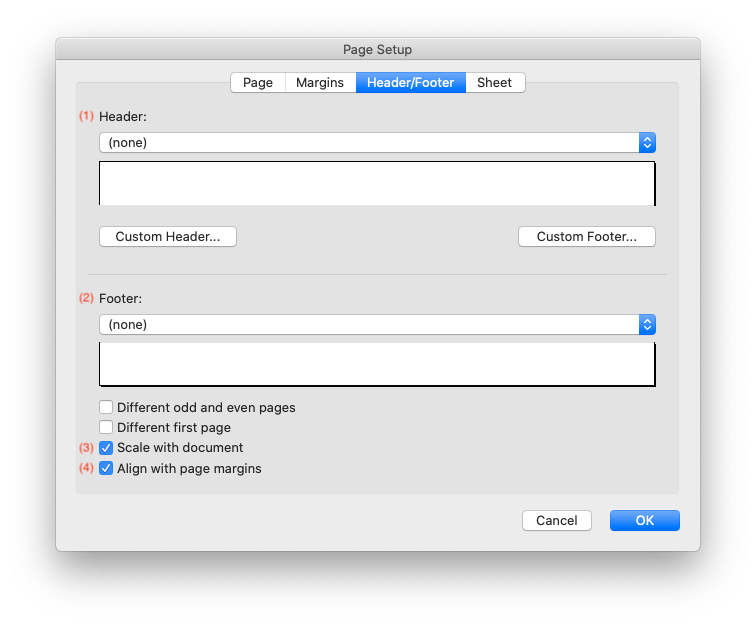
The equivalent rust_xlsxwriter methods are:
Worksheet::set_header()Worksheet::set_footer()Worksheet::set_header_footer_scale_with_doc()Worksheet::set_header_footer_align_with_page()
Headers and footers are explained in more detail in the next section on Adding Headers and Footers.
Note, the options for different first, odd and even pages are not supported in rust_xlsxwriter.
Page Setup - Sheet
The page Setup "Sheet" dialog looks like this:
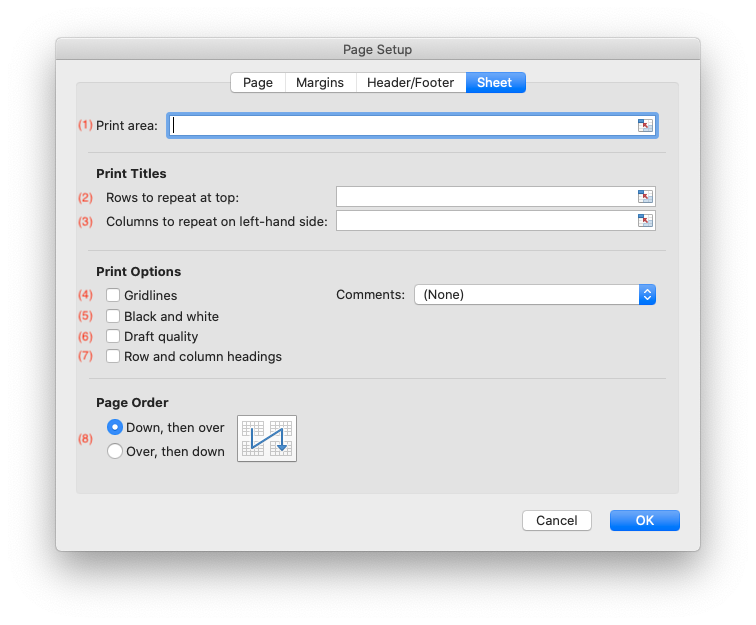
The equivalent rust_xlsxwriter methods are:
Worksheet::set_print_area()Worksheet::set_repeat_rows()Worksheet::set_repeat_columns()Worksheet::set_print_gridlines()Worksheet::set_print_black_and_white()Worksheet::set_print_draft()Worksheet::set_print_headings()Worksheet::set_page_order()
Adding Headers and Footers
Headers and footers can be added to worksheets using the
Worksheet::set_header() and Worksheet::set_footer() methods.
Headers and footers are generated using a string which is a combination of plain text and optional control characters.
The available control characters are:
| Control | Category | Description |
|---|---|---|
&L | Alignment | Left |
&C | Center | |
&R | Right | |
&[Page] or &P | Information | Page number |
&[Pages] or &N | Total number of pages | |
&[Date] or &D | Date | |
&[Time] or &T | Time | |
&[File] or &F | File name | |
&[Tab] or &A | Worksheet name | |
&[Path] or &Z | Workbook path | |
&fontsize | Font | Font size |
&"font,style" | Font name and style | |
&U | Single underline | |
&E | Double underline | |
&S | Strikethrough | |
&X | Superscript | |
&Y | Subscript | |
&[Picture] or &G | Images | Picture/image |
&& | Miscellaneous | Literal ampersand & |
Some of the placeholder variables have a long version like &[Page] and a short
version like &P. The longer version is displayed in the Excel interface but
the shorter version is the way that it is stored in the file format. Either
version is okay since rust_xlsxwriter will translate as required.
Headers and footers have 3 edit areas to the left, center and right. Text can be
aligned to these areas by prefixing the text with the control characters &L,
&C and &R.
For example:
worksheet.set_header("&LHello");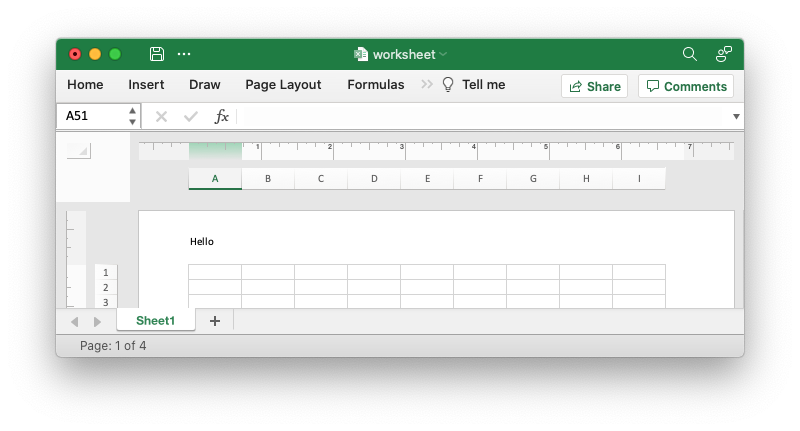
worksheet.set_header("&CHello");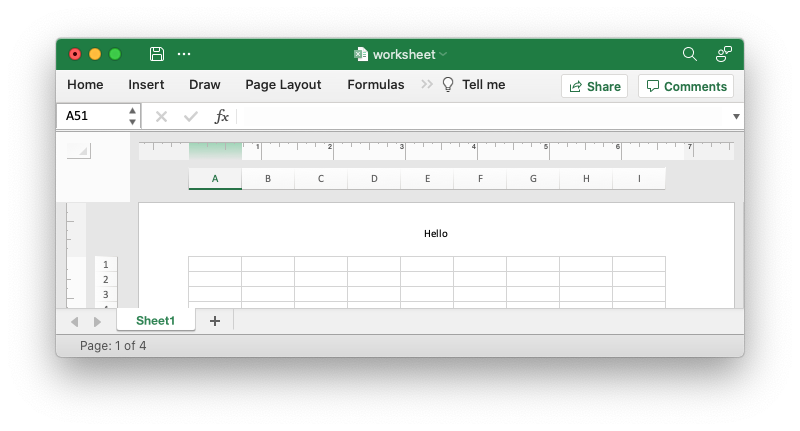
worksheet.set_header("&RHello");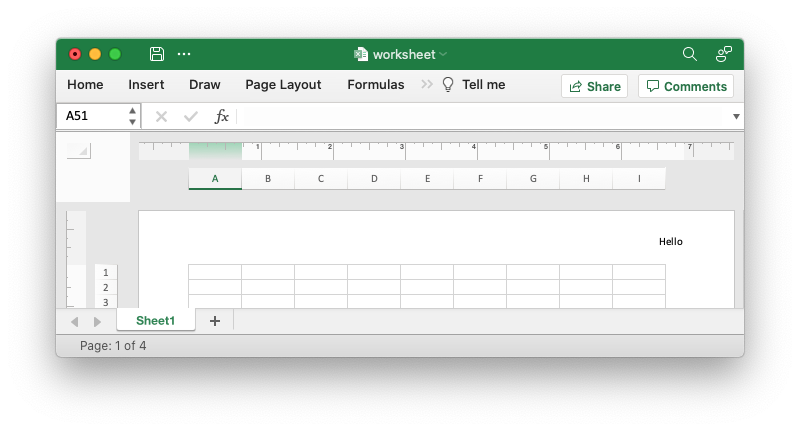
You can also have text in each of the alignment areas:
worksheet.set_header("&LCiao&CBello&RCielo");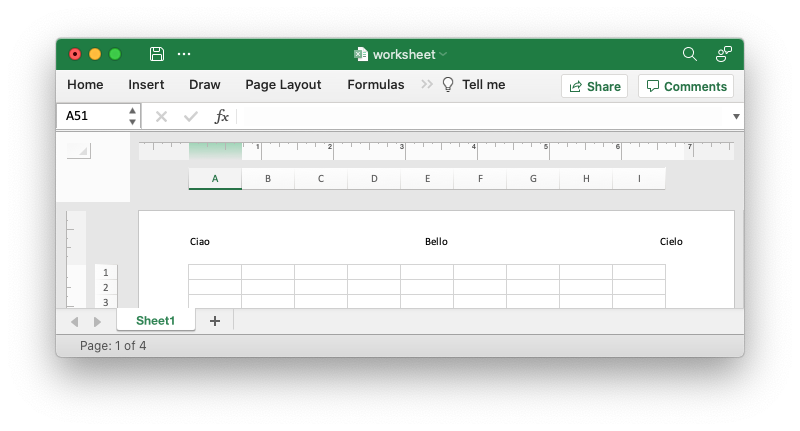
The information control characters act as variables/templates that Excel will update/expand as the workbook or worksheet changes.
worksheet.set_header("&CPage &[Page] of &[Pages]");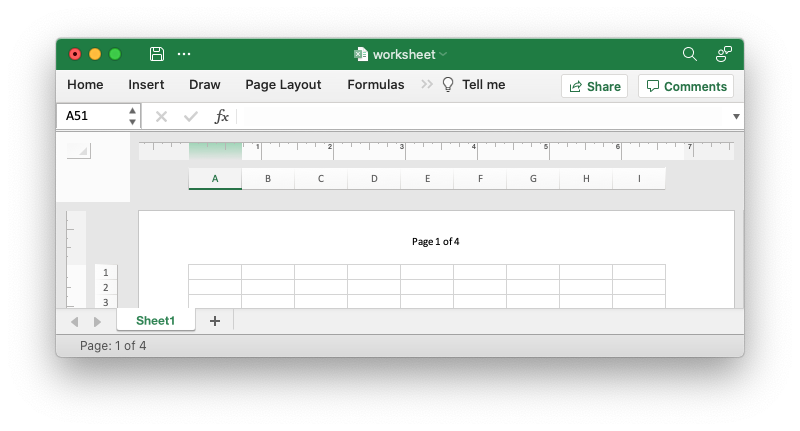
Times and dates are in the user's default format:
worksheet.set_header("&CUpdated at &[Time]");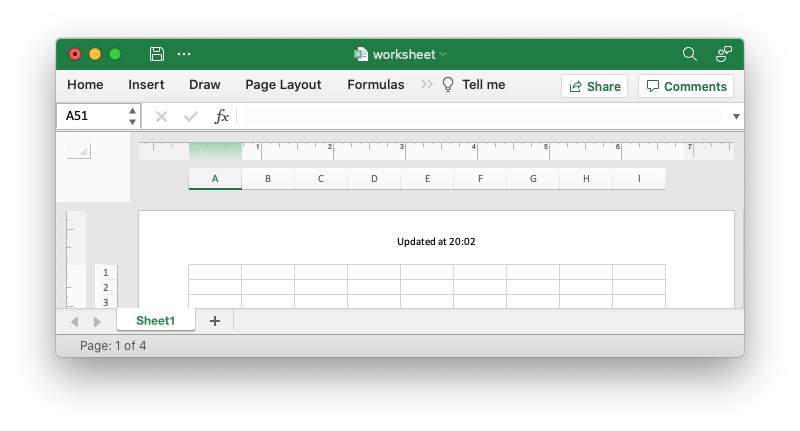
To insert an image in use &[Picture] or &G. You will also need to use
set_header_image() to set the corresponding image:
worksheet.set_header("&C&[Picture]");

let image = Image::new("examples/watermark.png")?;
worksheet.set_header_image(&image, XlsxImagePosition::Center);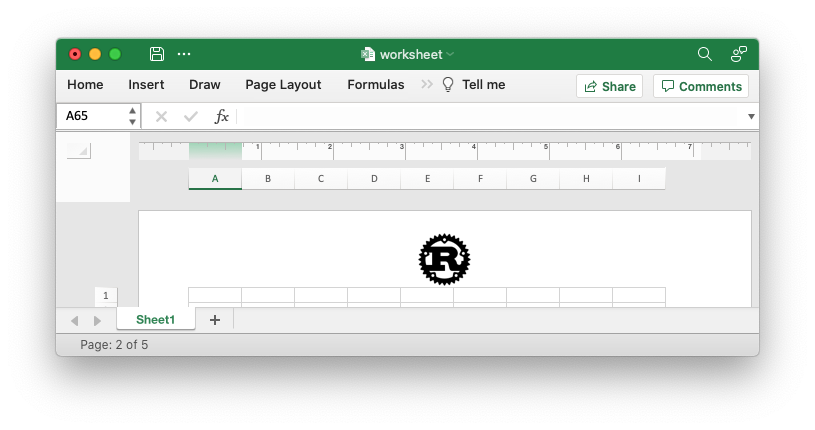
To include a single literal ampersand & in a header or footer you
should use a double ampersand &&:
worksheet.set_header("&CCuriouser && Curiouser - Attorneys at Law");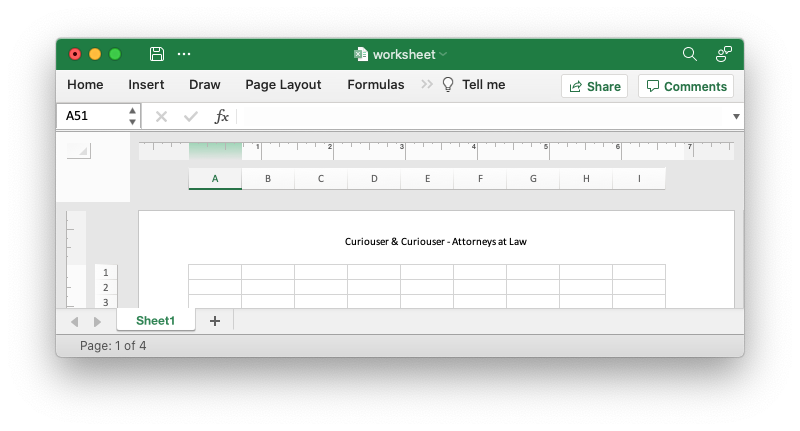
You can specify the font size of a section of the text by prefixing it with the
control character &n where n is the font size:
worksheet.set_header("&C&20Big Hello");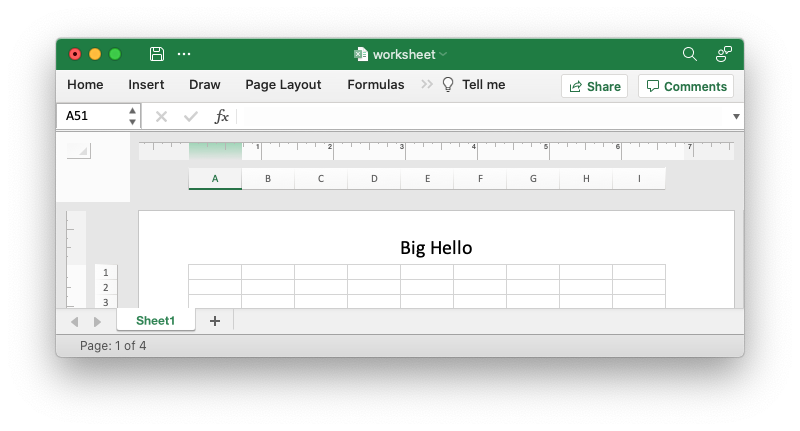
You can specify the font of a section of the text by prefixing it with the
control sequence &"font,style" where fontname is a font name such as Windows
font descriptions: "Regular", "Italic", "Bold" or "Bold Italic": "Courier New"
or "Times New Roman" and style is one of the standard Windows font
descriptions like “Regular”, “Italic”, “Bold” or “Bold Italic”:
worksheet.set_header(r#"&C&"Courier New,Bold Italic"Hello"#);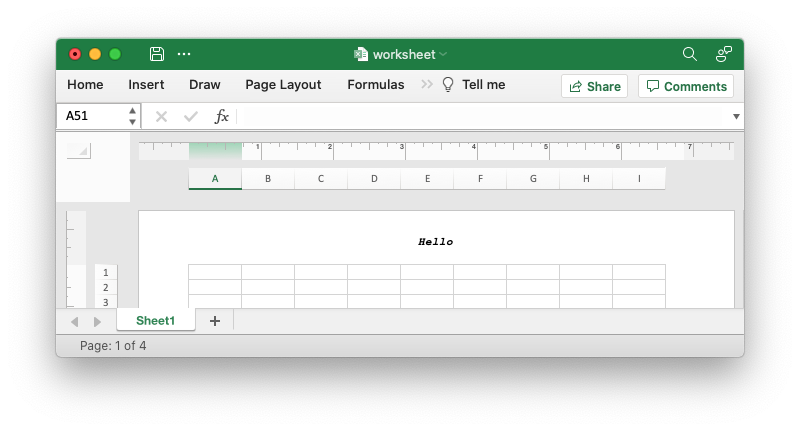
It is possible to combine all of these features together to create complex
headers and footers. If you set up a complex header in Excel you can transfer it
to rust_xlsxwriter by inspecting the string in the Excel file. For example the
following shows how unzip and grep the Excel XML sub-files on a Linux system.
The example uses libxml's xmllint to format the XML for clarity:
$ unzip myfile.xlsm -d myfile
$ xmllint --format `find myfile -name "*.xml" | xargs` | \
    egrep "Header|Footer" | sed 's/&/\&/g'

 <headerFooter scaleWithDoc="0">
   <oddHeader>&L&P</oddHeader>
 </headerFooter>
Note: Excel requires that the header or footer string be less than 256 characters, including the control characters. Strings longer than this will not be written, and a warning will be output.
Autofitting column widths
Column widths in a rust_xlsxwriter worksheet can be adjusted automatically
using the Worksheet::autofit() method.
There is no option in the xlsx file format that can be used to say "autofit columns on loading". Auto-fitting of columns is something that Excel does at runtime when it has access to all of the worksheet information as well as the Windows functions for calculating display areas based on fonts and formatting.
As such Worksheet::autofit() simulates this behavior by calculating string
widths using metrics taken from Excel. This isn't perfect but for most cases it
should be sufficient and if not you can set your own widths, see below.
The Worksheet::autofit() method ignores columns that already have an explicit
column width set via set_column_width() or
set_column_width_pixels() if it is
greater than the calculated maximum width. Alternatively, calling these methods
after Worksheet::autofit() will override the autofit value.
Note, Worksheet::autofit() iterates through all the cells in a worksheet
that have been populated with data and performs a length calculation on each
one, so it can have a performance overhead for larger worksheets.
See also the Autofitting Columns example.
Working with worksheet tabs
Worksheet tabs in Excel allow the user to differentiate between different worksheets.
Worksheets in a workbook can be highlighted via the tab name, color, position or the fact that it is active when the user opens the workbook.
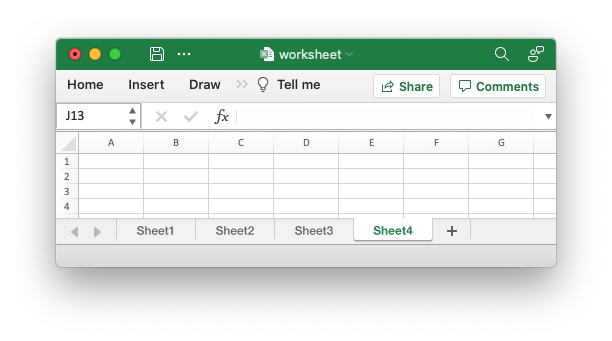
The rust_xlsxwriter library provides a number of methods, explained below, to
emulate this functionality.
Worksheet names
The worksheet name can be set with Worksheet::set_name():
// SPDX-License-Identifier: MIT OR Apache-2.0
//
// Copyright 2022-2026, John McNamara, jmcnamara@cpan.org

//! The following example demonstrates setting user defined worksheet names
//! and the default values when a name isn't set.

use rust_xlsxwriter::{Workbook, XlsxError};

fn main() -> Result<(), XlsxError> {
    let mut workbook = Workbook::new();

    let _worksheet1 = workbook.add_worksheet(); // Defaults to Sheet1
    let _worksheet2 = workbook.add_worksheet().set_name("Foglio2");
    let _worksheet3 = workbook.add_worksheet().set_name("Data");
    let _worksheet4 = workbook.add_worksheet(); // Defaults to Sheet4

    workbook.save("worksheets.xlsx")?;

    Ok(())
}
Which gives the following output:
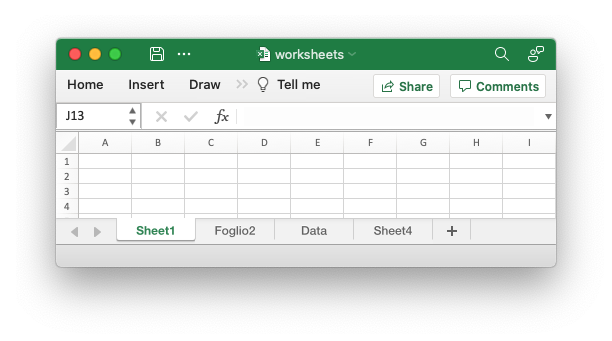
Excel applies various rules to worksheet names such as:
- The name must be less than 32 characters.
- The name cannot be blank.
- The name cannot contain any of the characters:
[ ] : * ? / \. - The name cannot start or end with an apostrophe.
- The name shouldn't be "History" (case-insensitive) since that is reserved by Excel.
- The name must not be a duplicate (case-insensitive) of another worksheet name used in the workbook.
The rules for worksheet names in Excel are explained in the Microsoft Office documentation.
Setting the active worksheet
In Excel the visible worksheet in a group of worksheets is known as the active worksheet. Since only one worksheet is in the foreground at any one time there can only be one active worksheet.
With rust_xlsxwriter the Worksheet::set_active() method is used to specify
which worksheet is active. If no worksheet is set as the active worksheet then
the default is to have the first one active, like in Excel.
Here is an example of making the second worksheet active:
// SPDX-License-Identifier: MIT OR Apache-2.0
//
// Copyright 2022-2026, John McNamara, jmcnamara@cpan.org

//! The following example demonstrates setting a worksheet as the visible
//! worksheet when a file is opened.

use rust_xlsxwriter::{Workbook, Worksheet, XlsxError};

fn main() -> Result<(), XlsxError> {
    let mut workbook = Workbook::new();

    let worksheet1 = Worksheet::new();
    let worksheet3 = Worksheet::new();
    let mut worksheet2 = Worksheet::new();

    worksheet2.set_active(true);

    workbook.push_worksheet(worksheet1);
    workbook.push_worksheet(worksheet2);
    workbook.push_worksheet(worksheet3);

    workbook.save("worksheet.xlsx")?;

    Ok(())
}
Which gives the following output:
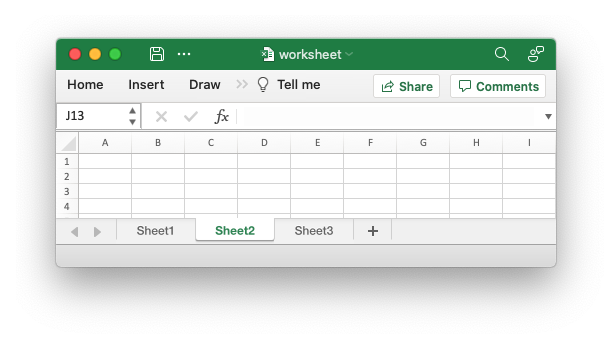
If you have a lot of worksheets then they may not all fit on the screen at the
same time. In cases like that the active worksheet will still be visible but its
tab may not be. In those, rare, cases you can use the
Worksheet::set_first_tab() method to set the first visible tab (not
worksheet) in a group of worksheets.
Setting worksheet tab colors
Another way of highlighting one or more worksheets in Excel is to set the tab
color. With rust_xlsxwriter this is achieved with
Worksheet::set_tab_color() and a Color color:
// SPDX-License-Identifier: MIT OR Apache-2.0
//
// Copyright 2022-2026, John McNamara, jmcnamara@cpan.org

//! The following example demonstrates set the tab color of worksheets.

use rust_xlsxwriter::{Color, Workbook, Worksheet, XlsxError};

fn main() -> Result<(), XlsxError> {
    let mut workbook = Workbook::new();

    let mut worksheet1 = Worksheet::new();
    let mut worksheet2 = Worksheet::new();
    let mut worksheet3 = Worksheet::new();
    let mut worksheet4 = Worksheet::new();

    worksheet1.set_tab_color(Color::Red);
    worksheet2.set_tab_color(Color::Green);
    worksheet3.set_tab_color(Color::RGB(0xFF9900));

    // worksheet4 will have the default color.
    worksheet4.set_active(true);

    workbook.push_worksheet(worksheet1);
    workbook.push_worksheet(worksheet2);
    workbook.push_worksheet(worksheet3);
    workbook.push_worksheet(worksheet4);

    workbook.save("worksheet.xlsx")?;

    Ok(())
}
Which gives the following output:
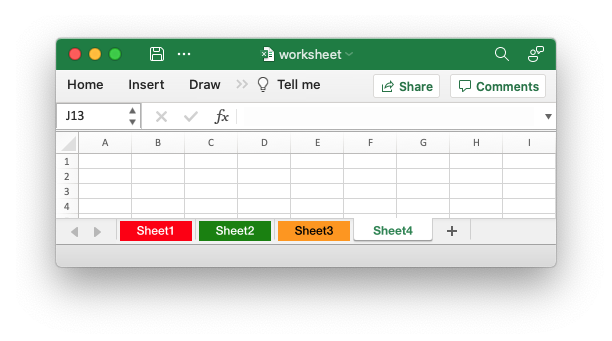
Hiding worksheets
Sometimes it is desirable to hide worksheets if they contain a lot of
intermediate data or calculations that end user doesn't need to see. With
rust_xlsxwriter this is achieved with the Worksheet::set_hidden()
method:
// SPDX-License-Identifier: MIT OR Apache-2.0
//
// Copyright 2022-2026, John McNamara, jmcnamara@cpan.org

//! The following example demonstrates hiding a worksheet.

use rust_xlsxwriter::{Workbook, Worksheet, XlsxError};

fn main() -> Result<(), XlsxError> {
    let mut workbook = Workbook::new();

    let worksheet1 = Worksheet::new();
    let worksheet3 = Worksheet::new();
    let mut worksheet2 = Worksheet::new();

    worksheet2.set_hidden(true);

    workbook.push_worksheet(worksheet1);
    workbook.push_worksheet(worksheet2);
    workbook.push_worksheet(worksheet3);

    workbook.save("worksheet.xlsx")?;

    Ok(())
}
Which gives the following output:
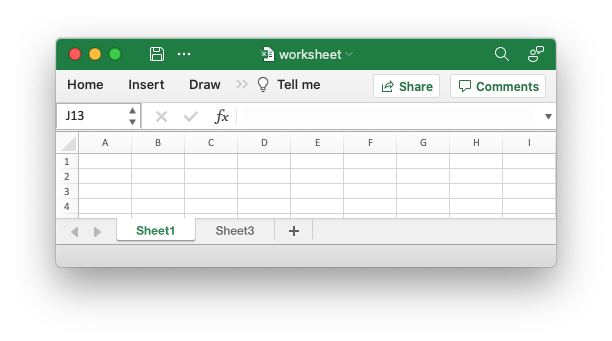
In Excel a hidden worksheet can not be activated or selected so
Worksheet::set_hidden() is mutually exclusive with the Worksheet::set_active()
and Worksheet::set_selected() methods. In addition, since the first worksheet
will default to being the active worksheet, you cannot hide the first worksheet
without activating another sheet.
Selecting worksheets
A selected worksheet has its tab highlighted. Selecting worksheets is a way of grouping them together so that, for example, several worksheets could be printed in one go.
The Worksheet::set_selected() method is used to indicate that a
worksheet is selected in a multi-sheet workbook.
A worksheet that has been activated via the Worksheet::set_active() method will
also appear as selected.
// SPDX-License-Identifier: MIT OR Apache-2.0
//
// Copyright 2022-2026, John McNamara, jmcnamara@cpan.org

//! The following example demonstrates selecting worksheet in a workbook. The
//! active worksheet is selected by default so in this example the first two
//! worksheets are selected.

use rust_xlsxwriter::{Workbook, Worksheet, XlsxError};

fn main() -> Result<(), XlsxError> {
    let mut workbook = Workbook::new();

    let worksheet1 = Worksheet::new();
    let worksheet3 = Worksheet::new();
    let mut worksheet2 = Worksheet::new();

    worksheet2.set_selected(true);

    workbook.push_worksheet(worksheet1);
    workbook.push_worksheet(worksheet2);
    workbook.push_worksheet(worksheet3);

    workbook.save("worksheet.xlsx")?;

    Ok(())
}
Which gives the following output. Note that Sheet 1 and Sheet2 are selected but Sheet3 isn't:
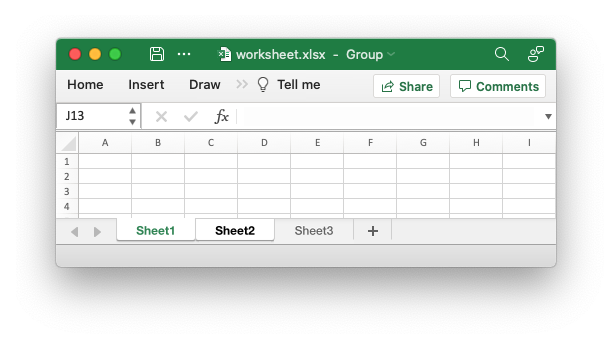
Worksheet protection
It is occasionally necessary to lock all or parts of a worksheet to prevent unintentional editing. For example you may have certain fields that you want a user to update but have other instruction or calculation cells that you don't want modified.
In Excel you do this by turning on the "Review -> Sheet Protect" option and in
rust_xlsxwriter you can use the Worksheet::protect() method:
// SPDX-License-Identifier: MIT OR Apache-2.0
//
// Copyright 2022-2026, John McNamara, jmcnamara@cpan.org

//! Example of cell locking and formula hiding in an Excel worksheet
//! `rust_xlsxwriter` library.

use rust_xlsxwriter::{Format, Workbook, XlsxError};

fn main() -> Result<(), XlsxError> {
    // Create a new Excel file object.
    let mut workbook = Workbook::new();

    // Add a worksheet to the workbook.
    let worksheet = workbook.add_worksheet();

    // Create some format objects.
    let unlocked = Format::new().set_unlocked();
    let hidden = Format::new().set_hidden();

    // Protect the worksheet to turn on cell locking.
    worksheet.protect();

    // Examples of cell locking and hiding.
    worksheet.write_string(0, 0, "Cell B1 is locked. It cannot be edited.")?;
    worksheet.write_formula(0, 1, "=1+2")?; // Locked by default.

    worksheet.write_string(1, 0, "Cell B2 is unlocked. It can be edited.")?;
    worksheet.write_formula_with_format(1, 1, "=1+2", &unlocked)?;

    worksheet.write_string(2, 0, "Cell B3 is hidden. The formula isn't visible.")?;
    worksheet.write_formula_with_format(2, 1, "=1+2", &hidden)?;

    worksheet.write_string(4, 0, "Use Menu -> Review -> Unprotect Sheet")?;
    worksheet.write_string(5, 0, "to remove the worksheet protection.")?;

    worksheet.autofit();

    // Save the file to disk.
    workbook.save("worksheet_protection.xlsx")?;

    Ok(())
}
Here is a more complete example:
// SPDX-License-Identifier: MIT OR Apache-2.0
//
// Copyright 2022-2026, John McNamara, jmcnamara@cpan.org

//! Example of cell locking and formula hiding in an Excel worksheet
//! `rust_xlsxwriter` library.

use rust_xlsxwriter::{Format, Workbook, XlsxError};

fn main() -> Result<(), XlsxError> {
    // Create a new Excel file object.
    let mut workbook = Workbook::new();

    // Add a worksheet to the workbook.
    let worksheet = workbook.add_worksheet();

    // Create some format objects.
    let unlocked = Format::new().set_unlocked();
    let hidden = Format::new().set_hidden();

    // Protect the worksheet to turn on cell locking.
    worksheet.protect();

    // Examples of cell locking and hiding.
    worksheet.write_string(0, 0, "Cell B1 is locked. It cannot be edited.")?;
    worksheet.write_formula(0, 1, "=1+2")?; // Locked by default.

    worksheet.write_string(1, 0, "Cell B2 is unlocked. It can be edited.")?;
    worksheet.write_formula_with_format(1, 1, "=1+2", &unlocked)?;

    worksheet.write_string(2, 0, "Cell B3 is hidden. The formula isn't visible.")?;
    worksheet.write_formula_with_format(2, 1, "=1+2", &hidden)?;

    worksheet.write_string(4, 0, "Use Menu -> Review -> Unprotect Sheet")?;
    worksheet.write_string(5, 0, "to remove the worksheet protection.")?;

    worksheet.autofit();

    // Save the file to disk.
    workbook.save("worksheet_protection.xlsx")?;

    Ok(())
}
The key parts of this example are:
- In Excel all cells have a default "locked" format so once a worksheet is protected the cells cannot be changed.
- To allow some cells to be edited you can set a "unlocked" format.
- You can also "hide" formulas in a protected worksheet.
The output from the program will look like the following. Note that cell "B2", which was unlocked in the example, has been edited.
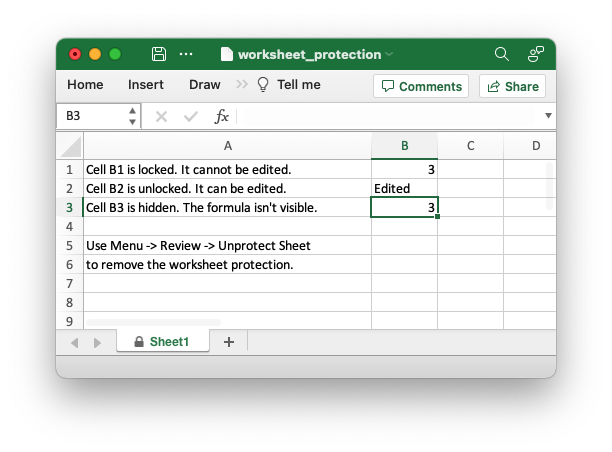
And this is the alert you get if you try to edit a locked cell.
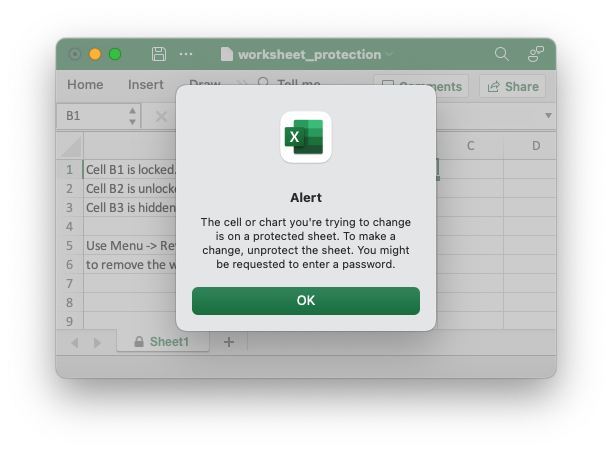
Setting a protection password
You can deter a user from turning off worksheet protection by adding a worksheet
level password using the Worksheet::protect_with_password() method:
// SPDX-License-Identifier: MIT OR Apache-2.0
//
// Copyright 2022-2026, John McNamara, jmcnamara@cpan.org

//! The following example demonstrates protecting a worksheet from editing with
//! a password.

use rust_xlsxwriter::{Workbook, XlsxError};

fn main() -> Result<(), XlsxError> {
    let mut workbook = Workbook::new();

    // Add a worksheet to the workbook.
    let worksheet = workbook.add_worksheet();

    // Protect the worksheet from modification.
    worksheet.protect_with_password("abc123");

    worksheet.write_string(0, 0, "Unlock the worksheet to edit the cell")?;

    workbook.save("worksheet.xlsx")?;

    Ok(())
}
This gives the following dialog when the user tries to unprotect the worksheet.
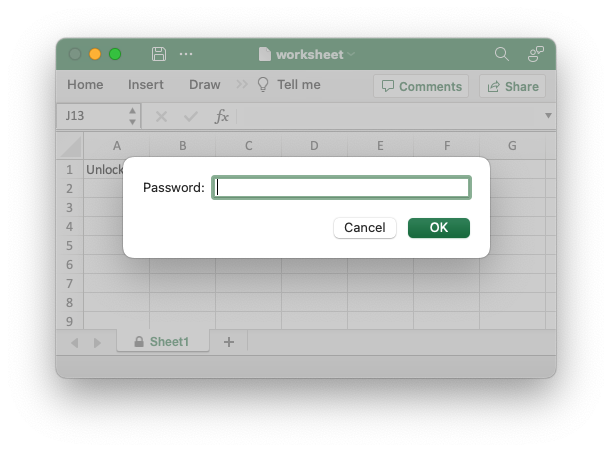
Note: Worksheet level passwords in Excel offer very weak protection.
They do not encrypt your data and are very easy to deactivate. Full workbook
encryption is not supported by rust_xlsxwriter. See the section on Workbook
Protection below.
Choosing which worksheet elements to protect
Excel allows you to control which objects or actions on the worksheet that are protected. The default Excel options are:
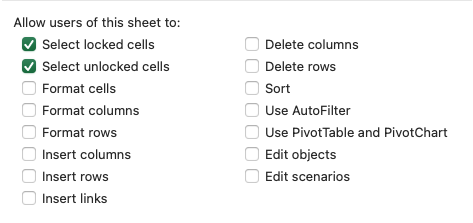
Almost all the options are protected by default apart from "Select locked cells" and "Select unlocked cells".
If you wish to turn on or off any of these options you can use the
ProtectionOptions struct and the Worksheet::protect_with_options()
method. For example:
// SPDX-License-Identifier: MIT OR Apache-2.0
//
// Copyright 2022-2026, John McNamara, jmcnamara@cpan.org

//! The following example demonstrates setting the worksheet properties to be
//! protected in a protected worksheet. In this case we protect the overall
//! worksheet but allow columns and rows to be inserted.

use rust_xlsxwriter::{ProtectionOptions, Workbook, XlsxError};

fn main() -> Result<(), XlsxError> {
    let mut workbook = Workbook::new();

    // Add a worksheet to the workbook.
    let worksheet = workbook.add_worksheet();

    // Set some of the options and use the defaults for everything else.
    let options = ProtectionOptions {
        insert_columns: true,
        insert_rows: true,
        ..ProtectionOptions::default()
    };

    // Set the protection options.
    worksheet.protect_with_options(&options);

    worksheet.write_string(0, 0, "Unlock the worksheet to edit the cell")?;

    workbook.save("worksheet.xlsx")?;

    Ok(())
}
This changes the allowed options to:
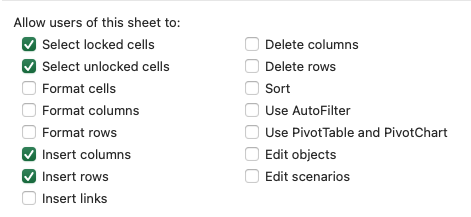
Workbook protection
As noted above rust_xlsxwriter doesn't provide workbook level
encryption/protection and it is unlikely that it will be added.
However, it is possible to encrypt an rust_xlsxwriter file using a third party open source tool called msoffice-crypt. This works for macOS, Linux and Windows:
msoffice-crypt.exe -e -p password clear.xlsx encrypted.xlsx
Read-only workbook
If you wish to have an Excel workbook open as read-only by default then you can
use the Workbook::read_only_recommended() method:
// SPDX-License-Identifier: MIT OR Apache-2.0
//
// Copyright 2022-2026, John McNamara, jmcnamara@cpan.org

//! The following example demonstrates creating a simple workbook which opens
//! with a recommendation that the file should be opened in read only mode.

use rust_xlsxwriter::{Workbook, XlsxError};

fn main() -> Result<(), XlsxError> {
    let mut workbook = Workbook::new();

    let _worksheet = workbook.add_worksheet();

    workbook.read_only_recommended();

    workbook.save("workbook.xlsx")?;

    Ok(())
}
This presents the user of the file with an option to open it in "read-only" mode. This means that any changes to the file can’t be saved back to the same file and must be saved to a new file.
The alert looks like this:
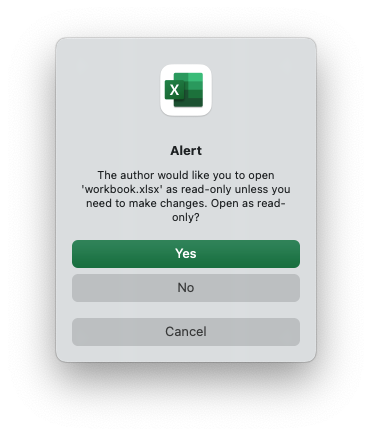
The Format struct
The Format struct is used to define cell formatting for data in a worksheet.
The properties of a cell that can be formatted include: fonts, colors, patterns, borders, alignment and number formatting.
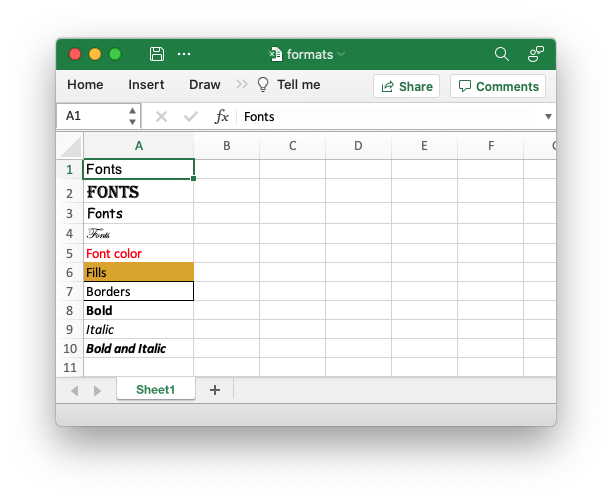
The output file above was created with the following code:
// SPDX-License-Identifier: MIT OR Apache-2.0
//
// Copyright 2022-2026, John McNamara, jmcnamara@cpan.org

//! The following example demonstrates some of the available formatting
//! properties.

use rust_xlsxwriter::{Color, Format, FormatBorder, Workbook, XlsxError};

fn main() -> Result<(), XlsxError> {
    // Create a new Excel file object.
    let mut workbook = Workbook::new();

    // Add a worksheet.
    let worksheet = workbook.add_worksheet();

    // Make the first column wider for clarity.
    worksheet.set_column_width(0, 14)?;

    // Create some sample formats to display
    let format1 = Format::new().set_font_name("Arial");
    worksheet.write_with_format(0, 0, "Fonts", &format1)?;

    let format2 = Format::new().set_font_name("Algerian").set_font_size(14);
    worksheet.write_with_format(1, 0, "Fonts", &format2)?;

    let format3 = Format::new().set_font_name("Comic Sans MS");
    worksheet.write_with_format(2, 0, "Fonts", &format3)?;

    let format4 = Format::new().set_font_name("Edwardian Script ITC");
    worksheet.write_with_format(3, 0, "Fonts", &format4)?;

    let format5 = Format::new().set_font_color(Color::Red);
    worksheet.write_with_format(4, 0, "Font color", &format5)?;

    let format6 = Format::new().set_background_color(Color::RGB(0xDAA520));
    worksheet.write_with_format(5, 0, "Fills", &format6)?;

    let format7 = Format::new().set_border(FormatBorder::Thin);
    worksheet.write_with_format(6, 0, "Borders", &format7)?;

    let format8 = Format::new().set_bold();
    worksheet.write_with_format(7, 0, "Bold", &format8)?;

    let format9 = Format::new().set_italic();
    worksheet.write_with_format(8, 0, "Italic", &format9)?;

    let format10 = Format::new().set_bold().set_italic();
    worksheet.write_with_format(9, 0, "Bold and Italic", &format10)?;

    workbook.save("formats.xlsx")?;

    Ok(())
}
Creating and using a Format object
Formats are created by calling the Format::new() method and properties as
set using the various methods shown is this section of the document. Once
the Format has been created it can be passed to one of the worksheet
write_*() methods. Multiple properties can be set by chaining them
together, for example:
// SPDX-License-Identifier: MIT OR Apache-2.0
//
// Copyright 2022-2026, John McNamara, jmcnamara@cpan.org

//! The following example demonstrates create a new format and setting the
//! properties.

use rust_xlsxwriter::{Color, Format, Workbook, XlsxError};

fn main() -> Result<(), XlsxError> {
    // Create a new Excel file object.
    let mut workbook = Workbook::new();

    // Add a worksheet.
    let worksheet = workbook.add_worksheet();

    // Create a new format and set some properties.
    let format = Format::new()
        .set_bold()
        .set_italic()
        .set_font_color(Color::Red);

    worksheet.write_with_format(0, 0, "Hello", &format)?;

    workbook.save("formats.xlsx")?;

    Ok(())
}
Output:
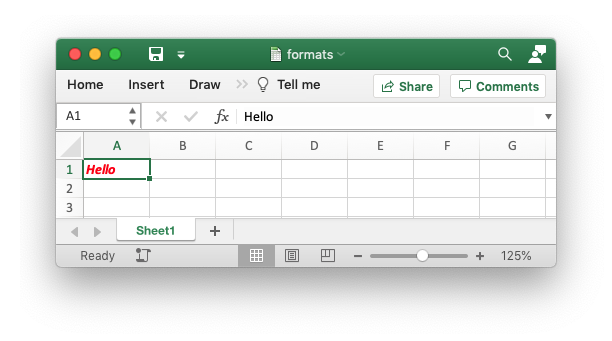
Formats can be cloned in the usual way:
// SPDX-License-Identifier: MIT OR Apache-2.0
//
// Copyright 2022-2026, John McNamara, jmcnamara@cpan.org

//! The following example demonstrates cloning a format and setting the
//! properties.

use rust_xlsxwriter::{Color, Format, Workbook, XlsxError};

fn main() -> Result<(), XlsxError> {
    // Create a new Excel file object.
    let mut workbook = Workbook::new();

    // Add a worksheet.
    let worksheet = workbook.add_worksheet();

    // Create a new format and set some properties.
    let format1 = Format::new().set_bold();

    // Clone a new format and set some properties.
    let format2 = format1.clone().set_font_color(Color::Blue);

    worksheet.write_with_format(0, 0, "Hello", &format1)?;
    worksheet.write_with_format(1, 0, "Hello", &format2)?;

    workbook.save("formats.xlsx")?;

    Ok(())
}
Output:
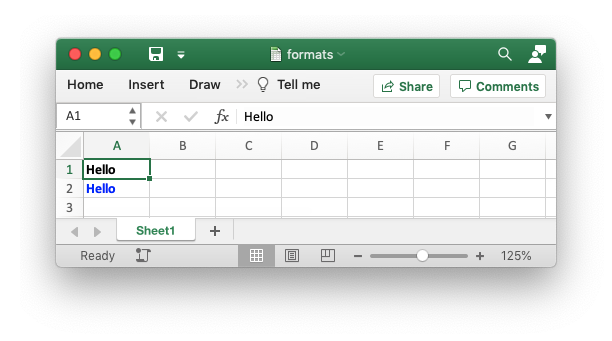
Format defaults
The default Excel cell format is a font setting of Calibri size 11 with all other properties turned off.
It is occasionally useful to use a default format with a method that requires a format but where you don't actually want to change the formatting.
// SPDX-License-Identifier: MIT OR Apache-2.0
//
// Copyright 2022-2026, John McNamara, jmcnamara@cpan.org

//! The following example demonstrates creating a default format.

use rust_xlsxwriter::{Format, Workbook, XlsxError};

fn main() -> Result<(), XlsxError> {
    // Create a new Excel file object.
    let mut workbook = Workbook::new();

    // Add a worksheet.
    let worksheet = workbook.add_worksheet();

    // Create a new default format.
    let format = Format::default();

    // These methods calls are equivalent.
    worksheet.write(0, 0, "Hello")?;
    worksheet.write_with_format(1, 0, "Hello", &format)?;

    workbook.save("formats.xlsx")?;

    Ok(())
}
Output showing that both strings have the same format:
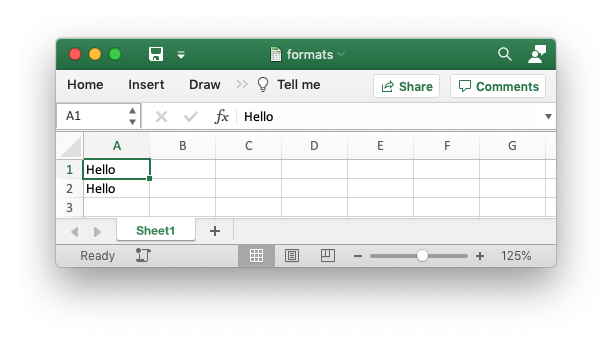
Format methods
The following table shows the Excel format categories, in the order shown in the
Excel “Format Cell” dialog, and the equivalent rust_xlsxwriter Format method.
The links will take you to the API docs:
Number Format Categories
The set_num_format() method is used to set the number format for numbers
used with Worksheet::write_number(). For example the following formats a
number with the Excel number format "$#,##0.00".
// SPDX-License-Identifier: MIT OR Apache-2.0
//
// Copyright 2022-2026, John McNamara, jmcnamara@cpan.org
//! The following example demonstrates setting a currency format for a worksheet
//! cell. This example doesn't actually set a currency format, for that see the
//! followup example in doc_format_currency2.rs.
use rust_xlsxwriter::{Format, Workbook, XlsxError};
fn main() -> Result<(), XlsxError> {
// Create a new Excel file object.
let mut workbook = Workbook::new();
// Add a worksheet.
let worksheet = workbook.add_worksheet();
// Add a format.
let currency_format = Format::new().set_num_format("$#,##0.00");
worksheet.write_with_format(0, 0, 1234.56, ¤cy_format)?;
workbook.save("currency_format.xlsx")?;
Ok(())
}Which give the following output with the category displayed:
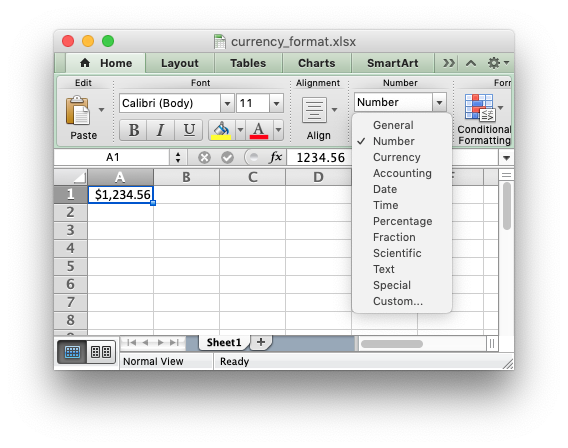
The number category is shown as "Number" but it is also possible to have it correspond to one of the other number categories such as "Currency" (which we might have expected in this case).
The Excel number categories are:
- General
- Number
- Currency
- Accounting
- Date
- Time
- Percentage
- Fraction
- Scientific
- Text
- Custom
If we wanted to have the number format display as a different category, such as "Currency", then would need to match the number format string used by Excel with the number format used by in our code. The easiest way to do this is to open the Number Formatting dialog in Excel and set the required format:
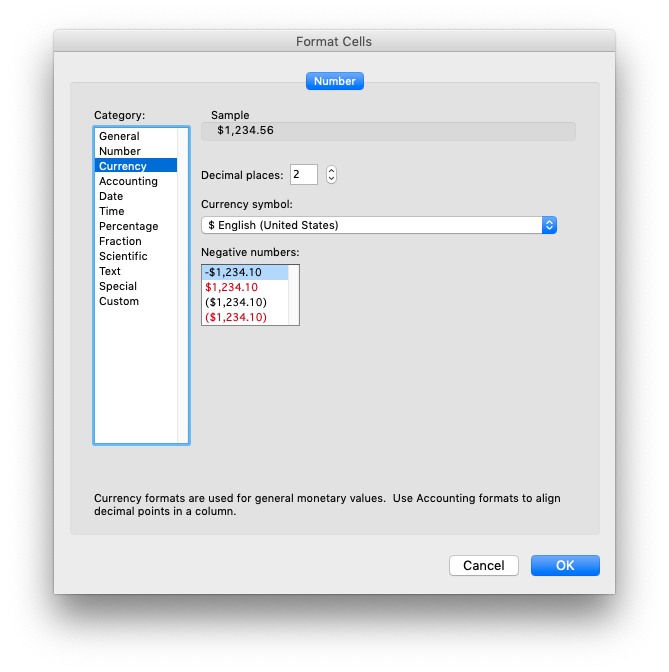
Then, while still in the dialog, change to Custom. The format displayed is the format used by Excel.
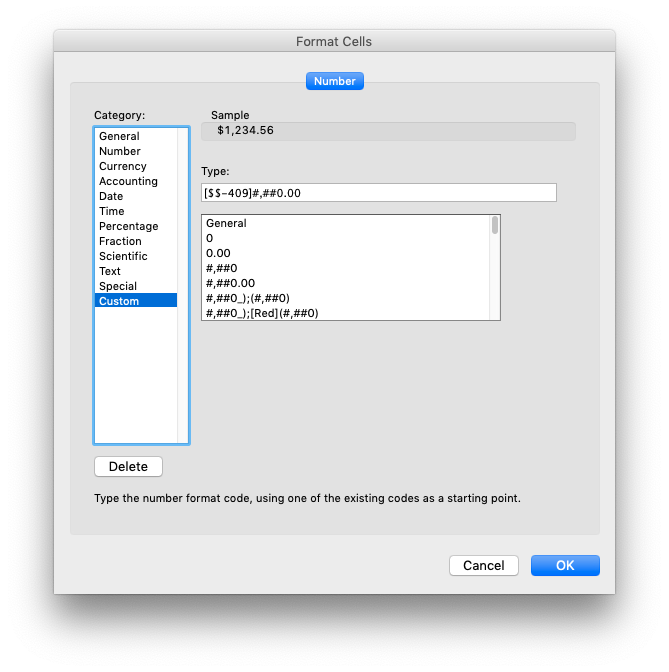
If we put the format that we found ("[$$-409]#,##0.00") into our previous
example and rerun it we will get a number format in the Currency category:
// SPDX-License-Identifier: MIT OR Apache-2.0
//
// Copyright 2022-2026, John McNamara, jmcnamara@cpan.org
//! The following example demonstrates setting a currency format for a worksheet
//! cell.
use rust_xlsxwriter::{Format, Workbook, XlsxError};
fn main() -> Result<(), XlsxError> {
// Create a new Excel file object.
let mut workbook = Workbook::new();
// Add a worksheet.
let worksheet = workbook.add_worksheet();
// Add a format.
let currency_format = Format::new().set_num_format("[$$-409]#,##0.00");
worksheet.write_with_format(0, 0, 1234.56, ¤cy_format)?;
workbook.save("currency_format.xlsx")?;
Ok(())
}That give us the following updated output. Note that the number category is now shown as Currency:
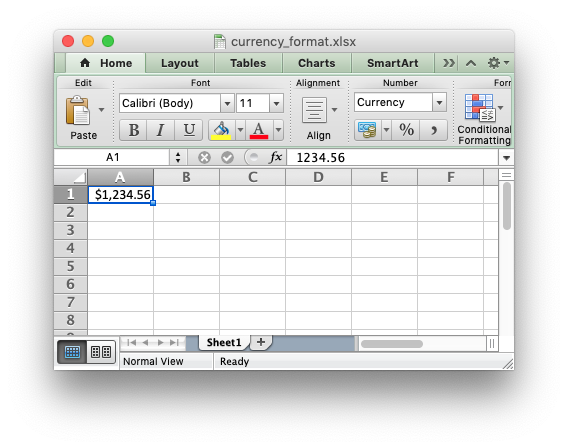
The same process can be used to find format strings for "Date" or "Accountancy" formats.
Number Formats in different Locales
As shown in the previous section the Format::set_num_format() method is used to
set the number format for rust_xlsxwriter formats. A common use case is to set
a number format with a "grouping/thousands" separator and a "decimal" point:
// SPDX-License-Identifier: MIT OR Apache-2.0
//
// Copyright 2022-2026, John McNamara, jmcnamara@cpan.org
//! The following example demonstrates setting a number format that appears
//! differently in different locales.
use rust_xlsxwriter::{Format, Workbook, XlsxError};
fn main() -> Result<(), XlsxError> {
// Create a new Excel file object.
let mut workbook = Workbook::new();
// Add a worksheet.
let worksheet = workbook.add_worksheet();
// Add a format.
let currency_format = Format::new().set_num_format("#,##0.00");
worksheet.write_with_format(0, 0, 1234.56, ¤cy_format)?;
workbook.save("number_format.xlsx")?;
Ok(())
}In the US locale (and some others) where the number "grouping/thousands"
separator is "," and the "decimal" point is "." which would be shown in
Excel as:
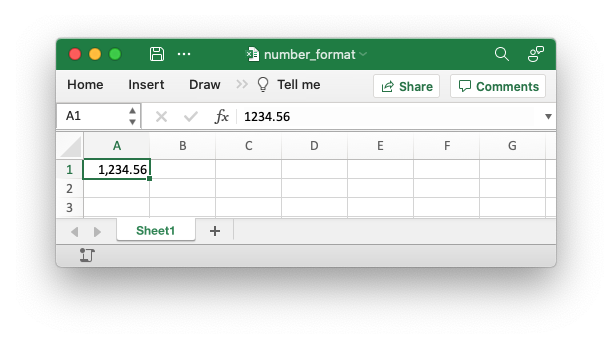
In other locales these values may be reversed or different. They are generally
set in the "Region" settings of Windows or Mac OS. Excel handles this by
storing the number format in the file format in the US locale, in this case
"#,##0.00", but renders it according to the regional settings of the host OS.
For example, here is the same, unmodified, output file shown above in a German
locale:
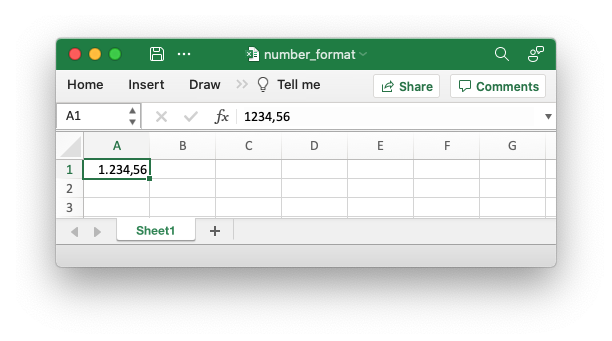
And here is the same file in a Russian locale. Note the use of a space as the "grouping/thousands" separator:
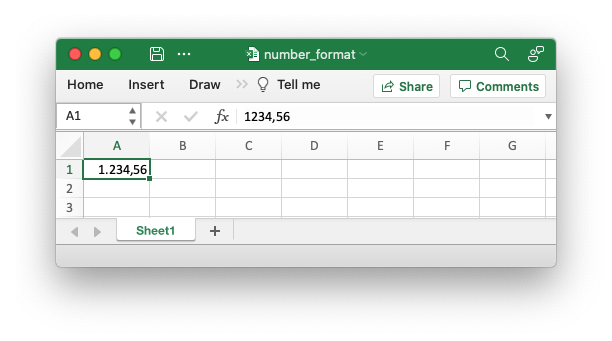
In order to replicate Excel's behavior all XlsxWriter programs should use US locale formatting which will then be rendered in the settings of your host OS.
Working with Colors
The Color enum defines Excel colors the can be used throughout the
rust_xlsxwriter library.
There are 3 types of colors within the enum:
- Predefined named RGB colors like
Color::Green. - User defined RGB colors like
Color::RGB(0x4F026A). - Theme colors like
Color::Theme(9, 4).
These are explained in more detail in the sections below.
Named colors
For convenience there are a number of predefined named colors which are translated internally to RGB colors. These are shown in the table below.
| Name | Value |
|---|---|
Color::Black | 0x000000 |
Color::Blue | 0x0000FF |
Color::Brown | 0x800000 |
Color::Cyan | 0x00FFFF |
Color::Gray | 0x808080 |
Color::Green | 0x008000 |
Color::Lime | 0x00FF00 |
Color::Magenta | 0xFF00FF |
Color::Navy | 0x000080 |
Color::Orange | 0xFF6600 |
Color::Pink | 0xFF00FF |
Color::Purple | 0x800080 |
Color::Red | 0xFF0000 |
Color::Silver | 0xC0C0C0 |
Color::White | 0xFFFFFF |
Color::Yellow | 0xFFFF00 |
Color::Default | None |
Color::Automatic | None |
The Color::Default value translates to the default color in whatever context
it is used. The Color::Automatic value is usually the same but can be
overridden by system settings.
RGB colors
These are the most common colors used throughout Excel. In rust_xlsxwriter
they can be generated using the Color::RGB() member of the enum like this:
Color::RGB(0x4F026A).
These are similar to HTML style colors which most people will be familiar with.
Theme colors
Theme colors are colors from the standard palette of 60 colors which is shown in the image below.
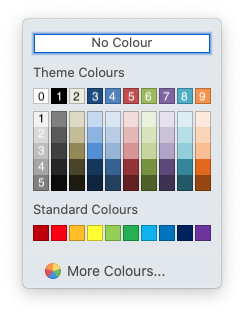
The syntax for theme colors in Color is Theme(color, shade) where color is
one of the 0-9 values on the top row and shade is the variant in the
associated column from 0-5. For example "White, background 1" in the top left is
Theme(0, 0) and "Orange, Accent 6, Darker 50%" in the bottom right is
Theme(9, 5).
Note, there are no plans to support anything other than the default Excel "Office" theme.
Working with Formulas
In general any Excel formula can be used directly in rust_xlsxwriter:
// SPDX-License-Identifier: MIT OR Apache-2.0
//
// Copyright 2022-2026, John McNamara, jmcnamara@cpan.org

//! The following example demonstrates writing a simple formula.

use rust_xlsxwriter::{Workbook, XlsxError};

fn main() -> Result<(), XlsxError> {
    let mut workbook = Workbook::new();
    let worksheet = workbook.add_worksheet();

    worksheet.write_formula(0, 0, "=10*B1 + C1")?;

    worksheet.write_number(0, 1, 5)?;
    worksheet.write_number(0, 2, 1)?;

    workbook.save("formula.xlsx")?;

    Ok(())
}
The formula will then be displayed as expected in Excel:
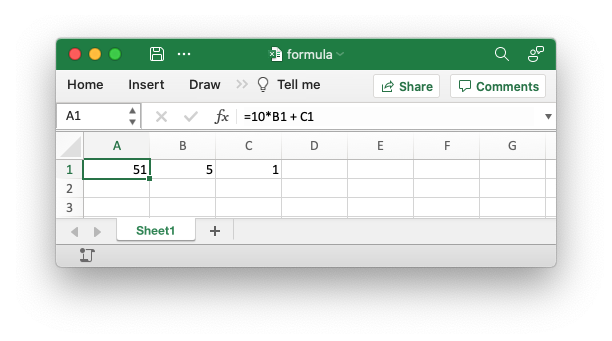
However, there are a few potential issues and differences that the user of
rust_xlsxwriter should be aware of. These are explained in the following
sections.
Formula Results
The rust_xlsxwriter library doesn't calculate the result of a formula and
instead stores the value "0" as the formula result. It then sets a global flag
in the XLSX file to say that all formulas and functions should be recalculated
when the file is opened.
This works fine with the majority of spreadsheet applications. However, applications that don't have a facility to calculate formulas will only display the 0 results. Examples of such applications are Excel viewers, PDF converters, and some mobile device applications.
If required, it is also possible to specify the calculated result of the
formula using the Worksheet::set_formula_result() method or the Formula::set_result() method:
// SPDX-License-Identifier: MIT OR Apache-2.0
//
// Copyright 2022-2026, John McNamara, jmcnamara@cpan.org

//! The following example demonstrates manually setting the result of a formula.
//! Note, this is only required for non-Excel applications that don't calculate
//! formula results.

use rust_xlsxwriter::{Formula, Workbook, XlsxError};

fn main() -> Result<(), XlsxError> {
    // Create a new Excel file object.
    let mut workbook = Workbook::new();

    // Add a worksheet to the workbook.
    let worksheet = workbook.add_worksheet();

    // Using the formula string syntax.
    worksheet
        .write_formula(0, 0, "1+1")?
        .set_formula_result(0, 0, "2");

    // Or using a Formula type.
    worksheet.write_formula(1, 0, Formula::new("2+2").set_result("4"))?;

    workbook.save("formulas.xlsx")?;

    Ok(())
}
One common spreadsheet application where the formula recalculation doesn't work
is LibreOffice (see the following issue report). If you wish to force
recalculation in LibreOffice you can use the
Worksheet::set_formula_result_default() method to set the default result to
an empty string:
// SPDX-License-Identifier: MIT OR Apache-2.0
//
// Copyright 2022-2026, John McNamara, jmcnamara@cpan.org

//! The following example demonstrates manually setting the default result for
//! all non-calculated formulas in a worksheet.

use rust_xlsxwriter::{Workbook, XlsxError};

fn main() -> Result<(), XlsxError> {
    // Create a new Excel file object.
    let mut workbook = Workbook::new();

    // Add a worksheet to the workbook.
    let worksheet = workbook.add_worksheet();

    worksheet.set_formula_result_default("");

    workbook.save("formulas.xlsx")?;

    Ok(())
}
Non US Excel functions and syntax
Excel stores formulas in the format of the US English version, regardless of the
language or locale of the end-user's version of Excel. Therefore all formula
function names written using rust_xlsxwriter must be in English. In addition,
formulas must be written with the US style separator/range operator which is a
comma (not semi-colon).
Some examples of how formulas should and shouldn't be written are shown below:
// SPDX-License-Identifier: MIT OR Apache-2.0
//
// Copyright 2022-2026, John McNamara, jmcnamara@cpan.org

//! The following example demonstrates some common formula syntax errors.

use rust_xlsxwriter::{Workbook, XlsxError};

fn main() -> Result<(), XlsxError> {
    let mut workbook = Workbook::new();
    let worksheet = workbook.add_worksheet();

    // OK.
    worksheet.write_formula(0, 0, "=SUM(1, 2, 3)")?;

    // Semi-colon separator. Causes Excel error on file opening.
    worksheet.write_formula(1, 0, "=SUM(1; 2; 3)")?;

    // French function name. Causes Excel error on file opening.
    worksheet.write_formula(2, 0, "=SOMME(1, 2, 3)")?;

    workbook.save("formula.xlsx")?;

    Ok(())
}
If you have a non-English version of Excel you can use the following multi-lingual Formula Translator to help you convert the formula. It can also replace semi-colons with commas.
Dynamic Array support
In Office 365 Excel introduced the concept of "Dynamic Arrays" and new functions that use them. The new functions are:
FILTERRANDARRAYSEQUENCESORTBYSORTUNIQUEXLOOKUPXMATCH
The following special case functions were also added with Dynamic Arrays:
SINGLE: Explained below in The Implicit Intersection Operator "@"ANCHORARRAY: Explained below in The Spilled Range Operator "#"
Dynamic Arrays - An introduction
Dynamic arrays in Excel are ranges of return values that can change size based
on the results. For example, a function such as FILTER() returns an array of
values that can vary in size depending on the the filter results:
// SPDX-License-Identifier: MIT OR Apache-2.0
//
// Copyright 2022-2026, John McNamara, jmcnamara@cpan.org

//! An example of how to use the `rust_xlsxwriter` library to write formulas and
//! functions that create dynamic arrays. These functions are new to Excel
//! 365. The examples mirror the examples in the Excel documentation for these
//! functions.
use rust_xlsxwriter::{Color, Format, Workbook, Worksheet, XlsxError};

fn main() -> Result<(), XlsxError> {
    // Create a new Excel file object.
    let mut workbook = Workbook::new();

    // Create some header formats to use in the worksheets.
    let header1 = Format::new()
        .set_foreground_color(Color::RGB(0x74AC4C))
        .set_font_color(Color::RGB(0xFFFFFF));

    let header2 = Format::new()
        .set_foreground_color(Color::RGB(0x528FD3))
        .set_font_color(Color::RGB(0xFFFFFF));

    // -----------------------------------------------------------------------
    // Example of using the FILTER() function.
    // -----------------------------------------------------------------------
    let worksheet1 = workbook.add_worksheet().set_name("Filter")?;

    worksheet1.write_dynamic_formula(1, 5, "=FILTER(A1:D17,C1:C17=K2)")?;

    // Write the data the function will work on.
    worksheet1.write_string_with_format(0, 10, "Product", &header2)?;
    worksheet1.write_string(1, 10, "Apple")?;
    worksheet1.write_string_with_format(0, 5, "Region", &header2)?;
    worksheet1.write_string_with_format(0, 6, "Sales Rep", &header2)?;
    worksheet1.write_string_with_format(0, 7, "Product", &header2)?;
    worksheet1.write_string_with_format(0, 8, "Units", &header2)?;

    // Add sample worksheet data to work on.
    write_worksheet_data(worksheet1, &header1)?;
    worksheet1.set_column_width_pixels(4, 20)?;
    worksheet1.set_column_width_pixels(9, 20)?;

    // -----------------------------------------------------------------------
    // Example of using the UNIQUE() function.
    // -----------------------------------------------------------------------
    let worksheet2 = workbook.add_worksheet().set_name("Unique")?;

    worksheet2.write_dynamic_formula(1, 5, "=UNIQUE(B2:B17)")?;

    // A more complex example combining SORT and UNIQUE.
    worksheet2.write_dynamic_formula(1, 7, "SORT(UNIQUE(B2:B17))")?;

    // Write the data the function will work on.
    worksheet2.write_string_with_format(0, 5, "Sales Rep", &header2)?;
    worksheet2.write_string_with_format(0, 7, "Sales Rep", &header2)?;

    // Add sample worksheet data to work on.
    write_worksheet_data(worksheet2, &header1)?;
    worksheet2.set_column_width_pixels(4, 20)?;
    worksheet2.set_column_width_pixels(6, 20)?;

    // -----------------------------------------------------------------------
    // Example of using the SORT() function.
    // -----------------------------------------------------------------------
    let worksheet3 = workbook.add_worksheet().set_name("Sort")?;

    // A simple SORT example.
    worksheet3.write_dynamic_formula(1, 5, "=SORT(B2:B17)")?;

    // A more complex example combining SORT and FILTER.
    worksheet3.write_dynamic_formula(1, 7, r#"=SORT(FILTER(C2:D17,D2:D17>5000,""),2,1)"#)?;

    // Write the data the function will work on.
    worksheet3.write_string_with_format(0, 5, "Sales Rep", &header2)?;
    worksheet3.write_string_with_format(0, 7, "Product", &header2)?;
    worksheet3.write_string_with_format(0, 8, "Units", &header2)?;

    // Add sample worksheet data to work on.
    write_worksheet_data(worksheet3, &header1)?;
    worksheet3.set_column_width_pixels(4, 20)?;
    worksheet3.set_column_width_pixels(6, 20)?;

    // -----------------------------------------------------------------------
    // Example of using the SORTBY() function.
    // -----------------------------------------------------------------------
    let worksheet4 = workbook.add_worksheet().set_name("Sortby")?;

    worksheet4.write_dynamic_formula(1, 3, "=SORTBY(A2:B9,B2:B9)")?;

    // Write the data the function will work on.
    worksheet4.write_string_with_format(0, 0, "Name", &header1)?;
    worksheet4.write_string_with_format(0, 1, "Age", &header1)?;

    worksheet4.write_string(1, 0, "Tom")?;
    worksheet4.write_string(2, 0, "Fred")?;
    worksheet4.write_string(3, 0, "Amy")?;
    worksheet4.write_string(4, 0, "Sal")?;
    worksheet4.write_string(5, 0, "Fritz")?;
    worksheet4.write_string(6, 0, "Srivan")?;
    worksheet4.write_string(7, 0, "Xi")?;
    worksheet4.write_string(8, 0, "Hector")?;

    worksheet4.write_number(1, 1, 52)?;
    worksheet4.write_number(2, 1, 65)?;
    worksheet4.write_number(3, 1, 22)?;
    worksheet4.write_number(4, 1, 73)?;
    worksheet4.write_number(5, 1, 19)?;
    worksheet4.write_number(6, 1, 39)?;
    worksheet4.write_number(7, 1, 19)?;
    worksheet4.write_number(8, 1, 66)?;

    worksheet4.write_string_with_format(0, 3, "Name", &header2)?;
    worksheet4.write_string_with_format(0, 4, "Age", &header2)?;

    worksheet4.set_column_width_pixels(2, 20)?;

    // -----------------------------------------------------------------------
    // Example of using the XLOOKUP() function.
    // -----------------------------------------------------------------------
    let worksheet5 = workbook.add_worksheet().set_name("Xlookup")?;

    worksheet5.write_dynamic_formula(0, 5, "=XLOOKUP(E1,A2:A9,C2:C9)")?;

    // Write the data the function will work on.
    worksheet5.write_string_with_format(0, 0, "Country", &header1)?;
    worksheet5.write_string_with_format(0, 1, "Abr", &header1)?;
    worksheet5.write_string_with_format(0, 2, "Prefix", &header1)?;

    worksheet5.write_string(1, 0, "China")?;
    worksheet5.write_string(2, 0, "India")?;
    worksheet5.write_string(3, 0, "United States")?;
    worksheet5.write_string(4, 0, "Indonesia")?;
    worksheet5.write_string(5, 0, "Brazil")?;
    worksheet5.write_string(6, 0, "Pakistan")?;
    worksheet5.write_string(7, 0, "Nigeria")?;
    worksheet5.write_string(8, 0, "Bangladesh")?;

    worksheet5.write_string(1, 1, "CN")?;
    worksheet5.write_string(2, 1, "IN")?;
    worksheet5.write_string(3, 1, "US")?;
    worksheet5.write_string(4, 1, "ID")?;
    worksheet5.write_string(5, 1, "BR")?;
    worksheet5.write_string(6, 1, "PK")?;
    worksheet5.write_string(7, 1, "NG")?;
    worksheet5.write_string(8, 1, "BD")?;

    worksheet5.write_number(1, 2, 86)?;
    worksheet5.write_number(2, 2, 91)?;
    worksheet5.write_number(3, 2, 1)?;
    worksheet5.write_number(4, 2, 62)?;
    worksheet5.write_number(5, 2, 55)?;
    worksheet5.write_number(6, 2, 92)?;
    worksheet5.write_number(7, 2, 234)?;
    worksheet5.write_number(8, 2, 880)?;

    worksheet5.write_string_with_format(0, 4, "Brazil", &header2)?;

    worksheet5.set_column_width_pixels(0, 100)?;
    worksheet5.set_column_width_pixels(3, 20)?;

    // -----------------------------------------------------------------------
    // Example of using the XMATCH() function.
    // -----------------------------------------------------------------------
    let worksheet6 = workbook.add_worksheet().set_name("Xmatch")?;

    worksheet6.write_dynamic_formula(1, 3, "=XMATCH(C2,A2:A6)")?;

    // Write the data the function will work on.
    worksheet6.write_string_with_format(0, 0, "Product", &header1)?;

    worksheet6.write_string(1, 0, "Apple")?;
    worksheet6.write_string(2, 0, "Grape")?;
    worksheet6.write_string(3, 0, "Pear")?;
    worksheet6.write_string(4, 0, "Banana")?;
    worksheet6.write_string(5, 0, "Cherry")?;

    worksheet6.write_string_with_format(0, 2, "Product", &header2)?;
    worksheet6.write_string_with_format(0, 3, "Position", &header2)?;
    worksheet6.write_string(1, 2, "Grape")?;

    worksheet6.set_column_width_pixels(1, 20)?;

    // -----------------------------------------------------------------------
    // Example of using the RANDARRAY() function.
    // -----------------------------------------------------------------------
    let worksheet7 = workbook.add_worksheet().set_name("Randarray")?;

    worksheet7.write_dynamic_formula(0, 0, "=RANDARRAY(5,3,1,100, TRUE)")?;

    // -----------------------------------------------------------------------
    // Example of using the SEQUENCE() function.
    // -----------------------------------------------------------------------
    let worksheet8 = workbook.add_worksheet().set_name("Sequence")?;

    worksheet8.write_dynamic_formula(0, 0, "=SEQUENCE(4,5)")?;

    // -----------------------------------------------------------------------
    // Example of using the Spill range operator.
    // -----------------------------------------------------------------------
    let worksheet9 = workbook.add_worksheet().set_name("Spill ranges")?;

    worksheet9.write_dynamic_formula(1, 7, "=ANCHORARRAY(F2)")?;

    worksheet9.write_dynamic_formula(1, 9, "=COUNTA(ANCHORARRAY(F2))")?;

    // Write the data the to work on.
    worksheet9.write_dynamic_formula(1, 5, "=UNIQUE(B2:B17)")?;
    worksheet9.write_string_with_format(0, 5, "Unique", &header2)?;
    worksheet9.write_string_with_format(0, 7, "Spill", &header2)?;
    worksheet9.write_string_with_format(0, 9, "Spill", &header2)?;

    // Add sample worksheet data to work on.
    write_worksheet_data(worksheet9, &header1)?;
    worksheet9.set_column_width_pixels(4, 20)?;
    worksheet9.set_column_width_pixels(6, 20)?;
    worksheet9.set_column_width_pixels(8, 20)?;

    // -----------------------------------------------------------------------
    // Example of using dynamic ranges with older Excel functions.
    // -----------------------------------------------------------------------
    let worksheet10 = workbook.add_worksheet().set_name("Older functions")?;

    worksheet10.write_dynamic_array_formula(0, 1, 2, 1, "=LEN(A1:A3)")?;

    // Write the data the to work on.
    worksheet10.write_string(0, 0, "Foo")?;
    worksheet10.write_string(1, 0, "Food")?;
    worksheet10.write_string(2, 0, "Frood")?;

    workbook.save("dynamic_arrays.xlsx")?;

    Ok(())
}

// A simple function and data structure to populate some of the worksheets.
fn write_worksheet_data(worksheet: &mut Worksheet, header: &Format) -> Result<(), XlsxError> {
    let worksheet_data = vec![
        ("East", "Tom", "Apple", 6380),
        ("West", "Fred", "Grape", 5619),
        ("North", "Amy", "Pear", 4565),
        ("South", "Sal", "Banana", 5323),
        ("East", "Fritz", "Apple", 4394),
        ("West", "Sravan", "Grape", 7195),
        ("North", "Xi", "Pear", 5231),
        ("South", "Hector", "Banana", 2427),
        ("East", "Tom", "Banana", 4213),
        ("West", "Fred", "Pear", 3239),
        ("North", "Amy", "Grape", 6520),
        ("South", "Sal", "Apple", 1310),
        ("East", "Fritz", "Banana", 6274),
        ("West", "Sravan", "Pear", 4894),
        ("North", "Xi", "Grape", 7580),
        ("South", "Hector", "Apple", 9814),
    ];

    worksheet.write_string_with_format(0, 0, "Region", header)?;
    worksheet.write_string_with_format(0, 1, "Sales Rep", header)?;
    worksheet.write_string_with_format(0, 2, "Product", header)?;
    worksheet.write_string_with_format(0, 3, "Units", header)?;

    let mut row = 1;
    for data in worksheet_data.iter() {
        worksheet.write_string(row, 0, data.0)?;
        worksheet.write_string(row, 1, data.1)?;
        worksheet.write_string(row, 2, data.2)?;
        worksheet.write_number(row, 3, data.3)?;
        row += 1;
    }

    Ok(())
}
This formula gives the results shown in the image below. The dynamic range here is "F2:I5" but it can vary based on the filter criteria.
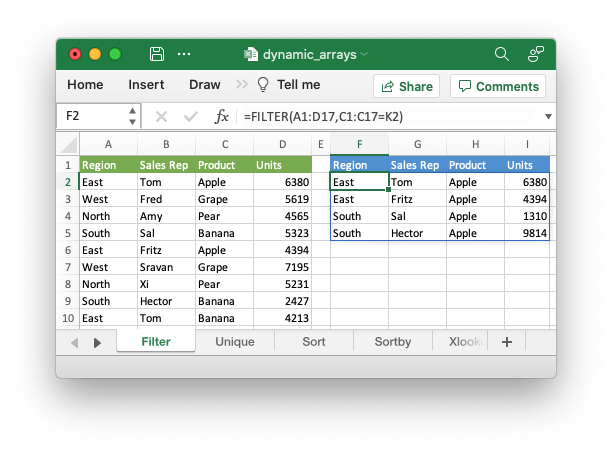
It is also possible to get dynamic array behavior with older Excel functions.
For example, the Excel function "=LEN(A1)" applies to a single cell and
returns a single value but it can also apply to a range of cells and return a
range of values using an array formula like "{=LEN(A1:A3)}". This type of
"static" array behavior is referred to as a CSE (Ctrl+Shift+Enter) formula and
has existed in Excel since early versions. In Office 365 Excel updated and
extended this behavior to create the concept of dynamic arrays. In Excel 365 you
can now write the previous LEN function as "=LEN(A1:A3)" and get a dynamic
range of return values:
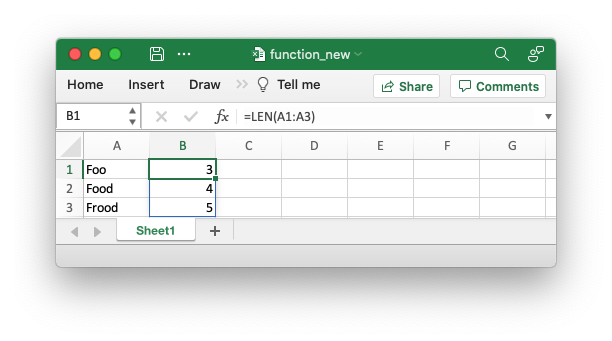
The difference between the two types of array functions is explained in the Microsoft documentation on Dynamic array formulas vs. legacy CSE array formulas.
In rust_xlsxwriter you can use the Worksheet::write_array_formula()
function to get a static/CSE range and
Worksheet::write_dynamic_array_formula() or
Worksheet::write_dynamic_formula() to get a dynamic range.
The Worksheet::write_dynamic_array_formula() function takes a (first_row, first_col, last_row, last_col) cell range to define the area that the formula
applies to. However, since the range is dynamic this generally won't be known in
advance in which case you can specify the range with the same start and end
cell. The following range is "F2:F2":
worksheet1.write_dynamic_array_formula(1, 5, 1, 5, "=FILTER(A1:D17,C1:C17=K2)")?;As a syntactic shortcut you can use the Worksheet::write_dynamic_formula()
function which only requires the start cell:
// SPDX-License-Identifier: MIT OR Apache-2.0
//
// Copyright 2022-2026, John McNamara, jmcnamara@cpan.org

//! An example of how to use the `rust_xlsxwriter` library to write formulas and
//! functions that create dynamic arrays. These functions are new to Excel
//! 365. The examples mirror the examples in the Excel documentation for these
//! functions.
use rust_xlsxwriter::{Color, Format, Workbook, Worksheet, XlsxError};

fn main() -> Result<(), XlsxError> {
    // Create a new Excel file object.
    let mut workbook = Workbook::new();

    // Create some header formats to use in the worksheets.
    let header1 = Format::new()
        .set_foreground_color(Color::RGB(0x74AC4C))
        .set_font_color(Color::RGB(0xFFFFFF));

    let header2 = Format::new()
        .set_foreground_color(Color::RGB(0x528FD3))
        .set_font_color(Color::RGB(0xFFFFFF));

    // -----------------------------------------------------------------------
    // Example of using the FILTER() function.
    // -----------------------------------------------------------------------
    let worksheet1 = workbook.add_worksheet().set_name("Filter")?;

    worksheet1.write_dynamic_formula(1, 5, "=FILTER(A1:D17,C1:C17=K2)")?;

    // Write the data the function will work on.
    worksheet1.write_string_with_format(0, 10, "Product", &header2)?;
    worksheet1.write_string(1, 10, "Apple")?;
    worksheet1.write_string_with_format(0, 5, "Region", &header2)?;
    worksheet1.write_string_with_format(0, 6, "Sales Rep", &header2)?;
    worksheet1.write_string_with_format(0, 7, "Product", &header2)?;
    worksheet1.write_string_with_format(0, 8, "Units", &header2)?;

    // Add sample worksheet data to work on.
    write_worksheet_data(worksheet1, &header1)?;
    worksheet1.set_column_width_pixels(4, 20)?;
    worksheet1.set_column_width_pixels(9, 20)?;

    // -----------------------------------------------------------------------
    // Example of using the UNIQUE() function.
    // -----------------------------------------------------------------------
    let worksheet2 = workbook.add_worksheet().set_name("Unique")?;

    worksheet2.write_dynamic_formula(1, 5, "=UNIQUE(B2:B17)")?;

    // A more complex example combining SORT and UNIQUE.
    worksheet2.write_dynamic_formula(1, 7, "SORT(UNIQUE(B2:B17))")?;

    // Write the data the function will work on.
    worksheet2.write_string_with_format(0, 5, "Sales Rep", &header2)?;
    worksheet2.write_string_with_format(0, 7, "Sales Rep", &header2)?;

    // Add sample worksheet data to work on.
    write_worksheet_data(worksheet2, &header1)?;
    worksheet2.set_column_width_pixels(4, 20)?;
    worksheet2.set_column_width_pixels(6, 20)?;

    // -----------------------------------------------------------------------
    // Example of using the SORT() function.
    // -----------------------------------------------------------------------
    let worksheet3 = workbook.add_worksheet().set_name("Sort")?;

    // A simple SORT example.
    worksheet3.write_dynamic_formula(1, 5, "=SORT(B2:B17)")?;

    // A more complex example combining SORT and FILTER.
    worksheet3.write_dynamic_formula(1, 7, r#"=SORT(FILTER(C2:D17,D2:D17>5000,""),2,1)"#)?;

    // Write the data the function will work on.
    worksheet3.write_string_with_format(0, 5, "Sales Rep", &header2)?;
    worksheet3.write_string_with_format(0, 7, "Product", &header2)?;
    worksheet3.write_string_with_format(0, 8, "Units", &header2)?;

    // Add sample worksheet data to work on.
    write_worksheet_data(worksheet3, &header1)?;
    worksheet3.set_column_width_pixels(4, 20)?;
    worksheet3.set_column_width_pixels(6, 20)?;

    // -----------------------------------------------------------------------
    // Example of using the SORTBY() function.
    // -----------------------------------------------------------------------
    let worksheet4 = workbook.add_worksheet().set_name("Sortby")?;

    worksheet4.write_dynamic_formula(1, 3, "=SORTBY(A2:B9,B2:B9)")?;

    // Write the data the function will work on.
    worksheet4.write_string_with_format(0, 0, "Name", &header1)?;
    worksheet4.write_string_with_format(0, 1, "Age", &header1)?;

    worksheet4.write_string(1, 0, "Tom")?;
    worksheet4.write_string(2, 0, "Fred")?;
    worksheet4.write_string(3, 0, "Amy")?;
    worksheet4.write_string(4, 0, "Sal")?;
    worksheet4.write_string(5, 0, "Fritz")?;
    worksheet4.write_string(6, 0, "Srivan")?;
    worksheet4.write_string(7, 0, "Xi")?;
    worksheet4.write_string(8, 0, "Hector")?;

    worksheet4.write_number(1, 1, 52)?;
    worksheet4.write_number(2, 1, 65)?;
    worksheet4.write_number(3, 1, 22)?;
    worksheet4.write_number(4, 1, 73)?;
    worksheet4.write_number(5, 1, 19)?;
    worksheet4.write_number(6, 1, 39)?;
    worksheet4.write_number(7, 1, 19)?;
    worksheet4.write_number(8, 1, 66)?;

    worksheet4.write_string_with_format(0, 3, "Name", &header2)?;
    worksheet4.write_string_with_format(0, 4, "Age", &header2)?;

    worksheet4.set_column_width_pixels(2, 20)?;

    // -----------------------------------------------------------------------
    // Example of using the XLOOKUP() function.
    // -----------------------------------------------------------------------
    let worksheet5 = workbook.add_worksheet().set_name("Xlookup")?;

    worksheet5.write_dynamic_formula(0, 5, "=XLOOKUP(E1,A2:A9,C2:C9)")?;

    // Write the data the function will work on.
    worksheet5.write_string_with_format(0, 0, "Country", &header1)?;
    worksheet5.write_string_with_format(0, 1, "Abr", &header1)?;
    worksheet5.write_string_with_format(0, 2, "Prefix", &header1)?;

    worksheet5.write_string(1, 0, "China")?;
    worksheet5.write_string(2, 0, "India")?;
    worksheet5.write_string(3, 0, "United States")?;
    worksheet5.write_string(4, 0, "Indonesia")?;
    worksheet5.write_string(5, 0, "Brazil")?;
    worksheet5.write_string(6, 0, "Pakistan")?;
    worksheet5.write_string(7, 0, "Nigeria")?;
    worksheet5.write_string(8, 0, "Bangladesh")?;

    worksheet5.write_string(1, 1, "CN")?;
    worksheet5.write_string(2, 1, "IN")?;
    worksheet5.write_string(3, 1, "US")?;
    worksheet5.write_string(4, 1, "ID")?;
    worksheet5.write_string(5, 1, "BR")?;
    worksheet5.write_string(6, 1, "PK")?;
    worksheet5.write_string(7, 1, "NG")?;
    worksheet5.write_string(8, 1, "BD")?;

    worksheet5.write_number(1, 2, 86)?;
    worksheet5.write_number(2, 2, 91)?;
    worksheet5.write_number(3, 2, 1)?;
    worksheet5.write_number(4, 2, 62)?;
    worksheet5.write_number(5, 2, 55)?;
    worksheet5.write_number(6, 2, 92)?;
    worksheet5.write_number(7, 2, 234)?;
    worksheet5.write_number(8, 2, 880)?;

    worksheet5.write_string_with_format(0, 4, "Brazil", &header2)?;

    worksheet5.set_column_width_pixels(0, 100)?;
    worksheet5.set_column_width_pixels(3, 20)?;

    // -----------------------------------------------------------------------
    // Example of using the XMATCH() function.
    // -----------------------------------------------------------------------
    let worksheet6 = workbook.add_worksheet().set_name("Xmatch")?;

    worksheet6.write_dynamic_formula(1, 3, "=XMATCH(C2,A2:A6)")?;

    // Write the data the function will work on.
    worksheet6.write_string_with_format(0, 0, "Product", &header1)?;

    worksheet6.write_string(1, 0, "Apple")?;
    worksheet6.write_string(2, 0, "Grape")?;
    worksheet6.write_string(3, 0, "Pear")?;
    worksheet6.write_string(4, 0, "Banana")?;
    worksheet6.write_string(5, 0, "Cherry")?;

    worksheet6.write_string_with_format(0, 2, "Product", &header2)?;
    worksheet6.write_string_with_format(0, 3, "Position", &header2)?;
    worksheet6.write_string(1, 2, "Grape")?;

    worksheet6.set_column_width_pixels(1, 20)?;

    // -----------------------------------------------------------------------
    // Example of using the RANDARRAY() function.
    // -----------------------------------------------------------------------
    let worksheet7 = workbook.add_worksheet().set_name("Randarray")?;

    worksheet7.write_dynamic_formula(0, 0, "=RANDARRAY(5,3,1,100, TRUE)")?;

    // -----------------------------------------------------------------------
    // Example of using the SEQUENCE() function.
    // -----------------------------------------------------------------------
    let worksheet8 = workbook.add_worksheet().set_name("Sequence")?;

    worksheet8.write_dynamic_formula(0, 0, "=SEQUENCE(4,5)")?;

    // -----------------------------------------------------------------------
    // Example of using the Spill range operator.
    // -----------------------------------------------------------------------
    let worksheet9 = workbook.add_worksheet().set_name("Spill ranges")?;

    worksheet9.write_dynamic_formula(1, 7, "=ANCHORARRAY(F2)")?;

    worksheet9.write_dynamic_formula(1, 9, "=COUNTA(ANCHORARRAY(F2))")?;

    // Write the data the to work on.
    worksheet9.write_dynamic_formula(1, 5, "=UNIQUE(B2:B17)")?;
    worksheet9.write_string_with_format(0, 5, "Unique", &header2)?;
    worksheet9.write_string_with_format(0, 7, "Spill", &header2)?;
    worksheet9.write_string_with_format(0, 9, "Spill", &header2)?;

    // Add sample worksheet data to work on.
    write_worksheet_data(worksheet9, &header1)?;
    worksheet9.set_column_width_pixels(4, 20)?;
    worksheet9.set_column_width_pixels(6, 20)?;
    worksheet9.set_column_width_pixels(8, 20)?;

    // -----------------------------------------------------------------------
    // Example of using dynamic ranges with older Excel functions.
    // -----------------------------------------------------------------------
    let worksheet10 = workbook.add_worksheet().set_name("Older functions")?;

    worksheet10.write_dynamic_array_formula(0, 1, 2, 1, "=LEN(A1:A3)")?;

    // Write the data the to work on.
    worksheet10.write_string(0, 0, "Foo")?;
    worksheet10.write_string(1, 0, "Food")?;
    worksheet10.write_string(2, 0, "Frood")?;

    workbook.save("dynamic_arrays.xlsx")?;

    Ok(())
}

// A simple function and data structure to populate some of the worksheets.
fn write_worksheet_data(worksheet: &mut Worksheet, header: &Format) -> Result<(), XlsxError> {
    let worksheet_data = vec![
        ("East", "Tom", "Apple", 6380),
        ("West", "Fred", "Grape", 5619),
        ("North", "Amy", "Pear", 4565),
        ("South", "Sal", "Banana", 5323),
        ("East", "Fritz", "Apple", 4394),
        ("West", "Sravan", "Grape", 7195),
        ("North", "Xi", "Pear", 5231),
        ("South", "Hector", "Banana", 2427),
        ("East", "Tom", "Banana", 4213),
        ("West", "Fred", "Pear", 3239),
        ("North", "Amy", "Grape", 6520),
        ("South", "Sal", "Apple", 1310),
        ("East", "Fritz", "Banana", 6274),
        ("West", "Sravan", "Pear", 4894),
        ("North", "Xi", "Grape", 7580),
        ("South", "Hector", "Apple", 9814),
    ];

    worksheet.write_string_with_format(0, 0, "Region", header)?;
    worksheet.write_string_with_format(0, 1, "Sales Rep", header)?;
    worksheet.write_string_with_format(0, 2, "Product", header)?;
    worksheet.write_string_with_format(0, 3, "Units", header)?;

    let mut row = 1;
    for data in worksheet_data.iter() {
        worksheet.write_string(row, 0, data.0)?;
        worksheet.write_string(row, 1, data.1)?;
        worksheet.write_string(row, 2, data.2)?;
        worksheet.write_number(row, 3, data.3)?;
        row += 1;
    }

    Ok(())
}
For a wider and more general introduction to dynamic arrays see the following: Dynamic array formulas in Excel.
The Implicit Intersection Operator "@"
The Implicit Intersection Operator, "@", is used by Excel 365 to indicate a position in a formula that is implicitly returning a single value when a range or an array could be returned.
We can see how this operator works in practice by considering the formula we
used in the last section: =LEN(A1:A3). In Excel versions without support for
dynamic arrays, i.e. prior to Excel 365, this formula would operate on a single
value from the input range and return a single value, like the following in
Excel 2011:
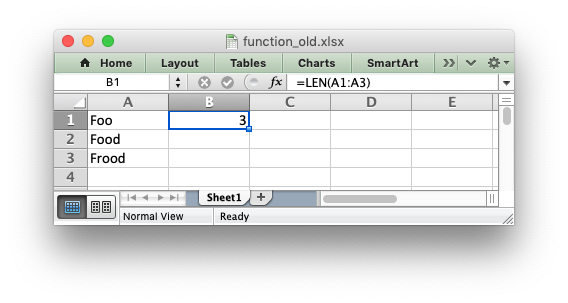
There is an implicit conversion here of the range of input values, "A1:A3", to a single value "A1". Since this was the default behavior of older versions of Excel this conversion isn't highlighted in any way. But if you open the same file in Excel 365 it will appear as follows:
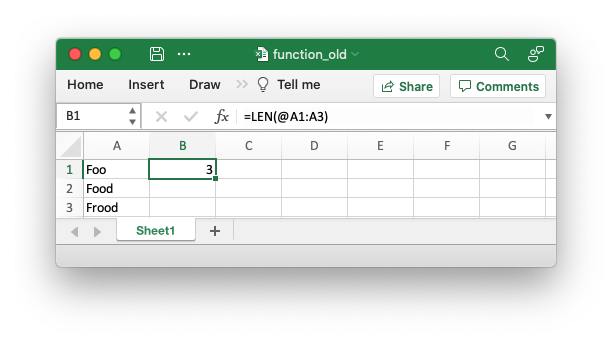
The result of the formula is the same (this is important to note) and it still operates on, and returns, a single value. However the formula now contains a "@" operator to show that it is implicitly using a single value from the given range.
In Excel 365, and with Worksheet::write_dynamic_formula() in rust_xlsxwriter,
it would operate on the entire range and return an array of values:

If you are encountering the Implicit Intersection Operator "@" for the first
time then it is probably from a point of view of "why is Excel/rust_xlsxwriter
putting @s in my formulas". In practical terms if you encounter this operator,
and you don't intend it to be there, then you should probably write the formula
as a CSE or dynamic array function using Worksheet::write_array_formula() or
Worksheet::write_dynamic_array_formula()
A full explanation of this operator is given in the Microsoft documentation on the Implicit intersection operator: @.
One important thing to note is that the "@" operator isn't stored with the
formula. It is just displayed by Excel 365 when reading "legacy" formulas.
However, it is possible to write it to a formula, if necessary, using
SINGLE(). The rare cases where this may be necessary are shown in the linked
document in the previous paragraph.
The Spilled Range Operator "#"
In the sections above we saw that dynamic array formulas can return variable sized ranges of results. The Excel documentation refers to this as a "Spilled" range/array from the idea that the results spill into the required number of cells. This is explained in the Microsoft documentation on Dynamic array formulas and spilled array behavior.
Since a spilled range is variable in size a new operator is required to refer to
the range. This operator is the Spilled range operator and it is represented
by "#". For example, the range F2# in the image below is used to refer to a
dynamic array returned by UNIQUE() in the cell F2:
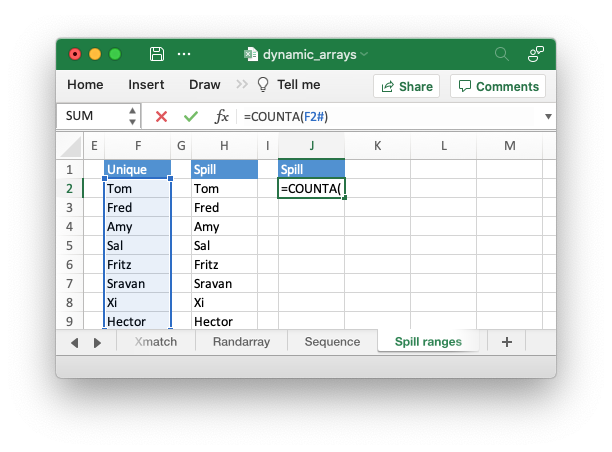
Unfortunately, Excel doesn't store the operator in the formula like this and in
rust_xlsxwriter you need to use the explicit function ANCHORARRAY() to refer
to a spilled range. The example in the image above was generated using the
following formula:
// SPDX-License-Identifier: MIT OR Apache-2.0
//
// Copyright 2022-2026, John McNamara, jmcnamara@cpan.org

//! An example of how to use the `rust_xlsxwriter` library to write formulas and
//! functions that create dynamic arrays. These functions are new to Excel
//! 365. The examples mirror the examples in the Excel documentation for these
//! functions.
use rust_xlsxwriter::{Color, Format, Workbook, Worksheet, XlsxError};

fn main() -> Result<(), XlsxError> {
    // Create a new Excel file object.
    let mut workbook = Workbook::new();

    // Create some header formats to use in the worksheets.
    let header1 = Format::new()
        .set_foreground_color(Color::RGB(0x74AC4C))
        .set_font_color(Color::RGB(0xFFFFFF));

    let header2 = Format::new()
        .set_foreground_color(Color::RGB(0x528FD3))
        .set_font_color(Color::RGB(0xFFFFFF));

    // -----------------------------------------------------------------------
    // Example of using the FILTER() function.
    // -----------------------------------------------------------------------
    let worksheet1 = workbook.add_worksheet().set_name("Filter")?;

    worksheet1.write_dynamic_formula(1, 5, "=FILTER(A1:D17,C1:C17=K2)")?;

    // Write the data the function will work on.
    worksheet1.write_string_with_format(0, 10, "Product", &header2)?;
    worksheet1.write_string(1, 10, "Apple")?;
    worksheet1.write_string_with_format(0, 5, "Region", &header2)?;
    worksheet1.write_string_with_format(0, 6, "Sales Rep", &header2)?;
    worksheet1.write_string_with_format(0, 7, "Product", &header2)?;
    worksheet1.write_string_with_format(0, 8, "Units", &header2)?;

    // Add sample worksheet data to work on.
    write_worksheet_data(worksheet1, &header1)?;
    worksheet1.set_column_width_pixels(4, 20)?;
    worksheet1.set_column_width_pixels(9, 20)?;

    // -----------------------------------------------------------------------
    // Example of using the UNIQUE() function.
    // -----------------------------------------------------------------------
    let worksheet2 = workbook.add_worksheet().set_name("Unique")?;

    worksheet2.write_dynamic_formula(1, 5, "=UNIQUE(B2:B17)")?;

    // A more complex example combining SORT and UNIQUE.
    worksheet2.write_dynamic_formula(1, 7, "SORT(UNIQUE(B2:B17))")?;

    // Write the data the function will work on.
    worksheet2.write_string_with_format(0, 5, "Sales Rep", &header2)?;
    worksheet2.write_string_with_format(0, 7, "Sales Rep", &header2)?;

    // Add sample worksheet data to work on.
    write_worksheet_data(worksheet2, &header1)?;
    worksheet2.set_column_width_pixels(4, 20)?;
    worksheet2.set_column_width_pixels(6, 20)?;

    // -----------------------------------------------------------------------
    // Example of using the SORT() function.
    // -----------------------------------------------------------------------
    let worksheet3 = workbook.add_worksheet().set_name("Sort")?;

    // A simple SORT example.
    worksheet3.write_dynamic_formula(1, 5, "=SORT(B2:B17)")?;

    // A more complex example combining SORT and FILTER.
    worksheet3.write_dynamic_formula(1, 7, r#"=SORT(FILTER(C2:D17,D2:D17>5000,""),2,1)"#)?;

    // Write the data the function will work on.
    worksheet3.write_string_with_format(0, 5, "Sales Rep", &header2)?;
    worksheet3.write_string_with_format(0, 7, "Product", &header2)?;
    worksheet3.write_string_with_format(0, 8, "Units", &header2)?;

    // Add sample worksheet data to work on.
    write_worksheet_data(worksheet3, &header1)?;
    worksheet3.set_column_width_pixels(4, 20)?;
    worksheet3.set_column_width_pixels(6, 20)?;

    // -----------------------------------------------------------------------
    // Example of using the SORTBY() function.
    // -----------------------------------------------------------------------
    let worksheet4 = workbook.add_worksheet().set_name("Sortby")?;

    worksheet4.write_dynamic_formula(1, 3, "=SORTBY(A2:B9,B2:B9)")?;

    // Write the data the function will work on.
    worksheet4.write_string_with_format(0, 0, "Name", &header1)?;
    worksheet4.write_string_with_format(0, 1, "Age", &header1)?;

    worksheet4.write_string(1, 0, "Tom")?;
    worksheet4.write_string(2, 0, "Fred")?;
    worksheet4.write_string(3, 0, "Amy")?;
    worksheet4.write_string(4, 0, "Sal")?;
    worksheet4.write_string(5, 0, "Fritz")?;
    worksheet4.write_string(6, 0, "Srivan")?;
    worksheet4.write_string(7, 0, "Xi")?;
    worksheet4.write_string(8, 0, "Hector")?;

    worksheet4.write_number(1, 1, 52)?;
    worksheet4.write_number(2, 1, 65)?;
    worksheet4.write_number(3, 1, 22)?;
    worksheet4.write_number(4, 1, 73)?;
    worksheet4.write_number(5, 1, 19)?;
    worksheet4.write_number(6, 1, 39)?;
    worksheet4.write_number(7, 1, 19)?;
    worksheet4.write_number(8, 1, 66)?;

    worksheet4.write_string_with_format(0, 3, "Name", &header2)?;
    worksheet4.write_string_with_format(0, 4, "Age", &header2)?;

    worksheet4.set_column_width_pixels(2, 20)?;

    // -----------------------------------------------------------------------
    // Example of using the XLOOKUP() function.
    // -----------------------------------------------------------------------
    let worksheet5 = workbook.add_worksheet().set_name("Xlookup")?;

    worksheet5.write_dynamic_formula(0, 5, "=XLOOKUP(E1,A2:A9,C2:C9)")?;

    // Write the data the function will work on.
    worksheet5.write_string_with_format(0, 0, "Country", &header1)?;
    worksheet5.write_string_with_format(0, 1, "Abr", &header1)?;
    worksheet5.write_string_with_format(0, 2, "Prefix", &header1)?;

    worksheet5.write_string(1, 0, "China")?;
    worksheet5.write_string(2, 0, "India")?;
    worksheet5.write_string(3, 0, "United States")?;
    worksheet5.write_string(4, 0, "Indonesia")?;
    worksheet5.write_string(5, 0, "Brazil")?;
    worksheet5.write_string(6, 0, "Pakistan")?;
    worksheet5.write_string(7, 0, "Nigeria")?;
    worksheet5.write_string(8, 0, "Bangladesh")?;

    worksheet5.write_string(1, 1, "CN")?;
    worksheet5.write_string(2, 1, "IN")?;
    worksheet5.write_string(3, 1, "US")?;
    worksheet5.write_string(4, 1, "ID")?;
    worksheet5.write_string(5, 1, "BR")?;
    worksheet5.write_string(6, 1, "PK")?;
    worksheet5.write_string(7, 1, "NG")?;
    worksheet5.write_string(8, 1, "BD")?;

    worksheet5.write_number(1, 2, 86)?;
    worksheet5.write_number(2, 2, 91)?;
    worksheet5.write_number(3, 2, 1)?;
    worksheet5.write_number(4, 2, 62)?;
    worksheet5.write_number(5, 2, 55)?;
    worksheet5.write_number(6, 2, 92)?;
    worksheet5.write_number(7, 2, 234)?;
    worksheet5.write_number(8, 2, 880)?;

    worksheet5.write_string_with_format(0, 4, "Brazil", &header2)?;

    worksheet5.set_column_width_pixels(0, 100)?;
    worksheet5.set_column_width_pixels(3, 20)?;

    // -----------------------------------------------------------------------
    // Example of using the XMATCH() function.
    // -----------------------------------------------------------------------
    let worksheet6 = workbook.add_worksheet().set_name("Xmatch")?;

    worksheet6.write_dynamic_formula(1, 3, "=XMATCH(C2,A2:A6)")?;

    // Write the data the function will work on.
    worksheet6.write_string_with_format(0, 0, "Product", &header1)?;

    worksheet6.write_string(1, 0, "Apple")?;
    worksheet6.write_string(2, 0, "Grape")?;
    worksheet6.write_string(3, 0, "Pear")?;
    worksheet6.write_string(4, 0, "Banana")?;
    worksheet6.write_string(5, 0, "Cherry")?;

    worksheet6.write_string_with_format(0, 2, "Product", &header2)?;
    worksheet6.write_string_with_format(0, 3, "Position", &header2)?;
    worksheet6.write_string(1, 2, "Grape")?;

    worksheet6.set_column_width_pixels(1, 20)?;

    // -----------------------------------------------------------------------
    // Example of using the RANDARRAY() function.
    // -----------------------------------------------------------------------
    let worksheet7 = workbook.add_worksheet().set_name("Randarray")?;

    worksheet7.write_dynamic_formula(0, 0, "=RANDARRAY(5,3,1,100, TRUE)")?;

    // -----------------------------------------------------------------------
    // Example of using the SEQUENCE() function.
    // -----------------------------------------------------------------------
    let worksheet8 = workbook.add_worksheet().set_name("Sequence")?;

    worksheet8.write_dynamic_formula(0, 0, "=SEQUENCE(4,5)")?;

    // -----------------------------------------------------------------------
    // Example of using the Spill range operator.
    // -----------------------------------------------------------------------
    let worksheet9 = workbook.add_worksheet().set_name("Spill ranges")?;

    worksheet9.write_dynamic_formula(1, 7, "=ANCHORARRAY(F2)")?;

    worksheet9.write_dynamic_formula(1, 9, "=COUNTA(ANCHORARRAY(F2))")?;

    // Write the data the to work on.
    worksheet9.write_dynamic_formula(1, 5, "=UNIQUE(B2:B17)")?;
    worksheet9.write_string_with_format(0, 5, "Unique", &header2)?;
    worksheet9.write_string_with_format(0, 7, "Spill", &header2)?;
    worksheet9.write_string_with_format(0, 9, "Spill", &header2)?;

    // Add sample worksheet data to work on.
    write_worksheet_data(worksheet9, &header1)?;
    worksheet9.set_column_width_pixels(4, 20)?;
    worksheet9.set_column_width_pixels(6, 20)?;
    worksheet9.set_column_width_pixels(8, 20)?;

    // -----------------------------------------------------------------------
    // Example of using dynamic ranges with older Excel functions.
    // -----------------------------------------------------------------------
    let worksheet10 = workbook.add_worksheet().set_name("Older functions")?;

    worksheet10.write_dynamic_array_formula(0, 1, 2, 1, "=LEN(A1:A3)")?;

    // Write the data the to work on.
    worksheet10.write_string(0, 0, "Foo")?;
    worksheet10.write_string(1, 0, "Food")?;
    worksheet10.write_string(2, 0, "Frood")?;

    workbook.save("dynamic_arrays.xlsx")?;

    Ok(())
}

// A simple function and data structure to populate some of the worksheets.
fn write_worksheet_data(worksheet: &mut Worksheet, header: &Format) -> Result<(), XlsxError> {
    let worksheet_data = vec![
        ("East", "Tom", "Apple", 6380),
        ("West", "Fred", "Grape", 5619),
        ("North", "Amy", "Pear", 4565),
        ("South", "Sal", "Banana", 5323),
        ("East", "Fritz", "Apple", 4394),
        ("West", "Sravan", "Grape", 7195),
        ("North", "Xi", "Pear", 5231),
        ("South", "Hector", "Banana", 2427),
        ("East", "Tom", "Banana", 4213),
        ("West", "Fred", "Pear", 3239),
        ("North", "Amy", "Grape", 6520),
        ("South", "Sal", "Apple", 1310),
        ("East", "Fritz", "Banana", 6274),
        ("West", "Sravan", "Pear", 4894),
        ("North", "Xi", "Grape", 7580),
        ("South", "Hector", "Apple", 9814),
    ];

    worksheet.write_string_with_format(0, 0, "Region", header)?;
    worksheet.write_string_with_format(0, 1, "Sales Rep", header)?;
    worksheet.write_string_with_format(0, 2, "Product", header)?;
    worksheet.write_string_with_format(0, 3, "Units", header)?;

    let mut row = 1;
    for data in worksheet_data.iter() {
        worksheet.write_string(row, 0, data.0)?;
        worksheet.write_string(row, 1, data.1)?;
        worksheet.write_string(row, 2, data.2)?;
        worksheet.write_number(row, 3, data.3)?;
        row += 1;
    }

    Ok(())
}
The Excel 365 LAMBDA() function
Recent versions of Excel 365 have introduced a powerful new function/feature
called LAMBDA(). This is similar to closure expressions in Rust or [lambda
expressions]
(https://docs.microsoft.com/en-us/cpp/cpp/lambda-expressions-in-cpp?view=msvc-160)
in C++ (and other languages).
Consider the following Excel example which converts the variable temp from
Fahrenheit to Celsius:
LAMBDA(temp, (5/9) * (temp-32))
This could be called in Excel with an argument:
=LAMBDA(temp, (5/9) * (temp-32))(212)
Or assigned to a defined name and called as a user defined function:
=ToCelsius(212)
A rust xlsxwriter example that replicates the described Excel functionality is shown below:
// SPDX-License-Identifier: MIT OR Apache-2.0
//
// Copyright 2022-2026, John McNamara, jmcnamara@cpan.org

//! An example of using the new Excel LAMBDA() function with the `rust_xlsxwriter`
//! library.

use rust_xlsxwriter::{Workbook, XlsxError};

fn main() -> Result<(), XlsxError> {
    // Create a new Excel file object.
    let mut workbook = Workbook::new();

    // Write a Lambda function to convert Fahrenheit to Celsius to a cell as a
    // defined name and use that to calculate a value.
    //
    // Note that the formula name is prefixed with "_xlfn." (this is normally
    // converted automatically by write_formula*() but isn't for defined names)
    // and note that the lambda function parameters are prefixed with "_xlpm.".
    // These prefixes won't show up in Excel.
    workbook.define_name(
        "ToCelsius",
        "=_xlfn.LAMBDA(_xlpm.temp, (5/9) * (_xlpm.temp-32))",
    )?;

    // Add a worksheet to the workbook.
    let worksheet = workbook.add_worksheet();

    // Write the same Lambda function as a cell formula.
    //
    // Note that the lambda function parameters must be prefixed with "_xlpm.".
    // These prefixes won't show up in Excel.
    worksheet.write_formula(0, 0, "=LAMBDA(_xlpm.temp, (5/9) * (_xlpm.temp-32))(32)")?;

    // The user defined name needs to be written explicitly as a dynamic array
    // formula.
    worksheet.write_dynamic_formula(1, 0, "=ToCelsius(212)")?;

    // Save the file to disk.
    workbook.save("lambda.xlsx")?;

    Ok(())
}
Note, that the formula name must have a "_xlfn." prefix and the parameters in
the LAMBDA() function must have a "_xlpm." prefix for compatibility with how
the formulas are stored in Excel. These prefixes won't show up in the formula,
as shown in the image.
Image of the output file:
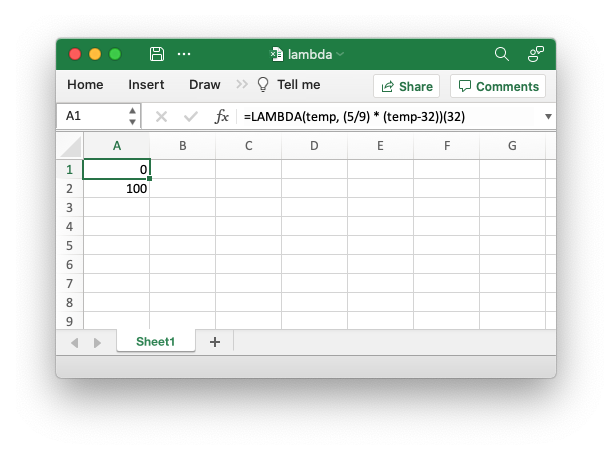
The LET() function is often used in conjunction with LAMBDA() to assign
names to calculation results.
Formulas added in Excel 2010 and later
Excel 2010 and later versions added functions which weren't defined in the
original file specification. These functions are referred to by Microsoft as
"Future Functions". Examples of these functions are ACOT, CHISQ.DIST.RT ,
CONFIDENCE.NORM, STDEV.P, STDEV.S and WORKDAY.INTL.
Although these formulas are displayed as normal in Excel they are stored with a
prefix. For example STDEV.S(B1:B5) is stored in the Excel file as
xlfn.STDEV.S(B1:B5). The rust_xlsxwriter crate makes these changes
automatically so in general you don't have to worry about this unless you are
dealing with features such as Lambda functions, see above. However, if required
you can manually prefix any required function with the _xlfn. prefix.
For completeness the following is a list of future functions taken from MS XLSX extensions documentation on future functions.
Note, the Python in Excel functions aren't simple functions and aren't supported.
| Future Functions |
|---|
_xlfn.ACOT |
_xlfn.ACOTH |
_xlfn.AGGREGATE |
_xlfn.ARABIC |
_xlfn.BASE |
_xlfn.BETA.DIST |
_xlfn.BETA.INV |
_xlfn.BINOM.DIST |
_xlfn.BINOM.DIST.RANGE |
_xlfn.BINOM.INV |
_xlfn.BITAND |
_xlfn.BITLSHIFT |
_xlfn.BITOR |
_xlfn.BITRSHIFT |
_xlfn.BITXOR |
_xlfn.CEILING.MATH |
_xlfn.CEILING.PRECISE |
_xlfn.CHISQ.DIST |
_xlfn.CHISQ.DIST.RT |
_xlfn.CHISQ.INV |
_xlfn.CHISQ.INV.RT |
_xlfn.CHISQ.TEST |
_xlfn.COMBINA |
_xlfn.CONCAT |
_xlfn.CONFIDENCE.NORM |
_xlfn.CONFIDENCE.T |
_xlfn.COT |
_xlfn.COTH |
_xlfn.COVARIANCE.P |
_xlfn.COVARIANCE.S |
_xlfn.CSC |
_xlfn.CSCH |
_xlfn.DAYS |
_xlfn.DECIMAL |
ECMA.CEILING |
_xlfn.ERF.PRECISE |
_xlfn.ERFC.PRECISE |
_xlfn.EXPON.DIST |
_xlfn.F.DIST |
_xlfn.F.DIST.RT |
_xlfn.F.INV |
_xlfn.F.INV.RT |
_xlfn.F.TEST |
_xlfn.FILTERXML |
_xlfn.FLOOR.MATH |
_xlfn.FLOOR.PRECISE |
_xlfn.FORECAST.ETS |
_xlfn.FORECAST.ETS.CONFINT |
_xlfn.FORECAST.ETS.SEASONALITY |
_xlfn.FORECAST.ETS.STAT |
_xlfn.FORECAST.LINEAR |
_xlfn.FORMULATEXT |
_xlfn.GAMMA |
_xlfn.GAMMA.DIST |
_xlfn.GAMMA.INV |
_xlfn.GAMMALN.PRECISE |
_xlfn.GAUSS |
_xlfn.HYPGEOM.DIST |
_xlfn.IFNA |
_xlfn.IFS |
_xlfn.IMCOSH |
_xlfn.IMCOT |
_xlfn.IMCSC |
_xlfn.IMCSCH |
_xlfn.IMSEC |
_xlfn.IMSECH |
_xlfn.IMSINH |
_xlfn.IMTAN |
_xlfn.ISFORMULA |
ISO.CEILING |
_xlfn.ISOWEEKNUM |
_xlfn.LOGNORM.DIST |
_xlfn.LOGNORM.INV |
_xlfn.MAXIFS |
_xlfn.MINIFS |
_xlfn.MODE.MULT |
_xlfn.MODE.SNGL |
_xlfn.MUNIT |
_xlfn.NEGBINOM.DIST |
NETWORKDAYS.INTL |
_xlfn.NORM.DIST |
_xlfn.NORM.INV |
_xlfn.NORM.S.DIST |
_xlfn.NORM.S.INV |
_xlfn.NUMBERVALUE |
_xlfn.PDURATION |
_xlfn.PERCENTILE.EXC |
_xlfn.PERCENTILE.INC |
_xlfn.PERCENTRANK.EXC |
_xlfn.PERCENTRANK.INC |
_xlfn.PERMUTATIONA |
_xlfn.PHI |
_xlfn.POISSON.DIST |
_xlfn.QUARTILE.EXC |
_xlfn.QUARTILE.INC |
_xlfn.QUERYSTRING |
_xlfn.RANK.AVG |
_xlfn.RANK.EQ |
_xlfn.RRI |
_xlfn.SEC |
_xlfn.SECH |
_xlfn.SHEET |
_xlfn.SHEETS |
_xlfn.SKEW.P |
_xlfn.STDEV.P |
_xlfn.STDEV.S |
_xlfn.SWITCH |
_xlfn.T.DIST |
_xlfn.T.DIST.2T |
_xlfn.T.DIST.RT |
_xlfn.T.INV |
_xlfn.T.INV.2T |
_xlfn.T.TEST |
_xlfn.TEXTJOIN |
_xlfn.UNICHAR |
_xlfn.UNICODE |
_xlfn.VAR.P |
_xlfn.VAR.S |
_xlfn.WEBSERVICE |
_xlfn.WEIBULL.DIST |
WORKDAY.INTL |
_xlfn.XOR |
_xlfn.Z.TEST |
The dynamic array functions shown in the Dynamic Array
support section are also future functions, however the
rust_xlsxwriter library automatically adds the required prefixes on the fly so
you don't have to add them explicitly.
| Dynamic Array Functions |
|---|
_xlfn.ANCHORARRAY |
_xlfn.LAMBDA |
_xlfn.RANDARRAY |
_xlfn.SEQUENCE |
_xlfn.SINGLE |
_xlfn.SORTBY |
_xlfn.UNIQUE |
_xlfn.XLOOKUP |
_xlfn.XMATCH |
_xlfn._xlws.FILTER |
_xlfn._xlws.SORT |
Dealing with formula errors
If there is an error in the syntax of a formula it is usually displayed in Excel
as #NAME?. Alternatively you may get a warning from Excel when the file is
loaded. If you encounter an error like this you can debug it using the following
steps:
-
Ensure the formula is valid in Excel by copying and pasting it into a cell. Note, this should be done in Excel and not other applications such as OpenOffice or LibreOffice since they may have slightly different syntax.
-
Ensure the formula is using comma separators instead of semi-colons, see Non US Excel functions and syntax.
-
Ensure the formula is in English, see Non US Excel functions and syntax.
-
Ensure that the formula doesn't contain an Excel 2010+ future function, see Formulas added in Excel 2010 and later. If it does then ensure that the correct prefix is used.
-
If the function loads in Excel but appears with one or more
@symbols added then it is probably an array function and should be written usingWorksheet::write_array_formula()orWorksheet::write_dynamic_array_formula()(see also Dynamic Array support).
Finally if you have completed all the previous steps and still get a #NAME?
error you can examine a valid Excel file to see what the correct syntax should
be. To do this you should create a valid formula in Excel and save the file. You
can then examine the XML in the unzipped file.
The following shows how to do that using Linux unzip and libxml's
xmllint to format the XML for clarity:
    $ unzip myfile.xlsx -d myfile
    $ xmllint --format myfile/xl/worksheets/sheet1.xml | grep '</f>'

            <f>SUM(1, 2, 3)</f>
Working with Autofilters
An autofilter is a way of adding drop down lists to the headers of a 2D range of worksheet data. This allows users to filter the data based on simple criteria so that some data is shown and some is hidden.
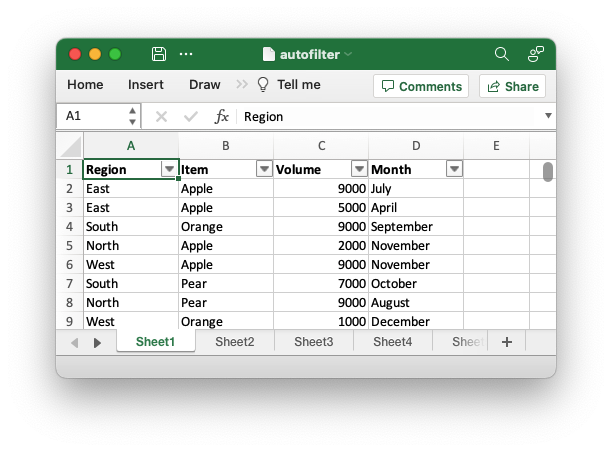
In rust_xlsxwriter this is set using the Worksheet::autofilter() method:
// SPDX-License-Identifier: MIT OR Apache-2.0
//
// Copyright 2022-2026, John McNamara, jmcnamara@cpan.org

//! An example of how to create autofilters with the `rust_xlsxwriter` library.
//!
//! An autofilter is a way of adding drop down lists to the headers of a 2D
//! range of worksheet data. This allows users to filter the data based on
//! simple criteria so that some data is shown and some is hidden.
//!

use rust_xlsxwriter::{FilterCondition, FilterCriteria, Format, Workbook, Worksheet, XlsxError};

fn main() -> Result<(), XlsxError> {
    // Create a new Excel file object.
    let mut workbook = Workbook::new();

    // -----------------------------------------------------------------------
    // 1. Add an autofilter to a data range.
    // -----------------------------------------------------------------------

    // Add a worksheet  with some sample data to filter.
    let worksheet = workbook.add_worksheet();
    populate_autofilter_data(worksheet, false)?;

    // Set the autofilter area, including the header/filter row.
    worksheet.autofilter(0, 0, 50, 3)?;

    // -----------------------------------------------------------------------
    // 2. Add an autofilter with a list filter condition.
    // -----------------------------------------------------------------------

    // Add a worksheet  with some sample data to filter.
    let worksheet = workbook.add_worksheet();
    populate_autofilter_data(worksheet, false)?;

    // Set the autofilter area.
    worksheet.autofilter(0, 0, 50, 3)?;

    // Set a filter condition to only show cells matching "East" in the first
    // column.
    let filter_condition = FilterCondition::new().add_list_filter("East");
    worksheet.filter_column(0, &filter_condition)?;

    // -----------------------------------------------------------------------
    // 3. Add an autofilter with a list filter condition on multiple items.
    // -----------------------------------------------------------------------

    // Add a worksheet  with some sample data to filter.
    let worksheet = workbook.add_worksheet();
    populate_autofilter_data(worksheet, false)?;

    // Set the autofilter area.
    worksheet.autofilter(0, 0, 50, 3)?;

    // Set a filter condition to only show cells matching "East", "West" or
    // "South" in the first column.
    let filter_condition = FilterCondition::new()
        .add_list_filter("East")
        .add_list_filter("West")
        .add_list_filter("South");
    worksheet.filter_column(0, &filter_condition)?;

    // -----------------------------------------------------------------------
    // 4. Add an autofilter with a list filter condition to match blank cells.
    // -----------------------------------------------------------------------

    // Add a worksheet  with some sample data to filter.
    let worksheet = workbook.add_worksheet();
    populate_autofilter_data(worksheet, true)?;

    // Set the autofilter area.
    worksheet.autofilter(0, 0, 50, 3)?;

    // Set a filter condition to only show cells matching blanks.
    let filter_condition = FilterCondition::new().add_list_blanks_filter();
    worksheet.filter_column(0, &filter_condition)?;

    // -----------------------------------------------------------------------
    // 5. Add an autofilter with list filters in multiple columns.
    // -----------------------------------------------------------------------

    // Add a worksheet  with some sample data to filter.
    let worksheet = workbook.add_worksheet();
    populate_autofilter_data(worksheet, false)?;

    // Set the autofilter area.
    worksheet.autofilter(0, 0, 50, 3)?;

    // Set a filter condition for 2 separate columns.
    let filter_condition1 = FilterCondition::new().add_list_filter("East");
    worksheet.filter_column(0, &filter_condition1)?;

    let filter_condition2 = FilterCondition::new().add_list_filter("July");
    worksheet.filter_column(3, &filter_condition2)?;

    // -----------------------------------------------------------------------
    // 6. Add an autofilter with custom filter condition.
    // -----------------------------------------------------------------------

    // Add a worksheet  with some sample data to filter.
    let worksheet = workbook.add_worksheet();
    populate_autofilter_data(worksheet, false)?;

    // Set the autofilter area for numbers greater than 8000.
    worksheet.autofilter(0, 0, 50, 3)?;

    // Set a custom number filter.
    let filter_condition =
        FilterCondition::new().add_custom_filter(FilterCriteria::GreaterThan, 8000);
    worksheet.filter_column(2, &filter_condition)?;

    // -----------------------------------------------------------------------
    // 7. Add an autofilter with 2 custom filters to create a "between" condition.
    // -----------------------------------------------------------------------

    // Add a worksheet  with some sample data to filter.
    let worksheet = workbook.add_worksheet();
    populate_autofilter_data(worksheet, false)?;

    // Set the autofilter area.
    worksheet.autofilter(0, 0, 50, 3)?;

    // Set two custom number filters in a "between" configuration.
    let filter_condition = FilterCondition::new()
        .add_custom_filter(FilterCriteria::GreaterThanOrEqualTo, 4000)
        .add_custom_filter(FilterCriteria::LessThanOrEqualTo, 6000);
    worksheet.filter_column(2, &filter_condition)?;

    // -----------------------------------------------------------------------
    // 8. Add an autofilter for non blanks.
    // -----------------------------------------------------------------------

    // Add a worksheet  with some sample data to filter.
    let worksheet = workbook.add_worksheet();
    populate_autofilter_data(worksheet, true)?;

    // Set the autofilter area.
    worksheet.autofilter(0, 0, 50, 3)?;

    // Filter non-blanks by filtering on all the unique non-blank
    // strings/numbers in the column.
    let filter_condition = FilterCondition::new()
        .add_list_filter("East")
        .add_list_filter("West")
        .add_list_filter("North")
        .add_list_filter("South");
    worksheet.filter_column(0, &filter_condition)?;

    // Or you can add a simpler custom filter to get the same result.

    // Set a custom number filter of `!= " "` to filter non blanks.
    let filter_condition =
        FilterCondition::new().add_custom_filter(FilterCriteria::NotEqualTo, " ");
    worksheet.filter_column(0, &filter_condition)?;

    // Save the file to disk.
    workbook.save("autofilter.xlsx")?;

    Ok(())
}

// Generate worksheet data to filter on.
pub fn populate_autofilter_data(
    worksheet: &mut Worksheet,
    add_blanks: bool,
) -> Result<(), XlsxError> {
    // The sample data to add to the worksheet.
    let mut data = vec![
        ("East", "Apple", 9000, "July"),
        ("East", "Apple", 5000, "April"),
        ("South", "Orange", 9000, "September"),
        ("North", "Apple", 2000, "November"),
        ("West", "Apple", 9000, "November"),
        ("South", "Pear", 7000, "October"),
        ("North", "Pear", 9000, "August"),
        ("West", "Orange", 1000, "December"),
        ("West", "Grape", 1000, "November"),
        ("South", "Pear", 10000, "April"),
        ("West", "Grape", 6000, "January"),
        ("South", "Orange", 3000, "May"),
        ("North", "Apple", 3000, "December"),
        ("South", "Apple", 7000, "February"),
        ("West", "Grape", 1000, "December"),
        ("East", "Grape", 8000, "February"),
        ("South", "Grape", 10000, "June"),
        ("West", "Pear", 7000, "December"),
        ("South", "Apple", 2000, "October"),
        ("East", "Grape", 7000, "December"),
        ("North", "Grape", 6000, "July"),
        ("East", "Pear", 8000, "February"),
        ("North", "Apple", 7000, "August"),
        ("North", "Orange", 7000, "July"),
        ("North", "Apple", 6000, "June"),
        ("South", "Grape", 8000, "September"),
        ("West", "Apple", 3000, "October"),
        ("South", "Orange", 10000, "November"),
        ("West", "Grape", 4000, "December"),
        ("North", "Orange", 5000, "August"),
        ("East", "Orange", 1000, "November"),
        ("East", "Orange", 4000, "October"),
        ("North", "Grape", 5000, "August"),
        ("East", "Apple", 1000, "July"),
        ("South", "Apple", 10000, "March"),
        ("East", "Grape", 7000, "October"),
        ("West", "Grape", 1000, "September"),
        ("East", "Grape", 10000, "October"),
        ("South", "Orange", 8000, "March"),
        ("North", "Apple", 4000, "July"),
        ("South", "Orange", 5000, "July"),
        ("West", "Apple", 4000, "June"),
        ("East", "Apple", 5000, "April"),
        ("North", "Pear", 3000, "August"),
        ("East", "Grape", 9000, "November"),
        ("North", "Orange", 8000, "October"),
        ("East", "Apple", 10000, "June"),
        ("South", "Pear", 1000, "December"),
        ("North", "Grape", 10000, "July"),
        ("East", "Grape", 6000, "February"),
    ];

    // Introduce blanks cells for some of the examples.
    if add_blanks {
        data[5].0 = "";
        data[18].0 = "";
        data[30].0 = "";
        data[40].0 = "";
    }

    // Widen the columns for clarity.
    worksheet.set_column_width(0, 12)?;
    worksheet.set_column_width(1, 12)?;
    worksheet.set_column_width(2, 12)?;
    worksheet.set_column_width(3, 12)?;

    // Write the header titles.
    let header_format = Format::new().set_bold();
    worksheet.write_string_with_format(0, 0, "Region", &header_format)?;
    worksheet.write_string_with_format(0, 1, "Item", &header_format)?;
    worksheet.write_string_with_format(0, 2, "Volume", &header_format)?;
    worksheet.write_string_with_format(0, 3, "Month", &header_format)?;

    // Write the other worksheet data.
    for (row, data) in data.iter().enumerate() {
        let row = 1 + row as u32;
        worksheet.write_string(row, 0, data.0)?;
        worksheet.write_string(row, 1, data.1)?;
        worksheet.write_number(row, 2, data.2)?;
        worksheet.write_string(row, 3, data.3)?;
    }

    Ok(())
}
Filter types
Excel supports two main types of filter conditions. The first, and most common, is a list filter where the user selects the items to filter from a list of all the values in the the column range:
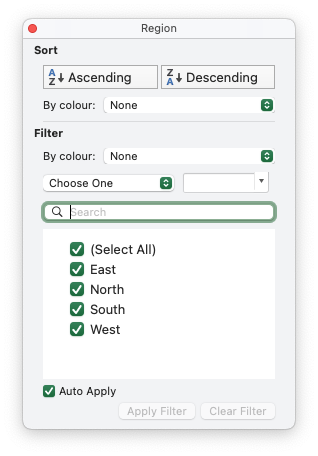
The other main type of filter is a custom filter where the user can specify 1 or 2 conditions like ">= 4000" and "<= 6000":
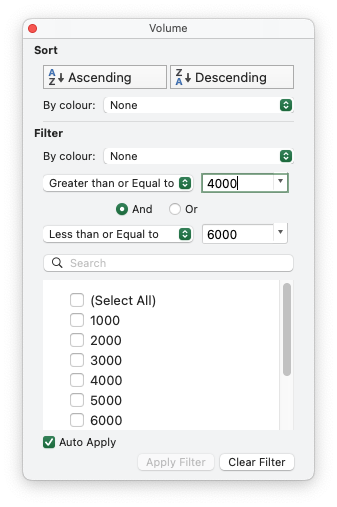
In Excel these are mutually exclusive and you will need to choose one or the other depending on your needs.
In rust_xlsxwriter you can set these filters using the FilterCondition struct and
the FilterCondition.add_list_filter() and
FilterCondition.add_custom_filter() methods. Some examples of these are shown in the next section.
Filter examples
Using the autofilter data and range shown above we will look at some examples of setting filters to highlight certain rows.
The first example is a list filter to show only rows that are in the "East" region in the first column:
// SPDX-License-Identifier: MIT OR Apache-2.0
//
// Copyright 2022-2026, John McNamara, jmcnamara@cpan.org

//! An example of how to create autofilters with the `rust_xlsxwriter` library.
//!
//! An autofilter is a way of adding drop down lists to the headers of a 2D
//! range of worksheet data. This allows users to filter the data based on
//! simple criteria so that some data is shown and some is hidden.
//!

use rust_xlsxwriter::{FilterCondition, FilterCriteria, Format, Workbook, Worksheet, XlsxError};

fn main() -> Result<(), XlsxError> {
    // Create a new Excel file object.
    let mut workbook = Workbook::new();

    // -----------------------------------------------------------------------
    // 1. Add an autofilter to a data range.
    // -----------------------------------------------------------------------

    // Add a worksheet  with some sample data to filter.
    let worksheet = workbook.add_worksheet();
    populate_autofilter_data(worksheet, false)?;

    // Set the autofilter area, including the header/filter row.
    worksheet.autofilter(0, 0, 50, 3)?;

    // -----------------------------------------------------------------------
    // 2. Add an autofilter with a list filter condition.
    // -----------------------------------------------------------------------

    // Add a worksheet  with some sample data to filter.
    let worksheet = workbook.add_worksheet();
    populate_autofilter_data(worksheet, false)?;

    // Set the autofilter area.
    worksheet.autofilter(0, 0, 50, 3)?;

    // Set a filter condition to only show cells matching "East" in the first
    // column.
    let filter_condition = FilterCondition::new().add_list_filter("East");
    worksheet.filter_column(0, &filter_condition)?;

    // -----------------------------------------------------------------------
    // 3. Add an autofilter with a list filter condition on multiple items.
    // -----------------------------------------------------------------------

    // Add a worksheet  with some sample data to filter.
    let worksheet = workbook.add_worksheet();
    populate_autofilter_data(worksheet, false)?;

    // Set the autofilter area.
    worksheet.autofilter(0, 0, 50, 3)?;

    // Set a filter condition to only show cells matching "East", "West" or
    // "South" in the first column.
    let filter_condition = FilterCondition::new()
        .add_list_filter("East")
        .add_list_filter("West")
        .add_list_filter("South");
    worksheet.filter_column(0, &filter_condition)?;

    // -----------------------------------------------------------------------
    // 4. Add an autofilter with a list filter condition to match blank cells.
    // -----------------------------------------------------------------------

    // Add a worksheet  with some sample data to filter.
    let worksheet = workbook.add_worksheet();
    populate_autofilter_data(worksheet, true)?;

    // Set the autofilter area.
    worksheet.autofilter(0, 0, 50, 3)?;

    // Set a filter condition to only show cells matching blanks.
    let filter_condition = FilterCondition::new().add_list_blanks_filter();
    worksheet.filter_column(0, &filter_condition)?;

    // -----------------------------------------------------------------------
    // 5. Add an autofilter with list filters in multiple columns.
    // -----------------------------------------------------------------------

    // Add a worksheet  with some sample data to filter.
    let worksheet = workbook.add_worksheet();
    populate_autofilter_data(worksheet, false)?;

    // Set the autofilter area.
    worksheet.autofilter(0, 0, 50, 3)?;

    // Set a filter condition for 2 separate columns.
    let filter_condition1 = FilterCondition::new().add_list_filter("East");
    worksheet.filter_column(0, &filter_condition1)?;

    let filter_condition2 = FilterCondition::new().add_list_filter("July");
    worksheet.filter_column(3, &filter_condition2)?;

    // -----------------------------------------------------------------------
    // 6. Add an autofilter with custom filter condition.
    // -----------------------------------------------------------------------

    // Add a worksheet  with some sample data to filter.
    let worksheet = workbook.add_worksheet();
    populate_autofilter_data(worksheet, false)?;

    // Set the autofilter area for numbers greater than 8000.
    worksheet.autofilter(0, 0, 50, 3)?;

    // Set a custom number filter.
    let filter_condition =
        FilterCondition::new().add_custom_filter(FilterCriteria::GreaterThan, 8000);
    worksheet.filter_column(2, &filter_condition)?;

    // -----------------------------------------------------------------------
    // 7. Add an autofilter with 2 custom filters to create a "between" condition.
    // -----------------------------------------------------------------------

    // Add a worksheet  with some sample data to filter.
    let worksheet = workbook.add_worksheet();
    populate_autofilter_data(worksheet, false)?;

    // Set the autofilter area.
    worksheet.autofilter(0, 0, 50, 3)?;

    // Set two custom number filters in a "between" configuration.
    let filter_condition = FilterCondition::new()
        .add_custom_filter(FilterCriteria::GreaterThanOrEqualTo, 4000)
        .add_custom_filter(FilterCriteria::LessThanOrEqualTo, 6000);
    worksheet.filter_column(2, &filter_condition)?;

    // -----------------------------------------------------------------------
    // 8. Add an autofilter for non blanks.
    // -----------------------------------------------------------------------

    // Add a worksheet  with some sample data to filter.
    let worksheet = workbook.add_worksheet();
    populate_autofilter_data(worksheet, true)?;

    // Set the autofilter area.
    worksheet.autofilter(0, 0, 50, 3)?;

    // Filter non-blanks by filtering on all the unique non-blank
    // strings/numbers in the column.
    let filter_condition = FilterCondition::new()
        .add_list_filter("East")
        .add_list_filter("West")
        .add_list_filter("North")
        .add_list_filter("South");
    worksheet.filter_column(0, &filter_condition)?;

    // Or you can add a simpler custom filter to get the same result.

    // Set a custom number filter of `!= " "` to filter non blanks.
    let filter_condition =
        FilterCondition::new().add_custom_filter(FilterCriteria::NotEqualTo, " ");
    worksheet.filter_column(0, &filter_condition)?;

    // Save the file to disk.
    workbook.save("autofilter.xlsx")?;

    Ok(())
}

// Generate worksheet data to filter on.
pub fn populate_autofilter_data(
    worksheet: &mut Worksheet,
    add_blanks: bool,
) -> Result<(), XlsxError> {
    // The sample data to add to the worksheet.
    let mut data = vec![
        ("East", "Apple", 9000, "July"),
        ("East", "Apple", 5000, "April"),
        ("South", "Orange", 9000, "September"),
        ("North", "Apple", 2000, "November"),
        ("West", "Apple", 9000, "November"),
        ("South", "Pear", 7000, "October"),
        ("North", "Pear", 9000, "August"),
        ("West", "Orange", 1000, "December"),
        ("West", "Grape", 1000, "November"),
        ("South", "Pear", 10000, "April"),
        ("West", "Grape", 6000, "January"),
        ("South", "Orange", 3000, "May"),
        ("North", "Apple", 3000, "December"),
        ("South", "Apple", 7000, "February"),
        ("West", "Grape", 1000, "December"),
        ("East", "Grape", 8000, "February"),
        ("South", "Grape", 10000, "June"),
        ("West", "Pear", 7000, "December"),
        ("South", "Apple", 2000, "October"),
        ("East", "Grape", 7000, "December"),
        ("North", "Grape", 6000, "July"),
        ("East", "Pear", 8000, "February"),
        ("North", "Apple", 7000, "August"),
        ("North", "Orange", 7000, "July"),
        ("North", "Apple", 6000, "June"),
        ("South", "Grape", 8000, "September"),
        ("West", "Apple", 3000, "October"),
        ("South", "Orange", 10000, "November"),
        ("West", "Grape", 4000, "December"),
        ("North", "Orange", 5000, "August"),
        ("East", "Orange", 1000, "November"),
        ("East", "Orange", 4000, "October"),
        ("North", "Grape", 5000, "August"),
        ("East", "Apple", 1000, "July"),
        ("South", "Apple", 10000, "March"),
        ("East", "Grape", 7000, "October"),
        ("West", "Grape", 1000, "September"),
        ("East", "Grape", 10000, "October"),
        ("South", "Orange", 8000, "March"),
        ("North", "Apple", 4000, "July"),
        ("South", "Orange", 5000, "July"),
        ("West", "Apple", 4000, "June"),
        ("East", "Apple", 5000, "April"),
        ("North", "Pear", 3000, "August"),
        ("East", "Grape", 9000, "November"),
        ("North", "Orange", 8000, "October"),
        ("East", "Apple", 10000, "June"),
        ("South", "Pear", 1000, "December"),
        ("North", "Grape", 10000, "July"),
        ("East", "Grape", 6000, "February"),
    ];

    // Introduce blanks cells for some of the examples.
    if add_blanks {
        data[5].0 = "";
        data[18].0 = "";
        data[30].0 = "";
        data[40].0 = "";
    }

    // Widen the columns for clarity.
    worksheet.set_column_width(0, 12)?;
    worksheet.set_column_width(1, 12)?;
    worksheet.set_column_width(2, 12)?;
    worksheet.set_column_width(3, 12)?;

    // Write the header titles.
    let header_format = Format::new().set_bold();
    worksheet.write_string_with_format(0, 0, "Region", &header_format)?;
    worksheet.write_string_with_format(0, 1, "Item", &header_format)?;
    worksheet.write_string_with_format(0, 2, "Volume", &header_format)?;
    worksheet.write_string_with_format(0, 3, "Month", &header_format)?;

    // Write the other worksheet data.
    for (row, data) in data.iter().enumerate() {
        let row = 1 + row as u32;
        worksheet.write_string(row, 0, data.0)?;
        worksheet.write_string(row, 1, data.1)?;
        worksheet.write_number(row, 2, data.2)?;
        worksheet.write_string(row, 3, data.3)?;
    }

    Ok(())
}
Example output. Note that the filtered column shows a funnel symbol as part of the dropdown arrow and the non matching rows are filtered out:
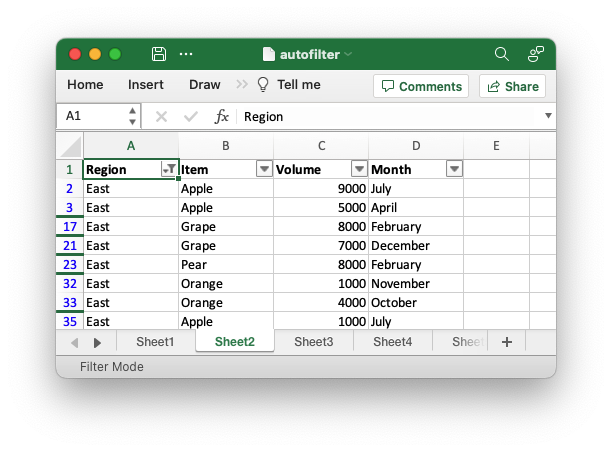
Multiple list conditions can be set by repeating FilterCondition.add_list_filter():
// SPDX-License-Identifier: MIT OR Apache-2.0
//
// Copyright 2022-2026, John McNamara, jmcnamara@cpan.org

//! An example of how to create autofilters with the `rust_xlsxwriter` library.
//!
//! An autofilter is a way of adding drop down lists to the headers of a 2D
//! range of worksheet data. This allows users to filter the data based on
//! simple criteria so that some data is shown and some is hidden.
//!

use rust_xlsxwriter::{FilterCondition, FilterCriteria, Format, Workbook, Worksheet, XlsxError};

fn main() -> Result<(), XlsxError> {
    // Create a new Excel file object.
    let mut workbook = Workbook::new();

    // -----------------------------------------------------------------------
    // 1. Add an autofilter to a data range.
    // -----------------------------------------------------------------------

    // Add a worksheet  with some sample data to filter.
    let worksheet = workbook.add_worksheet();
    populate_autofilter_data(worksheet, false)?;

    // Set the autofilter area, including the header/filter row.
    worksheet.autofilter(0, 0, 50, 3)?;

    // -----------------------------------------------------------------------
    // 2. Add an autofilter with a list filter condition.
    // -----------------------------------------------------------------------

    // Add a worksheet  with some sample data to filter.
    let worksheet = workbook.add_worksheet();
    populate_autofilter_data(worksheet, false)?;

    // Set the autofilter area.
    worksheet.autofilter(0, 0, 50, 3)?;

    // Set a filter condition to only show cells matching "East" in the first
    // column.
    let filter_condition = FilterCondition::new().add_list_filter("East");
    worksheet.filter_column(0, &filter_condition)?;

    // -----------------------------------------------------------------------
    // 3. Add an autofilter with a list filter condition on multiple items.
    // -----------------------------------------------------------------------

    // Add a worksheet  with some sample data to filter.
    let worksheet = workbook.add_worksheet();
    populate_autofilter_data(worksheet, false)?;

    // Set the autofilter area.
    worksheet.autofilter(0, 0, 50, 3)?;

    // Set a filter condition to only show cells matching "East", "West" or
    // "South" in the first column.
    let filter_condition = FilterCondition::new()
        .add_list_filter("East")
        .add_list_filter("West")
        .add_list_filter("South");
    worksheet.filter_column(0, &filter_condition)?;

    // -----------------------------------------------------------------------
    // 4. Add an autofilter with a list filter condition to match blank cells.
    // -----------------------------------------------------------------------

    // Add a worksheet  with some sample data to filter.
    let worksheet = workbook.add_worksheet();
    populate_autofilter_data(worksheet, true)?;

    // Set the autofilter area.
    worksheet.autofilter(0, 0, 50, 3)?;

    // Set a filter condition to only show cells matching blanks.
    let filter_condition = FilterCondition::new().add_list_blanks_filter();
    worksheet.filter_column(0, &filter_condition)?;

    // -----------------------------------------------------------------------
    // 5. Add an autofilter with list filters in multiple columns.
    // -----------------------------------------------------------------------

    // Add a worksheet  with some sample data to filter.
    let worksheet = workbook.add_worksheet();
    populate_autofilter_data(worksheet, false)?;

    // Set the autofilter area.
    worksheet.autofilter(0, 0, 50, 3)?;

    // Set a filter condition for 2 separate columns.
    let filter_condition1 = FilterCondition::new().add_list_filter("East");
    worksheet.filter_column(0, &filter_condition1)?;

    let filter_condition2 = FilterCondition::new().add_list_filter("July");
    worksheet.filter_column(3, &filter_condition2)?;

    // -----------------------------------------------------------------------
    // 6. Add an autofilter with custom filter condition.
    // -----------------------------------------------------------------------

    // Add a worksheet  with some sample data to filter.
    let worksheet = workbook.add_worksheet();
    populate_autofilter_data(worksheet, false)?;

    // Set the autofilter area for numbers greater than 8000.
    worksheet.autofilter(0, 0, 50, 3)?;

    // Set a custom number filter.
    let filter_condition =
        FilterCondition::new().add_custom_filter(FilterCriteria::GreaterThan, 8000);
    worksheet.filter_column(2, &filter_condition)?;

    // -----------------------------------------------------------------------
    // 7. Add an autofilter with 2 custom filters to create a "between" condition.
    // -----------------------------------------------------------------------

    // Add a worksheet  with some sample data to filter.
    let worksheet = workbook.add_worksheet();
    populate_autofilter_data(worksheet, false)?;

    // Set the autofilter area.
    worksheet.autofilter(0, 0, 50, 3)?;

    // Set two custom number filters in a "between" configuration.
    let filter_condition = FilterCondition::new()
        .add_custom_filter(FilterCriteria::GreaterThanOrEqualTo, 4000)
        .add_custom_filter(FilterCriteria::LessThanOrEqualTo, 6000);
    worksheet.filter_column(2, &filter_condition)?;

    // -----------------------------------------------------------------------
    // 8. Add an autofilter for non blanks.
    // -----------------------------------------------------------------------

    // Add a worksheet  with some sample data to filter.
    let worksheet = workbook.add_worksheet();
    populate_autofilter_data(worksheet, true)?;

    // Set the autofilter area.
    worksheet.autofilter(0, 0, 50, 3)?;

    // Filter non-blanks by filtering on all the unique non-blank
    // strings/numbers in the column.
    let filter_condition = FilterCondition::new()
        .add_list_filter("East")
        .add_list_filter("West")
        .add_list_filter("North")
        .add_list_filter("South");
    worksheet.filter_column(0, &filter_condition)?;

    // Or you can add a simpler custom filter to get the same result.

    // Set a custom number filter of `!= " "` to filter non blanks.
    let filter_condition =
        FilterCondition::new().add_custom_filter(FilterCriteria::NotEqualTo, " ");
    worksheet.filter_column(0, &filter_condition)?;

    // Save the file to disk.
    workbook.save("autofilter.xlsx")?;

    Ok(())
}

// Generate worksheet data to filter on.
pub fn populate_autofilter_data(
    worksheet: &mut Worksheet,
    add_blanks: bool,
) -> Result<(), XlsxError> {
    // The sample data to add to the worksheet.
    let mut data = vec![
        ("East", "Apple", 9000, "July"),
        ("East", "Apple", 5000, "April"),
        ("South", "Orange", 9000, "September"),
        ("North", "Apple", 2000, "November"),
        ("West", "Apple", 9000, "November"),
        ("South", "Pear", 7000, "October"),
        ("North", "Pear", 9000, "August"),
        ("West", "Orange", 1000, "December"),
        ("West", "Grape", 1000, "November"),
        ("South", "Pear", 10000, "April"),
        ("West", "Grape", 6000, "January"),
        ("South", "Orange", 3000, "May"),
        ("North", "Apple", 3000, "December"),
        ("South", "Apple", 7000, "February"),
        ("West", "Grape", 1000, "December"),
        ("East", "Grape", 8000, "February"),
        ("South", "Grape", 10000, "June"),
        ("West", "Pear", 7000, "December"),
        ("South", "Apple", 2000, "October"),
        ("East", "Grape", 7000, "December"),
        ("North", "Grape", 6000, "July"),
        ("East", "Pear", 8000, "February"),
        ("North", "Apple", 7000, "August"),
        ("North", "Orange", 7000, "July"),
        ("North", "Apple", 6000, "June"),
        ("South", "Grape", 8000, "September"),
        ("West", "Apple", 3000, "October"),
        ("South", "Orange", 10000, "November"),
        ("West", "Grape", 4000, "December"),
        ("North", "Orange", 5000, "August"),
        ("East", "Orange", 1000, "November"),
        ("East", "Orange", 4000, "October"),
        ("North", "Grape", 5000, "August"),
        ("East", "Apple", 1000, "July"),
        ("South", "Apple", 10000, "March"),
        ("East", "Grape", 7000, "October"),
        ("West", "Grape", 1000, "September"),
        ("East", "Grape", 10000, "October"),
        ("South", "Orange", 8000, "March"),
        ("North", "Apple", 4000, "July"),
        ("South", "Orange", 5000, "July"),
        ("West", "Apple", 4000, "June"),
        ("East", "Apple", 5000, "April"),
        ("North", "Pear", 3000, "August"),
        ("East", "Grape", 9000, "November"),
        ("North", "Orange", 8000, "October"),
        ("East", "Apple", 10000, "June"),
        ("South", "Pear", 1000, "December"),
        ("North", "Grape", 10000, "July"),
        ("East", "Grape", 6000, "February"),
    ];

    // Introduce blanks cells for some of the examples.
    if add_blanks {
        data[5].0 = "";
        data[18].0 = "";
        data[30].0 = "";
        data[40].0 = "";
    }

    // Widen the columns for clarity.
    worksheet.set_column_width(0, 12)?;
    worksheet.set_column_width(1, 12)?;
    worksheet.set_column_width(2, 12)?;
    worksheet.set_column_width(3, 12)?;

    // Write the header titles.
    let header_format = Format::new().set_bold();
    worksheet.write_string_with_format(0, 0, "Region", &header_format)?;
    worksheet.write_string_with_format(0, 1, "Item", &header_format)?;
    worksheet.write_string_with_format(0, 2, "Volume", &header_format)?;
    worksheet.write_string_with_format(0, 3, "Month", &header_format)?;

    // Write the other worksheet data.
    for (row, data) in data.iter().enumerate() {
        let row = 1 + row as u32;
        worksheet.write_string(row, 0, data.0)?;
        worksheet.write_string(row, 1, data.1)?;
        worksheet.write_number(row, 2, data.2)?;
        worksheet.write_string(row, 3, data.3)?;
    }

    Ok(())
}
Example output:
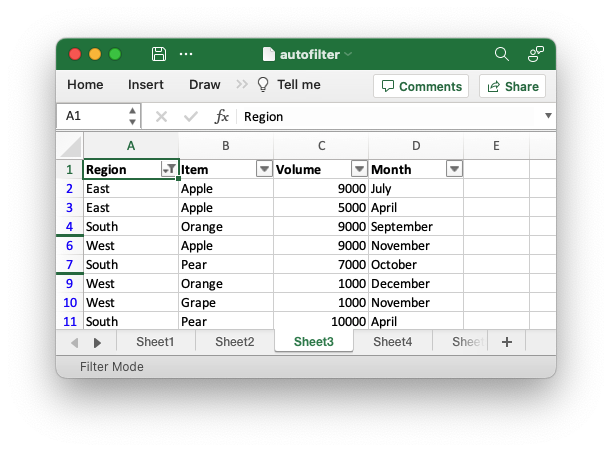
If the data contains blanks you can filter those cells as part of a list filter
or on their own using FilterCondition.add_list_blanks_filter():
// SPDX-License-Identifier: MIT OR Apache-2.0
//
// Copyright 2022-2026, John McNamara, jmcnamara@cpan.org

//! An example of how to create autofilters with the `rust_xlsxwriter` library.
//!
//! An autofilter is a way of adding drop down lists to the headers of a 2D
//! range of worksheet data. This allows users to filter the data based on
//! simple criteria so that some data is shown and some is hidden.
//!

use rust_xlsxwriter::{FilterCondition, FilterCriteria, Format, Workbook, Worksheet, XlsxError};

fn main() -> Result<(), XlsxError> {
    // Create a new Excel file object.
    let mut workbook = Workbook::new();

    // -----------------------------------------------------------------------
    // 1. Add an autofilter to a data range.
    // -----------------------------------------------------------------------

    // Add a worksheet  with some sample data to filter.
    let worksheet = workbook.add_worksheet();
    populate_autofilter_data(worksheet, false)?;

    // Set the autofilter area, including the header/filter row.
    worksheet.autofilter(0, 0, 50, 3)?;

    // -----------------------------------------------------------------------
    // 2. Add an autofilter with a list filter condition.
    // -----------------------------------------------------------------------

    // Add a worksheet  with some sample data to filter.
    let worksheet = workbook.add_worksheet();
    populate_autofilter_data(worksheet, false)?;

    // Set the autofilter area.
    worksheet.autofilter(0, 0, 50, 3)?;

    // Set a filter condition to only show cells matching "East" in the first
    // column.
    let filter_condition = FilterCondition::new().add_list_filter("East");
    worksheet.filter_column(0, &filter_condition)?;

    // -----------------------------------------------------------------------
    // 3. Add an autofilter with a list filter condition on multiple items.
    // -----------------------------------------------------------------------

    // Add a worksheet  with some sample data to filter.
    let worksheet = workbook.add_worksheet();
    populate_autofilter_data(worksheet, false)?;

    // Set the autofilter area.
    worksheet.autofilter(0, 0, 50, 3)?;

    // Set a filter condition to only show cells matching "East", "West" or
    // "South" in the first column.
    let filter_condition = FilterCondition::new()
        .add_list_filter("East")
        .add_list_filter("West")
        .add_list_filter("South");
    worksheet.filter_column(0, &filter_condition)?;

    // -----------------------------------------------------------------------
    // 4. Add an autofilter with a list filter condition to match blank cells.
    // -----------------------------------------------------------------------

    // Add a worksheet  with some sample data to filter.
    let worksheet = workbook.add_worksheet();
    populate_autofilter_data(worksheet, true)?;

    // Set the autofilter area.
    worksheet.autofilter(0, 0, 50, 3)?;

    // Set a filter condition to only show cells matching blanks.
    let filter_condition = FilterCondition::new().add_list_blanks_filter();
    worksheet.filter_column(0, &filter_condition)?;

    // -----------------------------------------------------------------------
    // 5. Add an autofilter with list filters in multiple columns.
    // -----------------------------------------------------------------------

    // Add a worksheet  with some sample data to filter.
    let worksheet = workbook.add_worksheet();
    populate_autofilter_data(worksheet, false)?;

    // Set the autofilter area.
    worksheet.autofilter(0, 0, 50, 3)?;

    // Set a filter condition for 2 separate columns.
    let filter_condition1 = FilterCondition::new().add_list_filter("East");
    worksheet.filter_column(0, &filter_condition1)?;

    let filter_condition2 = FilterCondition::new().add_list_filter("July");
    worksheet.filter_column(3, &filter_condition2)?;

    // -----------------------------------------------------------------------
    // 6. Add an autofilter with custom filter condition.
    // -----------------------------------------------------------------------

    // Add a worksheet  with some sample data to filter.
    let worksheet = workbook.add_worksheet();
    populate_autofilter_data(worksheet, false)?;

    // Set the autofilter area for numbers greater than 8000.
    worksheet.autofilter(0, 0, 50, 3)?;

    // Set a custom number filter.
    let filter_condition =
        FilterCondition::new().add_custom_filter(FilterCriteria::GreaterThan, 8000);
    worksheet.filter_column(2, &filter_condition)?;

    // -----------------------------------------------------------------------
    // 7. Add an autofilter with 2 custom filters to create a "between" condition.
    // -----------------------------------------------------------------------

    // Add a worksheet  with some sample data to filter.
    let worksheet = workbook.add_worksheet();
    populate_autofilter_data(worksheet, false)?;

    // Set the autofilter area.
    worksheet.autofilter(0, 0, 50, 3)?;

    // Set two custom number filters in a "between" configuration.
    let filter_condition = FilterCondition::new()
        .add_custom_filter(FilterCriteria::GreaterThanOrEqualTo, 4000)
        .add_custom_filter(FilterCriteria::LessThanOrEqualTo, 6000);
    worksheet.filter_column(2, &filter_condition)?;

    // -----------------------------------------------------------------------
    // 8. Add an autofilter for non blanks.
    // -----------------------------------------------------------------------

    // Add a worksheet  with some sample data to filter.
    let worksheet = workbook.add_worksheet();
    populate_autofilter_data(worksheet, true)?;

    // Set the autofilter area.
    worksheet.autofilter(0, 0, 50, 3)?;

    // Filter non-blanks by filtering on all the unique non-blank
    // strings/numbers in the column.
    let filter_condition = FilterCondition::new()
        .add_list_filter("East")
        .add_list_filter("West")
        .add_list_filter("North")
        .add_list_filter("South");
    worksheet.filter_column(0, &filter_condition)?;

    // Or you can add a simpler custom filter to get the same result.

    // Set a custom number filter of `!= " "` to filter non blanks.
    let filter_condition =
        FilterCondition::new().add_custom_filter(FilterCriteria::NotEqualTo, " ");
    worksheet.filter_column(0, &filter_condition)?;

    // Save the file to disk.
    workbook.save("autofilter.xlsx")?;

    Ok(())
}

// Generate worksheet data to filter on.
pub fn populate_autofilter_data(
    worksheet: &mut Worksheet,
    add_blanks: bool,
) -> Result<(), XlsxError> {
    // The sample data to add to the worksheet.
    let mut data = vec![
        ("East", "Apple", 9000, "July"),
        ("East", "Apple", 5000, "April"),
        ("South", "Orange", 9000, "September"),
        ("North", "Apple", 2000, "November"),
        ("West", "Apple", 9000, "November"),
        ("South", "Pear", 7000, "October"),
        ("North", "Pear", 9000, "August"),
        ("West", "Orange", 1000, "December"),
        ("West", "Grape", 1000, "November"),
        ("South", "Pear", 10000, "April"),
        ("West", "Grape", 6000, "January"),
        ("South", "Orange", 3000, "May"),
        ("North", "Apple", 3000, "December"),
        ("South", "Apple", 7000, "February"),
        ("West", "Grape", 1000, "December"),
        ("East", "Grape", 8000, "February"),
        ("South", "Grape", 10000, "June"),
        ("West", "Pear", 7000, "December"),
        ("South", "Apple", 2000, "October"),
        ("East", "Grape", 7000, "December"),
        ("North", "Grape", 6000, "July"),
        ("East", "Pear", 8000, "February"),
        ("North", "Apple", 7000, "August"),
        ("North", "Orange", 7000, "July"),
        ("North", "Apple", 6000, "June"),
        ("South", "Grape", 8000, "September"),
        ("West", "Apple", 3000, "October"),
        ("South", "Orange", 10000, "November"),
        ("West", "Grape", 4000, "December"),
        ("North", "Orange", 5000, "August"),
        ("East", "Orange", 1000, "November"),
        ("East", "Orange", 4000, "October"),
        ("North", "Grape", 5000, "August"),
        ("East", "Apple", 1000, "July"),
        ("South", "Apple", 10000, "March"),
        ("East", "Grape", 7000, "October"),
        ("West", "Grape", 1000, "September"),
        ("East", "Grape", 10000, "October"),
        ("South", "Orange", 8000, "March"),
        ("North", "Apple", 4000, "July"),
        ("South", "Orange", 5000, "July"),
        ("West", "Apple", 4000, "June"),
        ("East", "Apple", 5000, "April"),
        ("North", "Pear", 3000, "August"),
        ("East", "Grape", 9000, "November"),
        ("North", "Orange", 8000, "October"),
        ("East", "Apple", 10000, "June"),
        ("South", "Pear", 1000, "December"),
        ("North", "Grape", 10000, "July"),
        ("East", "Grape", 6000, "February"),
    ];

    // Introduce blanks cells for some of the examples.
    if add_blanks {
        data[5].0 = "";
        data[18].0 = "";
        data[30].0 = "";
        data[40].0 = "";
    }

    // Widen the columns for clarity.
    worksheet.set_column_width(0, 12)?;
    worksheet.set_column_width(1, 12)?;
    worksheet.set_column_width(2, 12)?;
    worksheet.set_column_width(3, 12)?;

    // Write the header titles.
    let header_format = Format::new().set_bold();
    worksheet.write_string_with_format(0, 0, "Region", &header_format)?;
    worksheet.write_string_with_format(0, 1, "Item", &header_format)?;
    worksheet.write_string_with_format(0, 2, "Volume", &header_format)?;
    worksheet.write_string_with_format(0, 3, "Month", &header_format)?;

    // Write the other worksheet data.
    for (row, data) in data.iter().enumerate() {
        let row = 1 + row as u32;
        worksheet.write_string(row, 0, data.0)?;
        worksheet.write_string(row, 1, data.1)?;
        worksheet.write_number(row, 2, data.2)?;
        worksheet.write_string(row, 3, data.3)?;
    }

    Ok(())
}
Example output:
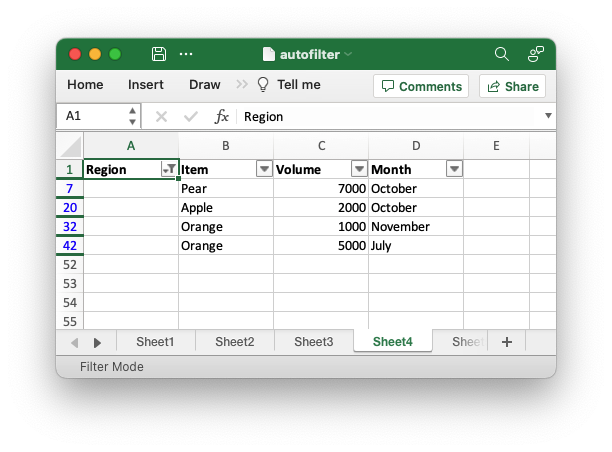
Filters can be added to more than one autofilter column to show specific data only:
// SPDX-License-Identifier: MIT OR Apache-2.0
//
// Copyright 2022-2026, John McNamara, jmcnamara@cpan.org

//! An example of how to create autofilters with the `rust_xlsxwriter` library.
//!
//! An autofilter is a way of adding drop down lists to the headers of a 2D
//! range of worksheet data. This allows users to filter the data based on
//! simple criteria so that some data is shown and some is hidden.
//!

use rust_xlsxwriter::{FilterCondition, FilterCriteria, Format, Workbook, Worksheet, XlsxError};

fn main() -> Result<(), XlsxError> {
    // Create a new Excel file object.
    let mut workbook = Workbook::new();

    // -----------------------------------------------------------------------
    // 1. Add an autofilter to a data range.
    // -----------------------------------------------------------------------

    // Add a worksheet  with some sample data to filter.
    let worksheet = workbook.add_worksheet();
    populate_autofilter_data(worksheet, false)?;

    // Set the autofilter area, including the header/filter row.
    worksheet.autofilter(0, 0, 50, 3)?;

    // -----------------------------------------------------------------------
    // 2. Add an autofilter with a list filter condition.
    // -----------------------------------------------------------------------

    // Add a worksheet  with some sample data to filter.
    let worksheet = workbook.add_worksheet();
    populate_autofilter_data(worksheet, false)?;

    // Set the autofilter area.
    worksheet.autofilter(0, 0, 50, 3)?;

    // Set a filter condition to only show cells matching "East" in the first
    // column.
    let filter_condition = FilterCondition::new().add_list_filter("East");
    worksheet.filter_column(0, &filter_condition)?;

    // -----------------------------------------------------------------------
    // 3. Add an autofilter with a list filter condition on multiple items.
    // -----------------------------------------------------------------------

    // Add a worksheet  with some sample data to filter.
    let worksheet = workbook.add_worksheet();
    populate_autofilter_data(worksheet, false)?;

    // Set the autofilter area.
    worksheet.autofilter(0, 0, 50, 3)?;

    // Set a filter condition to only show cells matching "East", "West" or
    // "South" in the first column.
    let filter_condition = FilterCondition::new()
        .add_list_filter("East")
        .add_list_filter("West")
        .add_list_filter("South");
    worksheet.filter_column(0, &filter_condition)?;

    // -----------------------------------------------------------------------
    // 4. Add an autofilter with a list filter condition to match blank cells.
    // -----------------------------------------------------------------------

    // Add a worksheet  with some sample data to filter.
    let worksheet = workbook.add_worksheet();
    populate_autofilter_data(worksheet, true)?;

    // Set the autofilter area.
    worksheet.autofilter(0, 0, 50, 3)?;

    // Set a filter condition to only show cells matching blanks.
    let filter_condition = FilterCondition::new().add_list_blanks_filter();
    worksheet.filter_column(0, &filter_condition)?;

    // -----------------------------------------------------------------------
    // 5. Add an autofilter with list filters in multiple columns.
    // -----------------------------------------------------------------------

    // Add a worksheet  with some sample data to filter.
    let worksheet = workbook.add_worksheet();
    populate_autofilter_data(worksheet, false)?;

    // Set the autofilter area.
    worksheet.autofilter(0, 0, 50, 3)?;

    // Set a filter condition for 2 separate columns.
    let filter_condition1 = FilterCondition::new().add_list_filter("East");
    worksheet.filter_column(0, &filter_condition1)?;

    let filter_condition2 = FilterCondition::new().add_list_filter("July");
    worksheet.filter_column(3, &filter_condition2)?;

    // -----------------------------------------------------------------------
    // 6. Add an autofilter with custom filter condition.
    // -----------------------------------------------------------------------

    // Add a worksheet  with some sample data to filter.
    let worksheet = workbook.add_worksheet();
    populate_autofilter_data(worksheet, false)?;

    // Set the autofilter area for numbers greater than 8000.
    worksheet.autofilter(0, 0, 50, 3)?;

    // Set a custom number filter.
    let filter_condition =
        FilterCondition::new().add_custom_filter(FilterCriteria::GreaterThan, 8000);
    worksheet.filter_column(2, &filter_condition)?;

    // -----------------------------------------------------------------------
    // 7. Add an autofilter with 2 custom filters to create a "between" condition.
    // -----------------------------------------------------------------------

    // Add a worksheet  with some sample data to filter.
    let worksheet = workbook.add_worksheet();
    populate_autofilter_data(worksheet, false)?;

    // Set the autofilter area.
    worksheet.autofilter(0, 0, 50, 3)?;

    // Set two custom number filters in a "between" configuration.
    let filter_condition = FilterCondition::new()
        .add_custom_filter(FilterCriteria::GreaterThanOrEqualTo, 4000)
        .add_custom_filter(FilterCriteria::LessThanOrEqualTo, 6000);
    worksheet.filter_column(2, &filter_condition)?;

    // -----------------------------------------------------------------------
    // 8. Add an autofilter for non blanks.
    // -----------------------------------------------------------------------

    // Add a worksheet  with some sample data to filter.
    let worksheet = workbook.add_worksheet();
    populate_autofilter_data(worksheet, true)?;

    // Set the autofilter area.
    worksheet.autofilter(0, 0, 50, 3)?;

    // Filter non-blanks by filtering on all the unique non-blank
    // strings/numbers in the column.
    let filter_condition = FilterCondition::new()
        .add_list_filter("East")
        .add_list_filter("West")
        .add_list_filter("North")
        .add_list_filter("South");
    worksheet.filter_column(0, &filter_condition)?;

    // Or you can add a simpler custom filter to get the same result.

    // Set a custom number filter of `!= " "` to filter non blanks.
    let filter_condition =
        FilterCondition::new().add_custom_filter(FilterCriteria::NotEqualTo, " ");
    worksheet.filter_column(0, &filter_condition)?;

    // Save the file to disk.
    workbook.save("autofilter.xlsx")?;

    Ok(())
}

// Generate worksheet data to filter on.
pub fn populate_autofilter_data(
    worksheet: &mut Worksheet,
    add_blanks: bool,
) -> Result<(), XlsxError> {
    // The sample data to add to the worksheet.
    let mut data = vec![
        ("East", "Apple", 9000, "July"),
        ("East", "Apple", 5000, "April"),
        ("South", "Orange", 9000, "September"),
        ("North", "Apple", 2000, "November"),
        ("West", "Apple", 9000, "November"),
        ("South", "Pear", 7000, "October"),
        ("North", "Pear", 9000, "August"),
        ("West", "Orange", 1000, "December"),
        ("West", "Grape", 1000, "November"),
        ("South", "Pear", 10000, "April"),
        ("West", "Grape", 6000, "January"),
        ("South", "Orange", 3000, "May"),
        ("North", "Apple", 3000, "December"),
        ("South", "Apple", 7000, "February"),
        ("West", "Grape", 1000, "December"),
        ("East", "Grape", 8000, "February"),
        ("South", "Grape", 10000, "June"),
        ("West", "Pear", 7000, "December"),
        ("South", "Apple", 2000, "October"),
        ("East", "Grape", 7000, "December"),
        ("North", "Grape", 6000, "July"),
        ("East", "Pear", 8000, "February"),
        ("North", "Apple", 7000, "August"),
        ("North", "Orange", 7000, "July"),
        ("North", "Apple", 6000, "June"),
        ("South", "Grape", 8000, "September"),
        ("West", "Apple", 3000, "October"),
        ("South", "Orange", 10000, "November"),
        ("West", "Grape", 4000, "December"),
        ("North", "Orange", 5000, "August"),
        ("East", "Orange", 1000, "November"),
        ("East", "Orange", 4000, "October"),
        ("North", "Grape", 5000, "August"),
        ("East", "Apple", 1000, "July"),
        ("South", "Apple", 10000, "March"),
        ("East", "Grape", 7000, "October"),
        ("West", "Grape", 1000, "September"),
        ("East", "Grape", 10000, "October"),
        ("South", "Orange", 8000, "March"),
        ("North", "Apple", 4000, "July"),
        ("South", "Orange", 5000, "July"),
        ("West", "Apple", 4000, "June"),
        ("East", "Apple", 5000, "April"),
        ("North", "Pear", 3000, "August"),
        ("East", "Grape", 9000, "November"),
        ("North", "Orange", 8000, "October"),
        ("East", "Apple", 10000, "June"),
        ("South", "Pear", 1000, "December"),
        ("North", "Grape", 10000, "July"),
        ("East", "Grape", 6000, "February"),
    ];

    // Introduce blanks cells for some of the examples.
    if add_blanks {
        data[5].0 = "";
        data[18].0 = "";
        data[30].0 = "";
        data[40].0 = "";
    }

    // Widen the columns for clarity.
    worksheet.set_column_width(0, 12)?;
    worksheet.set_column_width(1, 12)?;
    worksheet.set_column_width(2, 12)?;
    worksheet.set_column_width(3, 12)?;

    // Write the header titles.
    let header_format = Format::new().set_bold();
    worksheet.write_string_with_format(0, 0, "Region", &header_format)?;
    worksheet.write_string_with_format(0, 1, "Item", &header_format)?;
    worksheet.write_string_with_format(0, 2, "Volume", &header_format)?;
    worksheet.write_string_with_format(0, 3, "Month", &header_format)?;

    // Write the other worksheet data.
    for (row, data) in data.iter().enumerate() {
        let row = 1 + row as u32;
        worksheet.write_string(row, 0, data.0)?;
        worksheet.write_string(row, 1, data.1)?;
        worksheet.write_number(row, 2, data.2)?;
        worksheet.write_string(row, 3, data.3)?;
    }

    Ok(())
}
Example output, note the filters on columns A and D:
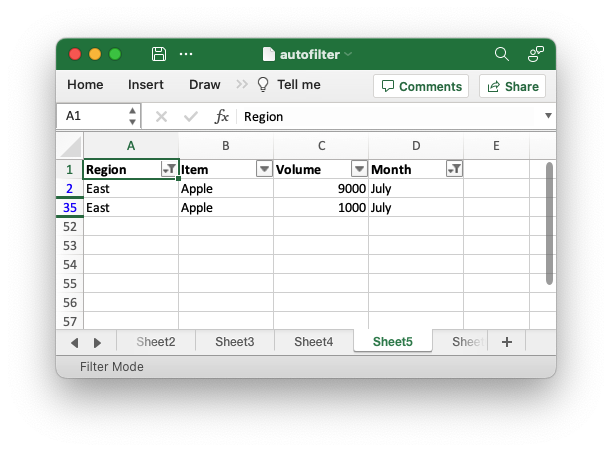
For finer grained control of the filtered data Excel allows 1 or 2 "custom"
filters for conditions like >= or begins with (for strings):
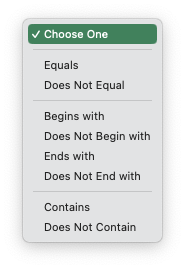
In rust_xlsxwriter you can set custom filters using the FilterCondition
struct and the FilterCondition.add_custom_filter() method. The
criteria/operators are set using the FilterCriteria struct:
// SPDX-License-Identifier: MIT OR Apache-2.0
//
// Copyright 2022-2026, John McNamara, jmcnamara@cpan.org

//! An example of how to create autofilters with the `rust_xlsxwriter` library.
//!
//! An autofilter is a way of adding drop down lists to the headers of a 2D
//! range of worksheet data. This allows users to filter the data based on
//! simple criteria so that some data is shown and some is hidden.
//!

use rust_xlsxwriter::{FilterCondition, FilterCriteria, Format, Workbook, Worksheet, XlsxError};

fn main() -> Result<(), XlsxError> {
    // Create a new Excel file object.
    let mut workbook = Workbook::new();

    // -----------------------------------------------------------------------
    // 1. Add an autofilter to a data range.
    // -----------------------------------------------------------------------

    // Add a worksheet  with some sample data to filter.
    let worksheet = workbook.add_worksheet();
    populate_autofilter_data(worksheet, false)?;

    // Set the autofilter area, including the header/filter row.
    worksheet.autofilter(0, 0, 50, 3)?;

    // -----------------------------------------------------------------------
    // 2. Add an autofilter with a list filter condition.
    // -----------------------------------------------------------------------

    // Add a worksheet  with some sample data to filter.
    let worksheet = workbook.add_worksheet();
    populate_autofilter_data(worksheet, false)?;

    // Set the autofilter area.
    worksheet.autofilter(0, 0, 50, 3)?;

    // Set a filter condition to only show cells matching "East" in the first
    // column.
    let filter_condition = FilterCondition::new().add_list_filter("East");
    worksheet.filter_column(0, &filter_condition)?;

    // -----------------------------------------------------------------------
    // 3. Add an autofilter with a list filter condition on multiple items.
    // -----------------------------------------------------------------------

    // Add a worksheet  with some sample data to filter.
    let worksheet = workbook.add_worksheet();
    populate_autofilter_data(worksheet, false)?;

    // Set the autofilter area.
    worksheet.autofilter(0, 0, 50, 3)?;

    // Set a filter condition to only show cells matching "East", "West" or
    // "South" in the first column.
    let filter_condition = FilterCondition::new()
        .add_list_filter("East")
        .add_list_filter("West")
        .add_list_filter("South");
    worksheet.filter_column(0, &filter_condition)?;

    // -----------------------------------------------------------------------
    // 4. Add an autofilter with a list filter condition to match blank cells.
    // -----------------------------------------------------------------------

    // Add a worksheet  with some sample data to filter.
    let worksheet = workbook.add_worksheet();
    populate_autofilter_data(worksheet, true)?;

    // Set the autofilter area.
    worksheet.autofilter(0, 0, 50, 3)?;

    // Set a filter condition to only show cells matching blanks.
    let filter_condition = FilterCondition::new().add_list_blanks_filter();
    worksheet.filter_column(0, &filter_condition)?;

    // -----------------------------------------------------------------------
    // 5. Add an autofilter with list filters in multiple columns.
    // -----------------------------------------------------------------------

    // Add a worksheet  with some sample data to filter.
    let worksheet = workbook.add_worksheet();
    populate_autofilter_data(worksheet, false)?;

    // Set the autofilter area.
    worksheet.autofilter(0, 0, 50, 3)?;

    // Set a filter condition for 2 separate columns.
    let filter_condition1 = FilterCondition::new().add_list_filter("East");
    worksheet.filter_column(0, &filter_condition1)?;

    let filter_condition2 = FilterCondition::new().add_list_filter("July");
    worksheet.filter_column(3, &filter_condition2)?;

    // -----------------------------------------------------------------------
    // 6. Add an autofilter with custom filter condition.
    // -----------------------------------------------------------------------

    // Add a worksheet  with some sample data to filter.
    let worksheet = workbook.add_worksheet();
    populate_autofilter_data(worksheet, false)?;

    // Set the autofilter area for numbers greater than 8000.
    worksheet.autofilter(0, 0, 50, 3)?;

    // Set a custom number filter.
    let filter_condition =
        FilterCondition::new().add_custom_filter(FilterCriteria::GreaterThan, 8000);
    worksheet.filter_column(2, &filter_condition)?;

    // -----------------------------------------------------------------------
    // 7. Add an autofilter with 2 custom filters to create a "between" condition.
    // -----------------------------------------------------------------------

    // Add a worksheet  with some sample data to filter.
    let worksheet = workbook.add_worksheet();
    populate_autofilter_data(worksheet, false)?;

    // Set the autofilter area.
    worksheet.autofilter(0, 0, 50, 3)?;

    // Set two custom number filters in a "between" configuration.
    let filter_condition = FilterCondition::new()
        .add_custom_filter(FilterCriteria::GreaterThanOrEqualTo, 4000)
        .add_custom_filter(FilterCriteria::LessThanOrEqualTo, 6000);
    worksheet.filter_column(2, &filter_condition)?;

    // -----------------------------------------------------------------------
    // 8. Add an autofilter for non blanks.
    // -----------------------------------------------------------------------

    // Add a worksheet  with some sample data to filter.
    let worksheet = workbook.add_worksheet();
    populate_autofilter_data(worksheet, true)?;

    // Set the autofilter area.
    worksheet.autofilter(0, 0, 50, 3)?;

    // Filter non-blanks by filtering on all the unique non-blank
    // strings/numbers in the column.
    let filter_condition = FilterCondition::new()
        .add_list_filter("East")
        .add_list_filter("West")
        .add_list_filter("North")
        .add_list_filter("South");
    worksheet.filter_column(0, &filter_condition)?;

    // Or you can add a simpler custom filter to get the same result.

    // Set a custom number filter of `!= " "` to filter non blanks.
    let filter_condition =
        FilterCondition::new().add_custom_filter(FilterCriteria::NotEqualTo, " ");
    worksheet.filter_column(0, &filter_condition)?;

    // Save the file to disk.
    workbook.save("autofilter.xlsx")?;

    Ok(())
}

// Generate worksheet data to filter on.
pub fn populate_autofilter_data(
    worksheet: &mut Worksheet,
    add_blanks: bool,
) -> Result<(), XlsxError> {
    // The sample data to add to the worksheet.
    let mut data = vec![
        ("East", "Apple", 9000, "July"),
        ("East", "Apple", 5000, "April"),
        ("South", "Orange", 9000, "September"),
        ("North", "Apple", 2000, "November"),
        ("West", "Apple", 9000, "November"),
        ("South", "Pear", 7000, "October"),
        ("North", "Pear", 9000, "August"),
        ("West", "Orange", 1000, "December"),
        ("West", "Grape", 1000, "November"),
        ("South", "Pear", 10000, "April"),
        ("West", "Grape", 6000, "January"),
        ("South", "Orange", 3000, "May"),
        ("North", "Apple", 3000, "December"),
        ("South", "Apple", 7000, "February"),
        ("West", "Grape", 1000, "December"),
        ("East", "Grape", 8000, "February"),
        ("South", "Grape", 10000, "June"),
        ("West", "Pear", 7000, "December"),
        ("South", "Apple", 2000, "October"),
        ("East", "Grape", 7000, "December"),
        ("North", "Grape", 6000, "July"),
        ("East", "Pear", 8000, "February"),
        ("North", "Apple", 7000, "August"),
        ("North", "Orange", 7000, "July"),
        ("North", "Apple", 6000, "June"),
        ("South", "Grape", 8000, "September"),
        ("West", "Apple", 3000, "October"),
        ("South", "Orange", 10000, "November"),
        ("West", "Grape", 4000, "December"),
        ("North", "Orange", 5000, "August"),
        ("East", "Orange", 1000, "November"),
        ("East", "Orange", 4000, "October"),
        ("North", "Grape", 5000, "August"),
        ("East", "Apple", 1000, "July"),
        ("South", "Apple", 10000, "March"),
        ("East", "Grape", 7000, "October"),
        ("West", "Grape", 1000, "September"),
        ("East", "Grape", 10000, "October"),
        ("South", "Orange", 8000, "March"),
        ("North", "Apple", 4000, "July"),
        ("South", "Orange", 5000, "July"),
        ("West", "Apple", 4000, "June"),
        ("East", "Apple", 5000, "April"),
        ("North", "Pear", 3000, "August"),
        ("East", "Grape", 9000, "November"),
        ("North", "Orange", 8000, "October"),
        ("East", "Apple", 10000, "June"),
        ("South", "Pear", 1000, "December"),
        ("North", "Grape", 10000, "July"),
        ("East", "Grape", 6000, "February"),
    ];

    // Introduce blanks cells for some of the examples.
    if add_blanks {
        data[5].0 = "";
        data[18].0 = "";
        data[30].0 = "";
        data[40].0 = "";
    }

    // Widen the columns for clarity.
    worksheet.set_column_width(0, 12)?;
    worksheet.set_column_width(1, 12)?;
    worksheet.set_column_width(2, 12)?;
    worksheet.set_column_width(3, 12)?;

    // Write the header titles.
    let header_format = Format::new().set_bold();
    worksheet.write_string_with_format(0, 0, "Region", &header_format)?;
    worksheet.write_string_with_format(0, 1, "Item", &header_format)?;
    worksheet.write_string_with_format(0, 2, "Volume", &header_format)?;
    worksheet.write_string_with_format(0, 3, "Month", &header_format)?;

    // Write the other worksheet data.
    for (row, data) in data.iter().enumerate() {
        let row = 1 + row as u32;
        worksheet.write_string(row, 0, data.0)?;
        worksheet.write_string(row, 1, data.1)?;
        worksheet.write_number(row, 2, data.2)?;
        worksheet.write_string(row, 3, data.3)?;
    }

    Ok(())
}
Example output:
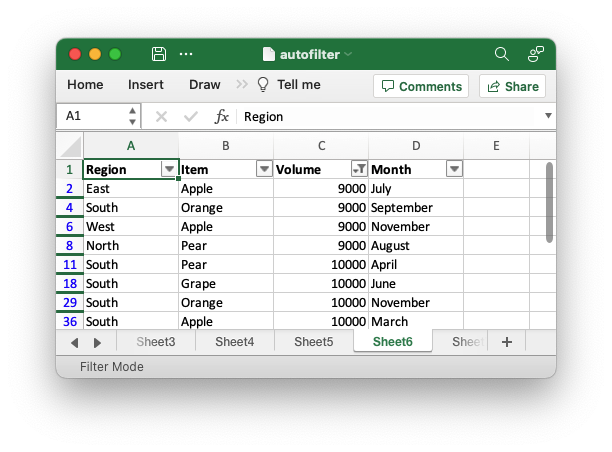
Using both custom filter conditions you can create conditions like "between":
// SPDX-License-Identifier: MIT OR Apache-2.0
//
// Copyright 2022-2026, John McNamara, jmcnamara@cpan.org

//! An example of how to create autofilters with the `rust_xlsxwriter` library.
//!
//! An autofilter is a way of adding drop down lists to the headers of a 2D
//! range of worksheet data. This allows users to filter the data based on
//! simple criteria so that some data is shown and some is hidden.
//!

use rust_xlsxwriter::{FilterCondition, FilterCriteria, Format, Workbook, Worksheet, XlsxError};

fn main() -> Result<(), XlsxError> {
    // Create a new Excel file object.
    let mut workbook = Workbook::new();

    // -----------------------------------------------------------------------
    // 1. Add an autofilter to a data range.
    // -----------------------------------------------------------------------

    // Add a worksheet  with some sample data to filter.
    let worksheet = workbook.add_worksheet();
    populate_autofilter_data(worksheet, false)?;

    // Set the autofilter area, including the header/filter row.
    worksheet.autofilter(0, 0, 50, 3)?;

    // -----------------------------------------------------------------------
    // 2. Add an autofilter with a list filter condition.
    // -----------------------------------------------------------------------

    // Add a worksheet  with some sample data to filter.
    let worksheet = workbook.add_worksheet();
    populate_autofilter_data(worksheet, false)?;

    // Set the autofilter area.
    worksheet.autofilter(0, 0, 50, 3)?;

    // Set a filter condition to only show cells matching "East" in the first
    // column.
    let filter_condition = FilterCondition::new().add_list_filter("East");
    worksheet.filter_column(0, &filter_condition)?;

    // -----------------------------------------------------------------------
    // 3. Add an autofilter with a list filter condition on multiple items.
    // -----------------------------------------------------------------------

    // Add a worksheet  with some sample data to filter.
    let worksheet = workbook.add_worksheet();
    populate_autofilter_data(worksheet, false)?;

    // Set the autofilter area.
    worksheet.autofilter(0, 0, 50, 3)?;

    // Set a filter condition to only show cells matching "East", "West" or
    // "South" in the first column.
    let filter_condition = FilterCondition::new()
        .add_list_filter("East")
        .add_list_filter("West")
        .add_list_filter("South");
    worksheet.filter_column(0, &filter_condition)?;

    // -----------------------------------------------------------------------
    // 4. Add an autofilter with a list filter condition to match blank cells.
    // -----------------------------------------------------------------------

    // Add a worksheet  with some sample data to filter.
    let worksheet = workbook.add_worksheet();
    populate_autofilter_data(worksheet, true)?;

    // Set the autofilter area.
    worksheet.autofilter(0, 0, 50, 3)?;

    // Set a filter condition to only show cells matching blanks.
    let filter_condition = FilterCondition::new().add_list_blanks_filter();
    worksheet.filter_column(0, &filter_condition)?;

    // -----------------------------------------------------------------------
    // 5. Add an autofilter with list filters in multiple columns.
    // -----------------------------------------------------------------------

    // Add a worksheet  with some sample data to filter.
    let worksheet = workbook.add_worksheet();
    populate_autofilter_data(worksheet, false)?;

    // Set the autofilter area.
    worksheet.autofilter(0, 0, 50, 3)?;

    // Set a filter condition for 2 separate columns.
    let filter_condition1 = FilterCondition::new().add_list_filter("East");
    worksheet.filter_column(0, &filter_condition1)?;

    let filter_condition2 = FilterCondition::new().add_list_filter("July");
    worksheet.filter_column(3, &filter_condition2)?;

    // -----------------------------------------------------------------------
    // 6. Add an autofilter with custom filter condition.
    // -----------------------------------------------------------------------

    // Add a worksheet  with some sample data to filter.
    let worksheet = workbook.add_worksheet();
    populate_autofilter_data(worksheet, false)?;

    // Set the autofilter area for numbers greater than 8000.
    worksheet.autofilter(0, 0, 50, 3)?;

    // Set a custom number filter.
    let filter_condition =
        FilterCondition::new().add_custom_filter(FilterCriteria::GreaterThan, 8000);
    worksheet.filter_column(2, &filter_condition)?;

    // -----------------------------------------------------------------------
    // 7. Add an autofilter with 2 custom filters to create a "between" condition.
    // -----------------------------------------------------------------------

    // Add a worksheet  with some sample data to filter.
    let worksheet = workbook.add_worksheet();
    populate_autofilter_data(worksheet, false)?;

    // Set the autofilter area.
    worksheet.autofilter(0, 0, 50, 3)?;

    // Set two custom number filters in a "between" configuration.
    let filter_condition = FilterCondition::new()
        .add_custom_filter(FilterCriteria::GreaterThanOrEqualTo, 4000)
        .add_custom_filter(FilterCriteria::LessThanOrEqualTo, 6000);
    worksheet.filter_column(2, &filter_condition)?;

    // -----------------------------------------------------------------------
    // 8. Add an autofilter for non blanks.
    // -----------------------------------------------------------------------

    // Add a worksheet  with some sample data to filter.
    let worksheet = workbook.add_worksheet();
    populate_autofilter_data(worksheet, true)?;

    // Set the autofilter area.
    worksheet.autofilter(0, 0, 50, 3)?;

    // Filter non-blanks by filtering on all the unique non-blank
    // strings/numbers in the column.
    let filter_condition = FilterCondition::new()
        .add_list_filter("East")
        .add_list_filter("West")
        .add_list_filter("North")
        .add_list_filter("South");
    worksheet.filter_column(0, &filter_condition)?;

    // Or you can add a simpler custom filter to get the same result.

    // Set a custom number filter of `!= " "` to filter non blanks.
    let filter_condition =
        FilterCondition::new().add_custom_filter(FilterCriteria::NotEqualTo, " ");
    worksheet.filter_column(0, &filter_condition)?;

    // Save the file to disk.
    workbook.save("autofilter.xlsx")?;

    Ok(())
}

// Generate worksheet data to filter on.
pub fn populate_autofilter_data(
    worksheet: &mut Worksheet,
    add_blanks: bool,
) -> Result<(), XlsxError> {
    // The sample data to add to the worksheet.
    let mut data = vec![
        ("East", "Apple", 9000, "July"),
        ("East", "Apple", 5000, "April"),
        ("South", "Orange", 9000, "September"),
        ("North", "Apple", 2000, "November"),
        ("West", "Apple", 9000, "November"),
        ("South", "Pear", 7000, "October"),
        ("North", "Pear", 9000, "August"),
        ("West", "Orange", 1000, "December"),
        ("West", "Grape", 1000, "November"),
        ("South", "Pear", 10000, "April"),
        ("West", "Grape", 6000, "January"),
        ("South", "Orange", 3000, "May"),
        ("North", "Apple", 3000, "December"),
        ("South", "Apple", 7000, "February"),
        ("West", "Grape", 1000, "December"),
        ("East", "Grape", 8000, "February"),
        ("South", "Grape", 10000, "June"),
        ("West", "Pear", 7000, "December"),
        ("South", "Apple", 2000, "October"),
        ("East", "Grape", 7000, "December"),
        ("North", "Grape", 6000, "July"),
        ("East", "Pear", 8000, "February"),
        ("North", "Apple", 7000, "August"),
        ("North", "Orange", 7000, "July"),
        ("North", "Apple", 6000, "June"),
        ("South", "Grape", 8000, "September"),
        ("West", "Apple", 3000, "October"),
        ("South", "Orange", 10000, "November"),
        ("West", "Grape", 4000, "December"),
        ("North", "Orange", 5000, "August"),
        ("East", "Orange", 1000, "November"),
        ("East", "Orange", 4000, "October"),
        ("North", "Grape", 5000, "August"),
        ("East", "Apple", 1000, "July"),
        ("South", "Apple", 10000, "March"),
        ("East", "Grape", 7000, "October"),
        ("West", "Grape", 1000, "September"),
        ("East", "Grape", 10000, "October"),
        ("South", "Orange", 8000, "March"),
        ("North", "Apple", 4000, "July"),
        ("South", "Orange", 5000, "July"),
        ("West", "Apple", 4000, "June"),
        ("East", "Apple", 5000, "April"),
        ("North", "Pear", 3000, "August"),
        ("East", "Grape", 9000, "November"),
        ("North", "Orange", 8000, "October"),
        ("East", "Apple", 10000, "June"),
        ("South", "Pear", 1000, "December"),
        ("North", "Grape", 10000, "July"),
        ("East", "Grape", 6000, "February"),
    ];

    // Introduce blanks cells for some of the examples.
    if add_blanks {
        data[5].0 = "";
        data[18].0 = "";
        data[30].0 = "";
        data[40].0 = "";
    }

    // Widen the columns for clarity.
    worksheet.set_column_width(0, 12)?;
    worksheet.set_column_width(1, 12)?;
    worksheet.set_column_width(2, 12)?;
    worksheet.set_column_width(3, 12)?;

    // Write the header titles.
    let header_format = Format::new().set_bold();
    worksheet.write_string_with_format(0, 0, "Region", &header_format)?;
    worksheet.write_string_with_format(0, 1, "Item", &header_format)?;
    worksheet.write_string_with_format(0, 2, "Volume", &header_format)?;
    worksheet.write_string_with_format(0, 3, "Month", &header_format)?;

    // Write the other worksheet data.
    for (row, data) in data.iter().enumerate() {
        let row = 1 + row as u32;
        worksheet.write_string(row, 0, data.0)?;
        worksheet.write_string(row, 1, data.1)?;
        worksheet.write_number(row, 2, data.2)?;
        worksheet.write_string(row, 3, data.3)?;
    }

    Ok(())
}
Example output:
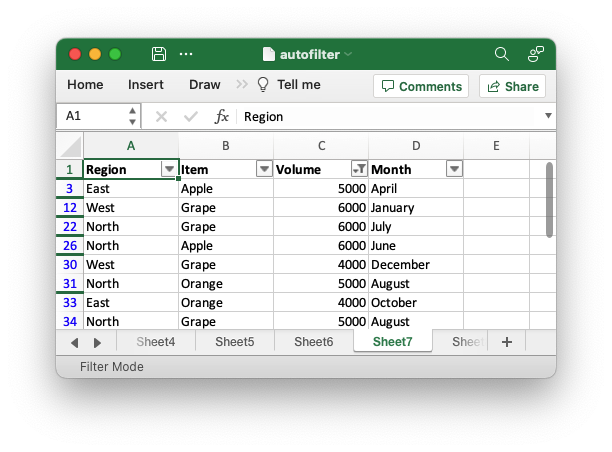
Note, Excel defaults to using an "And" operator for 2 custom filters but you can
set an "Or" operator using the FilterCondition.add_custom_boolean_or()
method.
Filtering Non-blanks
Excel supports, and uses, two different way to filter on non-blanks. The first is to filter all the unique non-blank strings/numbers in the column.
// SPDX-License-Identifier: MIT OR Apache-2.0
//
// Copyright 2022-2026, John McNamara, jmcnamara@cpan.org

//! An example of how to create autofilters with the `rust_xlsxwriter` library.
//!
//! An autofilter is a way of adding drop down lists to the headers of a 2D
//! range of worksheet data. This allows users to filter the data based on
//! simple criteria so that some data is shown and some is hidden.
//!

use rust_xlsxwriter::{FilterCondition, FilterCriteria, Format, Workbook, Worksheet, XlsxError};

fn main() -> Result<(), XlsxError> {
    // Create a new Excel file object.
    let mut workbook = Workbook::new();

    // -----------------------------------------------------------------------
    // 1. Add an autofilter to a data range.
    // -----------------------------------------------------------------------

    // Add a worksheet  with some sample data to filter.
    let worksheet = workbook.add_worksheet();
    populate_autofilter_data(worksheet, false)?;

    // Set the autofilter area, including the header/filter row.
    worksheet.autofilter(0, 0, 50, 3)?;

    // -----------------------------------------------------------------------
    // 2. Add an autofilter with a list filter condition.
    // -----------------------------------------------------------------------

    // Add a worksheet  with some sample data to filter.
    let worksheet = workbook.add_worksheet();
    populate_autofilter_data(worksheet, false)?;

    // Set the autofilter area.
    worksheet.autofilter(0, 0, 50, 3)?;

    // Set a filter condition to only show cells matching "East" in the first
    // column.
    let filter_condition = FilterCondition::new().add_list_filter("East");
    worksheet.filter_column(0, &filter_condition)?;

    // -----------------------------------------------------------------------
    // 3. Add an autofilter with a list filter condition on multiple items.
    // -----------------------------------------------------------------------

    // Add a worksheet  with some sample data to filter.
    let worksheet = workbook.add_worksheet();
    populate_autofilter_data(worksheet, false)?;

    // Set the autofilter area.
    worksheet.autofilter(0, 0, 50, 3)?;

    // Set a filter condition to only show cells matching "East", "West" or
    // "South" in the first column.
    let filter_condition = FilterCondition::new()
        .add_list_filter("East")
        .add_list_filter("West")
        .add_list_filter("South");
    worksheet.filter_column(0, &filter_condition)?;

    // -----------------------------------------------------------------------
    // 4. Add an autofilter with a list filter condition to match blank cells.
    // -----------------------------------------------------------------------

    // Add a worksheet  with some sample data to filter.
    let worksheet = workbook.add_worksheet();
    populate_autofilter_data(worksheet, true)?;

    // Set the autofilter area.
    worksheet.autofilter(0, 0, 50, 3)?;

    // Set a filter condition to only show cells matching blanks.
    let filter_condition = FilterCondition::new().add_list_blanks_filter();
    worksheet.filter_column(0, &filter_condition)?;

    // -----------------------------------------------------------------------
    // 5. Add an autofilter with list filters in multiple columns.
    // -----------------------------------------------------------------------

    // Add a worksheet  with some sample data to filter.
    let worksheet = workbook.add_worksheet();
    populate_autofilter_data(worksheet, false)?;

    // Set the autofilter area.
    worksheet.autofilter(0, 0, 50, 3)?;

    // Set a filter condition for 2 separate columns.
    let filter_condition1 = FilterCondition::new().add_list_filter("East");
    worksheet.filter_column(0, &filter_condition1)?;

    let filter_condition2 = FilterCondition::new().add_list_filter("July");
    worksheet.filter_column(3, &filter_condition2)?;

    // -----------------------------------------------------------------------
    // 6. Add an autofilter with custom filter condition.
    // -----------------------------------------------------------------------

    // Add a worksheet  with some sample data to filter.
    let worksheet = workbook.add_worksheet();
    populate_autofilter_data(worksheet, false)?;

    // Set the autofilter area for numbers greater than 8000.
    worksheet.autofilter(0, 0, 50, 3)?;

    // Set a custom number filter.
    let filter_condition =
        FilterCondition::new().add_custom_filter(FilterCriteria::GreaterThan, 8000);
    worksheet.filter_column(2, &filter_condition)?;

    // -----------------------------------------------------------------------
    // 7. Add an autofilter with 2 custom filters to create a "between" condition.
    // -----------------------------------------------------------------------

    // Add a worksheet  with some sample data to filter.
    let worksheet = workbook.add_worksheet();
    populate_autofilter_data(worksheet, false)?;

    // Set the autofilter area.
    worksheet.autofilter(0, 0, 50, 3)?;

    // Set two custom number filters in a "between" configuration.
    let filter_condition = FilterCondition::new()
        .add_custom_filter(FilterCriteria::GreaterThanOrEqualTo, 4000)
        .add_custom_filter(FilterCriteria::LessThanOrEqualTo, 6000);
    worksheet.filter_column(2, &filter_condition)?;

    // -----------------------------------------------------------------------
    // 8. Add an autofilter for non blanks.
    // -----------------------------------------------------------------------

    // Add a worksheet  with some sample data to filter.
    let worksheet = workbook.add_worksheet();
    populate_autofilter_data(worksheet, true)?;

    // Set the autofilter area.
    worksheet.autofilter(0, 0, 50, 3)?;

    // Filter non-blanks by filtering on all the unique non-blank
    // strings/numbers in the column.
    let filter_condition = FilterCondition::new()
        .add_list_filter("East")
        .add_list_filter("West")
        .add_list_filter("North")
        .add_list_filter("South");
    worksheet.filter_column(0, &filter_condition)?;

    // Or you can add a simpler custom filter to get the same result.

    // Set a custom number filter of `!= " "` to filter non blanks.
    let filter_condition =
        FilterCondition::new().add_custom_filter(FilterCriteria::NotEqualTo, " ");
    worksheet.filter_column(0, &filter_condition)?;

    // Save the file to disk.
    workbook.save("autofilter.xlsx")?;

    Ok(())
}

// Generate worksheet data to filter on.
pub fn populate_autofilter_data(
    worksheet: &mut Worksheet,
    add_blanks: bool,
) -> Result<(), XlsxError> {
    // The sample data to add to the worksheet.
    let mut data = vec![
        ("East", "Apple", 9000, "July"),
        ("East", "Apple", 5000, "April"),
        ("South", "Orange", 9000, "September"),
        ("North", "Apple", 2000, "November"),
        ("West", "Apple", 9000, "November"),
        ("South", "Pear", 7000, "October"),
        ("North", "Pear", 9000, "August"),
        ("West", "Orange", 1000, "December"),
        ("West", "Grape", 1000, "November"),
        ("South", "Pear", 10000, "April"),
        ("West", "Grape", 6000, "January"),
        ("South", "Orange", 3000, "May"),
        ("North", "Apple", 3000, "December"),
        ("South", "Apple", 7000, "February"),
        ("West", "Grape", 1000, "December"),
        ("East", "Grape", 8000, "February"),
        ("South", "Grape", 10000, "June"),
        ("West", "Pear", 7000, "December"),
        ("South", "Apple", 2000, "October"),
        ("East", "Grape", 7000, "December"),
        ("North", "Grape", 6000, "July"),
        ("East", "Pear", 8000, "February"),
        ("North", "Apple", 7000, "August"),
        ("North", "Orange", 7000, "July"),
        ("North", "Apple", 6000, "June"),
        ("South", "Grape", 8000, "September"),
        ("West", "Apple", 3000, "October"),
        ("South", "Orange", 10000, "November"),
        ("West", "Grape", 4000, "December"),
        ("North", "Orange", 5000, "August"),
        ("East", "Orange", 1000, "November"),
        ("East", "Orange", 4000, "October"),
        ("North", "Grape", 5000, "August"),
        ("East", "Apple", 1000, "July"),
        ("South", "Apple", 10000, "March"),
        ("East", "Grape", 7000, "October"),
        ("West", "Grape", 1000, "September"),
        ("East", "Grape", 10000, "October"),
        ("South", "Orange", 8000, "March"),
        ("North", "Apple", 4000, "July"),
        ("South", "Orange", 5000, "July"),
        ("West", "Apple", 4000, "June"),
        ("East", "Apple", 5000, "April"),
        ("North", "Pear", 3000, "August"),
        ("East", "Grape", 9000, "November"),
        ("North", "Orange", 8000, "October"),
        ("East", "Apple", 10000, "June"),
        ("South", "Pear", 1000, "December"),
        ("North", "Grape", 10000, "July"),
        ("East", "Grape", 6000, "February"),
    ];

    // Introduce blanks cells for some of the examples.
    if add_blanks {
        data[5].0 = "";
        data[18].0 = "";
        data[30].0 = "";
        data[40].0 = "";
    }

    // Widen the columns for clarity.
    worksheet.set_column_width(0, 12)?;
    worksheet.set_column_width(1, 12)?;
    worksheet.set_column_width(2, 12)?;
    worksheet.set_column_width(3, 12)?;

    // Write the header titles.
    let header_format = Format::new().set_bold();
    worksheet.write_string_with_format(0, 0, "Region", &header_format)?;
    worksheet.write_string_with_format(0, 1, "Item", &header_format)?;
    worksheet.write_string_with_format(0, 2, "Volume", &header_format)?;
    worksheet.write_string_with_format(0, 3, "Month", &header_format)?;

    // Write the other worksheet data.
    for (row, data) in data.iter().enumerate() {
        let row = 1 + row as u32;
        worksheet.write_string(row, 0, data.0)?;
        worksheet.write_string(row, 1, data.1)?;
        worksheet.write_number(row, 2, data.2)?;
        worksheet.write_string(row, 3, data.3)?;
    }

    Ok(())
}
However, if this is programmatically difficult to set up you can add a simpler custom filter to get the same result:
// SPDX-License-Identifier: MIT OR Apache-2.0
//
// Copyright 2022-2026, John McNamara, jmcnamara@cpan.org

//! An example of how to create autofilters with the `rust_xlsxwriter` library.
//!
//! An autofilter is a way of adding drop down lists to the headers of a 2D
//! range of worksheet data. This allows users to filter the data based on
//! simple criteria so that some data is shown and some is hidden.
//!

use rust_xlsxwriter::{FilterCondition, FilterCriteria, Format, Workbook, Worksheet, XlsxError};

fn main() -> Result<(), XlsxError> {
    // Create a new Excel file object.
    let mut workbook = Workbook::new();

    // -----------------------------------------------------------------------
    // 1. Add an autofilter to a data range.
    // -----------------------------------------------------------------------

    // Add a worksheet  with some sample data to filter.
    let worksheet = workbook.add_worksheet();
    populate_autofilter_data(worksheet, false)?;

    // Set the autofilter area, including the header/filter row.
    worksheet.autofilter(0, 0, 50, 3)?;

    // -----------------------------------------------------------------------
    // 2. Add an autofilter with a list filter condition.
    // -----------------------------------------------------------------------

    // Add a worksheet  with some sample data to filter.
    let worksheet = workbook.add_worksheet();
    populate_autofilter_data(worksheet, false)?;

    // Set the autofilter area.
    worksheet.autofilter(0, 0, 50, 3)?;

    // Set a filter condition to only show cells matching "East" in the first
    // column.
    let filter_condition = FilterCondition::new().add_list_filter("East");
    worksheet.filter_column(0, &filter_condition)?;

    // -----------------------------------------------------------------------
    // 3. Add an autofilter with a list filter condition on multiple items.
    // -----------------------------------------------------------------------

    // Add a worksheet  with some sample data to filter.
    let worksheet = workbook.add_worksheet();
    populate_autofilter_data(worksheet, false)?;

    // Set the autofilter area.
    worksheet.autofilter(0, 0, 50, 3)?;

    // Set a filter condition to only show cells matching "East", "West" or
    // "South" in the first column.
    let filter_condition = FilterCondition::new()
        .add_list_filter("East")
        .add_list_filter("West")
        .add_list_filter("South");
    worksheet.filter_column(0, &filter_condition)?;

    // -----------------------------------------------------------------------
    // 4. Add an autofilter with a list filter condition to match blank cells.
    // -----------------------------------------------------------------------

    // Add a worksheet  with some sample data to filter.
    let worksheet = workbook.add_worksheet();
    populate_autofilter_data(worksheet, true)?;

    // Set the autofilter area.
    worksheet.autofilter(0, 0, 50, 3)?;

    // Set a filter condition to only show cells matching blanks.
    let filter_condition = FilterCondition::new().add_list_blanks_filter();
    worksheet.filter_column(0, &filter_condition)?;

    // -----------------------------------------------------------------------
    // 5. Add an autofilter with list filters in multiple columns.
    // -----------------------------------------------------------------------

    // Add a worksheet  with some sample data to filter.
    let worksheet = workbook.add_worksheet();
    populate_autofilter_data(worksheet, false)?;

    // Set the autofilter area.
    worksheet.autofilter(0, 0, 50, 3)?;

    // Set a filter condition for 2 separate columns.
    let filter_condition1 = FilterCondition::new().add_list_filter("East");
    worksheet.filter_column(0, &filter_condition1)?;

    let filter_condition2 = FilterCondition::new().add_list_filter("July");
    worksheet.filter_column(3, &filter_condition2)?;

    // -----------------------------------------------------------------------
    // 6. Add an autofilter with custom filter condition.
    // -----------------------------------------------------------------------

    // Add a worksheet  with some sample data to filter.
    let worksheet = workbook.add_worksheet();
    populate_autofilter_data(worksheet, false)?;

    // Set the autofilter area for numbers greater than 8000.
    worksheet.autofilter(0, 0, 50, 3)?;

    // Set a custom number filter.
    let filter_condition =
        FilterCondition::new().add_custom_filter(FilterCriteria::GreaterThan, 8000);
    worksheet.filter_column(2, &filter_condition)?;

    // -----------------------------------------------------------------------
    // 7. Add an autofilter with 2 custom filters to create a "between" condition.
    // -----------------------------------------------------------------------

    // Add a worksheet  with some sample data to filter.
    let worksheet = workbook.add_worksheet();
    populate_autofilter_data(worksheet, false)?;

    // Set the autofilter area.
    worksheet.autofilter(0, 0, 50, 3)?;

    // Set two custom number filters in a "between" configuration.
    let filter_condition = FilterCondition::new()
        .add_custom_filter(FilterCriteria::GreaterThanOrEqualTo, 4000)
        .add_custom_filter(FilterCriteria::LessThanOrEqualTo, 6000);
    worksheet.filter_column(2, &filter_condition)?;

    // -----------------------------------------------------------------------
    // 8. Add an autofilter for non blanks.
    // -----------------------------------------------------------------------

    // Add a worksheet  with some sample data to filter.
    let worksheet = workbook.add_worksheet();
    populate_autofilter_data(worksheet, true)?;

    // Set the autofilter area.
    worksheet.autofilter(0, 0, 50, 3)?;

    // Filter non-blanks by filtering on all the unique non-blank
    // strings/numbers in the column.
    let filter_condition = FilterCondition::new()
        .add_list_filter("East")
        .add_list_filter("West")
        .add_list_filter("North")
        .add_list_filter("South");
    worksheet.filter_column(0, &filter_condition)?;

    // Or you can add a simpler custom filter to get the same result.

    // Set a custom number filter of `!= " "` to filter non blanks.
    let filter_condition =
        FilterCondition::new().add_custom_filter(FilterCriteria::NotEqualTo, " ");
    worksheet.filter_column(0, &filter_condition)?;

    // Save the file to disk.
    workbook.save("autofilter.xlsx")?;

    Ok(())
}

// Generate worksheet data to filter on.
pub fn populate_autofilter_data(
    worksheet: &mut Worksheet,
    add_blanks: bool,
) -> Result<(), XlsxError> {
    // The sample data to add to the worksheet.
    let mut data = vec![
        ("East", "Apple", 9000, "July"),
        ("East", "Apple", 5000, "April"),
        ("South", "Orange", 9000, "September"),
        ("North", "Apple", 2000, "November"),
        ("West", "Apple", 9000, "November"),
        ("South", "Pear", 7000, "October"),
        ("North", "Pear", 9000, "August"),
        ("West", "Orange", 1000, "December"),
        ("West", "Grape", 1000, "November"),
        ("South", "Pear", 10000, "April"),
        ("West", "Grape", 6000, "January"),
        ("South", "Orange", 3000, "May"),
        ("North", "Apple", 3000, "December"),
        ("South", "Apple", 7000, "February"),
        ("West", "Grape", 1000, "December"),
        ("East", "Grape", 8000, "February"),
        ("South", "Grape", 10000, "June"),
        ("West", "Pear", 7000, "December"),
        ("South", "Apple", 2000, "October"),
        ("East", "Grape", 7000, "December"),
        ("North", "Grape", 6000, "July"),
        ("East", "Pear", 8000, "February"),
        ("North", "Apple", 7000, "August"),
        ("North", "Orange", 7000, "July"),
        ("North", "Apple", 6000, "June"),
        ("South", "Grape", 8000, "September"),
        ("West", "Apple", 3000, "October"),
        ("South", "Orange", 10000, "November"),
        ("West", "Grape", 4000, "December"),
        ("North", "Orange", 5000, "August"),
        ("East", "Orange", 1000, "November"),
        ("East", "Orange", 4000, "October"),
        ("North", "Grape", 5000, "August"),
        ("East", "Apple", 1000, "July"),
        ("South", "Apple", 10000, "March"),
        ("East", "Grape", 7000, "October"),
        ("West", "Grape", 1000, "September"),
        ("East", "Grape", 10000, "October"),
        ("South", "Orange", 8000, "March"),
        ("North", "Apple", 4000, "July"),
        ("South", "Orange", 5000, "July"),
        ("West", "Apple", 4000, "June"),
        ("East", "Apple", 5000, "April"),
        ("North", "Pear", 3000, "August"),
        ("East", "Grape", 9000, "November"),
        ("North", "Orange", 8000, "October"),
        ("East", "Apple", 10000, "June"),
        ("South", "Pear", 1000, "December"),
        ("North", "Grape", 10000, "July"),
        ("East", "Grape", 6000, "February"),
    ];

    // Introduce blanks cells for some of the examples.
    if add_blanks {
        data[5].0 = "";
        data[18].0 = "";
        data[30].0 = "";
        data[40].0 = "";
    }

    // Widen the columns for clarity.
    worksheet.set_column_width(0, 12)?;
    worksheet.set_column_width(1, 12)?;
    worksheet.set_column_width(2, 12)?;
    worksheet.set_column_width(3, 12)?;

    // Write the header titles.
    let header_format = Format::new().set_bold();
    worksheet.write_string_with_format(0, 0, "Region", &header_format)?;
    worksheet.write_string_with_format(0, 1, "Item", &header_format)?;
    worksheet.write_string_with_format(0, 2, "Volume", &header_format)?;
    worksheet.write_string_with_format(0, 3, "Month", &header_format)?;

    // Write the other worksheet data.
    for (row, data) in data.iter().enumerate() {
        let row = 1 + row as u32;
        worksheet.write_string(row, 0, data.0)?;
        worksheet.write_string(row, 1, data.1)?;
        worksheet.write_number(row, 2, data.2)?;
        worksheet.write_string(row, 3, data.3)?;
    }

    Ok(())
}
Excel uses both these methods depending on context. Example output from either method:
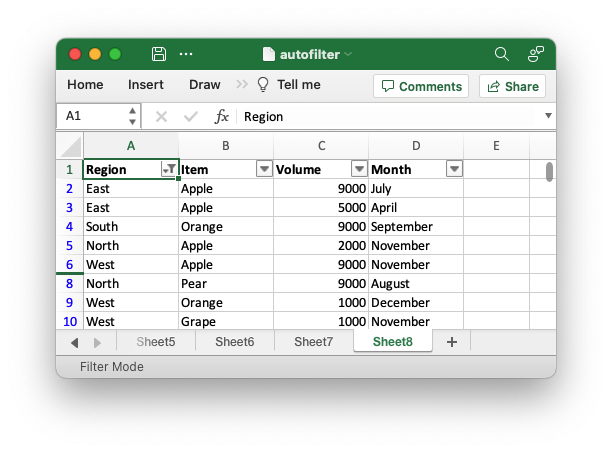
Auto-hiding filtered rows
When you add a filter condition to an autofilter in Excel it automatically hides all the rows that don't match the filter. This is something that happens at runtime and isn't part of the file format.
In order to simulate this behavior the rust_xlsxwriter library iterates through the worksheet data in the autofilter range and hides any rows that don't match. This is an additional feature that isn't available in the other language ports of "xlsxwriter". In those versions the programmer has to iterate through the input data and hide the rows manually.
In general the auto-hiding in rust_xlsxwriter works as expected, as can be seen in the examples above. However, there are some limitations such as:
- Only String, Number and Blank cells are currently handled.
- The return values from formulas are generally unknown and unhandled.
- Excel supports some simple regex matching of strings with
?and*when used withFilterCriteria::ContainsandDoesNotContain. These are not currently supported.
If you have some filter criteria that isn't handled correctly you can add to the
filtered rows by using Worksheet::set_row_hidden().
If the auto-hiding is incorrect you can also turn it off and handle it manually
using Worksheet::filter_automatic_off() or Worksheet::set_row_unhidden().
Cookbook Examples
This section contains sample applications that demonstrate different features of
the rust_xlsxwriter library.
- Hello World: Simple getting started example.
- Feature demo: Demonstrates more features of the library.
- Cell formatting: Demonstrates various formatting options.
- Merging cells: An example of merging cell ranges.
- Adding autofilters: Add an autofilter to a worksheet.
- Autofitting columns: Example of autofitting column widths.
- Adding worksheet tables: Add worksheet tables to a worksheet.
- Adding conditional formatting: Add conditional formats to a worksheet.
- Using data validation: Add data validation to cells in a worksheet.
- Adding cell notes: Add a Note to a cell.
- Extending generic write(): Example of extending the
write()method to handle user data types. - Rich strings: Add multi-font "rich" strings to a worksheet.
- Format colors: Creates a palette of the available colors.
- Theme: custom: Use a custom workbook theme
- Theme: Excel 2023/Aptos: Use the Excel 2023/Aptos theme
- Hyperlinks: Add hyperlinks to a worksheet.
- Chart: Simple: Simple getting started chart example.
- Chart: Styles: Example of setting default chart styles.
- Chart: Area: Excel Area chart example.
- Chart: Bar: Excel Bar chart example.
- Chart: Column: Excel Column chart example.
- Chart: Line: Excel Line chart example.
- Chart: Scatter: Excel Scatter chart example.
- Chart: Radar: Excel Radar chart example.
- Chart: Pie: Excel Pie chart example.
- Chart: Stock: Excel Stock chart example.
- Chart: Doughnut: Excel Doughnut chart example.
- Chart: Using a secondary axis: An example of a creating a chart with a secondary axis.
- Chart: Create a combined chart: An example of combining two chart types in one.
- Chart: Create a combined pareto chart: An example of a combined Pareto chart.
- Chart: Create a clustered/2D category char: An example of a chart with a clustered 2D category.
- Chart: Pattern Fill: Example of a chart with Pattern Fill.
- Chart: Gradient Fill: Example of a chart with Gradient Fill.
- Chart: Data table: Example of adding a data table below a chart.
- Chart: Data tools: Example of chart data analysis tools like trendlines.
- Chart: Gauge Chart: Example of composite "gauge" chart data.
- Sparklines: Simple example: A simple example of sparklines.
- Macros: Adding macros to a workbook: Adding a macro to a worksheet.
- Sparklines: Example with optional properties: An advanced example of sparklines showing available options.
- Inserting images: Add images to a worksheet.
- Embedding images in cells: An example of embedding images in a cell.
- Inserting images to fit: Inserting images to fit cell
- Inserting Checkboxes in worksheets: Inserting Checkboxes in worksheets
- Inserting Textboxes in worksheets: Inserting Textboxes in worksheets
- Ignoring Excel cell errors
- Create row outline groups
- Create column outline groups
- Right to left display: Sets a worksheet into right to left format.
- Using defined names: How to use user defined variable names in worksheets.
- Dynamic array formulas: Examples of dynamic arrays and formulas.
- Excel LAMBDA() function: Example of using the Excel 365+ LAMBDA() function.
- Headers and Footers: Shows how to set headers and footers.
- Setting document properties: Set the metadata properties for a workbook.
- Setting the Sensitivity Label: Setting the Sensitivity Label for a Document.
- Creating a Table of Contents: Using internal links to create a Table of Contents.
- Adding a watermark as a header image: Adding a watermark to a worksheet by adding an image to the header.
- Adding a watermark as a background image: Adding a watermark to a worksheet by adding a background image.
- Freeze Panes: Example of setting freeze panes in worksheets.
- Worksheet protection: Example of setting worksheet protection properties.
Hello World: Simple getting started example
Program to create a simple Hello World style Excel spreadsheet using the
rust_xlsxwriter library.
Image of the output file:

Code to generate the output file:
// SPDX-License-Identifier: MIT OR Apache-2.0
//
// Copyright 2022-2026, John McNamara, jmcnamara@cpan.org

//! Create a simple Hello World style Excel spreadsheet using the
//! `rust_xlsxwriter` library.

use rust_xlsxwriter::{Workbook, XlsxError};

fn main() -> Result<(), XlsxError> {
    // Create a new Excel file object.
    let mut workbook = Workbook::new();

    // Add a worksheet to the workbook.
    let worksheet = workbook.add_worksheet();

    // Write a string to cell (0, 0) = A1.
    worksheet.write(0, 0, "Hello")?;

    // Write a number to cell (1, 0) = A2.
    worksheet.write(1, 0, 12345)?;

    // Save the file to disk.
    workbook.save("hello.xlsx")?;

    Ok(())
}
Feature demo: Demonstrates more features of the library
A simple getting started example of some of the features of therust_xlsxwriter
library. It shows some examples of writing different data types, including
dates.
Image of the output file:

Code to generate the output file:
// SPDX-License-Identifier: MIT OR Apache-2.0
//
// Copyright 2022-2026, John McNamara, jmcnamara@cpan.org

//! A simple, getting started, example of some of the features of the
//! `rust_xlsxwriter` library.

use rust_xlsxwriter::*;

fn main() -> Result<(), XlsxError> {
    // Create a new Excel file object.
    let mut workbook = Workbook::new();

    // Create some formats to use in the worksheet.
    let bold_format = Format::new().set_bold();
    let decimal_format = Format::new().set_num_format("0.000");
    let date_format = Format::new().set_num_format("yyyy-mm-dd");
    let merge_format = Format::new()
        .set_border(FormatBorder::Thin)
        .set_align(FormatAlign::Center);

    // Add a worksheet to the workbook.
    let worksheet = workbook.add_worksheet();

    // Set the column width for clarity.
    worksheet.set_column_width(0, 22)?;

    // Write a string without formatting.
    worksheet.write(0, 0, "Hello")?;

    // Write a string with the bold format defined above.
    worksheet.write_with_format(1, 0, "World", &bold_format)?;

    // Write some numbers.
    worksheet.write(2, 0, 1)?;
    worksheet.write(3, 0, 2.34)?;

    // Write a number with formatting.
    worksheet.write_with_format(4, 0, 3.00, &decimal_format)?;

    // Write a formula.
    worksheet.write(5, 0, Formula::new("=SIN(PI()/4)"))?;

    // Write a date.
    let date = ExcelDateTime::from_ymd(2023, 1, 25)?;
    worksheet.write_with_format(6, 0, &date, &date_format)?;

    // Write some links.
    worksheet.write(7, 0, Url::new("https://www.rust-lang.org"))?;
    worksheet.write(8, 0, Url::new("https://www.rust-lang.org").set_text("Rust"))?;

    // Write some merged cells.
    worksheet.merge_range(9, 0, 9, 1, "Merged cells", &merge_format)?;

    // Insert an image.
    let image = Image::new("examples/rust_logo.png")?;
    worksheet.insert_image(1, 2, &image)?;

    // Save the file to disk.
    workbook.save("demo.xlsx")?;

    Ok(())
}
Cell formatting: Demonstrates various formatting options
An example of the various cell formatting options that are available in the
rust_xlsxwriter library. These are laid out on worksheets that correspond to the
sections of the Excel "Format Cells" dialog.
Image of the output file:
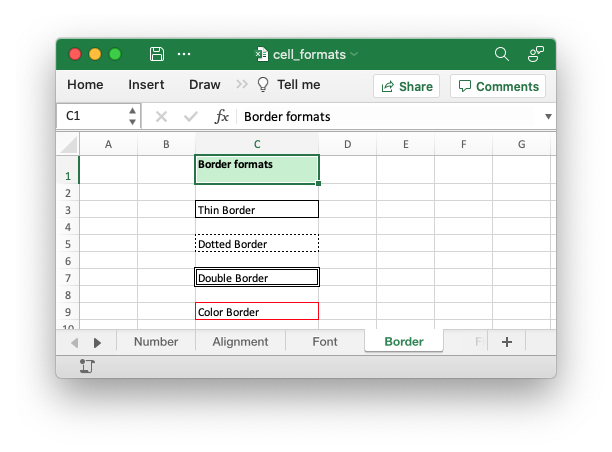
Code to generate the output file:
// SPDX-License-Identifier: MIT OR Apache-2.0
//
// Copyright 2022-2026, John McNamara, jmcnamara@cpan.org
//! An example of the various cell formatting options that are available in the
//! `rust_xlsxwriter` library. These are laid out on worksheets that correspond to
//! the sections of the Excel "Format Cells" dialog.
use rust_xlsxwriter::*;
fn main() -> Result<(), XlsxError> {
// Create a new Excel file object.
let mut workbook = Workbook::new();
// Add a general heading format.
let header_format = Format::new()
.set_bold()
.set_align(FormatAlign::Top)
.set_border(FormatBorder::Thin)
.set_background_color(Color::RGB(0xC6EFCE));
// -----------------------------------------------------------------------
// Create a worksheet that demonstrates number formatting.
// -----------------------------------------------------------------------
let worksheet = workbook.add_worksheet().set_name("Number")?;
// Make the header row and columns taller and wider for clarity.
worksheet.set_column_width(0, 18)?;
worksheet.set_column_width(1, 18)?;
worksheet.set_row_height(0, 25)?;
// Add some descriptive text and the formatted numbers.
worksheet.write_string_with_format(0, 0, "Number Categories", &header_format)?;
worksheet.write_string_with_format(0, 1, "Formatted Numbers", &header_format)?;
// Write an unformatted number with the default or "General" format.
worksheet.write_string(1, 0, "General")?;
worksheet.write_number(1, 1, 1234.567)?;
// Write a number with a decimal format.
worksheet.write_string(2, 0, "Number")?;
let decimal_format = Format::new().set_num_format("0.00");
worksheet.write_number_with_format(2, 1, 1234.567, &decimal_format)?;
// Write a number with a currency format.
worksheet.write_string(3, 0, "Currency")?;
let currency_format = Format::new().set_num_format("[$¥-ja-JP]#,##0.00");
worksheet.write_number_with_format(3, 1, 1234.567, ¤cy_format)?;
// Write a number with an accountancy format.
worksheet.write_string(4, 0, "Accountancy")?;
let accountancy_format = Format::new().set_num_format("_-[$¥-ja-JP]* #,##0.00_-");
worksheet.write_number_with_format(4, 1, 1234.567, &accountancy_format)?;
// Write a number with a short date format.
worksheet.write_string(5, 0, "Date")?;
let short_date_format = Format::new().set_num_format("yyyy-mm-dd;@");
worksheet.write_number_with_format(5, 1, 44927.23, &short_date_format)?;
// Write a number with a long date format.
worksheet.write_string(6, 0, "Date")?;
let long_date_format = Format::new().set_num_format("[$-x-sysdate]dddd, mmmm dd, yyyy");
worksheet.write_number_with_format(6, 1, 44927.23, &long_date_format)?;
// Write a number with a percentage format.
worksheet.write_string(7, 0, "Percentage")?;
let percentage_format = Format::new().set_num_format("0.00%");
worksheet.write_number_with_format(7, 1, 72.5 / 100.0, &percentage_format)?;
// Write a number with a fraction format.
worksheet.write_string(8, 0, "Fraction")?;
let fraction_format = Format::new().set_num_format("# ??/??");
worksheet.write_number_with_format(8, 1, 5.0 / 16.0, &fraction_format)?;
// Write a number with a percentage format.
worksheet.write_string(9, 0, "Scientific")?;
let scientific_format = Format::new().set_num_format("0.00E+00");
worksheet.write_number_with_format(9, 1, 1234.567, &scientific_format)?;
// Write a number with a text format.
worksheet.write_string(10, 0, "Text")?;
let text_format = Format::new().set_num_format("@");
worksheet.write_number_with_format(10, 1, 1234.567, &text_format)?;
// -----------------------------------------------------------------------
// Create a worksheet that demonstrates number formatting.
// -----------------------------------------------------------------------
let worksheet = workbook.add_worksheet().set_name("Alignment")?;
// Make some rows and columns taller and wider for clarity.
worksheet.set_column_width(0, 18)?;
for row_num in 0..5 {
worksheet.set_row_height(row_num, 30)?;
}
// Add some descriptive text at the top of the worksheet.
worksheet.write_string_with_format(0, 0, "Alignment formats", &header_format)?;
// Some examples of positional alignment formats.
let center_format = Format::new().set_align(FormatAlign::Center);
worksheet.write_string_with_format(1, 0, "Center", ¢er_format)?;
let top_left_format = Format::new()
.set_align(FormatAlign::Top)
.set_align(FormatAlign::Left);
worksheet.write_string_with_format(2, 0, "Top - Left", &top_left_format)?;
let center_center_format = Format::new()
.set_align(FormatAlign::VerticalCenter)
.set_align(FormatAlign::Center);
worksheet.write_string_with_format(3, 0, "Center - Center", ¢er_center_format)?;
let bottom_right_format = Format::new()
.set_align(FormatAlign::Bottom)
.set_align(FormatAlign::Right);
worksheet.write_string_with_format(4, 0, "Bottom - Right", &bottom_right_format)?;
// Some indentation formats.
let indent1_format = Format::new().set_indent(1);
worksheet.write_string_with_format(5, 0, "Indent 1", &indent1_format)?;
let indent2_format = Format::new().set_indent(2);
worksheet.write_string_with_format(6, 0, "Indent 2", &indent2_format)?;
// Text wrap format.
let text_wrap_format = Format::new().set_text_wrap();
worksheet.write_string_with_format(7, 0, "Some text that is wrapped", &text_wrap_format)?;
worksheet.write_string_with_format(8, 0, "Text\nwrapped\nat newlines", &text_wrap_format)?;
// Shrink text format.
let shrink_format = Format::new().set_shrink();
worksheet.write_string_with_format(9, 0, "Shrink wide text to fit cell", &shrink_format)?;
// Text rotation formats.
let rotate_format1 = Format::new().set_rotation(30);
worksheet.write_string_with_format(10, 0, "Rotate", &rotate_format1)?;
let rotate_format2 = Format::new().set_rotation(-30);
worksheet.write_string_with_format(11, 0, "Rotate", &rotate_format2)?;
let rotate_format3 = Format::new().set_rotation(270);
worksheet.write_string_with_format(12, 0, "Rotate", &rotate_format3)?;
// -----------------------------------------------------------------------
// Create a worksheet that demonstrates font formatting.
// -----------------------------------------------------------------------
let worksheet = workbook.add_worksheet().set_name("Font")?;
// Make the header row and columns taller and wider for clarity.
worksheet.set_column_width(0, 18)?;
worksheet.set_column_width(1, 18)?;
worksheet.set_row_height(0, 25)?;
// Add some descriptive text at the top of the worksheet.
worksheet.write_string_with_format(0, 0, "Font formatting", &header_format)?;
// Different fonts.
worksheet.write_string(1, 0, "Calibri 11 (default font)")?;
let algerian_format = Format::new().set_font_name("Algerian");
worksheet.write_string_with_format(2, 0, "Algerian", &algerian_format)?;
let consolas_format = Format::new().set_font_name("Consolas");
worksheet.write_string_with_format(3, 0, "Consolas", &consolas_format)?;
let comic_sans_format = Format::new().set_font_name("Comic Sans MS");
worksheet.write_string_with_format(4, 0, "Comic Sans MS", &comic_sans_format)?;
// Font styles.
let bold = Format::new().set_bold();
worksheet.write_string_with_format(5, 0, "Bold", &bold)?;
let italic = Format::new().set_italic();
worksheet.write_string_with_format(6, 0, "Italic", &italic)?;
let bold_italic = Format::new().set_bold().set_italic();
worksheet.write_string_with_format(7, 0, "Bold/Italic", &bold_italic)?;
// Font size.
let size_format = Format::new().set_font_size(18);
worksheet.write_string_with_format(8, 0, "Font size 18", &size_format)?;
// Font color.
let font_color_format = Format::new().set_font_color(Color::Red);
worksheet.write_string_with_format(9, 0, "Font color", &font_color_format)?;
// Font underline.
let underline_format = Format::new().set_underline(FormatUnderline::Single);
worksheet.write_string_with_format(10, 0, "Underline", &underline_format)?;
// Font strike-though.
let strikethrough_format = Format::new().set_font_strikethrough();
worksheet.write_string_with_format(11, 0, "Strikethrough", &strikethrough_format)?;
// -----------------------------------------------------------------------
// Create a worksheet that demonstrates border formatting.
// -----------------------------------------------------------------------
let worksheet = workbook.add_worksheet().set_name("Border")?;
// Make the header row and columns taller and wider for clarity.
worksheet.set_column_width(2, 18)?;
worksheet.set_row_height(0, 25)?;
// Add some descriptive text at the top of the worksheet.
worksheet.write_string_with_format(0, 2, "Border formats", &header_format)?;
// Add some borders to cells.
let border_format1 = Format::new().set_border(FormatBorder::Thin);
worksheet.write_string_with_format(2, 2, "Thin Border", &border_format1)?;
let border_format2 = Format::new().set_border(FormatBorder::Dotted);
worksheet.write_string_with_format(4, 2, "Dotted Border", &border_format2)?;
let border_format3 = Format::new().set_border(FormatBorder::Double);
worksheet.write_string_with_format(6, 2, "Double Border", &border_format3)?;
let border_format4 = Format::new()
.set_border(FormatBorder::Thin)
.set_border_color(Color::Red);
worksheet.write_string_with_format(8, 2, "Color Border", &border_format4)?;
// -----------------------------------------------------------------------
// Create a worksheet that demonstrates fill/pattern formatting.
// -----------------------------------------------------------------------
let worksheet = workbook.add_worksheet().set_name("Fill")?;
// Make the header row and columns taller and wider for clarity.
worksheet.set_column_width(1, 18)?;
worksheet.set_row_height(0, 25)?;
// Add some descriptive text at the top of the worksheet.
worksheet.write_string_with_format(0, 1, "Fill formats", &header_format)?;
// Write some cells with pattern fills.
let fill_format1 = Format::new()
.set_background_color(Color::Yellow)
.set_pattern(FormatPattern::Solid);
worksheet.write_string_with_format(2, 1, "Solid fill", &fill_format1)?;
let fill_format2 = Format::new()
.set_background_color(Color::Yellow)
.set_foreground_color(Color::Orange)
.set_pattern(FormatPattern::Gray0625);
worksheet.write_string_with_format(4, 1, "Pattern fill", &fill_format2)?;
// Save the file to disk.
workbook.save("cell_formats.xlsx")?;
Ok(())
}Merging cells: An example of merging cell ranges
This is an example of creating merged cells ranges in Excel using
Worksheet::merge_range().
The merge_range() method only handles strings but it can be used to merge
other data types, such as number, as shown below.
Image of the output file:
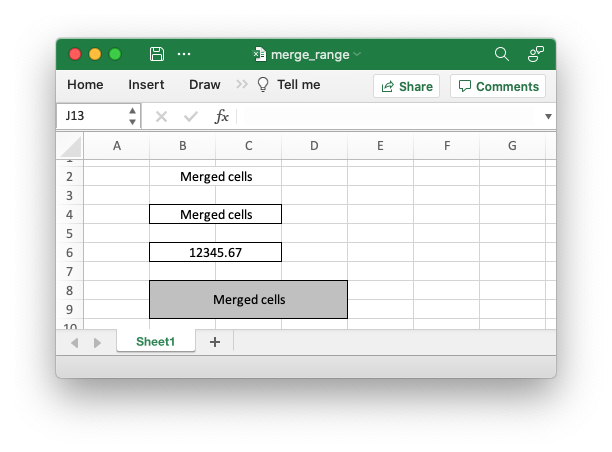
Code to generate the output file:
// SPDX-License-Identifier: MIT OR Apache-2.0
//
// Copyright 2022-2026, John McNamara, jmcnamara@cpan.org

//! An example of creating merged ranges in a worksheet using the
//! `rust_xlsxwriter` library.

use rust_xlsxwriter::{Color, Format, FormatAlign, FormatBorder, Workbook, XlsxError};

fn main() -> Result<(), XlsxError> {
    // Create a new Excel file object.
    let mut workbook = Workbook::new();
    let worksheet = workbook.add_worksheet();

    // Write some merged cells with centering.
    let format = Format::new().set_align(FormatAlign::Center);

    worksheet.merge_range(1, 1, 1, 2, "Merged cells", &format)?;

    // Write some merged cells with centering and a border.
    let format = Format::new()
        .set_align(FormatAlign::Center)
        .set_border(FormatBorder::Thin);

    worksheet.merge_range(3, 1, 3, 2, "Merged cells", &format)?;

    // Write some merged cells with a number by overwriting the first cell in
    // the string merge range with the formatted number.
    worksheet.merge_range(5, 1, 5, 2, "", &format)?;
    worksheet.write_number_with_format(5, 1, 12345.67, &format)?;

    // Example with a more complex format and larger range.
    let format = Format::new()
        .set_align(FormatAlign::Center)
        .set_align(FormatAlign::VerticalCenter)
        .set_border(FormatBorder::Thin)
        .set_background_color(Color::Silver);

    worksheet.merge_range(7, 1, 8, 3, "Merged cells", &format)?;

    // Save the file to disk.
    workbook.save("merge_range.xlsx")?;

    Ok(())
}
Autofilters: Add an autofilter to a worksheet
An example of how to create autofilters with the rust_xlsxwriter library.
An autofilter is a way of adding drop down lists to the headers of a 2D range of worksheet data. This allows users to filter the data based on simple criteria so that some data is shown and some is hidden.
See also Working with Autofilters
Image of the output file:

Code to generate the output file:
// SPDX-License-Identifier: MIT OR Apache-2.0
//
// Copyright 2022-2026, John McNamara, jmcnamara@cpan.org

//! An example of how to create autofilters with the `rust_xlsxwriter` library.
//!
//! An autofilter is a way of adding drop down lists to the headers of a 2D
//! range of worksheet data. This allows users to filter the data based on
//! simple criteria so that some data is shown and some is hidden.
//!

use rust_xlsxwriter::{FilterCondition, FilterCriteria, Format, Workbook, Worksheet, XlsxError};

fn main() -> Result<(), XlsxError> {
    // Create a new Excel file object.
    let mut workbook = Workbook::new();

    // -----------------------------------------------------------------------
    // 1. Add an autofilter to a data range.
    // -----------------------------------------------------------------------

    // Add a worksheet  with some sample data to filter.
    let worksheet = workbook.add_worksheet();
    populate_autofilter_data(worksheet, false)?;

    // Set the autofilter area, including the header/filter row.
    worksheet.autofilter(0, 0, 50, 3)?;

    // -----------------------------------------------------------------------
    // 2. Add an autofilter with a list filter condition.
    // -----------------------------------------------------------------------

    // Add a worksheet  with some sample data to filter.
    let worksheet = workbook.add_worksheet();
    populate_autofilter_data(worksheet, false)?;

    // Set the autofilter area.
    worksheet.autofilter(0, 0, 50, 3)?;

    // Set a filter condition to only show cells matching "East" in the first
    // column.
    let filter_condition = FilterCondition::new().add_list_filter("East");
    worksheet.filter_column(0, &filter_condition)?;

    // -----------------------------------------------------------------------
    // 3. Add an autofilter with a list filter condition on multiple items.
    // -----------------------------------------------------------------------

    // Add a worksheet  with some sample data to filter.
    let worksheet = workbook.add_worksheet();
    populate_autofilter_data(worksheet, false)?;

    // Set the autofilter area.
    worksheet.autofilter(0, 0, 50, 3)?;

    // Set a filter condition to only show cells matching "East", "West" or
    // "South" in the first column.
    let filter_condition = FilterCondition::new()
        .add_list_filter("East")
        .add_list_filter("West")
        .add_list_filter("South");
    worksheet.filter_column(0, &filter_condition)?;

    // -----------------------------------------------------------------------
    // 4. Add an autofilter with a list filter condition to match blank cells.
    // -----------------------------------------------------------------------

    // Add a worksheet  with some sample data to filter.
    let worksheet = workbook.add_worksheet();
    populate_autofilter_data(worksheet, true)?;

    // Set the autofilter area.
    worksheet.autofilter(0, 0, 50, 3)?;

    // Set a filter condition to only show cells matching blanks.
    let filter_condition = FilterCondition::new().add_list_blanks_filter();
    worksheet.filter_column(0, &filter_condition)?;

    // -----------------------------------------------------------------------
    // 5. Add an autofilter with list filters in multiple columns.
    // -----------------------------------------------------------------------

    // Add a worksheet  with some sample data to filter.
    let worksheet = workbook.add_worksheet();
    populate_autofilter_data(worksheet, false)?;

    // Set the autofilter area.
    worksheet.autofilter(0, 0, 50, 3)?;

    // Set a filter condition for 2 separate columns.
    let filter_condition1 = FilterCondition::new().add_list_filter("East");
    worksheet.filter_column(0, &filter_condition1)?;

    let filter_condition2 = FilterCondition::new().add_list_filter("July");
    worksheet.filter_column(3, &filter_condition2)?;

    // -----------------------------------------------------------------------
    // 6. Add an autofilter with custom filter condition.
    // -----------------------------------------------------------------------

    // Add a worksheet  with some sample data to filter.
    let worksheet = workbook.add_worksheet();
    populate_autofilter_data(worksheet, false)?;

    // Set the autofilter area for numbers greater than 8000.
    worksheet.autofilter(0, 0, 50, 3)?;

    // Set a custom number filter.
    let filter_condition =
        FilterCondition::new().add_custom_filter(FilterCriteria::GreaterThan, 8000);
    worksheet.filter_column(2, &filter_condition)?;

    // -----------------------------------------------------------------------
    // 7. Add an autofilter with 2 custom filters to create a "between" condition.
    // -----------------------------------------------------------------------

    // Add a worksheet  with some sample data to filter.
    let worksheet = workbook.add_worksheet();
    populate_autofilter_data(worksheet, false)?;

    // Set the autofilter area.
    worksheet.autofilter(0, 0, 50, 3)?;

    // Set two custom number filters in a "between" configuration.
    let filter_condition = FilterCondition::new()
        .add_custom_filter(FilterCriteria::GreaterThanOrEqualTo, 4000)
        .add_custom_filter(FilterCriteria::LessThanOrEqualTo, 6000);
    worksheet.filter_column(2, &filter_condition)?;

    // -----------------------------------------------------------------------
    // 8. Add an autofilter for non blanks.
    // -----------------------------------------------------------------------

    // Add a worksheet  with some sample data to filter.
    let worksheet = workbook.add_worksheet();
    populate_autofilter_data(worksheet, true)?;

    // Set the autofilter area.
    worksheet.autofilter(0, 0, 50, 3)?;

    // Filter non-blanks by filtering on all the unique non-blank
    // strings/numbers in the column.
    let filter_condition = FilterCondition::new()
        .add_list_filter("East")
        .add_list_filter("West")
        .add_list_filter("North")
        .add_list_filter("South");
    worksheet.filter_column(0, &filter_condition)?;

    // Or you can add a simpler custom filter to get the same result.

    // Set a custom number filter of `!= " "` to filter non blanks.
    let filter_condition =
        FilterCondition::new().add_custom_filter(FilterCriteria::NotEqualTo, " ");
    worksheet.filter_column(0, &filter_condition)?;

    // Save the file to disk.
    workbook.save("autofilter.xlsx")?;

    Ok(())
}

// Generate worksheet data to filter on.
pub fn populate_autofilter_data(
    worksheet: &mut Worksheet,
    add_blanks: bool,
) -> Result<(), XlsxError> {
    // The sample data to add to the worksheet.
    let mut data = vec![
        ("East", "Apple", 9000, "July"),
        ("East", "Apple", 5000, "April"),
        ("South", "Orange", 9000, "September"),
        ("North", "Apple", 2000, "November"),
        ("West", "Apple", 9000, "November"),
        ("South", "Pear", 7000, "October"),
        ("North", "Pear", 9000, "August"),
        ("West", "Orange", 1000, "December"),
        ("West", "Grape", 1000, "November"),
        ("South", "Pear", 10000, "April"),
        ("West", "Grape", 6000, "January"),
        ("South", "Orange", 3000, "May"),
        ("North", "Apple", 3000, "December"),
        ("South", "Apple", 7000, "February"),
        ("West", "Grape", 1000, "December"),
        ("East", "Grape", 8000, "February"),
        ("South", "Grape", 10000, "June"),
        ("West", "Pear", 7000, "December"),
        ("South", "Apple", 2000, "October"),
        ("East", "Grape", 7000, "December"),
        ("North", "Grape", 6000, "July"),
        ("East", "Pear", 8000, "February"),
        ("North", "Apple", 7000, "August"),
        ("North", "Orange", 7000, "July"),
        ("North", "Apple", 6000, "June"),
        ("South", "Grape", 8000, "September"),
        ("West", "Apple", 3000, "October"),
        ("South", "Orange", 10000, "November"),
        ("West", "Grape", 4000, "December"),
        ("North", "Orange", 5000, "August"),
        ("East", "Orange", 1000, "November"),
        ("East", "Orange", 4000, "October"),
        ("North", "Grape", 5000, "August"),
        ("East", "Apple", 1000, "July"),
        ("South", "Apple", 10000, "March"),
        ("East", "Grape", 7000, "October"),
        ("West", "Grape", 1000, "September"),
        ("East", "Grape", 10000, "October"),
        ("South", "Orange", 8000, "March"),
        ("North", "Apple", 4000, "July"),
        ("South", "Orange", 5000, "July"),
        ("West", "Apple", 4000, "June"),
        ("East", "Apple", 5000, "April"),
        ("North", "Pear", 3000, "August"),
        ("East", "Grape", 9000, "November"),
        ("North", "Orange", 8000, "October"),
        ("East", "Apple", 10000, "June"),
        ("South", "Pear", 1000, "December"),
        ("North", "Grape", 10000, "July"),
        ("East", "Grape", 6000, "February"),
    ];

    // Introduce blanks cells for some of the examples.
    if add_blanks {
        data[5].0 = "";
        data[18].0 = "";
        data[30].0 = "";
        data[40].0 = "";
    }

    // Widen the columns for clarity.
    worksheet.set_column_width(0, 12)?;
    worksheet.set_column_width(1, 12)?;
    worksheet.set_column_width(2, 12)?;
    worksheet.set_column_width(3, 12)?;

    // Write the header titles.
    let header_format = Format::new().set_bold();
    worksheet.write_string_with_format(0, 0, "Region", &header_format)?;
    worksheet.write_string_with_format(0, 1, "Item", &header_format)?;
    worksheet.write_string_with_format(0, 2, "Volume", &header_format)?;
    worksheet.write_string_with_format(0, 3, "Month", &header_format)?;

    // Write the other worksheet data.
    for (row, data) in data.iter().enumerate() {
        let row = 1 + row as u32;
        worksheet.write_string(row, 0, data.0)?;
        worksheet.write_string(row, 1, data.1)?;
        worksheet.write_number(row, 2, data.2)?;
        worksheet.write_string(row, 3, data.3)?;
    }

    Ok(())
}
Autofitting Columns: Example of autofitting column widths
This is an example of using the simulated autofit option to automatically set worksheet column widths based on the data in the column.
To get better results for autofitting numbers and dates you can enable the
enhanced_autofit feature in your Cargo.toml file. This uses the ssfmt
crate to more accurately simulate Excel's number formatting.
Image of the output file:
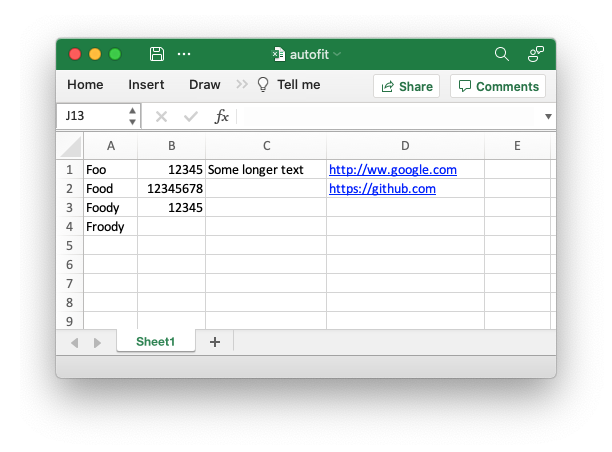
Code to generate the output file:
// SPDX-License-Identifier: MIT OR Apache-2.0
//
// Copyright 2022-2026, John McNamara, jmcnamara@cpan.org

//! An example of using simulated autofit to automatically adjust the width of
//! worksheet columns based on the data in the cells.
//!
//! To get better results for autofitting numbers and dates you can enable the
//! `enhanced_autofit` feature in your `Cargo.toml` file. This uses the `ssfmt`
//! crate to more accurately simulate Excel's number formatting.

use rust_xlsxwriter::{Workbook, XlsxError};

fn main() -> Result<(), XlsxError> {
    // Create a new Excel file object.
    let mut workbook = Workbook::new();

    // Add a worksheet to the workbook.
    let worksheet = workbook.add_worksheet();

    // Write some worksheet data to demonstrate autofitting.
    worksheet.write_string(0, 0, "Foo")?;
    worksheet.write_string(1, 0, "Food")?;
    worksheet.write_string(2, 0, "Foody")?;
    worksheet.write_string(3, 0, "Froody")?;

    worksheet.write_number(0, 1, 12345)?;
    worksheet.write_number(1, 1, 12345678)?;
    worksheet.write_number(2, 1, 12345)?;

    worksheet.write_string(0, 2, "Some longer text")?;

    worksheet.write_url(0, 3, "http://ww.google.com")?;
    worksheet.write_url(1, 3, "https://github.com")?;

    // Autofit the worksheet.
    worksheet.autofit();

    // Save the file to disk.
    workbook.save("autofit.xlsx")?;

    Ok(())
}
Tables: Adding worksheet tables
Tables in Excel are a way of grouping a range of cells into a single entity that has common formatting or that can be referenced from formulas. Tables can have column headers, autofilters, total rows, column formulas and different formatting styles.
The image below shows a default table in Excel with the default properties shown in the ribbon bar.
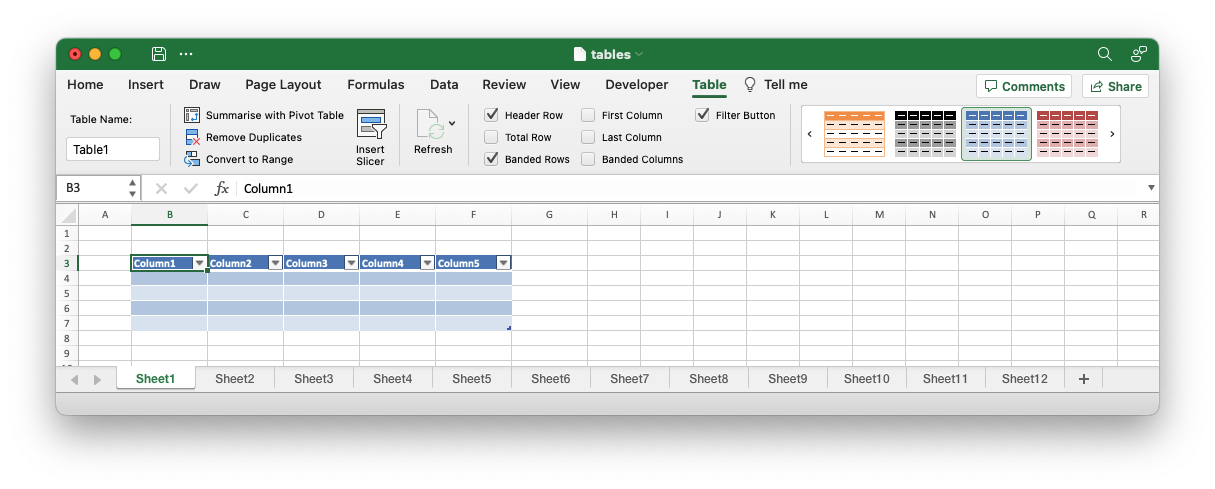
A table is added to a worksheet via the Worksheet::add_table()method. The
headers and total row of a table should be configured via a Table struct but
the table data can be added via standard Worksheet::write()methods.
Some examples:
Example 1. Default table with no data.
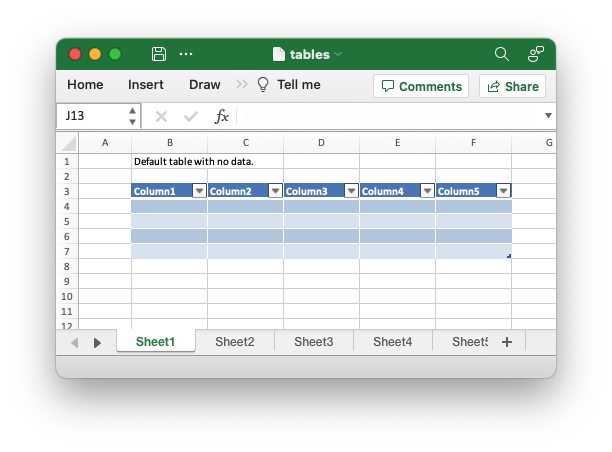
Code to generate the above example:
// SPDX-License-Identifier: MIT OR Apache-2.0
//
// Copyright 2022-2026, John McNamara, jmcnamara@cpan.org

//! Example of how to add tables to a worksheet using the `rust_xlsxwriter`
//! library.
//!
//! Tables in Excel are used to group rows and columns of data into a single
//! structure that can be referenced in a formula or formatted collectively.

use rust_xlsxwriter::{Table, TableColumn, TableFunction, TableStyle, Workbook, XlsxError};

fn main() -> Result<(), XlsxError> {
    // Create a new Excel file object.
    let mut workbook = Workbook::new();

    // Some sample data for the table.
    let items = ["Apples", "Pears", "Bananas", "Oranges"];
    let data = [
        [10000, 5000, 8000, 6000],
        [2000, 3000, 4000, 5000],
        [6000, 6000, 6500, 6000],
        [500, 300, 200, 700],
    ];

    // -----------------------------------------------------------------------
    // Example 1. Default table with no data.
    // -----------------------------------------------------------------------

    // Add a worksheet to the workbook.
    let worksheet = workbook.add_worksheet();

    let caption = "Default table with no data.";

    // Set the column widths for clarity.
    worksheet.set_column_range_width(1, 6, 12)?;

    // Write the caption.
    worksheet.write(0, 1, caption)?;

    // Create a new table.
    let table = Table::new();

    // Add the table to the worksheet.
    worksheet.add_table(2, 1, 6, 5, &table)?;

    // -----------------------------------------------------------------------
    // Example 2. Default table with data.
    // -----------------------------------------------------------------------

    // Add a worksheet to the workbook.
    let worksheet = workbook.add_worksheet();

    let caption = "Default table with data.";

    // Set the column widths for clarity.
    worksheet.set_column_range_width(1, 6, 12)?;

    // Write the caption.
    worksheet.write(0, 1, caption)?;

    // Write the table data.
    worksheet.write_column(3, 1, items)?;
    worksheet.write_row_matrix(3, 2, data)?;

    // Create a new table.
    let table = Table::new();

    // Add the table to the worksheet.
    worksheet.add_table(2, 1, 6, 5, &table)?;

    // -----------------------------------------------------------------------
    // Example 3. Table without default autofilter.
    // -----------------------------------------------------------------------

    // Add a worksheet to the workbook.
    let worksheet = workbook.add_worksheet();

    let caption = "Table without default autofilter.";

    // Set the column widths for clarity.
    worksheet.set_column_range_width(1, 6, 12)?;

    // Write the caption.
    worksheet.write(0, 1, caption)?;

    // Write the table data.
    worksheet.write_column(3, 1, items)?;
    worksheet.write_row_matrix(3, 2, data)?;

    // Create and configure a new table.
    let table = Table::new().set_autofilter(false);

    // Add the table to the worksheet.
    worksheet.add_table(2, 1, 6, 5, &table)?;

    // -----------------------------------------------------------------------
    // Example 4. Table without default header row.
    // -----------------------------------------------------------------------

    // Add a worksheet to the workbook.
    let worksheet = workbook.add_worksheet();

    let caption = "Table without default header row.";

    // Set the column widths for clarity.
    worksheet.set_column_range_width(1, 6, 12)?;

    // Write the caption.
    worksheet.write(0, 1, caption)?;

    // Write the table data.
    worksheet.write_column(3, 1, items)?;
    worksheet.write_row_matrix(3, 2, data)?;

    // Create and configure a new table.
    let table = Table::new().set_header_row(false);

    // Add the table to the worksheet.
    worksheet.add_table(3, 1, 6, 5, &table)?;

    // -----------------------------------------------------------------------
    // Example 5. Default table with "First Column" and "Last Column" options.
    // -----------------------------------------------------------------------

    // Add a worksheet to the workbook.
    let worksheet = workbook.add_worksheet();

    let caption = "Default table with 'First Column' and 'Last Column' options.";

    // Set the column widths for clarity.
    worksheet.set_column_range_width(1, 6, 12)?;

    // Write the caption.
    worksheet.write(0, 1, caption)?;

    // Write the table data.
    worksheet.write_column(3, 1, items)?;
    worksheet.write_row_matrix(3, 2, data)?;

    // Create and configure a new table.
    let table = Table::new().set_first_column(true).set_last_column(true);

    // Add the table to the worksheet.
    worksheet.add_table(2, 1, 6, 5, &table)?;

    // -----------------------------------------------------------------------
    // Example 6. Table with banded columns but without default banded rows.
    // -----------------------------------------------------------------------

    // Add a worksheet to the workbook.
    let worksheet = workbook.add_worksheet();

    let caption = "Table with banded columns but without default banded rows.";

    // Set the column widths for clarity.
    worksheet.set_column_range_width(1, 6, 12)?;

    // Write the caption.
    worksheet.write(0, 1, caption)?;

    // Write the table data.
    worksheet.write_column(3, 1, items)?;
    worksheet.write_row_matrix(3, 2, data)?;

    // Create and configure a new table.
    let table = Table::new().set_banded_rows(false).set_banded_columns(true);

    // Add the table to the worksheet.
    worksheet.add_table(2, 1, 6, 5, &table)?;

    // -----------------------------------------------------------------------
    // Example 7. Table with user defined column headers.
    // -----------------------------------------------------------------------

    // Add a worksheet to the workbook.
    let worksheet = workbook.add_worksheet();

    let caption = "Table with user defined column headers.";

    // Set the column widths for clarity.
    worksheet.set_column_range_width(1, 6, 12)?;

    // Write the caption.
    worksheet.write(0, 1, caption)?;

    // Write the table data.
    worksheet.write_column(3, 1, items)?;
    worksheet.write_row_matrix(3, 2, data)?;

    // Create and configure a new table.
    let columns = vec![
        TableColumn::new().set_header("Product"),
        TableColumn::new().set_header("Quarter 1"),
        TableColumn::new().set_header("Quarter 2"),
        TableColumn::new().set_header("Quarter 3"),
        TableColumn::new().set_header("Quarter 4"),
    ];

    let table = Table::new().set_columns(&columns);

    // Add the table to the worksheet.
    worksheet.add_table(2, 1, 6, 5, &table)?;

    // -----------------------------------------------------------------------
    // Example 8. Table with user defined column headers, and formulas.
    // -----------------------------------------------------------------------

    // Add a worksheet to the workbook.
    let worksheet = workbook.add_worksheet();

    let caption = "Table with user defined column headers, and formulas.";

    // Set the column widths for clarity.
    worksheet.set_column_range_width(1, 6, 12)?;

    // Write the caption.
    worksheet.write(0, 1, caption)?;

    // Write the table data.
    worksheet.write_column(3, 1, items)?;
    worksheet.write_row_matrix(3, 2, data)?;

    // Create and configure a new table.
    let columns = vec![
        TableColumn::new().set_header("Product"),
        TableColumn::new().set_header("Quarter 1"),
        TableColumn::new().set_header("Quarter 2"),
        TableColumn::new().set_header("Quarter 3"),
        TableColumn::new().set_header("Quarter 4"),
        TableColumn::new()
            .set_header("Year")
            .set_formula("SUM(Table8[@[Quarter 1]:[Quarter 4]])"),
    ];

    let table = Table::new().set_columns(&columns);

    // Add the table to the worksheet.
    worksheet.add_table(2, 1, 6, 6, &table)?;

    // -----------------------------------------------------------------------
    // Example 9. Table with totals row (but no caption or totals).
    // -----------------------------------------------------------------------

    // Add a worksheet to the workbook.
    let worksheet = workbook.add_worksheet();

    let caption = "Table with totals row (but no caption or totals).";

    // Set the column widths for clarity.
    worksheet.set_column_range_width(1, 6, 12)?;

    // Write the caption.
    worksheet.write(0, 1, caption)?;

    // Write the table data.
    worksheet.write_column(3, 1, items)?;
    worksheet.write_row_matrix(3, 2, data)?;

    // Create and configure a new table.
    let columns = vec![
        TableColumn::new().set_header("Product"),
        TableColumn::new().set_header("Quarter 1"),
        TableColumn::new().set_header("Quarter 2"),
        TableColumn::new().set_header("Quarter 3"),
        TableColumn::new().set_header("Quarter 4"),
        TableColumn::new()
            .set_header("Year")
            .set_formula("SUM(Table9[@[Quarter 1]:[Quarter 4]])"),
    ];

    let table = Table::new().set_columns(&columns).set_total_row(true);

    // Add the table to the worksheet.
    worksheet.add_table(2, 1, 7, 6, &table)?;

    // -----------------------------------------------------------------------
    // Example 10. Table with totals row with user captions and functions.
    // -----------------------------------------------------------------------

    // Add a worksheet to the workbook.
    let worksheet = workbook.add_worksheet();

    let caption = "Table with totals row with user captions and functions.";

    // Set the column widths for clarity.
    worksheet.set_column_range_width(1, 6, 12)?;

    // Write the caption.
    worksheet.write(0, 1, caption)?;

    // Write the table data.
    worksheet.write_column(3, 1, items)?;
    worksheet.write_row_matrix(3, 2, data)?;

    // Create and configure a new table.
    let columns = vec![
        TableColumn::new()
            .set_header("Product")
            .set_total_label("Totals"),
        TableColumn::new()
            .set_header("Quarter 1")
            .set_total_function(TableFunction::Sum),
        TableColumn::new()
            .set_header("Quarter 2")
            .set_total_function(TableFunction::Sum),
        TableColumn::new()
            .set_header("Quarter 3")
            .set_total_function(TableFunction::Sum),
        TableColumn::new()
            .set_header("Quarter 4")
            .set_total_function(TableFunction::Sum),
        TableColumn::new()
            .set_header("Year")
            .set_total_function(TableFunction::Sum)
            .set_formula("SUM(Table10[@[Quarter 1]:[Quarter 4]])"),
    ];

    let table = Table::new().set_columns(&columns).set_total_row(true);

    // Add the table to the worksheet.
    worksheet.add_table(2, 1, 7, 6, &table)?;

    // -----------------------------------------------------------------------
    // Example 11. Table with alternative Excel style.
    // -----------------------------------------------------------------------

    // Add a worksheet to the workbook.
    let worksheet = workbook.add_worksheet();

    let caption = "Table with alternative Excel style.";

    // Set the column widths for clarity.
    worksheet.set_column_range_width(1, 6, 12)?;

    // Write the caption.
    worksheet.write(0, 1, caption)?;

    // Write the table data.
    worksheet.write_column(3, 1, items)?;
    worksheet.write_row_matrix(3, 2, data)?;

    // Create and configure a new table.
    let columns = vec![
        TableColumn::new()
            .set_header("Product")
            .set_total_label("Totals"),
        TableColumn::new()
            .set_header("Quarter 1")
            .set_total_function(TableFunction::Sum),
        TableColumn::new()
            .set_header("Quarter 2")
            .set_total_function(TableFunction::Sum),
        TableColumn::new()
            .set_header("Quarter 3")
            .set_total_function(TableFunction::Sum),
        TableColumn::new()
            .set_header("Quarter 4")
            .set_total_function(TableFunction::Sum),
        TableColumn::new()
            .set_header("Year")
            .set_total_function(TableFunction::Sum)
            .set_formula("SUM(Table11[@[Quarter 1]:[Quarter 4]])"),
    ];

    let table = Table::new()
        .set_columns(&columns)
        .set_total_row(true)
        .set_style(TableStyle::Light11);

    // Add the table to the worksheet.
    worksheet.add_table(2, 1, 7, 6, &table)?;

    // -----------------------------------------------------------------------
    // Example 12. Table with Excel style removed.
    // -----------------------------------------------------------------------

    // Add a worksheet to the workbook.
    let worksheet = workbook.add_worksheet();

    let caption = "Table with Excel style removed.";

    // Set the column widths for clarity.
    worksheet.set_column_range_width(1, 6, 12)?;

    // Write the caption.
    worksheet.write(0, 1, caption)?;

    // Write the table data.
    worksheet.write_column(3, 1, items)?;
    worksheet.write_row_matrix(3, 2, data)?;

    // Create and configure a new table.
    let columns = vec![
        TableColumn::new()
            .set_header("Product")
            .set_total_label("Totals"),
        TableColumn::new()
            .set_header("Quarter 1")
            .set_total_function(TableFunction::Sum),
        TableColumn::new()
            .set_header("Quarter 2")
            .set_total_function(TableFunction::Sum),
        TableColumn::new()
            .set_header("Quarter 3")
            .set_total_function(TableFunction::Sum),
        TableColumn::new()
            .set_header("Quarter 4")
            .set_total_function(TableFunction::Sum),
        TableColumn::new()
            .set_header("Year")
            .set_total_function(TableFunction::Sum)
            .set_formula("SUM(Table12[@[Quarter 1]:[Quarter 4]])"),
    ];

    let table = Table::new()
        .set_columns(&columns)
        .set_total_row(true)
        .set_style(TableStyle::None);

    // Add the table to the worksheet.
    worksheet.add_table(2, 1, 7, 6, &table)?;

    // Save the file to disk.
    workbook.save("tables.xlsx")?;

    Ok(())
}
Example 2. Default table with data.
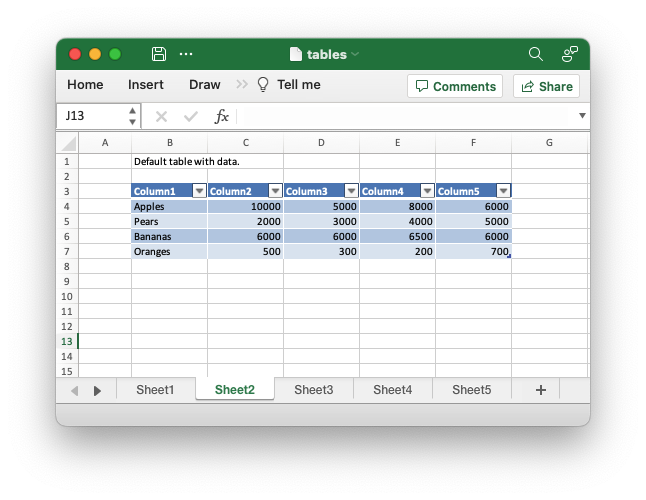
Code to generate the above example:
// SPDX-License-Identifier: MIT OR Apache-2.0
//
// Copyright 2022-2026, John McNamara, jmcnamara@cpan.org

//! Example of how to add tables to a worksheet using the `rust_xlsxwriter`
//! library.
//!
//! Tables in Excel are used to group rows and columns of data into a single
//! structure that can be referenced in a formula or formatted collectively.

use rust_xlsxwriter::{Table, TableColumn, TableFunction, TableStyle, Workbook, XlsxError};

fn main() -> Result<(), XlsxError> {
    // Create a new Excel file object.
    let mut workbook = Workbook::new();

    // Some sample data for the table.
    let items = ["Apples", "Pears", "Bananas", "Oranges"];
    let data = [
        [10000, 5000, 8000, 6000],
        [2000, 3000, 4000, 5000],
        [6000, 6000, 6500, 6000],
        [500, 300, 200, 700],
    ];

    // -----------------------------------------------------------------------
    // Example 1. Default table with no data.
    // -----------------------------------------------------------------------

    // Add a worksheet to the workbook.
    let worksheet = workbook.add_worksheet();

    let caption = "Default table with no data.";

    // Set the column widths for clarity.
    worksheet.set_column_range_width(1, 6, 12)?;

    // Write the caption.
    worksheet.write(0, 1, caption)?;

    // Create a new table.
    let table = Table::new();

    // Add the table to the worksheet.
    worksheet.add_table(2, 1, 6, 5, &table)?;

    // -----------------------------------------------------------------------
    // Example 2. Default table with data.
    // -----------------------------------------------------------------------

    // Add a worksheet to the workbook.
    let worksheet = workbook.add_worksheet();

    let caption = "Default table with data.";

    // Set the column widths for clarity.
    worksheet.set_column_range_width(1, 6, 12)?;

    // Write the caption.
    worksheet.write(0, 1, caption)?;

    // Write the table data.
    worksheet.write_column(3, 1, items)?;
    worksheet.write_row_matrix(3, 2, data)?;

    // Create a new table.
    let table = Table::new();

    // Add the table to the worksheet.
    worksheet.add_table(2, 1, 6, 5, &table)?;

    // -----------------------------------------------------------------------
    // Example 3. Table without default autofilter.
    // -----------------------------------------------------------------------

    // Add a worksheet to the workbook.
    let worksheet = workbook.add_worksheet();

    let caption = "Table without default autofilter.";

    // Set the column widths for clarity.
    worksheet.set_column_range_width(1, 6, 12)?;

    // Write the caption.
    worksheet.write(0, 1, caption)?;

    // Write the table data.
    worksheet.write_column(3, 1, items)?;
    worksheet.write_row_matrix(3, 2, data)?;

    // Create and configure a new table.
    let table = Table::new().set_autofilter(false);

    // Add the table to the worksheet.
    worksheet.add_table(2, 1, 6, 5, &table)?;

    // -----------------------------------------------------------------------
    // Example 4. Table without default header row.
    // -----------------------------------------------------------------------

    // Add a worksheet to the workbook.
    let worksheet = workbook.add_worksheet();

    let caption = "Table without default header row.";

    // Set the column widths for clarity.
    worksheet.set_column_range_width(1, 6, 12)?;

    // Write the caption.
    worksheet.write(0, 1, caption)?;

    // Write the table data.
    worksheet.write_column(3, 1, items)?;
    worksheet.write_row_matrix(3, 2, data)?;

    // Create and configure a new table.
    let table = Table::new().set_header_row(false);

    // Add the table to the worksheet.
    worksheet.add_table(3, 1, 6, 5, &table)?;

    // -----------------------------------------------------------------------
    // Example 5. Default table with "First Column" and "Last Column" options.
    // -----------------------------------------------------------------------

    // Add a worksheet to the workbook.
    let worksheet = workbook.add_worksheet();

    let caption = "Default table with 'First Column' and 'Last Column' options.";

    // Set the column widths for clarity.
    worksheet.set_column_range_width(1, 6, 12)?;

    // Write the caption.
    worksheet.write(0, 1, caption)?;

    // Write the table data.
    worksheet.write_column(3, 1, items)?;
    worksheet.write_row_matrix(3, 2, data)?;

    // Create and configure a new table.
    let table = Table::new().set_first_column(true).set_last_column(true);

    // Add the table to the worksheet.
    worksheet.add_table(2, 1, 6, 5, &table)?;

    // -----------------------------------------------------------------------
    // Example 6. Table with banded columns but without default banded rows.
    // -----------------------------------------------------------------------

    // Add a worksheet to the workbook.
    let worksheet = workbook.add_worksheet();

    let caption = "Table with banded columns but without default banded rows.";

    // Set the column widths for clarity.
    worksheet.set_column_range_width(1, 6, 12)?;

    // Write the caption.
    worksheet.write(0, 1, caption)?;

    // Write the table data.
    worksheet.write_column(3, 1, items)?;
    worksheet.write_row_matrix(3, 2, data)?;

    // Create and configure a new table.
    let table = Table::new().set_banded_rows(false).set_banded_columns(true);

    // Add the table to the worksheet.
    worksheet.add_table(2, 1, 6, 5, &table)?;

    // -----------------------------------------------------------------------
    // Example 7. Table with user defined column headers.
    // -----------------------------------------------------------------------

    // Add a worksheet to the workbook.
    let worksheet = workbook.add_worksheet();

    let caption = "Table with user defined column headers.";

    // Set the column widths for clarity.
    worksheet.set_column_range_width(1, 6, 12)?;

    // Write the caption.
    worksheet.write(0, 1, caption)?;

    // Write the table data.
    worksheet.write_column(3, 1, items)?;
    worksheet.write_row_matrix(3, 2, data)?;

    // Create and configure a new table.
    let columns = vec![
        TableColumn::new().set_header("Product"),
        TableColumn::new().set_header("Quarter 1"),
        TableColumn::new().set_header("Quarter 2"),
        TableColumn::new().set_header("Quarter 3"),
        TableColumn::new().set_header("Quarter 4"),
    ];

    let table = Table::new().set_columns(&columns);

    // Add the table to the worksheet.
    worksheet.add_table(2, 1, 6, 5, &table)?;

    // -----------------------------------------------------------------------
    // Example 8. Table with user defined column headers, and formulas.
    // -----------------------------------------------------------------------

    // Add a worksheet to the workbook.
    let worksheet = workbook.add_worksheet();

    let caption = "Table with user defined column headers, and formulas.";

    // Set the column widths for clarity.
    worksheet.set_column_range_width(1, 6, 12)?;

    // Write the caption.
    worksheet.write(0, 1, caption)?;

    // Write the table data.
    worksheet.write_column(3, 1, items)?;
    worksheet.write_row_matrix(3, 2, data)?;

    // Create and configure a new table.
    let columns = vec![
        TableColumn::new().set_header("Product"),
        TableColumn::new().set_header("Quarter 1"),
        TableColumn::new().set_header("Quarter 2"),
        TableColumn::new().set_header("Quarter 3"),
        TableColumn::new().set_header("Quarter 4"),
        TableColumn::new()
            .set_header("Year")
            .set_formula("SUM(Table8[@[Quarter 1]:[Quarter 4]])"),
    ];

    let table = Table::new().set_columns(&columns);

    // Add the table to the worksheet.
    worksheet.add_table(2, 1, 6, 6, &table)?;

    // -----------------------------------------------------------------------
    // Example 9. Table with totals row (but no caption or totals).
    // -----------------------------------------------------------------------

    // Add a worksheet to the workbook.
    let worksheet = workbook.add_worksheet();

    let caption = "Table with totals row (but no caption or totals).";

    // Set the column widths for clarity.
    worksheet.set_column_range_width(1, 6, 12)?;

    // Write the caption.
    worksheet.write(0, 1, caption)?;

    // Write the table data.
    worksheet.write_column(3, 1, items)?;
    worksheet.write_row_matrix(3, 2, data)?;

    // Create and configure a new table.
    let columns = vec![
        TableColumn::new().set_header("Product"),
        TableColumn::new().set_header("Quarter 1"),
        TableColumn::new().set_header("Quarter 2"),
        TableColumn::new().set_header("Quarter 3"),
        TableColumn::new().set_header("Quarter 4"),
        TableColumn::new()
            .set_header("Year")
            .set_formula("SUM(Table9[@[Quarter 1]:[Quarter 4]])"),
    ];

    let table = Table::new().set_columns(&columns).set_total_row(true);

    // Add the table to the worksheet.
    worksheet.add_table(2, 1, 7, 6, &table)?;

    // -----------------------------------------------------------------------
    // Example 10. Table with totals row with user captions and functions.
    // -----------------------------------------------------------------------

    // Add a worksheet to the workbook.
    let worksheet = workbook.add_worksheet();

    let caption = "Table with totals row with user captions and functions.";

    // Set the column widths for clarity.
    worksheet.set_column_range_width(1, 6, 12)?;

    // Write the caption.
    worksheet.write(0, 1, caption)?;

    // Write the table data.
    worksheet.write_column(3, 1, items)?;
    worksheet.write_row_matrix(3, 2, data)?;

    // Create and configure a new table.
    let columns = vec![
        TableColumn::new()
            .set_header("Product")
            .set_total_label("Totals"),
        TableColumn::new()
            .set_header("Quarter 1")
            .set_total_function(TableFunction::Sum),
        TableColumn::new()
            .set_header("Quarter 2")
            .set_total_function(TableFunction::Sum),
        TableColumn::new()
            .set_header("Quarter 3")
            .set_total_function(TableFunction::Sum),
        TableColumn::new()
            .set_header("Quarter 4")
            .set_total_function(TableFunction::Sum),
        TableColumn::new()
            .set_header("Year")
            .set_total_function(TableFunction::Sum)
            .set_formula("SUM(Table10[@[Quarter 1]:[Quarter 4]])"),
    ];

    let table = Table::new().set_columns(&columns).set_total_row(true);

    // Add the table to the worksheet.
    worksheet.add_table(2, 1, 7, 6, &table)?;

    // -----------------------------------------------------------------------
    // Example 11. Table with alternative Excel style.
    // -----------------------------------------------------------------------

    // Add a worksheet to the workbook.
    let worksheet = workbook.add_worksheet();

    let caption = "Table with alternative Excel style.";

    // Set the column widths for clarity.
    worksheet.set_column_range_width(1, 6, 12)?;

    // Write the caption.
    worksheet.write(0, 1, caption)?;

    // Write the table data.
    worksheet.write_column(3, 1, items)?;
    worksheet.write_row_matrix(3, 2, data)?;

    // Create and configure a new table.
    let columns = vec![
        TableColumn::new()
            .set_header("Product")
            .set_total_label("Totals"),
        TableColumn::new()
            .set_header("Quarter 1")
            .set_total_function(TableFunction::Sum),
        TableColumn::new()
            .set_header("Quarter 2")
            .set_total_function(TableFunction::Sum),
        TableColumn::new()
            .set_header("Quarter 3")
            .set_total_function(TableFunction::Sum),
        TableColumn::new()
            .set_header("Quarter 4")
            .set_total_function(TableFunction::Sum),
        TableColumn::new()
            .set_header("Year")
            .set_total_function(TableFunction::Sum)
            .set_formula("SUM(Table11[@[Quarter 1]:[Quarter 4]])"),
    ];

    let table = Table::new()
        .set_columns(&columns)
        .set_total_row(true)
        .set_style(TableStyle::Light11);

    // Add the table to the worksheet.
    worksheet.add_table(2, 1, 7, 6, &table)?;

    // -----------------------------------------------------------------------
    // Example 12. Table with Excel style removed.
    // -----------------------------------------------------------------------

    // Add a worksheet to the workbook.
    let worksheet = workbook.add_worksheet();

    let caption = "Table with Excel style removed.";

    // Set the column widths for clarity.
    worksheet.set_column_range_width(1, 6, 12)?;

    // Write the caption.
    worksheet.write(0, 1, caption)?;

    // Write the table data.
    worksheet.write_column(3, 1, items)?;
    worksheet.write_row_matrix(3, 2, data)?;

    // Create and configure a new table.
    let columns = vec![
        TableColumn::new()
            .set_header("Product")
            .set_total_label("Totals"),
        TableColumn::new()
            .set_header("Quarter 1")
            .set_total_function(TableFunction::Sum),
        TableColumn::new()
            .set_header("Quarter 2")
            .set_total_function(TableFunction::Sum),
        TableColumn::new()
            .set_header("Quarter 3")
            .set_total_function(TableFunction::Sum),
        TableColumn::new()
            .set_header("Quarter 4")
            .set_total_function(TableFunction::Sum),
        TableColumn::new()
            .set_header("Year")
            .set_total_function(TableFunction::Sum)
            .set_formula("SUM(Table12[@[Quarter 1]:[Quarter 4]])"),
    ];

    let table = Table::new()
        .set_columns(&columns)
        .set_total_row(true)
        .set_style(TableStyle::None);

    // Add the table to the worksheet.
    worksheet.add_table(2, 1, 7, 6, &table)?;

    // Save the file to disk.
    workbook.save("tables.xlsx")?;

    Ok(())
}
Example 3. Table without default autofilter.
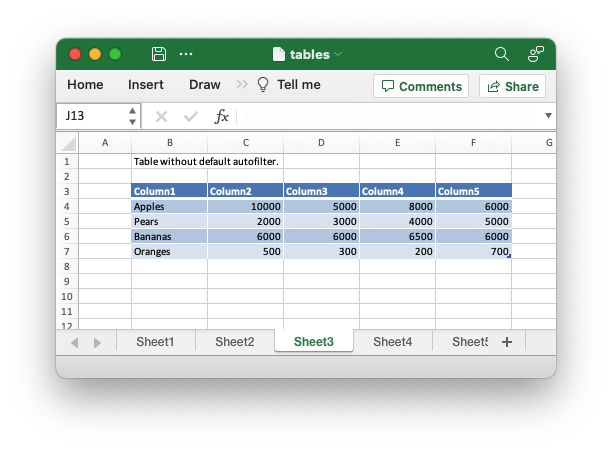
Code to generate the above example:
// SPDX-License-Identifier: MIT OR Apache-2.0
//
// Copyright 2022-2026, John McNamara, jmcnamara@cpan.org

//! Example of how to add tables to a worksheet using the `rust_xlsxwriter`
//! library.
//!
//! Tables in Excel are used to group rows and columns of data into a single
//! structure that can be referenced in a formula or formatted collectively.

use rust_xlsxwriter::{Table, TableColumn, TableFunction, TableStyle, Workbook, XlsxError};

fn main() -> Result<(), XlsxError> {
    // Create a new Excel file object.
    let mut workbook = Workbook::new();

    // Some sample data for the table.
    let items = ["Apples", "Pears", "Bananas", "Oranges"];
    let data = [
        [10000, 5000, 8000, 6000],
        [2000, 3000, 4000, 5000],
        [6000, 6000, 6500, 6000],
        [500, 300, 200, 700],
    ];

    // -----------------------------------------------------------------------
    // Example 1. Default table with no data.
    // -----------------------------------------------------------------------

    // Add a worksheet to the workbook.
    let worksheet = workbook.add_worksheet();

    let caption = "Default table with no data.";

    // Set the column widths for clarity.
    worksheet.set_column_range_width(1, 6, 12)?;

    // Write the caption.
    worksheet.write(0, 1, caption)?;

    // Create a new table.
    let table = Table::new();

    // Add the table to the worksheet.
    worksheet.add_table(2, 1, 6, 5, &table)?;

    // -----------------------------------------------------------------------
    // Example 2. Default table with data.
    // -----------------------------------------------------------------------

    // Add a worksheet to the workbook.
    let worksheet = workbook.add_worksheet();

    let caption = "Default table with data.";

    // Set the column widths for clarity.
    worksheet.set_column_range_width(1, 6, 12)?;

    // Write the caption.
    worksheet.write(0, 1, caption)?;

    // Write the table data.
    worksheet.write_column(3, 1, items)?;
    worksheet.write_row_matrix(3, 2, data)?;

    // Create a new table.
    let table = Table::new();

    // Add the table to the worksheet.
    worksheet.add_table(2, 1, 6, 5, &table)?;

    // -----------------------------------------------------------------------
    // Example 3. Table without default autofilter.
    // -----------------------------------------------------------------------

    // Add a worksheet to the workbook.
    let worksheet = workbook.add_worksheet();

    let caption = "Table without default autofilter.";

    // Set the column widths for clarity.
    worksheet.set_column_range_width(1, 6, 12)?;

    // Write the caption.
    worksheet.write(0, 1, caption)?;

    // Write the table data.
    worksheet.write_column(3, 1, items)?;
    worksheet.write_row_matrix(3, 2, data)?;

    // Create and configure a new table.
    let table = Table::new().set_autofilter(false);

    // Add the table to the worksheet.
    worksheet.add_table(2, 1, 6, 5, &table)?;

    // -----------------------------------------------------------------------
    // Example 4. Table without default header row.
    // -----------------------------------------------------------------------

    // Add a worksheet to the workbook.
    let worksheet = workbook.add_worksheet();

    let caption = "Table without default header row.";

    // Set the column widths for clarity.
    worksheet.set_column_range_width(1, 6, 12)?;

    // Write the caption.
    worksheet.write(0, 1, caption)?;

    // Write the table data.
    worksheet.write_column(3, 1, items)?;
    worksheet.write_row_matrix(3, 2, data)?;

    // Create and configure a new table.
    let table = Table::new().set_header_row(false);

    // Add the table to the worksheet.
    worksheet.add_table(3, 1, 6, 5, &table)?;

    // -----------------------------------------------------------------------
    // Example 5. Default table with "First Column" and "Last Column" options.
    // -----------------------------------------------------------------------

    // Add a worksheet to the workbook.
    let worksheet = workbook.add_worksheet();

    let caption = "Default table with 'First Column' and 'Last Column' options.";

    // Set the column widths for clarity.
    worksheet.set_column_range_width(1, 6, 12)?;

    // Write the caption.
    worksheet.write(0, 1, caption)?;

    // Write the table data.
    worksheet.write_column(3, 1, items)?;
    worksheet.write_row_matrix(3, 2, data)?;

    // Create and configure a new table.
    let table = Table::new().set_first_column(true).set_last_column(true);

    // Add the table to the worksheet.
    worksheet.add_table(2, 1, 6, 5, &table)?;

    // -----------------------------------------------------------------------
    // Example 6. Table with banded columns but without default banded rows.
    // -----------------------------------------------------------------------

    // Add a worksheet to the workbook.
    let worksheet = workbook.add_worksheet();

    let caption = "Table with banded columns but without default banded rows.";

    // Set the column widths for clarity.
    worksheet.set_column_range_width(1, 6, 12)?;

    // Write the caption.
    worksheet.write(0, 1, caption)?;

    // Write the table data.
    worksheet.write_column(3, 1, items)?;
    worksheet.write_row_matrix(3, 2, data)?;

    // Create and configure a new table.
    let table = Table::new().set_banded_rows(false).set_banded_columns(true);

    // Add the table to the worksheet.
    worksheet.add_table(2, 1, 6, 5, &table)?;

    // -----------------------------------------------------------------------
    // Example 7. Table with user defined column headers.
    // -----------------------------------------------------------------------

    // Add a worksheet to the workbook.
    let worksheet = workbook.add_worksheet();

    let caption = "Table with user defined column headers.";

    // Set the column widths for clarity.
    worksheet.set_column_range_width(1, 6, 12)?;

    // Write the caption.
    worksheet.write(0, 1, caption)?;

    // Write the table data.
    worksheet.write_column(3, 1, items)?;
    worksheet.write_row_matrix(3, 2, data)?;

    // Create and configure a new table.
    let columns = vec![
        TableColumn::new().set_header("Product"),
        TableColumn::new().set_header("Quarter 1"),
        TableColumn::new().set_header("Quarter 2"),
        TableColumn::new().set_header("Quarter 3"),
        TableColumn::new().set_header("Quarter 4"),
    ];

    let table = Table::new().set_columns(&columns);

    // Add the table to the worksheet.
    worksheet.add_table(2, 1, 6, 5, &table)?;

    // -----------------------------------------------------------------------
    // Example 8. Table with user defined column headers, and formulas.
    // -----------------------------------------------------------------------

    // Add a worksheet to the workbook.
    let worksheet = workbook.add_worksheet();

    let caption = "Table with user defined column headers, and formulas.";

    // Set the column widths for clarity.
    worksheet.set_column_range_width(1, 6, 12)?;

    // Write the caption.
    worksheet.write(0, 1, caption)?;

    // Write the table data.
    worksheet.write_column(3, 1, items)?;
    worksheet.write_row_matrix(3, 2, data)?;

    // Create and configure a new table.
    let columns = vec![
        TableColumn::new().set_header("Product"),
        TableColumn::new().set_header("Quarter 1"),
        TableColumn::new().set_header("Quarter 2"),
        TableColumn::new().set_header("Quarter 3"),
        TableColumn::new().set_header("Quarter 4"),
        TableColumn::new()
            .set_header("Year")
            .set_formula("SUM(Table8[@[Quarter 1]:[Quarter 4]])"),
    ];

    let table = Table::new().set_columns(&columns);

    // Add the table to the worksheet.
    worksheet.add_table(2, 1, 6, 6, &table)?;

    // -----------------------------------------------------------------------
    // Example 9. Table with totals row (but no caption or totals).
    // -----------------------------------------------------------------------

    // Add a worksheet to the workbook.
    let worksheet = workbook.add_worksheet();

    let caption = "Table with totals row (but no caption or totals).";

    // Set the column widths for clarity.
    worksheet.set_column_range_width(1, 6, 12)?;

    // Write the caption.
    worksheet.write(0, 1, caption)?;

    // Write the table data.
    worksheet.write_column(3, 1, items)?;
    worksheet.write_row_matrix(3, 2, data)?;

    // Create and configure a new table.
    let columns = vec![
        TableColumn::new().set_header("Product"),
        TableColumn::new().set_header("Quarter 1"),
        TableColumn::new().set_header("Quarter 2"),
        TableColumn::new().set_header("Quarter 3"),
        TableColumn::new().set_header("Quarter 4"),
        TableColumn::new()
            .set_header("Year")
            .set_formula("SUM(Table9[@[Quarter 1]:[Quarter 4]])"),
    ];

    let table = Table::new().set_columns(&columns).set_total_row(true);

    // Add the table to the worksheet.
    worksheet.add_table(2, 1, 7, 6, &table)?;

    // -----------------------------------------------------------------------
    // Example 10. Table with totals row with user captions and functions.
    // -----------------------------------------------------------------------

    // Add a worksheet to the workbook.
    let worksheet = workbook.add_worksheet();

    let caption = "Table with totals row with user captions and functions.";

    // Set the column widths for clarity.
    worksheet.set_column_range_width(1, 6, 12)?;

    // Write the caption.
    worksheet.write(0, 1, caption)?;

    // Write the table data.
    worksheet.write_column(3, 1, items)?;
    worksheet.write_row_matrix(3, 2, data)?;

    // Create and configure a new table.
    let columns = vec![
        TableColumn::new()
            .set_header("Product")
            .set_total_label("Totals"),
        TableColumn::new()
            .set_header("Quarter 1")
            .set_total_function(TableFunction::Sum),
        TableColumn::new()
            .set_header("Quarter 2")
            .set_total_function(TableFunction::Sum),
        TableColumn::new()
            .set_header("Quarter 3")
            .set_total_function(TableFunction::Sum),
        TableColumn::new()
            .set_header("Quarter 4")
            .set_total_function(TableFunction::Sum),
        TableColumn::new()
            .set_header("Year")
            .set_total_function(TableFunction::Sum)
            .set_formula("SUM(Table10[@[Quarter 1]:[Quarter 4]])"),
    ];

    let table = Table::new().set_columns(&columns).set_total_row(true);

    // Add the table to the worksheet.
    worksheet.add_table(2, 1, 7, 6, &table)?;

    // -----------------------------------------------------------------------
    // Example 11. Table with alternative Excel style.
    // -----------------------------------------------------------------------

    // Add a worksheet to the workbook.
    let worksheet = workbook.add_worksheet();

    let caption = "Table with alternative Excel style.";

    // Set the column widths for clarity.
    worksheet.set_column_range_width(1, 6, 12)?;

    // Write the caption.
    worksheet.write(0, 1, caption)?;

    // Write the table data.
    worksheet.write_column(3, 1, items)?;
    worksheet.write_row_matrix(3, 2, data)?;

    // Create and configure a new table.
    let columns = vec![
        TableColumn::new()
            .set_header("Product")
            .set_total_label("Totals"),
        TableColumn::new()
            .set_header("Quarter 1")
            .set_total_function(TableFunction::Sum),
        TableColumn::new()
            .set_header("Quarter 2")
            .set_total_function(TableFunction::Sum),
        TableColumn::new()
            .set_header("Quarter 3")
            .set_total_function(TableFunction::Sum),
        TableColumn::new()
            .set_header("Quarter 4")
            .set_total_function(TableFunction::Sum),
        TableColumn::new()
            .set_header("Year")
            .set_total_function(TableFunction::Sum)
            .set_formula("SUM(Table11[@[Quarter 1]:[Quarter 4]])"),
    ];

    let table = Table::new()
        .set_columns(&columns)
        .set_total_row(true)
        .set_style(TableStyle::Light11);

    // Add the table to the worksheet.
    worksheet.add_table(2, 1, 7, 6, &table)?;

    // -----------------------------------------------------------------------
    // Example 12. Table with Excel style removed.
    // -----------------------------------------------------------------------

    // Add a worksheet to the workbook.
    let worksheet = workbook.add_worksheet();

    let caption = "Table with Excel style removed.";

    // Set the column widths for clarity.
    worksheet.set_column_range_width(1, 6, 12)?;

    // Write the caption.
    worksheet.write(0, 1, caption)?;

    // Write the table data.
    worksheet.write_column(3, 1, items)?;
    worksheet.write_row_matrix(3, 2, data)?;

    // Create and configure a new table.
    let columns = vec![
        TableColumn::new()
            .set_header("Product")
            .set_total_label("Totals"),
        TableColumn::new()
            .set_header("Quarter 1")
            .set_total_function(TableFunction::Sum),
        TableColumn::new()
            .set_header("Quarter 2")
            .set_total_function(TableFunction::Sum),
        TableColumn::new()
            .set_header("Quarter 3")
            .set_total_function(TableFunction::Sum),
        TableColumn::new()
            .set_header("Quarter 4")
            .set_total_function(TableFunction::Sum),
        TableColumn::new()
            .set_header("Year")
            .set_total_function(TableFunction::Sum)
            .set_formula("SUM(Table12[@[Quarter 1]:[Quarter 4]])"),
    ];

    let table = Table::new()
        .set_columns(&columns)
        .set_total_row(true)
        .set_style(TableStyle::None);

    // Add the table to the worksheet.
    worksheet.add_table(2, 1, 7, 6, &table)?;

    // Save the file to disk.
    workbook.save("tables.xlsx")?;

    Ok(())
}
Example 4. Table without default header row.
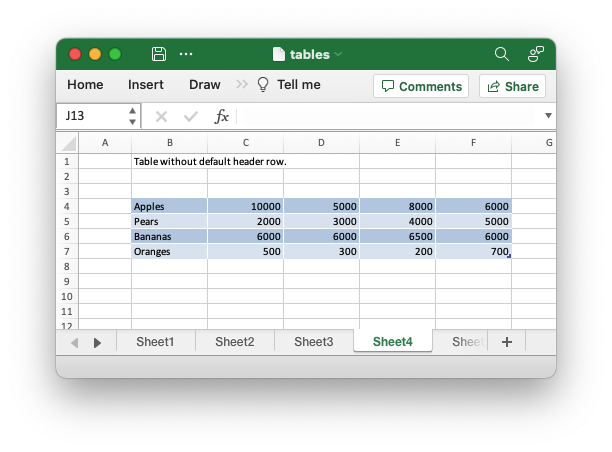
Code to generate the above example:
// SPDX-License-Identifier: MIT OR Apache-2.0
//
// Copyright 2022-2026, John McNamara, jmcnamara@cpan.org

//! Example of how to add tables to a worksheet using the `rust_xlsxwriter`
//! library.
//!
//! Tables in Excel are used to group rows and columns of data into a single
//! structure that can be referenced in a formula or formatted collectively.

use rust_xlsxwriter::{Table, TableColumn, TableFunction, TableStyle, Workbook, XlsxError};

fn main() -> Result<(), XlsxError> {
    // Create a new Excel file object.
    let mut workbook = Workbook::new();

    // Some sample data for the table.
    let items = ["Apples", "Pears", "Bananas", "Oranges"];
    let data = [
        [10000, 5000, 8000, 6000],
        [2000, 3000, 4000, 5000],
        [6000, 6000, 6500, 6000],
        [500, 300, 200, 700],
    ];

    // -----------------------------------------------------------------------
    // Example 1. Default table with no data.
    // -----------------------------------------------------------------------

    // Add a worksheet to the workbook.
    let worksheet = workbook.add_worksheet();

    let caption = "Default table with no data.";

    // Set the column widths for clarity.
    worksheet.set_column_range_width(1, 6, 12)?;

    // Write the caption.
    worksheet.write(0, 1, caption)?;

    // Create a new table.
    let table = Table::new();

    // Add the table to the worksheet.
    worksheet.add_table(2, 1, 6, 5, &table)?;

    // -----------------------------------------------------------------------
    // Example 2. Default table with data.
    // -----------------------------------------------------------------------

    // Add a worksheet to the workbook.
    let worksheet = workbook.add_worksheet();

    let caption = "Default table with data.";

    // Set the column widths for clarity.
    worksheet.set_column_range_width(1, 6, 12)?;

    // Write the caption.
    worksheet.write(0, 1, caption)?;

    // Write the table data.
    worksheet.write_column(3, 1, items)?;
    worksheet.write_row_matrix(3, 2, data)?;

    // Create a new table.
    let table = Table::new();

    // Add the table to the worksheet.
    worksheet.add_table(2, 1, 6, 5, &table)?;

    // -----------------------------------------------------------------------
    // Example 3. Table without default autofilter.
    // -----------------------------------------------------------------------

    // Add a worksheet to the workbook.
    let worksheet = workbook.add_worksheet();

    let caption = "Table without default autofilter.";

    // Set the column widths for clarity.
    worksheet.set_column_range_width(1, 6, 12)?;

    // Write the caption.
    worksheet.write(0, 1, caption)?;

    // Write the table data.
    worksheet.write_column(3, 1, items)?;
    worksheet.write_row_matrix(3, 2, data)?;

    // Create and configure a new table.
    let table = Table::new().set_autofilter(false);

    // Add the table to the worksheet.
    worksheet.add_table(2, 1, 6, 5, &table)?;

    // -----------------------------------------------------------------------
    // Example 4. Table without default header row.
    // -----------------------------------------------------------------------

    // Add a worksheet to the workbook.
    let worksheet = workbook.add_worksheet();

    let caption = "Table without default header row.";

    // Set the column widths for clarity.
    worksheet.set_column_range_width(1, 6, 12)?;

    // Write the caption.
    worksheet.write(0, 1, caption)?;

    // Write the table data.
    worksheet.write_column(3, 1, items)?;
    worksheet.write_row_matrix(3, 2, data)?;

    // Create and configure a new table.
    let table = Table::new().set_header_row(false);

    // Add the table to the worksheet.
    worksheet.add_table(3, 1, 6, 5, &table)?;

    // -----------------------------------------------------------------------
    // Example 5. Default table with "First Column" and "Last Column" options.
    // -----------------------------------------------------------------------

    // Add a worksheet to the workbook.
    let worksheet = workbook.add_worksheet();

    let caption = "Default table with 'First Column' and 'Last Column' options.";

    // Set the column widths for clarity.
    worksheet.set_column_range_width(1, 6, 12)?;

    // Write the caption.
    worksheet.write(0, 1, caption)?;

    // Write the table data.
    worksheet.write_column(3, 1, items)?;
    worksheet.write_row_matrix(3, 2, data)?;

    // Create and configure a new table.
    let table = Table::new().set_first_column(true).set_last_column(true);

    // Add the table to the worksheet.
    worksheet.add_table(2, 1, 6, 5, &table)?;

    // -----------------------------------------------------------------------
    // Example 6. Table with banded columns but without default banded rows.
    // -----------------------------------------------------------------------

    // Add a worksheet to the workbook.
    let worksheet = workbook.add_worksheet();

    let caption = "Table with banded columns but without default banded rows.";

    // Set the column widths for clarity.
    worksheet.set_column_range_width(1, 6, 12)?;

    // Write the caption.
    worksheet.write(0, 1, caption)?;

    // Write the table data.
    worksheet.write_column(3, 1, items)?;
    worksheet.write_row_matrix(3, 2, data)?;

    // Create and configure a new table.
    let table = Table::new().set_banded_rows(false).set_banded_columns(true);

    // Add the table to the worksheet.
    worksheet.add_table(2, 1, 6, 5, &table)?;

    // -----------------------------------------------------------------------
    // Example 7. Table with user defined column headers.
    // -----------------------------------------------------------------------

    // Add a worksheet to the workbook.
    let worksheet = workbook.add_worksheet();

    let caption = "Table with user defined column headers.";

    // Set the column widths for clarity.
    worksheet.set_column_range_width(1, 6, 12)?;

    // Write the caption.
    worksheet.write(0, 1, caption)?;

    // Write the table data.
    worksheet.write_column(3, 1, items)?;
    worksheet.write_row_matrix(3, 2, data)?;

    // Create and configure a new table.
    let columns = vec![
        TableColumn::new().set_header("Product"),
        TableColumn::new().set_header("Quarter 1"),
        TableColumn::new().set_header("Quarter 2"),
        TableColumn::new().set_header("Quarter 3"),
        TableColumn::new().set_header("Quarter 4"),
    ];

    let table = Table::new().set_columns(&columns);

    // Add the table to the worksheet.
    worksheet.add_table(2, 1, 6, 5, &table)?;

    // -----------------------------------------------------------------------
    // Example 8. Table with user defined column headers, and formulas.
    // -----------------------------------------------------------------------

    // Add a worksheet to the workbook.
    let worksheet = workbook.add_worksheet();

    let caption = "Table with user defined column headers, and formulas.";

    // Set the column widths for clarity.
    worksheet.set_column_range_width(1, 6, 12)?;

    // Write the caption.
    worksheet.write(0, 1, caption)?;

    // Write the table data.
    worksheet.write_column(3, 1, items)?;
    worksheet.write_row_matrix(3, 2, data)?;

    // Create and configure a new table.
    let columns = vec![
        TableColumn::new().set_header("Product"),
        TableColumn::new().set_header("Quarter 1"),
        TableColumn::new().set_header("Quarter 2"),
        TableColumn::new().set_header("Quarter 3"),
        TableColumn::new().set_header("Quarter 4"),
        TableColumn::new()
            .set_header("Year")
            .set_formula("SUM(Table8[@[Quarter 1]:[Quarter 4]])"),
    ];

    let table = Table::new().set_columns(&columns);

    // Add the table to the worksheet.
    worksheet.add_table(2, 1, 6, 6, &table)?;

    // -----------------------------------------------------------------------
    // Example 9. Table with totals row (but no caption or totals).
    // -----------------------------------------------------------------------

    // Add a worksheet to the workbook.
    let worksheet = workbook.add_worksheet();

    let caption = "Table with totals row (but no caption or totals).";

    // Set the column widths for clarity.
    worksheet.set_column_range_width(1, 6, 12)?;

    // Write the caption.
    worksheet.write(0, 1, caption)?;

    // Write the table data.
    worksheet.write_column(3, 1, items)?;
    worksheet.write_row_matrix(3, 2, data)?;

    // Create and configure a new table.
    let columns = vec![
        TableColumn::new().set_header("Product"),
        TableColumn::new().set_header("Quarter 1"),
        TableColumn::new().set_header("Quarter 2"),
        TableColumn::new().set_header("Quarter 3"),
        TableColumn::new().set_header("Quarter 4"),
        TableColumn::new()
            .set_header("Year")
            .set_formula("SUM(Table9[@[Quarter 1]:[Quarter 4]])"),
    ];

    let table = Table::new().set_columns(&columns).set_total_row(true);

    // Add the table to the worksheet.
    worksheet.add_table(2, 1, 7, 6, &table)?;

    // -----------------------------------------------------------------------
    // Example 10. Table with totals row with user captions and functions.
    // -----------------------------------------------------------------------

    // Add a worksheet to the workbook.
    let worksheet = workbook.add_worksheet();

    let caption = "Table with totals row with user captions and functions.";

    // Set the column widths for clarity.
    worksheet.set_column_range_width(1, 6, 12)?;

    // Write the caption.
    worksheet.write(0, 1, caption)?;

    // Write the table data.
    worksheet.write_column(3, 1, items)?;
    worksheet.write_row_matrix(3, 2, data)?;

    // Create and configure a new table.
    let columns = vec![
        TableColumn::new()
            .set_header("Product")
            .set_total_label("Totals"),
        TableColumn::new()
            .set_header("Quarter 1")
            .set_total_function(TableFunction::Sum),
        TableColumn::new()
            .set_header("Quarter 2")
            .set_total_function(TableFunction::Sum),
        TableColumn::new()
            .set_header("Quarter 3")
            .set_total_function(TableFunction::Sum),
        TableColumn::new()
            .set_header("Quarter 4")
            .set_total_function(TableFunction::Sum),
        TableColumn::new()
            .set_header("Year")
            .set_total_function(TableFunction::Sum)
            .set_formula("SUM(Table10[@[Quarter 1]:[Quarter 4]])"),
    ];

    let table = Table::new().set_columns(&columns).set_total_row(true);

    // Add the table to the worksheet.
    worksheet.add_table(2, 1, 7, 6, &table)?;

    // -----------------------------------------------------------------------
    // Example 11. Table with alternative Excel style.
    // -----------------------------------------------------------------------

    // Add a worksheet to the workbook.
    let worksheet = workbook.add_worksheet();

    let caption = "Table with alternative Excel style.";

    // Set the column widths for clarity.
    worksheet.set_column_range_width(1, 6, 12)?;

    // Write the caption.
    worksheet.write(0, 1, caption)?;

    // Write the table data.
    worksheet.write_column(3, 1, items)?;
    worksheet.write_row_matrix(3, 2, data)?;

    // Create and configure a new table.
    let columns = vec![
        TableColumn::new()
            .set_header("Product")
            .set_total_label("Totals"),
        TableColumn::new()
            .set_header("Quarter 1")
            .set_total_function(TableFunction::Sum),
        TableColumn::new()
            .set_header("Quarter 2")
            .set_total_function(TableFunction::Sum),
        TableColumn::new()
            .set_header("Quarter 3")
            .set_total_function(TableFunction::Sum),
        TableColumn::new()
            .set_header("Quarter 4")
            .set_total_function(TableFunction::Sum),
        TableColumn::new()
            .set_header("Year")
            .set_total_function(TableFunction::Sum)
            .set_formula("SUM(Table11[@[Quarter 1]:[Quarter 4]])"),
    ];

    let table = Table::new()
        .set_columns(&columns)
        .set_total_row(true)
        .set_style(TableStyle::Light11);

    // Add the table to the worksheet.
    worksheet.add_table(2, 1, 7, 6, &table)?;

    // -----------------------------------------------------------------------
    // Example 12. Table with Excel style removed.
    // -----------------------------------------------------------------------

    // Add a worksheet to the workbook.
    let worksheet = workbook.add_worksheet();

    let caption = "Table with Excel style removed.";

    // Set the column widths for clarity.
    worksheet.set_column_range_width(1, 6, 12)?;

    // Write the caption.
    worksheet.write(0, 1, caption)?;

    // Write the table data.
    worksheet.write_column(3, 1, items)?;
    worksheet.write_row_matrix(3, 2, data)?;

    // Create and configure a new table.
    let columns = vec![
        TableColumn::new()
            .set_header("Product")
            .set_total_label("Totals"),
        TableColumn::new()
            .set_header("Quarter 1")
            .set_total_function(TableFunction::Sum),
        TableColumn::new()
            .set_header("Quarter 2")
            .set_total_function(TableFunction::Sum),
        TableColumn::new()
            .set_header("Quarter 3")
            .set_total_function(TableFunction::Sum),
        TableColumn::new()
            .set_header("Quarter 4")
            .set_total_function(TableFunction::Sum),
        TableColumn::new()
            .set_header("Year")
            .set_total_function(TableFunction::Sum)
            .set_formula("SUM(Table12[@[Quarter 1]:[Quarter 4]])"),
    ];

    let table = Table::new()
        .set_columns(&columns)
        .set_total_row(true)
        .set_style(TableStyle::None);

    // Add the table to the worksheet.
    worksheet.add_table(2, 1, 7, 6, &table)?;

    // Save the file to disk.
    workbook.save("tables.xlsx")?;

    Ok(())
}
Example 5. Default table with "First Column" and "Last Column" options.
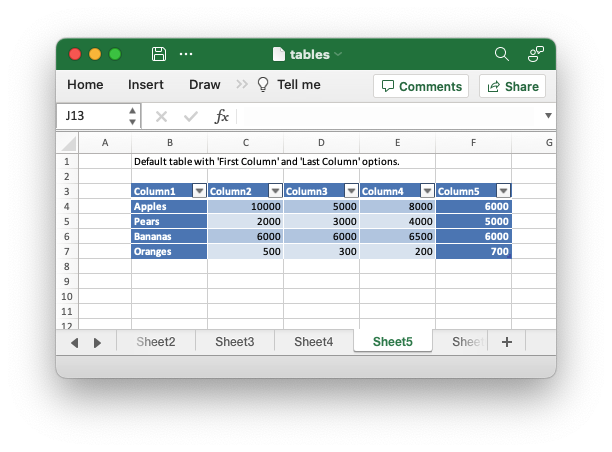
Code to generate the above example:
// SPDX-License-Identifier: MIT OR Apache-2.0
//
// Copyright 2022-2026, John McNamara, jmcnamara@cpan.org

//! Example of how to add tables to a worksheet using the `rust_xlsxwriter`
//! library.
//!
//! Tables in Excel are used to group rows and columns of data into a single
//! structure that can be referenced in a formula or formatted collectively.

use rust_xlsxwriter::{Table, TableColumn, TableFunction, TableStyle, Workbook, XlsxError};

fn main() -> Result<(), XlsxError> {
    // Create a new Excel file object.
    let mut workbook = Workbook::new();

    // Some sample data for the table.
    let items = ["Apples", "Pears", "Bananas", "Oranges"];
    let data = [
        [10000, 5000, 8000, 6000],
        [2000, 3000, 4000, 5000],
        [6000, 6000, 6500, 6000],
        [500, 300, 200, 700],
    ];

    // -----------------------------------------------------------------------
    // Example 1. Default table with no data.
    // -----------------------------------------------------------------------

    // Add a worksheet to the workbook.
    let worksheet = workbook.add_worksheet();

    let caption = "Default table with no data.";

    // Set the column widths for clarity.
    worksheet.set_column_range_width(1, 6, 12)?;

    // Write the caption.
    worksheet.write(0, 1, caption)?;

    // Create a new table.
    let table = Table::new();

    // Add the table to the worksheet.
    worksheet.add_table(2, 1, 6, 5, &table)?;

    // -----------------------------------------------------------------------
    // Example 2. Default table with data.
    // -----------------------------------------------------------------------

    // Add a worksheet to the workbook.
    let worksheet = workbook.add_worksheet();

    let caption = "Default table with data.";

    // Set the column widths for clarity.
    worksheet.set_column_range_width(1, 6, 12)?;

    // Write the caption.
    worksheet.write(0, 1, caption)?;

    // Write the table data.
    worksheet.write_column(3, 1, items)?;
    worksheet.write_row_matrix(3, 2, data)?;

    // Create a new table.
    let table = Table::new();

    // Add the table to the worksheet.
    worksheet.add_table(2, 1, 6, 5, &table)?;

    // -----------------------------------------------------------------------
    // Example 3. Table without default autofilter.
    // -----------------------------------------------------------------------

    // Add a worksheet to the workbook.
    let worksheet = workbook.add_worksheet();

    let caption = "Table without default autofilter.";

    // Set the column widths for clarity.
    worksheet.set_column_range_width(1, 6, 12)?;

    // Write the caption.
    worksheet.write(0, 1, caption)?;

    // Write the table data.
    worksheet.write_column(3, 1, items)?;
    worksheet.write_row_matrix(3, 2, data)?;

    // Create and configure a new table.
    let table = Table::new().set_autofilter(false);

    // Add the table to the worksheet.
    worksheet.add_table(2, 1, 6, 5, &table)?;

    // -----------------------------------------------------------------------
    // Example 4. Table without default header row.
    // -----------------------------------------------------------------------

    // Add a worksheet to the workbook.
    let worksheet = workbook.add_worksheet();

    let caption = "Table without default header row.";

    // Set the column widths for clarity.
    worksheet.set_column_range_width(1, 6, 12)?;

    // Write the caption.
    worksheet.write(0, 1, caption)?;

    // Write the table data.
    worksheet.write_column(3, 1, items)?;
    worksheet.write_row_matrix(3, 2, data)?;

    // Create and configure a new table.
    let table = Table::new().set_header_row(false);

    // Add the table to the worksheet.
    worksheet.add_table(3, 1, 6, 5, &table)?;

    // -----------------------------------------------------------------------
    // Example 5. Default table with "First Column" and "Last Column" options.
    // -----------------------------------------------------------------------

    // Add a worksheet to the workbook.
    let worksheet = workbook.add_worksheet();

    let caption = "Default table with 'First Column' and 'Last Column' options.";

    // Set the column widths for clarity.
    worksheet.set_column_range_width(1, 6, 12)?;

    // Write the caption.
    worksheet.write(0, 1, caption)?;

    // Write the table data.
    worksheet.write_column(3, 1, items)?;
    worksheet.write_row_matrix(3, 2, data)?;

    // Create and configure a new table.
    let table = Table::new().set_first_column(true).set_last_column(true);

    // Add the table to the worksheet.
    worksheet.add_table(2, 1, 6, 5, &table)?;

    // -----------------------------------------------------------------------
    // Example 6. Table with banded columns but without default banded rows.
    // -----------------------------------------------------------------------

    // Add a worksheet to the workbook.
    let worksheet = workbook.add_worksheet();

    let caption = "Table with banded columns but without default banded rows.";

    // Set the column widths for clarity.
    worksheet.set_column_range_width(1, 6, 12)?;

    // Write the caption.
    worksheet.write(0, 1, caption)?;

    // Write the table data.
    worksheet.write_column(3, 1, items)?;
    worksheet.write_row_matrix(3, 2, data)?;

    // Create and configure a new table.
    let table = Table::new().set_banded_rows(false).set_banded_columns(true);

    // Add the table to the worksheet.
    worksheet.add_table(2, 1, 6, 5, &table)?;

    // -----------------------------------------------------------------------
    // Example 7. Table with user defined column headers.
    // -----------------------------------------------------------------------

    // Add a worksheet to the workbook.
    let worksheet = workbook.add_worksheet();

    let caption = "Table with user defined column headers.";

    // Set the column widths for clarity.
    worksheet.set_column_range_width(1, 6, 12)?;

    // Write the caption.
    worksheet.write(0, 1, caption)?;

    // Write the table data.
    worksheet.write_column(3, 1, items)?;
    worksheet.write_row_matrix(3, 2, data)?;

    // Create and configure a new table.
    let columns = vec![
        TableColumn::new().set_header("Product"),
        TableColumn::new().set_header("Quarter 1"),
        TableColumn::new().set_header("Quarter 2"),
        TableColumn::new().set_header("Quarter 3"),
        TableColumn::new().set_header("Quarter 4"),
    ];

    let table = Table::new().set_columns(&columns);

    // Add the table to the worksheet.
    worksheet.add_table(2, 1, 6, 5, &table)?;

    // -----------------------------------------------------------------------
    // Example 8. Table with user defined column headers, and formulas.
    // -----------------------------------------------------------------------

    // Add a worksheet to the workbook.
    let worksheet = workbook.add_worksheet();

    let caption = "Table with user defined column headers, and formulas.";

    // Set the column widths for clarity.
    worksheet.set_column_range_width(1, 6, 12)?;

    // Write the caption.
    worksheet.write(0, 1, caption)?;

    // Write the table data.
    worksheet.write_column(3, 1, items)?;
    worksheet.write_row_matrix(3, 2, data)?;

    // Create and configure a new table.
    let columns = vec![
        TableColumn::new().set_header("Product"),
        TableColumn::new().set_header("Quarter 1"),
        TableColumn::new().set_header("Quarter 2"),
        TableColumn::new().set_header("Quarter 3"),
        TableColumn::new().set_header("Quarter 4"),
        TableColumn::new()
            .set_header("Year")
            .set_formula("SUM(Table8[@[Quarter 1]:[Quarter 4]])"),
    ];

    let table = Table::new().set_columns(&columns);

    // Add the table to the worksheet.
    worksheet.add_table(2, 1, 6, 6, &table)?;

    // -----------------------------------------------------------------------
    // Example 9. Table with totals row (but no caption or totals).
    // -----------------------------------------------------------------------

    // Add a worksheet to the workbook.
    let worksheet = workbook.add_worksheet();

    let caption = "Table with totals row (but no caption or totals).";

    // Set the column widths for clarity.
    worksheet.set_column_range_width(1, 6, 12)?;

    // Write the caption.
    worksheet.write(0, 1, caption)?;

    // Write the table data.
    worksheet.write_column(3, 1, items)?;
    worksheet.write_row_matrix(3, 2, data)?;

    // Create and configure a new table.
    let columns = vec![
        TableColumn::new().set_header("Product"),
        TableColumn::new().set_header("Quarter 1"),
        TableColumn::new().set_header("Quarter 2"),
        TableColumn::new().set_header("Quarter 3"),
        TableColumn::new().set_header("Quarter 4"),
        TableColumn::new()
            .set_header("Year")
            .set_formula("SUM(Table9[@[Quarter 1]:[Quarter 4]])"),
    ];

    let table = Table::new().set_columns(&columns).set_total_row(true);

    // Add the table to the worksheet.
    worksheet.add_table(2, 1, 7, 6, &table)?;

    // -----------------------------------------------------------------------
    // Example 10. Table with totals row with user captions and functions.
    // -----------------------------------------------------------------------

    // Add a worksheet to the workbook.
    let worksheet = workbook.add_worksheet();

    let caption = "Table with totals row with user captions and functions.";

    // Set the column widths for clarity.
    worksheet.set_column_range_width(1, 6, 12)?;

    // Write the caption.
    worksheet.write(0, 1, caption)?;

    // Write the table data.
    worksheet.write_column(3, 1, items)?;
    worksheet.write_row_matrix(3, 2, data)?;

    // Create and configure a new table.
    let columns = vec![
        TableColumn::new()
            .set_header("Product")
            .set_total_label("Totals"),
        TableColumn::new()
            .set_header("Quarter 1")
            .set_total_function(TableFunction::Sum),
        TableColumn::new()
            .set_header("Quarter 2")
            .set_total_function(TableFunction::Sum),
        TableColumn::new()
            .set_header("Quarter 3")
            .set_total_function(TableFunction::Sum),
        TableColumn::new()
            .set_header("Quarter 4")
            .set_total_function(TableFunction::Sum),
        TableColumn::new()
            .set_header("Year")
            .set_total_function(TableFunction::Sum)
            .set_formula("SUM(Table10[@[Quarter 1]:[Quarter 4]])"),
    ];

    let table = Table::new().set_columns(&columns).set_total_row(true);

    // Add the table to the worksheet.
    worksheet.add_table(2, 1, 7, 6, &table)?;

    // -----------------------------------------------------------------------
    // Example 11. Table with alternative Excel style.
    // -----------------------------------------------------------------------

    // Add a worksheet to the workbook.
    let worksheet = workbook.add_worksheet();

    let caption = "Table with alternative Excel style.";

    // Set the column widths for clarity.
    worksheet.set_column_range_width(1, 6, 12)?;

    // Write the caption.
    worksheet.write(0, 1, caption)?;

    // Write the table data.
    worksheet.write_column(3, 1, items)?;
    worksheet.write_row_matrix(3, 2, data)?;

    // Create and configure a new table.
    let columns = vec![
        TableColumn::new()
            .set_header("Product")
            .set_total_label("Totals"),
        TableColumn::new()
            .set_header("Quarter 1")
            .set_total_function(TableFunction::Sum),
        TableColumn::new()
            .set_header("Quarter 2")
            .set_total_function(TableFunction::Sum),
        TableColumn::new()
            .set_header("Quarter 3")
            .set_total_function(TableFunction::Sum),
        TableColumn::new()
            .set_header("Quarter 4")
            .set_total_function(TableFunction::Sum),
        TableColumn::new()
            .set_header("Year")
            .set_total_function(TableFunction::Sum)
            .set_formula("SUM(Table11[@[Quarter 1]:[Quarter 4]])"),
    ];

    let table = Table::new()
        .set_columns(&columns)
        .set_total_row(true)
        .set_style(TableStyle::Light11);

    // Add the table to the worksheet.
    worksheet.add_table(2, 1, 7, 6, &table)?;

    // -----------------------------------------------------------------------
    // Example 12. Table with Excel style removed.
    // -----------------------------------------------------------------------

    // Add a worksheet to the workbook.
    let worksheet = workbook.add_worksheet();

    let caption = "Table with Excel style removed.";

    // Set the column widths for clarity.
    worksheet.set_column_range_width(1, 6, 12)?;

    // Write the caption.
    worksheet.write(0, 1, caption)?;

    // Write the table data.
    worksheet.write_column(3, 1, items)?;
    worksheet.write_row_matrix(3, 2, data)?;

    // Create and configure a new table.
    let columns = vec![
        TableColumn::new()
            .set_header("Product")
            .set_total_label("Totals"),
        TableColumn::new()
            .set_header("Quarter 1")
            .set_total_function(TableFunction::Sum),
        TableColumn::new()
            .set_header("Quarter 2")
            .set_total_function(TableFunction::Sum),
        TableColumn::new()
            .set_header("Quarter 3")
            .set_total_function(TableFunction::Sum),
        TableColumn::new()
            .set_header("Quarter 4")
            .set_total_function(TableFunction::Sum),
        TableColumn::new()
            .set_header("Year")
            .set_total_function(TableFunction::Sum)
            .set_formula("SUM(Table12[@[Quarter 1]:[Quarter 4]])"),
    ];

    let table = Table::new()
        .set_columns(&columns)
        .set_total_row(true)
        .set_style(TableStyle::None);

    // Add the table to the worksheet.
    worksheet.add_table(2, 1, 7, 6, &table)?;

    // Save the file to disk.
    workbook.save("tables.xlsx")?;

    Ok(())
}
Example 6. Table with banded columns but without default banded rows.
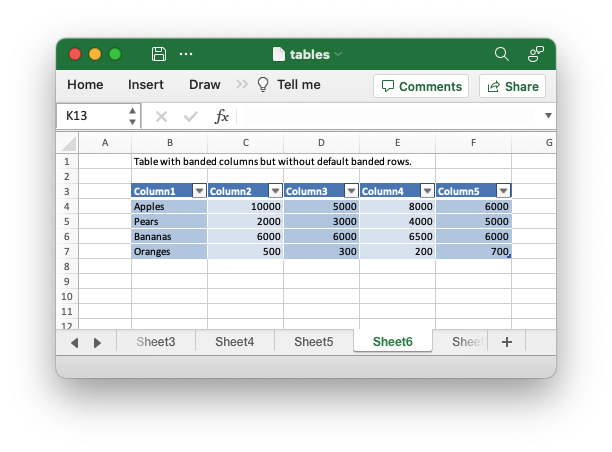
Code to generate the above example:
// SPDX-License-Identifier: MIT OR Apache-2.0
//
// Copyright 2022-2026, John McNamara, jmcnamara@cpan.org

//! Example of how to add tables to a worksheet using the `rust_xlsxwriter`
//! library.
//!
//! Tables in Excel are used to group rows and columns of data into a single
//! structure that can be referenced in a formula or formatted collectively.

use rust_xlsxwriter::{Table, TableColumn, TableFunction, TableStyle, Workbook, XlsxError};

fn main() -> Result<(), XlsxError> {
    // Create a new Excel file object.
    let mut workbook = Workbook::new();

    // Some sample data for the table.
    let items = ["Apples", "Pears", "Bananas", "Oranges"];
    let data = [
        [10000, 5000, 8000, 6000],
        [2000, 3000, 4000, 5000],
        [6000, 6000, 6500, 6000],
        [500, 300, 200, 700],
    ];

    // -----------------------------------------------------------------------
    // Example 1. Default table with no data.
    // -----------------------------------------------------------------------

    // Add a worksheet to the workbook.
    let worksheet = workbook.add_worksheet();

    let caption = "Default table with no data.";

    // Set the column widths for clarity.
    worksheet.set_column_range_width(1, 6, 12)?;

    // Write the caption.
    worksheet.write(0, 1, caption)?;

    // Create a new table.
    let table = Table::new();

    // Add the table to the worksheet.
    worksheet.add_table(2, 1, 6, 5, &table)?;

    // -----------------------------------------------------------------------
    // Example 2. Default table with data.
    // -----------------------------------------------------------------------

    // Add a worksheet to the workbook.
    let worksheet = workbook.add_worksheet();

    let caption = "Default table with data.";

    // Set the column widths for clarity.
    worksheet.set_column_range_width(1, 6, 12)?;

    // Write the caption.
    worksheet.write(0, 1, caption)?;

    // Write the table data.
    worksheet.write_column(3, 1, items)?;
    worksheet.write_row_matrix(3, 2, data)?;

    // Create a new table.
    let table = Table::new();

    // Add the table to the worksheet.
    worksheet.add_table(2, 1, 6, 5, &table)?;

    // -----------------------------------------------------------------------
    // Example 3. Table without default autofilter.
    // -----------------------------------------------------------------------

    // Add a worksheet to the workbook.
    let worksheet = workbook.add_worksheet();

    let caption = "Table without default autofilter.";

    // Set the column widths for clarity.
    worksheet.set_column_range_width(1, 6, 12)?;

    // Write the caption.
    worksheet.write(0, 1, caption)?;

    // Write the table data.
    worksheet.write_column(3, 1, items)?;
    worksheet.write_row_matrix(3, 2, data)?;

    // Create and configure a new table.
    let table = Table::new().set_autofilter(false);

    // Add the table to the worksheet.
    worksheet.add_table(2, 1, 6, 5, &table)?;

    // -----------------------------------------------------------------------
    // Example 4. Table without default header row.
    // -----------------------------------------------------------------------

    // Add a worksheet to the workbook.
    let worksheet = workbook.add_worksheet();

    let caption = "Table without default header row.";

    // Set the column widths for clarity.
    worksheet.set_column_range_width(1, 6, 12)?;

    // Write the caption.
    worksheet.write(0, 1, caption)?;

    // Write the table data.
    worksheet.write_column(3, 1, items)?;
    worksheet.write_row_matrix(3, 2, data)?;

    // Create and configure a new table.
    let table = Table::new().set_header_row(false);

    // Add the table to the worksheet.
    worksheet.add_table(3, 1, 6, 5, &table)?;

    // -----------------------------------------------------------------------
    // Example 5. Default table with "First Column" and "Last Column" options.
    // -----------------------------------------------------------------------

    // Add a worksheet to the workbook.
    let worksheet = workbook.add_worksheet();

    let caption = "Default table with 'First Column' and 'Last Column' options.";

    // Set the column widths for clarity.
    worksheet.set_column_range_width(1, 6, 12)?;

    // Write the caption.
    worksheet.write(0, 1, caption)?;

    // Write the table data.
    worksheet.write_column(3, 1, items)?;
    worksheet.write_row_matrix(3, 2, data)?;

    // Create and configure a new table.
    let table = Table::new().set_first_column(true).set_last_column(true);

    // Add the table to the worksheet.
    worksheet.add_table(2, 1, 6, 5, &table)?;

    // -----------------------------------------------------------------------
    // Example 6. Table with banded columns but without default banded rows.
    // -----------------------------------------------------------------------

    // Add a worksheet to the workbook.
    let worksheet = workbook.add_worksheet();

    let caption = "Table with banded columns but without default banded rows.";

    // Set the column widths for clarity.
    worksheet.set_column_range_width(1, 6, 12)?;

    // Write the caption.
    worksheet.write(0, 1, caption)?;

    // Write the table data.
    worksheet.write_column(3, 1, items)?;
    worksheet.write_row_matrix(3, 2, data)?;

    // Create and configure a new table.
    let table = Table::new().set_banded_rows(false).set_banded_columns(true);

    // Add the table to the worksheet.
    worksheet.add_table(2, 1, 6, 5, &table)?;

    // -----------------------------------------------------------------------
    // Example 7. Table with user defined column headers.
    // -----------------------------------------------------------------------

    // Add a worksheet to the workbook.
    let worksheet = workbook.add_worksheet();

    let caption = "Table with user defined column headers.";

    // Set the column widths for clarity.
    worksheet.set_column_range_width(1, 6, 12)?;

    // Write the caption.
    worksheet.write(0, 1, caption)?;

    // Write the table data.
    worksheet.write_column(3, 1, items)?;
    worksheet.write_row_matrix(3, 2, data)?;

    // Create and configure a new table.
    let columns = vec![
        TableColumn::new().set_header("Product"),
        TableColumn::new().set_header("Quarter 1"),
        TableColumn::new().set_header("Quarter 2"),
        TableColumn::new().set_header("Quarter 3"),
        TableColumn::new().set_header("Quarter 4"),
    ];

    let table = Table::new().set_columns(&columns);

    // Add the table to the worksheet.
    worksheet.add_table(2, 1, 6, 5, &table)?;

    // -----------------------------------------------------------------------
    // Example 8. Table with user defined column headers, and formulas.
    // -----------------------------------------------------------------------

    // Add a worksheet to the workbook.
    let worksheet = workbook.add_worksheet();

    let caption = "Table with user defined column headers, and formulas.";

    // Set the column widths for clarity.
    worksheet.set_column_range_width(1, 6, 12)?;

    // Write the caption.
    worksheet.write(0, 1, caption)?;

    // Write the table data.
    worksheet.write_column(3, 1, items)?;
    worksheet.write_row_matrix(3, 2, data)?;

    // Create and configure a new table.
    let columns = vec![
        TableColumn::new().set_header("Product"),
        TableColumn::new().set_header("Quarter 1"),
        TableColumn::new().set_header("Quarter 2"),
        TableColumn::new().set_header("Quarter 3"),
        TableColumn::new().set_header("Quarter 4"),
        TableColumn::new()
            .set_header("Year")
            .set_formula("SUM(Table8[@[Quarter 1]:[Quarter 4]])"),
    ];

    let table = Table::new().set_columns(&columns);

    // Add the table to the worksheet.
    worksheet.add_table(2, 1, 6, 6, &table)?;

    // -----------------------------------------------------------------------
    // Example 9. Table with totals row (but no caption or totals).
    // -----------------------------------------------------------------------

    // Add a worksheet to the workbook.
    let worksheet = workbook.add_worksheet();

    let caption = "Table with totals row (but no caption or totals).";

    // Set the column widths for clarity.
    worksheet.set_column_range_width(1, 6, 12)?;

    // Write the caption.
    worksheet.write(0, 1, caption)?;

    // Write the table data.
    worksheet.write_column(3, 1, items)?;
    worksheet.write_row_matrix(3, 2, data)?;

    // Create and configure a new table.
    let columns = vec![
        TableColumn::new().set_header("Product"),
        TableColumn::new().set_header("Quarter 1"),
        TableColumn::new().set_header("Quarter 2"),
        TableColumn::new().set_header("Quarter 3"),
        TableColumn::new().set_header("Quarter 4"),
        TableColumn::new()
            .set_header("Year")
            .set_formula("SUM(Table9[@[Quarter 1]:[Quarter 4]])"),
    ];

    let table = Table::new().set_columns(&columns).set_total_row(true);

    // Add the table to the worksheet.
    worksheet.add_table(2, 1, 7, 6, &table)?;

    // -----------------------------------------------------------------------
    // Example 10. Table with totals row with user captions and functions.
    // -----------------------------------------------------------------------

    // Add a worksheet to the workbook.
    let worksheet = workbook.add_worksheet();

    let caption = "Table with totals row with user captions and functions.";

    // Set the column widths for clarity.
    worksheet.set_column_range_width(1, 6, 12)?;

    // Write the caption.
    worksheet.write(0, 1, caption)?;

    // Write the table data.
    worksheet.write_column(3, 1, items)?;
    worksheet.write_row_matrix(3, 2, data)?;

    // Create and configure a new table.
    let columns = vec![
        TableColumn::new()
            .set_header("Product")
            .set_total_label("Totals"),
        TableColumn::new()
            .set_header("Quarter 1")
            .set_total_function(TableFunction::Sum),
        TableColumn::new()
            .set_header("Quarter 2")
            .set_total_function(TableFunction::Sum),
        TableColumn::new()
            .set_header("Quarter 3")
            .set_total_function(TableFunction::Sum),
        TableColumn::new()
            .set_header("Quarter 4")
            .set_total_function(TableFunction::Sum),
        TableColumn::new()
            .set_header("Year")
            .set_total_function(TableFunction::Sum)
            .set_formula("SUM(Table10[@[Quarter 1]:[Quarter 4]])"),
    ];

    let table = Table::new().set_columns(&columns).set_total_row(true);

    // Add the table to the worksheet.
    worksheet.add_table(2, 1, 7, 6, &table)?;

    // -----------------------------------------------------------------------
    // Example 11. Table with alternative Excel style.
    // -----------------------------------------------------------------------

    // Add a worksheet to the workbook.
    let worksheet = workbook.add_worksheet();

    let caption = "Table with alternative Excel style.";

    // Set the column widths for clarity.
    worksheet.set_column_range_width(1, 6, 12)?;

    // Write the caption.
    worksheet.write(0, 1, caption)?;

    // Write the table data.
    worksheet.write_column(3, 1, items)?;
    worksheet.write_row_matrix(3, 2, data)?;

    // Create and configure a new table.
    let columns = vec![
        TableColumn::new()
            .set_header("Product")
            .set_total_label("Totals"),
        TableColumn::new()
            .set_header("Quarter 1")
            .set_total_function(TableFunction::Sum),
        TableColumn::new()
            .set_header("Quarter 2")
            .set_total_function(TableFunction::Sum),
        TableColumn::new()
            .set_header("Quarter 3")
            .set_total_function(TableFunction::Sum),
        TableColumn::new()
            .set_header("Quarter 4")
            .set_total_function(TableFunction::Sum),
        TableColumn::new()
            .set_header("Year")
            .set_total_function(TableFunction::Sum)
            .set_formula("SUM(Table11[@[Quarter 1]:[Quarter 4]])"),
    ];

    let table = Table::new()
        .set_columns(&columns)
        .set_total_row(true)
        .set_style(TableStyle::Light11);

    // Add the table to the worksheet.
    worksheet.add_table(2, 1, 7, 6, &table)?;

    // -----------------------------------------------------------------------
    // Example 12. Table with Excel style removed.
    // -----------------------------------------------------------------------

    // Add a worksheet to the workbook.
    let worksheet = workbook.add_worksheet();

    let caption = "Table with Excel style removed.";

    // Set the column widths for clarity.
    worksheet.set_column_range_width(1, 6, 12)?;

    // Write the caption.
    worksheet.write(0, 1, caption)?;

    // Write the table data.
    worksheet.write_column(3, 1, items)?;
    worksheet.write_row_matrix(3, 2, data)?;

    // Create and configure a new table.
    let columns = vec![
        TableColumn::new()
            .set_header("Product")
            .set_total_label("Totals"),
        TableColumn::new()
            .set_header("Quarter 1")
            .set_total_function(TableFunction::Sum),
        TableColumn::new()
            .set_header("Quarter 2")
            .set_total_function(TableFunction::Sum),
        TableColumn::new()
            .set_header("Quarter 3")
            .set_total_function(TableFunction::Sum),
        TableColumn::new()
            .set_header("Quarter 4")
            .set_total_function(TableFunction::Sum),
        TableColumn::new()
            .set_header("Year")
            .set_total_function(TableFunction::Sum)
            .set_formula("SUM(Table12[@[Quarter 1]:[Quarter 4]])"),
    ];

    let table = Table::new()
        .set_columns(&columns)
        .set_total_row(true)
        .set_style(TableStyle::None);

    // Add the table to the worksheet.
    worksheet.add_table(2, 1, 7, 6, &table)?;

    // Save the file to disk.
    workbook.save("tables.xlsx")?;

    Ok(())
}
Example 7. Table with user defined column headers.
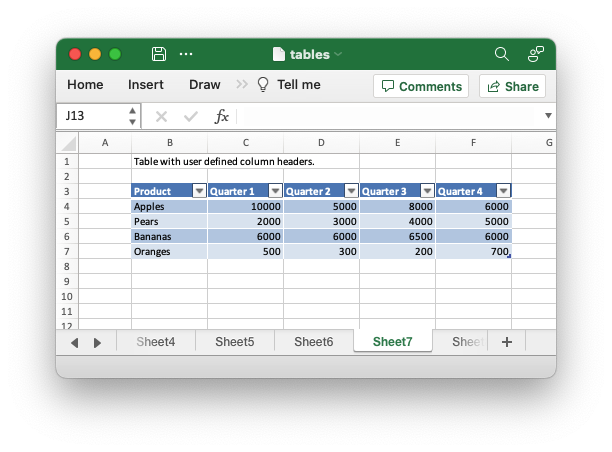
Code to generate the above example:
// SPDX-License-Identifier: MIT OR Apache-2.0
//
// Copyright 2022-2026, John McNamara, jmcnamara@cpan.org

//! Example of how to add tables to a worksheet using the `rust_xlsxwriter`
//! library.
//!
//! Tables in Excel are used to group rows and columns of data into a single
//! structure that can be referenced in a formula or formatted collectively.

use rust_xlsxwriter::{Table, TableColumn, TableFunction, TableStyle, Workbook, XlsxError};

fn main() -> Result<(), XlsxError> {
    // Create a new Excel file object.
    let mut workbook = Workbook::new();

    // Some sample data for the table.
    let items = ["Apples", "Pears", "Bananas", "Oranges"];
    let data = [
        [10000, 5000, 8000, 6000],
        [2000, 3000, 4000, 5000],
        [6000, 6000, 6500, 6000],
        [500, 300, 200, 700],
    ];

    // -----------------------------------------------------------------------
    // Example 1. Default table with no data.
    // -----------------------------------------------------------------------

    // Add a worksheet to the workbook.
    let worksheet = workbook.add_worksheet();

    let caption = "Default table with no data.";

    // Set the column widths for clarity.
    worksheet.set_column_range_width(1, 6, 12)?;

    // Write the caption.
    worksheet.write(0, 1, caption)?;

    // Create a new table.
    let table = Table::new();

    // Add the table to the worksheet.
    worksheet.add_table(2, 1, 6, 5, &table)?;

    // -----------------------------------------------------------------------
    // Example 2. Default table with data.
    // -----------------------------------------------------------------------

    // Add a worksheet to the workbook.
    let worksheet = workbook.add_worksheet();

    let caption = "Default table with data.";

    // Set the column widths for clarity.
    worksheet.set_column_range_width(1, 6, 12)?;

    // Write the caption.
    worksheet.write(0, 1, caption)?;

    // Write the table data.
    worksheet.write_column(3, 1, items)?;
    worksheet.write_row_matrix(3, 2, data)?;

    // Create a new table.
    let table = Table::new();

    // Add the table to the worksheet.
    worksheet.add_table(2, 1, 6, 5, &table)?;

    // -----------------------------------------------------------------------
    // Example 3. Table without default autofilter.
    // -----------------------------------------------------------------------

    // Add a worksheet to the workbook.
    let worksheet = workbook.add_worksheet();

    let caption = "Table without default autofilter.";

    // Set the column widths for clarity.
    worksheet.set_column_range_width(1, 6, 12)?;

    // Write the caption.
    worksheet.write(0, 1, caption)?;

    // Write the table data.
    worksheet.write_column(3, 1, items)?;
    worksheet.write_row_matrix(3, 2, data)?;

    // Create and configure a new table.
    let table = Table::new().set_autofilter(false);

    // Add the table to the worksheet.
    worksheet.add_table(2, 1, 6, 5, &table)?;

    // -----------------------------------------------------------------------
    // Example 4. Table without default header row.
    // -----------------------------------------------------------------------

    // Add a worksheet to the workbook.
    let worksheet = workbook.add_worksheet();

    let caption = "Table without default header row.";

    // Set the column widths for clarity.
    worksheet.set_column_range_width(1, 6, 12)?;

    // Write the caption.
    worksheet.write(0, 1, caption)?;

    // Write the table data.
    worksheet.write_column(3, 1, items)?;
    worksheet.write_row_matrix(3, 2, data)?;

    // Create and configure a new table.
    let table = Table::new().set_header_row(false);

    // Add the table to the worksheet.
    worksheet.add_table(3, 1, 6, 5, &table)?;

    // -----------------------------------------------------------------------
    // Example 5. Default table with "First Column" and "Last Column" options.
    // -----------------------------------------------------------------------

    // Add a worksheet to the workbook.
    let worksheet = workbook.add_worksheet();

    let caption = "Default table with 'First Column' and 'Last Column' options.";

    // Set the column widths for clarity.
    worksheet.set_column_range_width(1, 6, 12)?;

    // Write the caption.
    worksheet.write(0, 1, caption)?;

    // Write the table data.
    worksheet.write_column(3, 1, items)?;
    worksheet.write_row_matrix(3, 2, data)?;

    // Create and configure a new table.
    let table = Table::new().set_first_column(true).set_last_column(true);

    // Add the table to the worksheet.
    worksheet.add_table(2, 1, 6, 5, &table)?;

    // -----------------------------------------------------------------------
    // Example 6. Table with banded columns but without default banded rows.
    // -----------------------------------------------------------------------

    // Add a worksheet to the workbook.
    let worksheet = workbook.add_worksheet();

    let caption = "Table with banded columns but without default banded rows.";

    // Set the column widths for clarity.
    worksheet.set_column_range_width(1, 6, 12)?;

    // Write the caption.
    worksheet.write(0, 1, caption)?;

    // Write the table data.
    worksheet.write_column(3, 1, items)?;
    worksheet.write_row_matrix(3, 2, data)?;

    // Create and configure a new table.
    let table = Table::new().set_banded_rows(false).set_banded_columns(true);

    // Add the table to the worksheet.
    worksheet.add_table(2, 1, 6, 5, &table)?;

    // -----------------------------------------------------------------------
    // Example 7. Table with user defined column headers.
    // -----------------------------------------------------------------------

    // Add a worksheet to the workbook.
    let worksheet = workbook.add_worksheet();

    let caption = "Table with user defined column headers.";

    // Set the column widths for clarity.
    worksheet.set_column_range_width(1, 6, 12)?;

    // Write the caption.
    worksheet.write(0, 1, caption)?;

    // Write the table data.
    worksheet.write_column(3, 1, items)?;
    worksheet.write_row_matrix(3, 2, data)?;

    // Create and configure a new table.
    let columns = vec![
        TableColumn::new().set_header("Product"),
        TableColumn::new().set_header("Quarter 1"),
        TableColumn::new().set_header("Quarter 2"),
        TableColumn::new().set_header("Quarter 3"),
        TableColumn::new().set_header("Quarter 4"),
    ];

    let table = Table::new().set_columns(&columns);

    // Add the table to the worksheet.
    worksheet.add_table(2, 1, 6, 5, &table)?;

    // -----------------------------------------------------------------------
    // Example 8. Table with user defined column headers, and formulas.
    // -----------------------------------------------------------------------

    // Add a worksheet to the workbook.
    let worksheet = workbook.add_worksheet();

    let caption = "Table with user defined column headers, and formulas.";

    // Set the column widths for clarity.
    worksheet.set_column_range_width(1, 6, 12)?;

    // Write the caption.
    worksheet.write(0, 1, caption)?;

    // Write the table data.
    worksheet.write_column(3, 1, items)?;
    worksheet.write_row_matrix(3, 2, data)?;

    // Create and configure a new table.
    let columns = vec![
        TableColumn::new().set_header("Product"),
        TableColumn::new().set_header("Quarter 1"),
        TableColumn::new().set_header("Quarter 2"),
        TableColumn::new().set_header("Quarter 3"),
        TableColumn::new().set_header("Quarter 4"),
        TableColumn::new()
            .set_header("Year")
            .set_formula("SUM(Table8[@[Quarter 1]:[Quarter 4]])"),
    ];

    let table = Table::new().set_columns(&columns);

    // Add the table to the worksheet.
    worksheet.add_table(2, 1, 6, 6, &table)?;

    // -----------------------------------------------------------------------
    // Example 9. Table with totals row (but no caption or totals).
    // -----------------------------------------------------------------------

    // Add a worksheet to the workbook.
    let worksheet = workbook.add_worksheet();

    let caption = "Table with totals row (but no caption or totals).";

    // Set the column widths for clarity.
    worksheet.set_column_range_width(1, 6, 12)?;

    // Write the caption.
    worksheet.write(0, 1, caption)?;

    // Write the table data.
    worksheet.write_column(3, 1, items)?;
    worksheet.write_row_matrix(3, 2, data)?;

    // Create and configure a new table.
    let columns = vec![
        TableColumn::new().set_header("Product"),
        TableColumn::new().set_header("Quarter 1"),
        TableColumn::new().set_header("Quarter 2"),
        TableColumn::new().set_header("Quarter 3"),
        TableColumn::new().set_header("Quarter 4"),
        TableColumn::new()
            .set_header("Year")
            .set_formula("SUM(Table9[@[Quarter 1]:[Quarter 4]])"),
    ];

    let table = Table::new().set_columns(&columns).set_total_row(true);

    // Add the table to the worksheet.
    worksheet.add_table(2, 1, 7, 6, &table)?;

    // -----------------------------------------------------------------------
    // Example 10. Table with totals row with user captions and functions.
    // -----------------------------------------------------------------------

    // Add a worksheet to the workbook.
    let worksheet = workbook.add_worksheet();

    let caption = "Table with totals row with user captions and functions.";

    // Set the column widths for clarity.
    worksheet.set_column_range_width(1, 6, 12)?;

    // Write the caption.
    worksheet.write(0, 1, caption)?;

    // Write the table data.
    worksheet.write_column(3, 1, items)?;
    worksheet.write_row_matrix(3, 2, data)?;

    // Create and configure a new table.
    let columns = vec![
        TableColumn::new()
            .set_header("Product")
            .set_total_label("Totals"),
        TableColumn::new()
            .set_header("Quarter 1")
            .set_total_function(TableFunction::Sum),
        TableColumn::new()
            .set_header("Quarter 2")
            .set_total_function(TableFunction::Sum),
        TableColumn::new()
            .set_header("Quarter 3")
            .set_total_function(TableFunction::Sum),
        TableColumn::new()
            .set_header("Quarter 4")
            .set_total_function(TableFunction::Sum),
        TableColumn::new()
            .set_header("Year")
            .set_total_function(TableFunction::Sum)
            .set_formula("SUM(Table10[@[Quarter 1]:[Quarter 4]])"),
    ];

    let table = Table::new().set_columns(&columns).set_total_row(true);

    // Add the table to the worksheet.
    worksheet.add_table(2, 1, 7, 6, &table)?;

    // -----------------------------------------------------------------------
    // Example 11. Table with alternative Excel style.
    // -----------------------------------------------------------------------

    // Add a worksheet to the workbook.
    let worksheet = workbook.add_worksheet();

    let caption = "Table with alternative Excel style.";

    // Set the column widths for clarity.
    worksheet.set_column_range_width(1, 6, 12)?;

    // Write the caption.
    worksheet.write(0, 1, caption)?;

    // Write the table data.
    worksheet.write_column(3, 1, items)?;
    worksheet.write_row_matrix(3, 2, data)?;

    // Create and configure a new table.
    let columns = vec![
        TableColumn::new()
            .set_header("Product")
            .set_total_label("Totals"),
        TableColumn::new()
            .set_header("Quarter 1")
            .set_total_function(TableFunction::Sum),
        TableColumn::new()
            .set_header("Quarter 2")
            .set_total_function(TableFunction::Sum),
        TableColumn::new()
            .set_header("Quarter 3")
            .set_total_function(TableFunction::Sum),
        TableColumn::new()
            .set_header("Quarter 4")
            .set_total_function(TableFunction::Sum),
        TableColumn::new()
            .set_header("Year")
            .set_total_function(TableFunction::Sum)
            .set_formula("SUM(Table11[@[Quarter 1]:[Quarter 4]])"),
    ];

    let table = Table::new()
        .set_columns(&columns)
        .set_total_row(true)
        .set_style(TableStyle::Light11);

    // Add the table to the worksheet.
    worksheet.add_table(2, 1, 7, 6, &table)?;

    // -----------------------------------------------------------------------
    // Example 12. Table with Excel style removed.
    // -----------------------------------------------------------------------

    // Add a worksheet to the workbook.
    let worksheet = workbook.add_worksheet();

    let caption = "Table with Excel style removed.";

    // Set the column widths for clarity.
    worksheet.set_column_range_width(1, 6, 12)?;

    // Write the caption.
    worksheet.write(0, 1, caption)?;

    // Write the table data.
    worksheet.write_column(3, 1, items)?;
    worksheet.write_row_matrix(3, 2, data)?;

    // Create and configure a new table.
    let columns = vec![
        TableColumn::new()
            .set_header("Product")
            .set_total_label("Totals"),
        TableColumn::new()
            .set_header("Quarter 1")
            .set_total_function(TableFunction::Sum),
        TableColumn::new()
            .set_header("Quarter 2")
            .set_total_function(TableFunction::Sum),
        TableColumn::new()
            .set_header("Quarter 3")
            .set_total_function(TableFunction::Sum),
        TableColumn::new()
            .set_header("Quarter 4")
            .set_total_function(TableFunction::Sum),
        TableColumn::new()
            .set_header("Year")
            .set_total_function(TableFunction::Sum)
            .set_formula("SUM(Table12[@[Quarter 1]:[Quarter 4]])"),
    ];

    let table = Table::new()
        .set_columns(&columns)
        .set_total_row(true)
        .set_style(TableStyle::None);

    // Add the table to the worksheet.
    worksheet.add_table(2, 1, 7, 6, &table)?;

    // Save the file to disk.
    workbook.save("tables.xlsx")?;

    Ok(())
}
Example 8. Table with user defined column headers, and formulas.
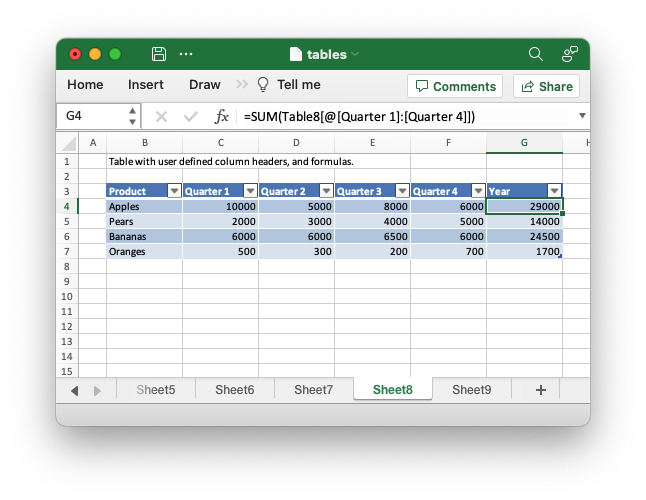
Code to generate the above example:
// SPDX-License-Identifier: MIT OR Apache-2.0
//
// Copyright 2022-2026, John McNamara, jmcnamara@cpan.org

//! Example of how to add tables to a worksheet using the `rust_xlsxwriter`
//! library.
//!
//! Tables in Excel are used to group rows and columns of data into a single
//! structure that can be referenced in a formula or formatted collectively.

use rust_xlsxwriter::{Table, TableColumn, TableFunction, TableStyle, Workbook, XlsxError};

fn main() -> Result<(), XlsxError> {
    // Create a new Excel file object.
    let mut workbook = Workbook::new();

    // Some sample data for the table.
    let items = ["Apples", "Pears", "Bananas", "Oranges"];
    let data = [
        [10000, 5000, 8000, 6000],
        [2000, 3000, 4000, 5000],
        [6000, 6000, 6500, 6000],
        [500, 300, 200, 700],
    ];

    // -----------------------------------------------------------------------
    // Example 1. Default table with no data.
    // -----------------------------------------------------------------------

    // Add a worksheet to the workbook.
    let worksheet = workbook.add_worksheet();

    let caption = "Default table with no data.";

    // Set the column widths for clarity.
    worksheet.set_column_range_width(1, 6, 12)?;

    // Write the caption.
    worksheet.write(0, 1, caption)?;

    // Create a new table.
    let table = Table::new();

    // Add the table to the worksheet.
    worksheet.add_table(2, 1, 6, 5, &table)?;

    // -----------------------------------------------------------------------
    // Example 2. Default table with data.
    // -----------------------------------------------------------------------

    // Add a worksheet to the workbook.
    let worksheet = workbook.add_worksheet();

    let caption = "Default table with data.";

    // Set the column widths for clarity.
    worksheet.set_column_range_width(1, 6, 12)?;

    // Write the caption.
    worksheet.write(0, 1, caption)?;

    // Write the table data.
    worksheet.write_column(3, 1, items)?;
    worksheet.write_row_matrix(3, 2, data)?;

    // Create a new table.
    let table = Table::new();

    // Add the table to the worksheet.
    worksheet.add_table(2, 1, 6, 5, &table)?;

    // -----------------------------------------------------------------------
    // Example 3. Table without default autofilter.
    // -----------------------------------------------------------------------

    // Add a worksheet to the workbook.
    let worksheet = workbook.add_worksheet();

    let caption = "Table without default autofilter.";

    // Set the column widths for clarity.
    worksheet.set_column_range_width(1, 6, 12)?;

    // Write the caption.
    worksheet.write(0, 1, caption)?;

    // Write the table data.
    worksheet.write_column(3, 1, items)?;
    worksheet.write_row_matrix(3, 2, data)?;

    // Create and configure a new table.
    let table = Table::new().set_autofilter(false);

    // Add the table to the worksheet.
    worksheet.add_table(2, 1, 6, 5, &table)?;

    // -----------------------------------------------------------------------
    // Example 4. Table without default header row.
    // -----------------------------------------------------------------------

    // Add a worksheet to the workbook.
    let worksheet = workbook.add_worksheet();

    let caption = "Table without default header row.";

    // Set the column widths for clarity.
    worksheet.set_column_range_width(1, 6, 12)?;

    // Write the caption.
    worksheet.write(0, 1, caption)?;

    // Write the table data.
    worksheet.write_column(3, 1, items)?;
    worksheet.write_row_matrix(3, 2, data)?;

    // Create and configure a new table.
    let table = Table::new().set_header_row(false);

    // Add the table to the worksheet.
    worksheet.add_table(3, 1, 6, 5, &table)?;

    // -----------------------------------------------------------------------
    // Example 5. Default table with "First Column" and "Last Column" options.
    // -----------------------------------------------------------------------

    // Add a worksheet to the workbook.
    let worksheet = workbook.add_worksheet();

    let caption = "Default table with 'First Column' and 'Last Column' options.";

    // Set the column widths for clarity.
    worksheet.set_column_range_width(1, 6, 12)?;

    // Write the caption.
    worksheet.write(0, 1, caption)?;

    // Write the table data.
    worksheet.write_column(3, 1, items)?;
    worksheet.write_row_matrix(3, 2, data)?;

    // Create and configure a new table.
    let table = Table::new().set_first_column(true).set_last_column(true);

    // Add the table to the worksheet.
    worksheet.add_table(2, 1, 6, 5, &table)?;

    // -----------------------------------------------------------------------
    // Example 6. Table with banded columns but without default banded rows.
    // -----------------------------------------------------------------------

    // Add a worksheet to the workbook.
    let worksheet = workbook.add_worksheet();

    let caption = "Table with banded columns but without default banded rows.";

    // Set the column widths for clarity.
    worksheet.set_column_range_width(1, 6, 12)?;

    // Write the caption.
    worksheet.write(0, 1, caption)?;

    // Write the table data.
    worksheet.write_column(3, 1, items)?;
    worksheet.write_row_matrix(3, 2, data)?;

    // Create and configure a new table.
    let table = Table::new().set_banded_rows(false).set_banded_columns(true);

    // Add the table to the worksheet.
    worksheet.add_table(2, 1, 6, 5, &table)?;

    // -----------------------------------------------------------------------
    // Example 7. Table with user defined column headers.
    // -----------------------------------------------------------------------

    // Add a worksheet to the workbook.
    let worksheet = workbook.add_worksheet();

    let caption = "Table with user defined column headers.";

    // Set the column widths for clarity.
    worksheet.set_column_range_width(1, 6, 12)?;

    // Write the caption.
    worksheet.write(0, 1, caption)?;

    // Write the table data.
    worksheet.write_column(3, 1, items)?;
    worksheet.write_row_matrix(3, 2, data)?;

    // Create and configure a new table.
    let columns = vec![
        TableColumn::new().set_header("Product"),
        TableColumn::new().set_header("Quarter 1"),
        TableColumn::new().set_header("Quarter 2"),
        TableColumn::new().set_header("Quarter 3"),
        TableColumn::new().set_header("Quarter 4"),
    ];

    let table = Table::new().set_columns(&columns);

    // Add the table to the worksheet.
    worksheet.add_table(2, 1, 6, 5, &table)?;

    // -----------------------------------------------------------------------
    // Example 8. Table with user defined column headers, and formulas.
    // -----------------------------------------------------------------------

    // Add a worksheet to the workbook.
    let worksheet = workbook.add_worksheet();

    let caption = "Table with user defined column headers, and formulas.";

    // Set the column widths for clarity.
    worksheet.set_column_range_width(1, 6, 12)?;

    // Write the caption.
    worksheet.write(0, 1, caption)?;

    // Write the table data.
    worksheet.write_column(3, 1, items)?;
    worksheet.write_row_matrix(3, 2, data)?;

    // Create and configure a new table.
    let columns = vec![
        TableColumn::new().set_header("Product"),
        TableColumn::new().set_header("Quarter 1"),
        TableColumn::new().set_header("Quarter 2"),
        TableColumn::new().set_header("Quarter 3"),
        TableColumn::new().set_header("Quarter 4"),
        TableColumn::new()
            .set_header("Year")
            .set_formula("SUM(Table8[@[Quarter 1]:[Quarter 4]])"),
    ];

    let table = Table::new().set_columns(&columns);

    // Add the table to the worksheet.
    worksheet.add_table(2, 1, 6, 6, &table)?;

    // -----------------------------------------------------------------------
    // Example 9. Table with totals row (but no caption or totals).
    // -----------------------------------------------------------------------

    // Add a worksheet to the workbook.
    let worksheet = workbook.add_worksheet();

    let caption = "Table with totals row (but no caption or totals).";

    // Set the column widths for clarity.
    worksheet.set_column_range_width(1, 6, 12)?;

    // Write the caption.
    worksheet.write(0, 1, caption)?;

    // Write the table data.
    worksheet.write_column(3, 1, items)?;
    worksheet.write_row_matrix(3, 2, data)?;

    // Create and configure a new table.
    let columns = vec![
        TableColumn::new().set_header("Product"),
        TableColumn::new().set_header("Quarter 1"),
        TableColumn::new().set_header("Quarter 2"),
        TableColumn::new().set_header("Quarter 3"),
        TableColumn::new().set_header("Quarter 4"),
        TableColumn::new()
            .set_header("Year")
            .set_formula("SUM(Table9[@[Quarter 1]:[Quarter 4]])"),
    ];

    let table = Table::new().set_columns(&columns).set_total_row(true);

    // Add the table to the worksheet.
    worksheet.add_table(2, 1, 7, 6, &table)?;

    // -----------------------------------------------------------------------
    // Example 10. Table with totals row with user captions and functions.
    // -----------------------------------------------------------------------

    // Add a worksheet to the workbook.
    let worksheet = workbook.add_worksheet();

    let caption = "Table with totals row with user captions and functions.";

    // Set the column widths for clarity.
    worksheet.set_column_range_width(1, 6, 12)?;

    // Write the caption.
    worksheet.write(0, 1, caption)?;

    // Write the table data.
    worksheet.write_column(3, 1, items)?;
    worksheet.write_row_matrix(3, 2, data)?;

    // Create and configure a new table.
    let columns = vec![
        TableColumn::new()
            .set_header("Product")
            .set_total_label("Totals"),
        TableColumn::new()
            .set_header("Quarter 1")
            .set_total_function(TableFunction::Sum),
        TableColumn::new()
            .set_header("Quarter 2")
            .set_total_function(TableFunction::Sum),
        TableColumn::new()
            .set_header("Quarter 3")
            .set_total_function(TableFunction::Sum),
        TableColumn::new()
            .set_header("Quarter 4")
            .set_total_function(TableFunction::Sum),
        TableColumn::new()
            .set_header("Year")
            .set_total_function(TableFunction::Sum)
            .set_formula("SUM(Table10[@[Quarter 1]:[Quarter 4]])"),
    ];

    let table = Table::new().set_columns(&columns).set_total_row(true);

    // Add the table to the worksheet.
    worksheet.add_table(2, 1, 7, 6, &table)?;

    // -----------------------------------------------------------------------
    // Example 11. Table with alternative Excel style.
    // -----------------------------------------------------------------------

    // Add a worksheet to the workbook.
    let worksheet = workbook.add_worksheet();

    let caption = "Table with alternative Excel style.";

    // Set the column widths for clarity.
    worksheet.set_column_range_width(1, 6, 12)?;

    // Write the caption.
    worksheet.write(0, 1, caption)?;

    // Write the table data.
    worksheet.write_column(3, 1, items)?;
    worksheet.write_row_matrix(3, 2, data)?;

    // Create and configure a new table.
    let columns = vec![
        TableColumn::new()
            .set_header("Product")
            .set_total_label("Totals"),
        TableColumn::new()
            .set_header("Quarter 1")
            .set_total_function(TableFunction::Sum),
        TableColumn::new()
            .set_header("Quarter 2")
            .set_total_function(TableFunction::Sum),
        TableColumn::new()
            .set_header("Quarter 3")
            .set_total_function(TableFunction::Sum),
        TableColumn::new()
            .set_header("Quarter 4")
            .set_total_function(TableFunction::Sum),
        TableColumn::new()
            .set_header("Year")
            .set_total_function(TableFunction::Sum)
            .set_formula("SUM(Table11[@[Quarter 1]:[Quarter 4]])"),
    ];

    let table = Table::new()
        .set_columns(&columns)
        .set_total_row(true)
        .set_style(TableStyle::Light11);

    // Add the table to the worksheet.
    worksheet.add_table(2, 1, 7, 6, &table)?;

    // -----------------------------------------------------------------------
    // Example 12. Table with Excel style removed.
    // -----------------------------------------------------------------------

    // Add a worksheet to the workbook.
    let worksheet = workbook.add_worksheet();

    let caption = "Table with Excel style removed.";

    // Set the column widths for clarity.
    worksheet.set_column_range_width(1, 6, 12)?;

    // Write the caption.
    worksheet.write(0, 1, caption)?;

    // Write the table data.
    worksheet.write_column(3, 1, items)?;
    worksheet.write_row_matrix(3, 2, data)?;

    // Create and configure a new table.
    let columns = vec![
        TableColumn::new()
            .set_header("Product")
            .set_total_label("Totals"),
        TableColumn::new()
            .set_header("Quarter 1")
            .set_total_function(TableFunction::Sum),
        TableColumn::new()
            .set_header("Quarter 2")
            .set_total_function(TableFunction::Sum),
        TableColumn::new()
            .set_header("Quarter 3")
            .set_total_function(TableFunction::Sum),
        TableColumn::new()
            .set_header("Quarter 4")
            .set_total_function(TableFunction::Sum),
        TableColumn::new()
            .set_header("Year")
            .set_total_function(TableFunction::Sum)
            .set_formula("SUM(Table12[@[Quarter 1]:[Quarter 4]])"),
    ];

    let table = Table::new()
        .set_columns(&columns)
        .set_total_row(true)
        .set_style(TableStyle::None);

    // Add the table to the worksheet.
    worksheet.add_table(2, 1, 7, 6, &table)?;

    // Save the file to disk.
    workbook.save("tables.xlsx")?;

    Ok(())
}
Example 9. Table with totals row (but no caption or totals).
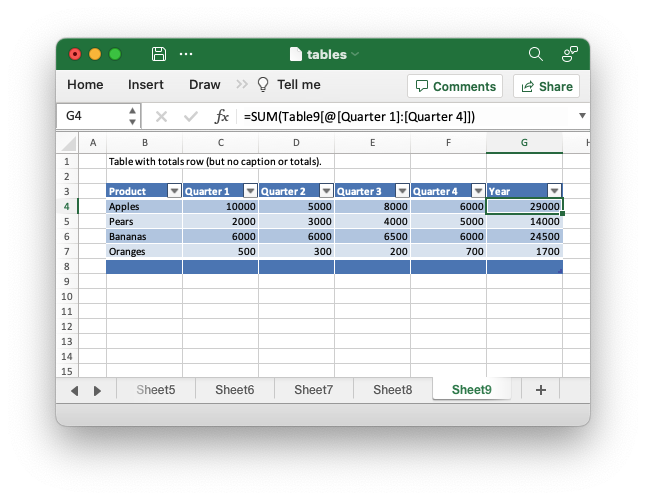
Code to generate the above example:
// SPDX-License-Identifier: MIT OR Apache-2.0
//
// Copyright 2022-2026, John McNamara, jmcnamara@cpan.org

//! Example of how to add tables to a worksheet using the `rust_xlsxwriter`
//! library.
//!
//! Tables in Excel are used to group rows and columns of data into a single
//! structure that can be referenced in a formula or formatted collectively.

use rust_xlsxwriter::{Table, TableColumn, TableFunction, TableStyle, Workbook, XlsxError};

fn main() -> Result<(), XlsxError> {
    // Create a new Excel file object.
    let mut workbook = Workbook::new();

    // Some sample data for the table.
    let items = ["Apples", "Pears", "Bananas", "Oranges"];
    let data = [
        [10000, 5000, 8000, 6000],
        [2000, 3000, 4000, 5000],
        [6000, 6000, 6500, 6000],
        [500, 300, 200, 700],
    ];

    // -----------------------------------------------------------------------
    // Example 1. Default table with no data.
    // -----------------------------------------------------------------------

    // Add a worksheet to the workbook.
    let worksheet = workbook.add_worksheet();

    let caption = "Default table with no data.";

    // Set the column widths for clarity.
    worksheet.set_column_range_width(1, 6, 12)?;

    // Write the caption.
    worksheet.write(0, 1, caption)?;

    // Create a new table.
    let table = Table::new();

    // Add the table to the worksheet.
    worksheet.add_table(2, 1, 6, 5, &table)?;

    // -----------------------------------------------------------------------
    // Example 2. Default table with data.
    // -----------------------------------------------------------------------

    // Add a worksheet to the workbook.
    let worksheet = workbook.add_worksheet();

    let caption = "Default table with data.";

    // Set the column widths for clarity.
    worksheet.set_column_range_width(1, 6, 12)?;

    // Write the caption.
    worksheet.write(0, 1, caption)?;

    // Write the table data.
    worksheet.write_column(3, 1, items)?;
    worksheet.write_row_matrix(3, 2, data)?;

    // Create a new table.
    let table = Table::new();

    // Add the table to the worksheet.
    worksheet.add_table(2, 1, 6, 5, &table)?;

    // -----------------------------------------------------------------------
    // Example 3. Table without default autofilter.
    // -----------------------------------------------------------------------

    // Add a worksheet to the workbook.
    let worksheet = workbook.add_worksheet();

    let caption = "Table without default autofilter.";

    // Set the column widths for clarity.
    worksheet.set_column_range_width(1, 6, 12)?;

    // Write the caption.
    worksheet.write(0, 1, caption)?;

    // Write the table data.
    worksheet.write_column(3, 1, items)?;
    worksheet.write_row_matrix(3, 2, data)?;

    // Create and configure a new table.
    let table = Table::new().set_autofilter(false);

    // Add the table to the worksheet.
    worksheet.add_table(2, 1, 6, 5, &table)?;

    // -----------------------------------------------------------------------
    // Example 4. Table without default header row.
    // -----------------------------------------------------------------------

    // Add a worksheet to the workbook.
    let worksheet = workbook.add_worksheet();

    let caption = "Table without default header row.";

    // Set the column widths for clarity.
    worksheet.set_column_range_width(1, 6, 12)?;

    // Write the caption.
    worksheet.write(0, 1, caption)?;

    // Write the table data.
    worksheet.write_column(3, 1, items)?;
    worksheet.write_row_matrix(3, 2, data)?;

    // Create and configure a new table.
    let table = Table::new().set_header_row(false);

    // Add the table to the worksheet.
    worksheet.add_table(3, 1, 6, 5, &table)?;

    // -----------------------------------------------------------------------
    // Example 5. Default table with "First Column" and "Last Column" options.
    // -----------------------------------------------------------------------

    // Add a worksheet to the workbook.
    let worksheet = workbook.add_worksheet();

    let caption = "Default table with 'First Column' and 'Last Column' options.";

    // Set the column widths for clarity.
    worksheet.set_column_range_width(1, 6, 12)?;

    // Write the caption.
    worksheet.write(0, 1, caption)?;

    // Write the table data.
    worksheet.write_column(3, 1, items)?;
    worksheet.write_row_matrix(3, 2, data)?;

    // Create and configure a new table.
    let table = Table::new().set_first_column(true).set_last_column(true);

    // Add the table to the worksheet.
    worksheet.add_table(2, 1, 6, 5, &table)?;

    // -----------------------------------------------------------------------
    // Example 6. Table with banded columns but without default banded rows.
    // -----------------------------------------------------------------------

    // Add a worksheet to the workbook.
    let worksheet = workbook.add_worksheet();

    let caption = "Table with banded columns but without default banded rows.";

    // Set the column widths for clarity.
    worksheet.set_column_range_width(1, 6, 12)?;

    // Write the caption.
    worksheet.write(0, 1, caption)?;

    // Write the table data.
    worksheet.write_column(3, 1, items)?;
    worksheet.write_row_matrix(3, 2, data)?;

    // Create and configure a new table.
    let table = Table::new().set_banded_rows(false).set_banded_columns(true);

    // Add the table to the worksheet.
    worksheet.add_table(2, 1, 6, 5, &table)?;

    // -----------------------------------------------------------------------
    // Example 7. Table with user defined column headers.
    // -----------------------------------------------------------------------

    // Add a worksheet to the workbook.
    let worksheet = workbook.add_worksheet();

    let caption = "Table with user defined column headers.";

    // Set the column widths for clarity.
    worksheet.set_column_range_width(1, 6, 12)?;

    // Write the caption.
    worksheet.write(0, 1, caption)?;

    // Write the table data.
    worksheet.write_column(3, 1, items)?;
    worksheet.write_row_matrix(3, 2, data)?;

    // Create and configure a new table.
    let columns = vec![
        TableColumn::new().set_header("Product"),
        TableColumn::new().set_header("Quarter 1"),
        TableColumn::new().set_header("Quarter 2"),
        TableColumn::new().set_header("Quarter 3"),
        TableColumn::new().set_header("Quarter 4"),
    ];

    let table = Table::new().set_columns(&columns);

    // Add the table to the worksheet.
    worksheet.add_table(2, 1, 6, 5, &table)?;

    // -----------------------------------------------------------------------
    // Example 8. Table with user defined column headers, and formulas.
    // -----------------------------------------------------------------------

    // Add a worksheet to the workbook.
    let worksheet = workbook.add_worksheet();

    let caption = "Table with user defined column headers, and formulas.";

    // Set the column widths for clarity.
    worksheet.set_column_range_width(1, 6, 12)?;

    // Write the caption.
    worksheet.write(0, 1, caption)?;

    // Write the table data.
    worksheet.write_column(3, 1, items)?;
    worksheet.write_row_matrix(3, 2, data)?;

    // Create and configure a new table.
    let columns = vec![
        TableColumn::new().set_header("Product"),
        TableColumn::new().set_header("Quarter 1"),
        TableColumn::new().set_header("Quarter 2"),
        TableColumn::new().set_header("Quarter 3"),
        TableColumn::new().set_header("Quarter 4"),
        TableColumn::new()
            .set_header("Year")
            .set_formula("SUM(Table8[@[Quarter 1]:[Quarter 4]])"),
    ];

    let table = Table::new().set_columns(&columns);

    // Add the table to the worksheet.
    worksheet.add_table(2, 1, 6, 6, &table)?;

    // -----------------------------------------------------------------------
    // Example 9. Table with totals row (but no caption or totals).
    // -----------------------------------------------------------------------

    // Add a worksheet to the workbook.
    let worksheet = workbook.add_worksheet();

    let caption = "Table with totals row (but no caption or totals).";

    // Set the column widths for clarity.
    worksheet.set_column_range_width(1, 6, 12)?;

    // Write the caption.
    worksheet.write(0, 1, caption)?;

    // Write the table data.
    worksheet.write_column(3, 1, items)?;
    worksheet.write_row_matrix(3, 2, data)?;

    // Create and configure a new table.
    let columns = vec![
        TableColumn::new().set_header("Product"),
        TableColumn::new().set_header("Quarter 1"),
        TableColumn::new().set_header("Quarter 2"),
        TableColumn::new().set_header("Quarter 3"),
        TableColumn::new().set_header("Quarter 4"),
        TableColumn::new()
            .set_header("Year")
            .set_formula("SUM(Table9[@[Quarter 1]:[Quarter 4]])"),
    ];

    let table = Table::new().set_columns(&columns).set_total_row(true);

    // Add the table to the worksheet.
    worksheet.add_table(2, 1, 7, 6, &table)?;

    // -----------------------------------------------------------------------
    // Example 10. Table with totals row with user captions and functions.
    // -----------------------------------------------------------------------

    // Add a worksheet to the workbook.
    let worksheet = workbook.add_worksheet();

    let caption = "Table with totals row with user captions and functions.";

    // Set the column widths for clarity.
    worksheet.set_column_range_width(1, 6, 12)?;

    // Write the caption.
    worksheet.write(0, 1, caption)?;

    // Write the table data.
    worksheet.write_column(3, 1, items)?;
    worksheet.write_row_matrix(3, 2, data)?;

    // Create and configure a new table.
    let columns = vec![
        TableColumn::new()
            .set_header("Product")
            .set_total_label("Totals"),
        TableColumn::new()
            .set_header("Quarter 1")
            .set_total_function(TableFunction::Sum),
        TableColumn::new()
            .set_header("Quarter 2")
            .set_total_function(TableFunction::Sum),
        TableColumn::new()
            .set_header("Quarter 3")
            .set_total_function(TableFunction::Sum),
        TableColumn::new()
            .set_header("Quarter 4")
            .set_total_function(TableFunction::Sum),
        TableColumn::new()
            .set_header("Year")
            .set_total_function(TableFunction::Sum)
            .set_formula("SUM(Table10[@[Quarter 1]:[Quarter 4]])"),
    ];

    let table = Table::new().set_columns(&columns).set_total_row(true);

    // Add the table to the worksheet.
    worksheet.add_table(2, 1, 7, 6, &table)?;

    // -----------------------------------------------------------------------
    // Example 11. Table with alternative Excel style.
    // -----------------------------------------------------------------------

    // Add a worksheet to the workbook.
    let worksheet = workbook.add_worksheet();

    let caption = "Table with alternative Excel style.";

    // Set the column widths for clarity.
    worksheet.set_column_range_width(1, 6, 12)?;

    // Write the caption.
    worksheet.write(0, 1, caption)?;

    // Write the table data.
    worksheet.write_column(3, 1, items)?;
    worksheet.write_row_matrix(3, 2, data)?;

    // Create and configure a new table.
    let columns = vec![
        TableColumn::new()
            .set_header("Product")
            .set_total_label("Totals"),
        TableColumn::new()
            .set_header("Quarter 1")
            .set_total_function(TableFunction::Sum),
        TableColumn::new()
            .set_header("Quarter 2")
            .set_total_function(TableFunction::Sum),
        TableColumn::new()
            .set_header("Quarter 3")
            .set_total_function(TableFunction::Sum),
        TableColumn::new()
            .set_header("Quarter 4")
            .set_total_function(TableFunction::Sum),
        TableColumn::new()
            .set_header("Year")
            .set_total_function(TableFunction::Sum)
            .set_formula("SUM(Table11[@[Quarter 1]:[Quarter 4]])"),
    ];

    let table = Table::new()
        .set_columns(&columns)
        .set_total_row(true)
        .set_style(TableStyle::Light11);

    // Add the table to the worksheet.
    worksheet.add_table(2, 1, 7, 6, &table)?;

    // -----------------------------------------------------------------------
    // Example 12. Table with Excel style removed.
    // -----------------------------------------------------------------------

    // Add a worksheet to the workbook.
    let worksheet = workbook.add_worksheet();

    let caption = "Table with Excel style removed.";

    // Set the column widths for clarity.
    worksheet.set_column_range_width(1, 6, 12)?;

    // Write the caption.
    worksheet.write(0, 1, caption)?;

    // Write the table data.
    worksheet.write_column(3, 1, items)?;
    worksheet.write_row_matrix(3, 2, data)?;

    // Create and configure a new table.
    let columns = vec![
        TableColumn::new()
            .set_header("Product")
            .set_total_label("Totals"),
        TableColumn::new()
            .set_header("Quarter 1")
            .set_total_function(TableFunction::Sum),
        TableColumn::new()
            .set_header("Quarter 2")
            .set_total_function(TableFunction::Sum),
        TableColumn::new()
            .set_header("Quarter 3")
            .set_total_function(TableFunction::Sum),
        TableColumn::new()
            .set_header("Quarter 4")
            .set_total_function(TableFunction::Sum),
        TableColumn::new()
            .set_header("Year")
            .set_total_function(TableFunction::Sum)
            .set_formula("SUM(Table12[@[Quarter 1]:[Quarter 4]])"),
    ];

    let table = Table::new()
        .set_columns(&columns)
        .set_total_row(true)
        .set_style(TableStyle::None);

    // Add the table to the worksheet.
    worksheet.add_table(2, 1, 7, 6, &table)?;

    // Save the file to disk.
    workbook.save("tables.xlsx")?;

    Ok(())
}
Example 10. Table with totals row with user captions and functions.
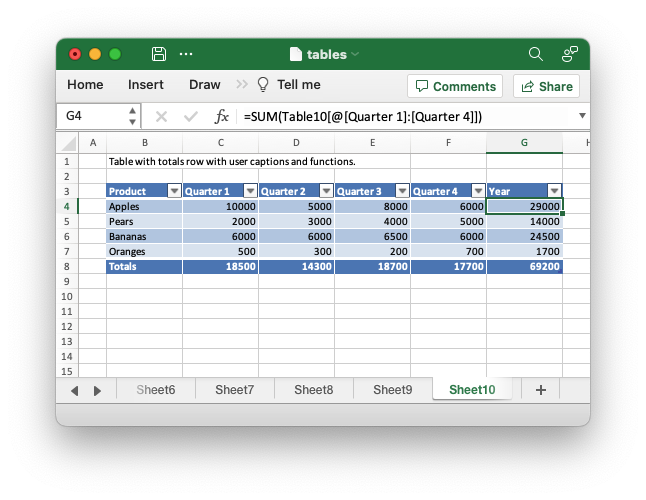
Code to generate the above example:
// SPDX-License-Identifier: MIT OR Apache-2.0
//
// Copyright 2022-2026, John McNamara, jmcnamara@cpan.org

//! Example of how to add tables to a worksheet using the `rust_xlsxwriter`
//! library.
//!
//! Tables in Excel are used to group rows and columns of data into a single
//! structure that can be referenced in a formula or formatted collectively.

use rust_xlsxwriter::{Table, TableColumn, TableFunction, TableStyle, Workbook, XlsxError};

fn main() -> Result<(), XlsxError> {
    // Create a new Excel file object.
    let mut workbook = Workbook::new();

    // Some sample data for the table.
    let items = ["Apples", "Pears", "Bananas", "Oranges"];
    let data = [
        [10000, 5000, 8000, 6000],
        [2000, 3000, 4000, 5000],
        [6000, 6000, 6500, 6000],
        [500, 300, 200, 700],
    ];

    // -----------------------------------------------------------------------
    // Example 1. Default table with no data.
    // -----------------------------------------------------------------------

    // Add a worksheet to the workbook.
    let worksheet = workbook.add_worksheet();

    let caption = "Default table with no data.";

    // Set the column widths for clarity.
    worksheet.set_column_range_width(1, 6, 12)?;

    // Write the caption.
    worksheet.write(0, 1, caption)?;

    // Create a new table.
    let table = Table::new();

    // Add the table to the worksheet.
    worksheet.add_table(2, 1, 6, 5, &table)?;

    // -----------------------------------------------------------------------
    // Example 2. Default table with data.
    // -----------------------------------------------------------------------

    // Add a worksheet to the workbook.
    let worksheet = workbook.add_worksheet();

    let caption = "Default table with data.";

    // Set the column widths for clarity.
    worksheet.set_column_range_width(1, 6, 12)?;

    // Write the caption.
    worksheet.write(0, 1, caption)?;

    // Write the table data.
    worksheet.write_column(3, 1, items)?;
    worksheet.write_row_matrix(3, 2, data)?;

    // Create a new table.
    let table = Table::new();

    // Add the table to the worksheet.
    worksheet.add_table(2, 1, 6, 5, &table)?;

    // -----------------------------------------------------------------------
    // Example 3. Table without default autofilter.
    // -----------------------------------------------------------------------

    // Add a worksheet to the workbook.
    let worksheet = workbook.add_worksheet();

    let caption = "Table without default autofilter.";

    // Set the column widths for clarity.
    worksheet.set_column_range_width(1, 6, 12)?;

    // Write the caption.
    worksheet.write(0, 1, caption)?;

    // Write the table data.
    worksheet.write_column(3, 1, items)?;
    worksheet.write_row_matrix(3, 2, data)?;

    // Create and configure a new table.
    let table = Table::new().set_autofilter(false);

    // Add the table to the worksheet.
    worksheet.add_table(2, 1, 6, 5, &table)?;

    // -----------------------------------------------------------------------
    // Example 4. Table without default header row.
    // -----------------------------------------------------------------------

    // Add a worksheet to the workbook.
    let worksheet = workbook.add_worksheet();

    let caption = "Table without default header row.";

    // Set the column widths for clarity.
    worksheet.set_column_range_width(1, 6, 12)?;

    // Write the caption.
    worksheet.write(0, 1, caption)?;

    // Write the table data.
    worksheet.write_column(3, 1, items)?;
    worksheet.write_row_matrix(3, 2, data)?;

    // Create and configure a new table.
    let table = Table::new().set_header_row(false);

    // Add the table to the worksheet.
    worksheet.add_table(3, 1, 6, 5, &table)?;

    // -----------------------------------------------------------------------
    // Example 5. Default table with "First Column" and "Last Column" options.
    // -----------------------------------------------------------------------

    // Add a worksheet to the workbook.
    let worksheet = workbook.add_worksheet();

    let caption = "Default table with 'First Column' and 'Last Column' options.";

    // Set the column widths for clarity.
    worksheet.set_column_range_width(1, 6, 12)?;

    // Write the caption.
    worksheet.write(0, 1, caption)?;

    // Write the table data.
    worksheet.write_column(3, 1, items)?;
    worksheet.write_row_matrix(3, 2, data)?;

    // Create and configure a new table.
    let table = Table::new().set_first_column(true).set_last_column(true);

    // Add the table to the worksheet.
    worksheet.add_table(2, 1, 6, 5, &table)?;

    // -----------------------------------------------------------------------
    // Example 6. Table with banded columns but without default banded rows.
    // -----------------------------------------------------------------------

    // Add a worksheet to the workbook.
    let worksheet = workbook.add_worksheet();

    let caption = "Table with banded columns but without default banded rows.";

    // Set the column widths for clarity.
    worksheet.set_column_range_width(1, 6, 12)?;

    // Write the caption.
    worksheet.write(0, 1, caption)?;

    // Write the table data.
    worksheet.write_column(3, 1, items)?;
    worksheet.write_row_matrix(3, 2, data)?;

    // Create and configure a new table.
    let table = Table::new().set_banded_rows(false).set_banded_columns(true);

    // Add the table to the worksheet.
    worksheet.add_table(2, 1, 6, 5, &table)?;

    // -----------------------------------------------------------------------
    // Example 7. Table with user defined column headers.
    // -----------------------------------------------------------------------

    // Add a worksheet to the workbook.
    let worksheet = workbook.add_worksheet();

    let caption = "Table with user defined column headers.";

    // Set the column widths for clarity.
    worksheet.set_column_range_width(1, 6, 12)?;

    // Write the caption.
    worksheet.write(0, 1, caption)?;

    // Write the table data.
    worksheet.write_column(3, 1, items)?;
    worksheet.write_row_matrix(3, 2, data)?;

    // Create and configure a new table.
    let columns = vec![
        TableColumn::new().set_header("Product"),
        TableColumn::new().set_header("Quarter 1"),
        TableColumn::new().set_header("Quarter 2"),
        TableColumn::new().set_header("Quarter 3"),
        TableColumn::new().set_header("Quarter 4"),
    ];

    let table = Table::new().set_columns(&columns);

    // Add the table to the worksheet.
    worksheet.add_table(2, 1, 6, 5, &table)?;

    // -----------------------------------------------------------------------
    // Example 8. Table with user defined column headers, and formulas.
    // -----------------------------------------------------------------------

    // Add a worksheet to the workbook.
    let worksheet = workbook.add_worksheet();

    let caption = "Table with user defined column headers, and formulas.";

    // Set the column widths for clarity.
    worksheet.set_column_range_width(1, 6, 12)?;

    // Write the caption.
    worksheet.write(0, 1, caption)?;

    // Write the table data.
    worksheet.write_column(3, 1, items)?;
    worksheet.write_row_matrix(3, 2, data)?;

    // Create and configure a new table.
    let columns = vec![
        TableColumn::new().set_header("Product"),
        TableColumn::new().set_header("Quarter 1"),
        TableColumn::new().set_header("Quarter 2"),
        TableColumn::new().set_header("Quarter 3"),
        TableColumn::new().set_header("Quarter 4"),
        TableColumn::new()
            .set_header("Year")
            .set_formula("SUM(Table8[@[Quarter 1]:[Quarter 4]])"),
    ];

    let table = Table::new().set_columns(&columns);

    // Add the table to the worksheet.
    worksheet.add_table(2, 1, 6, 6, &table)?;

    // -----------------------------------------------------------------------
    // Example 9. Table with totals row (but no caption or totals).
    // -----------------------------------------------------------------------

    // Add a worksheet to the workbook.
    let worksheet = workbook.add_worksheet();

    let caption = "Table with totals row (but no caption or totals).";

    // Set the column widths for clarity.
    worksheet.set_column_range_width(1, 6, 12)?;

    // Write the caption.
    worksheet.write(0, 1, caption)?;

    // Write the table data.
    worksheet.write_column(3, 1, items)?;
    worksheet.write_row_matrix(3, 2, data)?;

    // Create and configure a new table.
    let columns = vec![
        TableColumn::new().set_header("Product"),
        TableColumn::new().set_header("Quarter 1"),
        TableColumn::new().set_header("Quarter 2"),
        TableColumn::new().set_header("Quarter 3"),
        TableColumn::new().set_header("Quarter 4"),
        TableColumn::new()
            .set_header("Year")
            .set_formula("SUM(Table9[@[Quarter 1]:[Quarter 4]])"),
    ];

    let table = Table::new().set_columns(&columns).set_total_row(true);

    // Add the table to the worksheet.
    worksheet.add_table(2, 1, 7, 6, &table)?;

    // -----------------------------------------------------------------------
    // Example 10. Table with totals row with user captions and functions.
    // -----------------------------------------------------------------------

    // Add a worksheet to the workbook.
    let worksheet = workbook.add_worksheet();

    let caption = "Table with totals row with user captions and functions.";

    // Set the column widths for clarity.
    worksheet.set_column_range_width(1, 6, 12)?;

    // Write the caption.
    worksheet.write(0, 1, caption)?;

    // Write the table data.
    worksheet.write_column(3, 1, items)?;
    worksheet.write_row_matrix(3, 2, data)?;

    // Create and configure a new table.
    let columns = vec![
        TableColumn::new()
            .set_header("Product")
            .set_total_label("Totals"),
        TableColumn::new()
            .set_header("Quarter 1")
            .set_total_function(TableFunction::Sum),
        TableColumn::new()
            .set_header("Quarter 2")
            .set_total_function(TableFunction::Sum),
        TableColumn::new()
            .set_header("Quarter 3")
            .set_total_function(TableFunction::Sum),
        TableColumn::new()
            .set_header("Quarter 4")
            .set_total_function(TableFunction::Sum),
        TableColumn::new()
            .set_header("Year")
            .set_total_function(TableFunction::Sum)
            .set_formula("SUM(Table10[@[Quarter 1]:[Quarter 4]])"),
    ];

    let table = Table::new().set_columns(&columns).set_total_row(true);

    // Add the table to the worksheet.
    worksheet.add_table(2, 1, 7, 6, &table)?;

    // -----------------------------------------------------------------------
    // Example 11. Table with alternative Excel style.
    // -----------------------------------------------------------------------

    // Add a worksheet to the workbook.
    let worksheet = workbook.add_worksheet();

    let caption = "Table with alternative Excel style.";

    // Set the column widths for clarity.
    worksheet.set_column_range_width(1, 6, 12)?;

    // Write the caption.
    worksheet.write(0, 1, caption)?;

    // Write the table data.
    worksheet.write_column(3, 1, items)?;
    worksheet.write_row_matrix(3, 2, data)?;

    // Create and configure a new table.
    let columns = vec![
        TableColumn::new()
            .set_header("Product")
            .set_total_label("Totals"),
        TableColumn::new()
            .set_header("Quarter 1")
            .set_total_function(TableFunction::Sum),
        TableColumn::new()
            .set_header("Quarter 2")
            .set_total_function(TableFunction::Sum),
        TableColumn::new()
            .set_header("Quarter 3")
            .set_total_function(TableFunction::Sum),
        TableColumn::new()
            .set_header("Quarter 4")
            .set_total_function(TableFunction::Sum),
        TableColumn::new()
            .set_header("Year")
            .set_total_function(TableFunction::Sum)
            .set_formula("SUM(Table11[@[Quarter 1]:[Quarter 4]])"),
    ];

    let table = Table::new()
        .set_columns(&columns)
        .set_total_row(true)
        .set_style(TableStyle::Light11);

    // Add the table to the worksheet.
    worksheet.add_table(2, 1, 7, 6, &table)?;

    // -----------------------------------------------------------------------
    // Example 12. Table with Excel style removed.
    // -----------------------------------------------------------------------

    // Add a worksheet to the workbook.
    let worksheet = workbook.add_worksheet();

    let caption = "Table with Excel style removed.";

    // Set the column widths for clarity.
    worksheet.set_column_range_width(1, 6, 12)?;

    // Write the caption.
    worksheet.write(0, 1, caption)?;

    // Write the table data.
    worksheet.write_column(3, 1, items)?;
    worksheet.write_row_matrix(3, 2, data)?;

    // Create and configure a new table.
    let columns = vec![
        TableColumn::new()
            .set_header("Product")
            .set_total_label("Totals"),
        TableColumn::new()
            .set_header("Quarter 1")
            .set_total_function(TableFunction::Sum),
        TableColumn::new()
            .set_header("Quarter 2")
            .set_total_function(TableFunction::Sum),
        TableColumn::new()
            .set_header("Quarter 3")
            .set_total_function(TableFunction::Sum),
        TableColumn::new()
            .set_header("Quarter 4")
            .set_total_function(TableFunction::Sum),
        TableColumn::new()
            .set_header("Year")
            .set_total_function(TableFunction::Sum)
            .set_formula("SUM(Table12[@[Quarter 1]:[Quarter 4]])"),
    ];

    let table = Table::new()
        .set_columns(&columns)
        .set_total_row(true)
        .set_style(TableStyle::None);

    // Add the table to the worksheet.
    worksheet.add_table(2, 1, 7, 6, &table)?;

    // Save the file to disk.
    workbook.save("tables.xlsx")?;

    Ok(())
}
Example 11. Table with alternative Excel style.
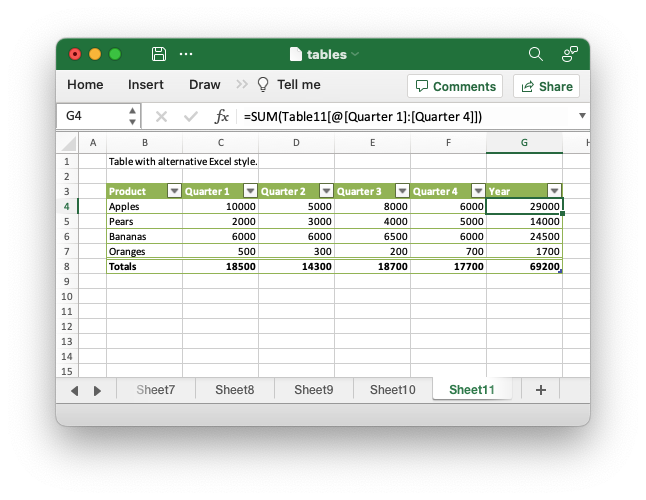
Code to generate the above example:
// SPDX-License-Identifier: MIT OR Apache-2.0
//
// Copyright 2022-2026, John McNamara, jmcnamara@cpan.org

//! Example of how to add tables to a worksheet using the `rust_xlsxwriter`
//! library.
//!
//! Tables in Excel are used to group rows and columns of data into a single
//! structure that can be referenced in a formula or formatted collectively.

use rust_xlsxwriter::{Table, TableColumn, TableFunction, TableStyle, Workbook, XlsxError};

fn main() -> Result<(), XlsxError> {
    // Create a new Excel file object.
    let mut workbook = Workbook::new();

    // Some sample data for the table.
    let items = ["Apples", "Pears", "Bananas", "Oranges"];
    let data = [
        [10000, 5000, 8000, 6000],
        [2000, 3000, 4000, 5000],
        [6000, 6000, 6500, 6000],
        [500, 300, 200, 700],
    ];

    // -----------------------------------------------------------------------
    // Example 1. Default table with no data.
    // -----------------------------------------------------------------------

    // Add a worksheet to the workbook.
    let worksheet = workbook.add_worksheet();

    let caption = "Default table with no data.";

    // Set the column widths for clarity.
    worksheet.set_column_range_width(1, 6, 12)?;

    // Write the caption.
    worksheet.write(0, 1, caption)?;

    // Create a new table.
    let table = Table::new();

    // Add the table to the worksheet.
    worksheet.add_table(2, 1, 6, 5, &table)?;

    // -----------------------------------------------------------------------
    // Example 2. Default table with data.
    // -----------------------------------------------------------------------

    // Add a worksheet to the workbook.
    let worksheet = workbook.add_worksheet();

    let caption = "Default table with data.";

    // Set the column widths for clarity.
    worksheet.set_column_range_width(1, 6, 12)?;

    // Write the caption.
    worksheet.write(0, 1, caption)?;

    // Write the table data.
    worksheet.write_column(3, 1, items)?;
    worksheet.write_row_matrix(3, 2, data)?;

    // Create a new table.
    let table = Table::new();

    // Add the table to the worksheet.
    worksheet.add_table(2, 1, 6, 5, &table)?;

    // -----------------------------------------------------------------------
    // Example 3. Table without default autofilter.
    // -----------------------------------------------------------------------

    // Add a worksheet to the workbook.
    let worksheet = workbook.add_worksheet();

    let caption = "Table without default autofilter.";

    // Set the column widths for clarity.
    worksheet.set_column_range_width(1, 6, 12)?;

    // Write the caption.
    worksheet.write(0, 1, caption)?;

    // Write the table data.
    worksheet.write_column(3, 1, items)?;
    worksheet.write_row_matrix(3, 2, data)?;

    // Create and configure a new table.
    let table = Table::new().set_autofilter(false);

    // Add the table to the worksheet.
    worksheet.add_table(2, 1, 6, 5, &table)?;

    // -----------------------------------------------------------------------
    // Example 4. Table without default header row.
    // -----------------------------------------------------------------------

    // Add a worksheet to the workbook.
    let worksheet = workbook.add_worksheet();

    let caption = "Table without default header row.";

    // Set the column widths for clarity.
    worksheet.set_column_range_width(1, 6, 12)?;

    // Write the caption.
    worksheet.write(0, 1, caption)?;

    // Write the table data.
    worksheet.write_column(3, 1, items)?;
    worksheet.write_row_matrix(3, 2, data)?;

    // Create and configure a new table.
    let table = Table::new().set_header_row(false);

    // Add the table to the worksheet.
    worksheet.add_table(3, 1, 6, 5, &table)?;

    // -----------------------------------------------------------------------
    // Example 5. Default table with "First Column" and "Last Column" options.
    // -----------------------------------------------------------------------

    // Add a worksheet to the workbook.
    let worksheet = workbook.add_worksheet();

    let caption = "Default table with 'First Column' and 'Last Column' options.";

    // Set the column widths for clarity.
    worksheet.set_column_range_width(1, 6, 12)?;

    // Write the caption.
    worksheet.write(0, 1, caption)?;

    // Write the table data.
    worksheet.write_column(3, 1, items)?;
    worksheet.write_row_matrix(3, 2, data)?;

    // Create and configure a new table.
    let table = Table::new().set_first_column(true).set_last_column(true);

    // Add the table to the worksheet.
    worksheet.add_table(2, 1, 6, 5, &table)?;

    // -----------------------------------------------------------------------
    // Example 6. Table with banded columns but without default banded rows.
    // -----------------------------------------------------------------------

    // Add a worksheet to the workbook.
    let worksheet = workbook.add_worksheet();

    let caption = "Table with banded columns but without default banded rows.";

    // Set the column widths for clarity.
    worksheet.set_column_range_width(1, 6, 12)?;

    // Write the caption.
    worksheet.write(0, 1, caption)?;

    // Write the table data.
    worksheet.write_column(3, 1, items)?;
    worksheet.write_row_matrix(3, 2, data)?;

    // Create and configure a new table.
    let table = Table::new().set_banded_rows(false).set_banded_columns(true);

    // Add the table to the worksheet.
    worksheet.add_table(2, 1, 6, 5, &table)?;

    // -----------------------------------------------------------------------
    // Example 7. Table with user defined column headers.
    // -----------------------------------------------------------------------

    // Add a worksheet to the workbook.
    let worksheet = workbook.add_worksheet();

    let caption = "Table with user defined column headers.";

    // Set the column widths for clarity.
    worksheet.set_column_range_width(1, 6, 12)?;

    // Write the caption.
    worksheet.write(0, 1, caption)?;

    // Write the table data.
    worksheet.write_column(3, 1, items)?;
    worksheet.write_row_matrix(3, 2, data)?;

    // Create and configure a new table.
    let columns = vec![
        TableColumn::new().set_header("Product"),
        TableColumn::new().set_header("Quarter 1"),
        TableColumn::new().set_header("Quarter 2"),
        TableColumn::new().set_header("Quarter 3"),
        TableColumn::new().set_header("Quarter 4"),
    ];

    let table = Table::new().set_columns(&columns);

    // Add the table to the worksheet.
    worksheet.add_table(2, 1, 6, 5, &table)?;

    // -----------------------------------------------------------------------
    // Example 8. Table with user defined column headers, and formulas.
    // -----------------------------------------------------------------------

    // Add a worksheet to the workbook.
    let worksheet = workbook.add_worksheet();

    let caption = "Table with user defined column headers, and formulas.";

    // Set the column widths for clarity.
    worksheet.set_column_range_width(1, 6, 12)?;

    // Write the caption.
    worksheet.write(0, 1, caption)?;

    // Write the table data.
    worksheet.write_column(3, 1, items)?;
    worksheet.write_row_matrix(3, 2, data)?;

    // Create and configure a new table.
    let columns = vec![
        TableColumn::new().set_header("Product"),
        TableColumn::new().set_header("Quarter 1"),
        TableColumn::new().set_header("Quarter 2"),
        TableColumn::new().set_header("Quarter 3"),
        TableColumn::new().set_header("Quarter 4"),
        TableColumn::new()
            .set_header("Year")
            .set_formula("SUM(Table8[@[Quarter 1]:[Quarter 4]])"),
    ];

    let table = Table::new().set_columns(&columns);

    // Add the table to the worksheet.
    worksheet.add_table(2, 1, 6, 6, &table)?;

    // -----------------------------------------------------------------------
    // Example 9. Table with totals row (but no caption or totals).
    // -----------------------------------------------------------------------

    // Add a worksheet to the workbook.
    let worksheet = workbook.add_worksheet();

    let caption = "Table with totals row (but no caption or totals).";

    // Set the column widths for clarity.
    worksheet.set_column_range_width(1, 6, 12)?;

    // Write the caption.
    worksheet.write(0, 1, caption)?;

    // Write the table data.
    worksheet.write_column(3, 1, items)?;
    worksheet.write_row_matrix(3, 2, data)?;

    // Create and configure a new table.
    let columns = vec![
        TableColumn::new().set_header("Product"),
        TableColumn::new().set_header("Quarter 1"),
        TableColumn::new().set_header("Quarter 2"),
        TableColumn::new().set_header("Quarter 3"),
        TableColumn::new().set_header("Quarter 4"),
        TableColumn::new()
            .set_header("Year")
            .set_formula("SUM(Table9[@[Quarter 1]:[Quarter 4]])"),
    ];

    let table = Table::new().set_columns(&columns).set_total_row(true);

    // Add the table to the worksheet.
    worksheet.add_table(2, 1, 7, 6, &table)?;

    // -----------------------------------------------------------------------
    // Example 10. Table with totals row with user captions and functions.
    // -----------------------------------------------------------------------

    // Add a worksheet to the workbook.
    let worksheet = workbook.add_worksheet();

    let caption = "Table with totals row with user captions and functions.";

    // Set the column widths for clarity.
    worksheet.set_column_range_width(1, 6, 12)?;

    // Write the caption.
    worksheet.write(0, 1, caption)?;

    // Write the table data.
    worksheet.write_column(3, 1, items)?;
    worksheet.write_row_matrix(3, 2, data)?;

    // Create and configure a new table.
    let columns = vec![
        TableColumn::new()
            .set_header("Product")
            .set_total_label("Totals"),
        TableColumn::new()
            .set_header("Quarter 1")
            .set_total_function(TableFunction::Sum),
        TableColumn::new()
            .set_header("Quarter 2")
            .set_total_function(TableFunction::Sum),
        TableColumn::new()
            .set_header("Quarter 3")
            .set_total_function(TableFunction::Sum),
        TableColumn::new()
            .set_header("Quarter 4")
            .set_total_function(TableFunction::Sum),
        TableColumn::new()
            .set_header("Year")
            .set_total_function(TableFunction::Sum)
            .set_formula("SUM(Table10[@[Quarter 1]:[Quarter 4]])"),
    ];

    let table = Table::new().set_columns(&columns).set_total_row(true);

    // Add the table to the worksheet.
    worksheet.add_table(2, 1, 7, 6, &table)?;

    // -----------------------------------------------------------------------
    // Example 11. Table with alternative Excel style.
    // -----------------------------------------------------------------------

    // Add a worksheet to the workbook.
    let worksheet = workbook.add_worksheet();

    let caption = "Table with alternative Excel style.";

    // Set the column widths for clarity.
    worksheet.set_column_range_width(1, 6, 12)?;

    // Write the caption.
    worksheet.write(0, 1, caption)?;

    // Write the table data.
    worksheet.write_column(3, 1, items)?;
    worksheet.write_row_matrix(3, 2, data)?;

    // Create and configure a new table.
    let columns = vec![
        TableColumn::new()
            .set_header("Product")
            .set_total_label("Totals"),
        TableColumn::new()
            .set_header("Quarter 1")
            .set_total_function(TableFunction::Sum),
        TableColumn::new()
            .set_header("Quarter 2")
            .set_total_function(TableFunction::Sum),
        TableColumn::new()
            .set_header("Quarter 3")
            .set_total_function(TableFunction::Sum),
        TableColumn::new()
            .set_header("Quarter 4")
            .set_total_function(TableFunction::Sum),
        TableColumn::new()
            .set_header("Year")
            .set_total_function(TableFunction::Sum)
            .set_formula("SUM(Table11[@[Quarter 1]:[Quarter 4]])"),
    ];

    let table = Table::new()
        .set_columns(&columns)
        .set_total_row(true)
        .set_style(TableStyle::Light11);

    // Add the table to the worksheet.
    worksheet.add_table(2, 1, 7, 6, &table)?;

    // -----------------------------------------------------------------------
    // Example 12. Table with Excel style removed.
    // -----------------------------------------------------------------------

    // Add a worksheet to the workbook.
    let worksheet = workbook.add_worksheet();

    let caption = "Table with Excel style removed.";

    // Set the column widths for clarity.
    worksheet.set_column_range_width(1, 6, 12)?;

    // Write the caption.
    worksheet.write(0, 1, caption)?;

    // Write the table data.
    worksheet.write_column(3, 1, items)?;
    worksheet.write_row_matrix(3, 2, data)?;

    // Create and configure a new table.
    let columns = vec![
        TableColumn::new()
            .set_header("Product")
            .set_total_label("Totals"),
        TableColumn::new()
            .set_header("Quarter 1")
            .set_total_function(TableFunction::Sum),
        TableColumn::new()
            .set_header("Quarter 2")
            .set_total_function(TableFunction::Sum),
        TableColumn::new()
            .set_header("Quarter 3")
            .set_total_function(TableFunction::Sum),
        TableColumn::new()
            .set_header("Quarter 4")
            .set_total_function(TableFunction::Sum),
        TableColumn::new()
            .set_header("Year")
            .set_total_function(TableFunction::Sum)
            .set_formula("SUM(Table12[@[Quarter 1]:[Quarter 4]])"),
    ];

    let table = Table::new()
        .set_columns(&columns)
        .set_total_row(true)
        .set_style(TableStyle::None);

    // Add the table to the worksheet.
    worksheet.add_table(2, 1, 7, 6, &table)?;

    // Save the file to disk.
    workbook.save("tables.xlsx")?;

    Ok(())
}
Example 12. Table with Excel style removed.
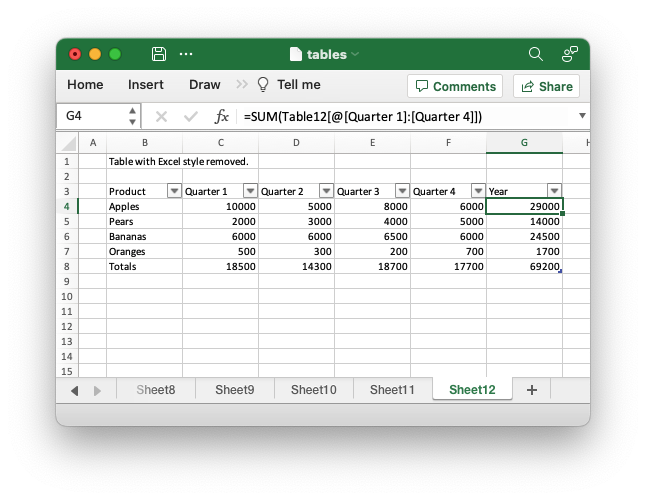
Code to generate the above example:
// SPDX-License-Identifier: MIT OR Apache-2.0
//
// Copyright 2022-2026, John McNamara, jmcnamara@cpan.org

//! Example of how to add tables to a worksheet using the `rust_xlsxwriter`
//! library.
//!
//! Tables in Excel are used to group rows and columns of data into a single
//! structure that can be referenced in a formula or formatted collectively.

use rust_xlsxwriter::{Table, TableColumn, TableFunction, TableStyle, Workbook, XlsxError};

fn main() -> Result<(), XlsxError> {
    // Create a new Excel file object.
    let mut workbook = Workbook::new();

    // Some sample data for the table.
    let items = ["Apples", "Pears", "Bananas", "Oranges"];
    let data = [
        [10000, 5000, 8000, 6000],
        [2000, 3000, 4000, 5000],
        [6000, 6000, 6500, 6000],
        [500, 300, 200, 700],
    ];

    // -----------------------------------------------------------------------
    // Example 1. Default table with no data.
    // -----------------------------------------------------------------------

    // Add a worksheet to the workbook.
    let worksheet = workbook.add_worksheet();

    let caption = "Default table with no data.";

    // Set the column widths for clarity.
    worksheet.set_column_range_width(1, 6, 12)?;

    // Write the caption.
    worksheet.write(0, 1, caption)?;

    // Create a new table.
    let table = Table::new();

    // Add the table to the worksheet.
    worksheet.add_table(2, 1, 6, 5, &table)?;

    // -----------------------------------------------------------------------
    // Example 2. Default table with data.
    // -----------------------------------------------------------------------

    // Add a worksheet to the workbook.
    let worksheet = workbook.add_worksheet();

    let caption = "Default table with data.";

    // Set the column widths for clarity.
    worksheet.set_column_range_width(1, 6, 12)?;

    // Write the caption.
    worksheet.write(0, 1, caption)?;

    // Write the table data.
    worksheet.write_column(3, 1, items)?;
    worksheet.write_row_matrix(3, 2, data)?;

    // Create a new table.
    let table = Table::new();

    // Add the table to the worksheet.
    worksheet.add_table(2, 1, 6, 5, &table)?;

    // -----------------------------------------------------------------------
    // Example 3. Table without default autofilter.
    // -----------------------------------------------------------------------

    // Add a worksheet to the workbook.
    let worksheet = workbook.add_worksheet();

    let caption = "Table without default autofilter.";

    // Set the column widths for clarity.
    worksheet.set_column_range_width(1, 6, 12)?;

    // Write the caption.
    worksheet.write(0, 1, caption)?;

    // Write the table data.
    worksheet.write_column(3, 1, items)?;
    worksheet.write_row_matrix(3, 2, data)?;

    // Create and configure a new table.
    let table = Table::new().set_autofilter(false);

    // Add the table to the worksheet.
    worksheet.add_table(2, 1, 6, 5, &table)?;

    // -----------------------------------------------------------------------
    // Example 4. Table without default header row.
    // -----------------------------------------------------------------------

    // Add a worksheet to the workbook.
    let worksheet = workbook.add_worksheet();

    let caption = "Table without default header row.";

    // Set the column widths for clarity.
    worksheet.set_column_range_width(1, 6, 12)?;

    // Write the caption.
    worksheet.write(0, 1, caption)?;

    // Write the table data.
    worksheet.write_column(3, 1, items)?;
    worksheet.write_row_matrix(3, 2, data)?;

    // Create and configure a new table.
    let table = Table::new().set_header_row(false);

    // Add the table to the worksheet.
    worksheet.add_table(3, 1, 6, 5, &table)?;

    // -----------------------------------------------------------------------
    // Example 5. Default table with "First Column" and "Last Column" options.
    // -----------------------------------------------------------------------

    // Add a worksheet to the workbook.
    let worksheet = workbook.add_worksheet();

    let caption = "Default table with 'First Column' and 'Last Column' options.";

    // Set the column widths for clarity.
    worksheet.set_column_range_width(1, 6, 12)?;

    // Write the caption.
    worksheet.write(0, 1, caption)?;

    // Write the table data.
    worksheet.write_column(3, 1, items)?;
    worksheet.write_row_matrix(3, 2, data)?;

    // Create and configure a new table.
    let table = Table::new().set_first_column(true).set_last_column(true);

    // Add the table to the worksheet.
    worksheet.add_table(2, 1, 6, 5, &table)?;

    // -----------------------------------------------------------------------
    // Example 6. Table with banded columns but without default banded rows.
    // -----------------------------------------------------------------------

    // Add a worksheet to the workbook.
    let worksheet = workbook.add_worksheet();

    let caption = "Table with banded columns but without default banded rows.";

    // Set the column widths for clarity.
    worksheet.set_column_range_width(1, 6, 12)?;

    // Write the caption.
    worksheet.write(0, 1, caption)?;

    // Write the table data.
    worksheet.write_column(3, 1, items)?;
    worksheet.write_row_matrix(3, 2, data)?;

    // Create and configure a new table.
    let table = Table::new().set_banded_rows(false).set_banded_columns(true);

    // Add the table to the worksheet.
    worksheet.add_table(2, 1, 6, 5, &table)?;

    // -----------------------------------------------------------------------
    // Example 7. Table with user defined column headers.
    // -----------------------------------------------------------------------

    // Add a worksheet to the workbook.
    let worksheet = workbook.add_worksheet();

    let caption = "Table with user defined column headers.";

    // Set the column widths for clarity.
    worksheet.set_column_range_width(1, 6, 12)?;

    // Write the caption.
    worksheet.write(0, 1, caption)?;

    // Write the table data.
    worksheet.write_column(3, 1, items)?;
    worksheet.write_row_matrix(3, 2, data)?;

    // Create and configure a new table.
    let columns = vec![
        TableColumn::new().set_header("Product"),
        TableColumn::new().set_header("Quarter 1"),
        TableColumn::new().set_header("Quarter 2"),
        TableColumn::new().set_header("Quarter 3"),
        TableColumn::new().set_header("Quarter 4"),
    ];

    let table = Table::new().set_columns(&columns);

    // Add the table to the worksheet.
    worksheet.add_table(2, 1, 6, 5, &table)?;

    // -----------------------------------------------------------------------
    // Example 8. Table with user defined column headers, and formulas.
    // -----------------------------------------------------------------------

    // Add a worksheet to the workbook.
    let worksheet = workbook.add_worksheet();

    let caption = "Table with user defined column headers, and formulas.";

    // Set the column widths for clarity.
    worksheet.set_column_range_width(1, 6, 12)?;

    // Write the caption.
    worksheet.write(0, 1, caption)?;

    // Write the table data.
    worksheet.write_column(3, 1, items)?;
    worksheet.write_row_matrix(3, 2, data)?;

    // Create and configure a new table.
    let columns = vec![
        TableColumn::new().set_header("Product"),
        TableColumn::new().set_header("Quarter 1"),
        TableColumn::new().set_header("Quarter 2"),
        TableColumn::new().set_header("Quarter 3"),
        TableColumn::new().set_header("Quarter 4"),
        TableColumn::new()
            .set_header("Year")
            .set_formula("SUM(Table8[@[Quarter 1]:[Quarter 4]])"),
    ];

    let table = Table::new().set_columns(&columns);

    // Add the table to the worksheet.
    worksheet.add_table(2, 1, 6, 6, &table)?;

    // -----------------------------------------------------------------------
    // Example 9. Table with totals row (but no caption or totals).
    // -----------------------------------------------------------------------

    // Add a worksheet to the workbook.
    let worksheet = workbook.add_worksheet();

    let caption = "Table with totals row (but no caption or totals).";

    // Set the column widths for clarity.
    worksheet.set_column_range_width(1, 6, 12)?;

    // Write the caption.
    worksheet.write(0, 1, caption)?;

    // Write the table data.
    worksheet.write_column(3, 1, items)?;
    worksheet.write_row_matrix(3, 2, data)?;

    // Create and configure a new table.
    let columns = vec![
        TableColumn::new().set_header("Product"),
        TableColumn::new().set_header("Quarter 1"),
        TableColumn::new().set_header("Quarter 2"),
        TableColumn::new().set_header("Quarter 3"),
        TableColumn::new().set_header("Quarter 4"),
        TableColumn::new()
            .set_header("Year")
            .set_formula("SUM(Table9[@[Quarter 1]:[Quarter 4]])"),
    ];

    let table = Table::new().set_columns(&columns).set_total_row(true);

    // Add the table to the worksheet.
    worksheet.add_table(2, 1, 7, 6, &table)?;

    // -----------------------------------------------------------------------
    // Example 10. Table with totals row with user captions and functions.
    // -----------------------------------------------------------------------

    // Add a worksheet to the workbook.
    let worksheet = workbook.add_worksheet();

    let caption = "Table with totals row with user captions and functions.";

    // Set the column widths for clarity.
    worksheet.set_column_range_width(1, 6, 12)?;

    // Write the caption.
    worksheet.write(0, 1, caption)?;

    // Write the table data.
    worksheet.write_column(3, 1, items)?;
    worksheet.write_row_matrix(3, 2, data)?;

    // Create and configure a new table.
    let columns = vec![
        TableColumn::new()
            .set_header("Product")
            .set_total_label("Totals"),
        TableColumn::new()
            .set_header("Quarter 1")
            .set_total_function(TableFunction::Sum),
        TableColumn::new()
            .set_header("Quarter 2")
            .set_total_function(TableFunction::Sum),
        TableColumn::new()
            .set_header("Quarter 3")
            .set_total_function(TableFunction::Sum),
        TableColumn::new()
            .set_header("Quarter 4")
            .set_total_function(TableFunction::Sum),
        TableColumn::new()
            .set_header("Year")
            .set_total_function(TableFunction::Sum)
            .set_formula("SUM(Table10[@[Quarter 1]:[Quarter 4]])"),
    ];

    let table = Table::new().set_columns(&columns).set_total_row(true);

    // Add the table to the worksheet.
    worksheet.add_table(2, 1, 7, 6, &table)?;

    // -----------------------------------------------------------------------
    // Example 11. Table with alternative Excel style.
    // -----------------------------------------------------------------------

    // Add a worksheet to the workbook.
    let worksheet = workbook.add_worksheet();

    let caption = "Table with alternative Excel style.";

    // Set the column widths for clarity.
    worksheet.set_column_range_width(1, 6, 12)?;

    // Write the caption.
    worksheet.write(0, 1, caption)?;

    // Write the table data.
    worksheet.write_column(3, 1, items)?;
    worksheet.write_row_matrix(3, 2, data)?;

    // Create and configure a new table.
    let columns = vec![
        TableColumn::new()
            .set_header("Product")
            .set_total_label("Totals"),
        TableColumn::new()
            .set_header("Quarter 1")
            .set_total_function(TableFunction::Sum),
        TableColumn::new()
            .set_header("Quarter 2")
            .set_total_function(TableFunction::Sum),
        TableColumn::new()
            .set_header("Quarter 3")
            .set_total_function(TableFunction::Sum),
        TableColumn::new()
            .set_header("Quarter 4")
            .set_total_function(TableFunction::Sum),
        TableColumn::new()
            .set_header("Year")
            .set_total_function(TableFunction::Sum)
            .set_formula("SUM(Table11[@[Quarter 1]:[Quarter 4]])"),
    ];

    let table = Table::new()
        .set_columns(&columns)
        .set_total_row(true)
        .set_style(TableStyle::Light11);

    // Add the table to the worksheet.
    worksheet.add_table(2, 1, 7, 6, &table)?;

    // -----------------------------------------------------------------------
    // Example 12. Table with Excel style removed.
    // -----------------------------------------------------------------------

    // Add a worksheet to the workbook.
    let worksheet = workbook.add_worksheet();

    let caption = "Table with Excel style removed.";

    // Set the column widths for clarity.
    worksheet.set_column_range_width(1, 6, 12)?;

    // Write the caption.
    worksheet.write(0, 1, caption)?;

    // Write the table data.
    worksheet.write_column(3, 1, items)?;
    worksheet.write_row_matrix(3, 2, data)?;

    // Create and configure a new table.
    let columns = vec![
        TableColumn::new()
            .set_header("Product")
            .set_total_label("Totals"),
        TableColumn::new()
            .set_header("Quarter 1")
            .set_total_function(TableFunction::Sum),
        TableColumn::new()
            .set_header("Quarter 2")
            .set_total_function(TableFunction::Sum),
        TableColumn::new()
            .set_header("Quarter 3")
            .set_total_function(TableFunction::Sum),
        TableColumn::new()
            .set_header("Quarter 4")
            .set_total_function(TableFunction::Sum),
        TableColumn::new()
            .set_header("Year")
            .set_total_function(TableFunction::Sum)
            .set_formula("SUM(Table12[@[Quarter 1]:[Quarter 4]])"),
    ];

    let table = Table::new()
        .set_columns(&columns)
        .set_total_row(true)
        .set_style(TableStyle::None);

    // Add the table to the worksheet.
    worksheet.add_table(2, 1, 7, 6, &table)?;

    // Save the file to disk.
    workbook.save("tables.xlsx")?;

    Ok(())
}
Conditional Formatting: Adding conditional formatting to worksheets
Conditional formatting is a feature of Excel which allows you to apply a format to a cell or a range of cells based on user defined rules. For example you might apply rules like the following to highlight cells in different ranges.
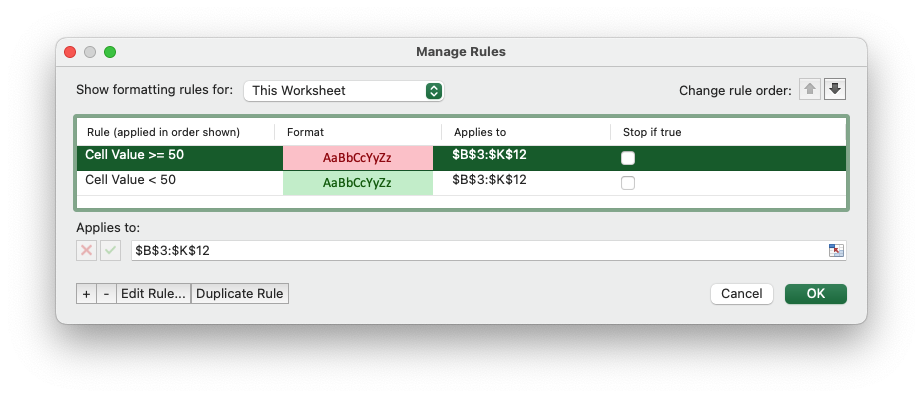
The examples below show how to use the various types of conditional formatting
with rust_xlsxwriter.
Some examples:
Example 1. Cell conditional formatting. Cells with values >= 50 are in light red. Values < 50 are in light green.
See ConditionalFormatCell for more details.
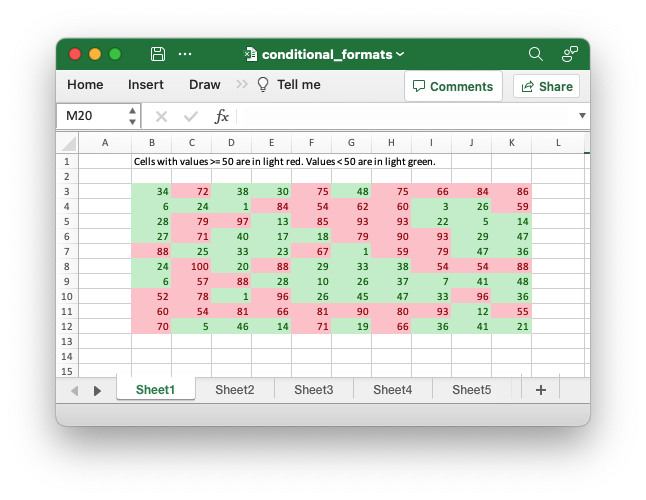
Code to generate the above example:
// SPDX-License-Identifier: MIT OR Apache-2.0
//
// Copyright 2022-2026, John McNamara, jmcnamara@cpan.org

//! Example of how to add conditional formatting to a worksheet using the
//! `rust_xlsxwriter` library.
//!
//! Conditional formatting allows you to apply a format to a cell or a range of
//! cells based on user defined rule.

use rust_xlsxwriter::{
    ConditionalFormat2ColorScale, ConditionalFormat3ColorScale, ConditionalFormatAverage,
    ConditionalFormatAverageRule, ConditionalFormatCell, ConditionalFormatCellRule,
    ConditionalFormatDataBar, ConditionalFormatDataBarDirection, ConditionalFormatDuplicate,
    ConditionalFormatFormula, ConditionalFormatIconSet, ConditionalFormatIconType,
    ConditionalFormatText, ConditionalFormatTextRule, ConditionalFormatTop, Format, Workbook,
    XlsxError,
};

fn main() -> Result<(), XlsxError> {
    // Create a new Excel file object.
    let mut workbook = Workbook::new();

    // Add a format. Light red fill with dark red text.
    let format1 = Format::new()
        .set_font_color("9C0006")
        .set_background_color("FFC7CE");

    // Add a format. Green fill with dark green text.
    let format2 = Format::new()
        .set_font_color("006100")
        .set_background_color("C6EFCE");

    // Add a format for headers.
    let bold = Format::new().set_bold();

    // Add a format for descriptions.
    let indent = Format::new().set_indent(2);

    // some sample data to run the conditional formatting against.
    let data = [
        [34, 72, 38, 30, 75, 48, 75, 66, 84, 86],
        [6, 24, 1, 84, 54, 62, 60, 3, 26, 59],
        [28, 79, 97, 13, 85, 93, 93, 22, 5, 14],
        [27, 71, 40, 17, 18, 79, 90, 93, 29, 47],
        [88, 25, 33, 23, 67, 1, 59, 79, 47, 36],
        [24, 100, 20, 88, 29, 33, 38, 54, 54, 88],
        [6, 57, 88, 28, 10, 26, 37, 7, 41, 48],
        [52, 78, 1, 96, 26, 45, 47, 33, 96, 36],
        [60, 54, 81, 66, 81, 90, 80, 93, 12, 55],
        [70, 5, 46, 14, 71, 19, 66, 36, 41, 21],
    ];

    // -----------------------------------------------------------------------
    // Worksheet 1. Cell conditional formatting.
    // -----------------------------------------------------------------------
    let caption = "Cells with values >= 50 are in light red. Values < 50 are in light green.";

    // Add a worksheet to the workbook.
    let worksheet = workbook.add_worksheet();

    // Write the caption.
    worksheet.write(0, 1, caption)?;

    // Write the worksheet data.
    worksheet.write_row_matrix(2, 1, data)?;

    // Set the column widths for clarity.
    worksheet.set_column_range_width(1, 10, 6)?;

    // Write a conditional format over a range.
    let conditional_format = ConditionalFormatCell::new()
        .set_rule(ConditionalFormatCellRule::GreaterThanOrEqualTo(50))
        .set_format(&format1);

    worksheet.add_conditional_format(2, 1, 11, 10, &conditional_format)?;

    // Write another conditional format over the same range.
    let conditional_format = ConditionalFormatCell::new()
        .set_rule(ConditionalFormatCellRule::LessThan(50))
        .set_format(&format2);

    worksheet.add_conditional_format(2, 1, 11, 10, &conditional_format)?;

    // -----------------------------------------------------------------------
    // Worksheet 2. Cell conditional formatting with between ranges.
    // -----------------------------------------------------------------------
    let caption =
        "Values between 30 and 70 are in light red. Values outside that range are in light green.";

    // Add a worksheet to the workbook.
    let worksheet = workbook.add_worksheet();

    // Write the caption.
    worksheet.write(0, 1, caption)?;

    // Write the worksheet data.
    worksheet.write_row_matrix(2, 1, data)?;

    // Set the column widths for clarity.
    worksheet.set_column_range_width(1, 10, 6)?;

    // Write a conditional format over a range.
    let conditional_format = ConditionalFormatCell::new()
        .set_rule(ConditionalFormatCellRule::Between(30, 70))
        .set_format(&format1);

    worksheet.add_conditional_format(2, 1, 11, 10, &conditional_format)?;

    // Write another conditional format over the same range.
    let conditional_format = ConditionalFormatCell::new()
        .set_rule(ConditionalFormatCellRule::NotBetween(30, 70))
        .set_format(&format2);

    worksheet.add_conditional_format(2, 1, 11, 10, &conditional_format)?;

    // -----------------------------------------------------------------------
    // Worksheet 3. Duplicate and Unique conditional formats.
    // -----------------------------------------------------------------------
    let caption = "Duplicate values are in light red. Unique values are in light green.";

    // Add a worksheet to the workbook.
    let worksheet = workbook.add_worksheet();

    // Write the caption.
    worksheet.write(0, 1, caption)?;

    // Write the worksheet data.
    worksheet.write_row_matrix(2, 1, data)?;

    // Set the column widths for clarity.
    worksheet.set_column_range_width(1, 10, 6)?;

    // Write a conditional format over a range.
    let conditional_format = ConditionalFormatDuplicate::new().set_format(&format1);

    worksheet.add_conditional_format(2, 1, 11, 10, &conditional_format)?;

    // Invert the duplicate conditional format to show unique values in the
    // same range.
    let conditional_format = ConditionalFormatDuplicate::new()
        .invert()
        .set_format(&format2);

    worksheet.add_conditional_format(2, 1, 11, 10, &conditional_format)?;

    // -----------------------------------------------------------------------
    // Worksheet 4. Above and Below Average conditional formats.
    // -----------------------------------------------------------------------
    let caption = "Above average values are in light red. Below average values are in light green.";

    // Add a worksheet to the workbook.
    let worksheet = workbook.add_worksheet();

    // Write the caption.
    worksheet.write(0, 1, caption)?;

    // Write the worksheet data.
    worksheet.write_row_matrix(2, 1, data)?;

    // Set the column widths for clarity.
    worksheet.set_column_range_width(1, 10, 6)?;

    // Write a conditional format over a range. The default criteria is Above Average.
    let conditional_format = ConditionalFormatAverage::new().set_format(&format1);

    worksheet.add_conditional_format(2, 1, 11, 10, &conditional_format)?;

    // Write another conditional format over the same range.
    let conditional_format = ConditionalFormatAverage::new()
        .set_rule(ConditionalFormatAverageRule::BelowAverage)
        .set_format(&format2);

    worksheet.add_conditional_format(2, 1, 11, 10, &conditional_format)?;

    // -----------------------------------------------------------------------
    // Worksheet 5. Top and Bottom range conditional formats.
    // -----------------------------------------------------------------------
    let caption = "Top 10 values are in light red. Bottom 10 values are in light green.";

    // Add a worksheet to the workbook.
    let worksheet = workbook.add_worksheet();

    // Write the caption.
    worksheet.write(0, 1, caption)?;

    // Write the worksheet data.
    worksheet.write_row_matrix(2, 1, data)?;

    // Set the column widths for clarity.
    worksheet.set_column_range_width(1, 10, 6)?;

    // Write a conditional format over a range.
    let conditional_format = ConditionalFormatTop::new()
        .set_rule(rust_xlsxwriter::ConditionalFormatTopRule::Top(10))
        .set_format(&format1);

    worksheet.add_conditional_format(2, 1, 11, 10, &conditional_format)?;

    // Also show the bottom values in the same range.
    let conditional_format = ConditionalFormatTop::new()
        .set_rule(rust_xlsxwriter::ConditionalFormatTopRule::Bottom(10))
        .set_format(&format2);

    worksheet.add_conditional_format(2, 1, 11, 10, &conditional_format)?;

    // -----------------------------------------------------------------------
    // Worksheet 6. Cell conditional formatting in non-contiguous range.
    // -----------------------------------------------------------------------
    let caption = "Cells with values >= 50 are in light red. Values < 50 are in light green. Non-contiguous ranges.";

    // Add a worksheet to the workbook.
    let worksheet = workbook.add_worksheet();

    // Write the caption.
    worksheet.write(0, 1, caption)?;

    // Write the worksheet data.
    worksheet.write_row_matrix(2, 1, data)?;

    // Set the column widths for clarity.
    worksheet.set_column_range_width(1, 10, 6)?;

    // Write a conditional format over a non-contiguous range.
    let conditional_format = ConditionalFormatCell::new()
        .set_rule(ConditionalFormatCellRule::GreaterThanOrEqualTo(50))
        .set_multi_range("B3:D6 I3:K6 B9:D12 I9:K12")
        .set_format(&format1);

    worksheet.add_conditional_format(2, 1, 11, 10, &conditional_format)?;

    // Write another conditional format over the same range.
    let conditional_format = ConditionalFormatCell::new()
        .set_rule(ConditionalFormatCellRule::LessThan(50))
        .set_multi_range("B3:D6 I3:K6 B9:D12 I9:K12")
        .set_format(&format2);

    worksheet.add_conditional_format(2, 1, 11, 10, &conditional_format)?;

    // -----------------------------------------------------------------------
    // Worksheet 7. Formula conditional formatting.
    // -----------------------------------------------------------------------
    let caption = "Even numbered cells are in light green. Odd numbered cells are in light red.";

    // Add a worksheet to the workbook.
    let worksheet = workbook.add_worksheet();

    // Write the caption.
    worksheet.write(0, 1, caption)?;

    // Write the worksheet data.
    worksheet.write_row_matrix(2, 1, data)?;

    // Set the column widths for clarity.
    worksheet.set_column_range_width(1, 10, 6)?;

    // Write a conditional format over a range.
    let conditional_format = ConditionalFormatFormula::new()
        .set_rule("=ISODD(B3)")
        .set_format(&format1);

    worksheet.add_conditional_format(2, 1, 11, 10, &conditional_format)?;

    // Write another conditional format over the same range.
    let conditional_format = ConditionalFormatFormula::new()
        .set_rule("=ISEVEN(B3)")
        .set_format(&format2);

    worksheet.add_conditional_format(2, 1, 11, 10, &conditional_format)?;

    // -----------------------------------------------------------------------
    // Worksheet 8. Text style conditional formats.
    // -----------------------------------------------------------------------
    let caption =
        "Column A shows words that contain the sub-word 'rust'. Column C shows words that start/end with 't'";

    // Add a worksheet to the workbook.
    let worksheet = workbook.add_worksheet();

    // Write the caption.
    worksheet.write(0, 0, caption)?;

    // Add some sample data.
    let word_list = [
        "apocrustic",
        "burstwort",
        "cloudburst",
        "crustification",
        "distrustfulness",
        "laurustine",
        "outburst",
        "rusticism",
        "thunderburst",
        "trustee",
        "trustworthiness",
        "unburstableness",
        "unfrustratable",
    ];
    worksheet.write_column(1, 0, word_list)?;
    worksheet.write_column(1, 2, word_list)?;

    // Set the column widths for clarity.
    worksheet.set_column_width(0, 20)?;
    worksheet.set_column_width(2, 20)?;

    // Write a text "containing" conditional format over a range.
    let conditional_format = ConditionalFormatText::new()
        .set_rule(ConditionalFormatTextRule::Contains("rust".to_string()))
        .set_format(&format2);

    worksheet.add_conditional_format(1, 0, 13, 0, &conditional_format)?;

    // Write a text "not containing" conditional format over the same range.
    let conditional_format = ConditionalFormatText::new()
        .set_rule(ConditionalFormatTextRule::DoesNotContain(
            "rust".to_string(),
        ))
        .set_format(&format1);

    worksheet.add_conditional_format(1, 0, 13, 0, &conditional_format)?;

    // Write a text "begins with" conditional format over a range.
    let conditional_format = ConditionalFormatText::new()
        .set_rule(ConditionalFormatTextRule::BeginsWith("t".to_string()))
        .set_format(&format2);

    worksheet.add_conditional_format(1, 2, 13, 2, &conditional_format)?;

    // Write a text "ends with" conditional format over the same range.
    let conditional_format = ConditionalFormatText::new()
        .set_rule(ConditionalFormatTextRule::EndsWith("t".to_string()))
        .set_format(&format1);

    worksheet.add_conditional_format(1, 2, 13, 2, &conditional_format)?;

    // -----------------------------------------------------------------------
    // Worksheet 9. Examples of 2 color scale conditional formats.
    // -----------------------------------------------------------------------
    let caption = "Examples of 2 color scale conditional formats";

    // Add a worksheet to the workbook.
    let worksheet = workbook.add_worksheet();

    // Write the caption.
    worksheet.write(0, 1, caption)?;

    // Write the worksheet data.
    let data = [1, 2, 3, 4, 5, 6, 7, 8, 9, 10];
    worksheet.write_column(2, 1, data)?;
    worksheet.write_column(2, 3, data)?;
    worksheet.write_column(2, 5, data)?;
    worksheet.write_column(2, 7, data)?;
    worksheet.write_column(2, 9, data)?;
    worksheet.write_column(2, 11, data)?;

    // Set the column widths for clarity.
    worksheet.set_column_range_width(0, 12, 6)?;

    // Write 2 color scale formats with standard Excel colors.
    let conditional_format = ConditionalFormat2ColorScale::new()
        .set_minimum_color("F8696B")
        .set_maximum_color("FCFCFF");

    worksheet.add_conditional_format(2, 1, 11, 1, &conditional_format)?;

    let conditional_format = ConditionalFormat2ColorScale::new()
        .set_minimum_color("FCFCFF")
        .set_maximum_color("F8696B");

    worksheet.add_conditional_format(2, 3, 11, 3, &conditional_format)?;

    let conditional_format = ConditionalFormat2ColorScale::new()
        .set_minimum_color("FCFCFF")
        .set_maximum_color("63BE7B");

    worksheet.add_conditional_format(2, 5, 11, 5, &conditional_format)?;

    let conditional_format = ConditionalFormat2ColorScale::new()
        .set_minimum_color("63BE7B")
        .set_maximum_color("FCFCFF");

    worksheet.add_conditional_format(2, 7, 11, 7, &conditional_format)?;

    let conditional_format = ConditionalFormat2ColorScale::new()
        .set_minimum_color("FFEF9C")
        .set_maximum_color("63BE7B");

    worksheet.add_conditional_format(2, 9, 11, 9, &conditional_format)?;

    let conditional_format = ConditionalFormat2ColorScale::new()
        .set_minimum_color("63BE7B")
        .set_maximum_color("FFEF9C");

    worksheet.add_conditional_format(2, 11, 11, 11, &conditional_format)?;

    // -----------------------------------------------------------------------
    // Worksheet 10. Examples of 3 color scale conditional formats.
    // -----------------------------------------------------------------------
    let caption = "Examples of 3 color scale conditional formats";

    // Add a worksheet to the workbook.
    let worksheet = workbook.add_worksheet();

    // Write the caption.
    worksheet.write(0, 1, caption)?;

    // Write the worksheet data.
    let data = [1, 2, 3, 4, 5, 6, 7, 8, 9, 10];
    worksheet.write_column(2, 1, data)?;
    worksheet.write_column(2, 3, data)?;
    worksheet.write_column(2, 5, data)?;
    worksheet.write_column(2, 7, data)?;
    worksheet.write_column(2, 9, data)?;
    worksheet.write_column(2, 11, data)?;

    // Set the column widths for clarity.
    worksheet.set_column_range_width(0, 12, 6)?;

    // Write 3 color scale formats with standard Excel colors.
    let conditional_format = ConditionalFormat3ColorScale::new()
        .set_minimum_color("F8696B")
        .set_midpoint_color("FFEB84")
        .set_maximum_color("63BE7B");

    worksheet.add_conditional_format(2, 1, 11, 1, &conditional_format)?;

    let conditional_format = ConditionalFormat3ColorScale::new()
        .set_minimum_color("63BE7B")
        .set_midpoint_color("FFEB84")
        .set_maximum_color("F8696B");

    worksheet.add_conditional_format(2, 3, 11, 3, &conditional_format)?;

    let conditional_format = ConditionalFormat3ColorScale::new()
        .set_minimum_color("F8696B")
        .set_midpoint_color("FCFCFF")
        .set_maximum_color("63BE7B");

    worksheet.add_conditional_format(2, 5, 11, 5, &conditional_format)?;

    let conditional_format = ConditionalFormat3ColorScale::new()
        .set_minimum_color("63BE7B")
        .set_midpoint_color("FCFCFF")
        .set_maximum_color("F8696B");

    worksheet.add_conditional_format(2, 7, 11, 7, &conditional_format)?;

    let conditional_format = ConditionalFormat3ColorScale::new()
        .set_minimum_color("F8696B")
        .set_midpoint_color("FCFCFF")
        .set_maximum_color("5A8AC6");

    worksheet.add_conditional_format(2, 9, 11, 9, &conditional_format)?;

    let conditional_format = ConditionalFormat3ColorScale::new()
        .set_minimum_color("5A8AC6")
        .set_midpoint_color("FCFCFF")
        .set_maximum_color("F8696B");

    worksheet.add_conditional_format(2, 11, 11, 11, &conditional_format)?;

    // -----------------------------------------------------------------------
    // Worksheet 11. Examples of data bars.
    // -----------------------------------------------------------------------
    let caption = "Examples of data bars";

    // Add a worksheet to the workbook.
    let worksheet = workbook.add_worksheet();

    // Write the caption.
    worksheet.write_with_format(0, 1, caption, &bold)?;
    worksheet.write(1, 1, "Default")?;
    worksheet.write(1, 3, "Default negative")?;
    worksheet.write(1, 5, "User color")?;
    worksheet.write(1, 7, "Changed direction")?;

    // Write the worksheet data.
    let data1 = [1, 2, 3, 4, 5, 6, 7, 8, 9, 10];
    let data2 = [6, 4, 2, -2, -4, -6, -4, -2, 2, 4];
    worksheet.write_column(2, 1, data1)?;
    worksheet.write_column(2, 3, data2)?;
    worksheet.write_column(2, 5, data1)?;
    worksheet.write_column(2, 7, data1)?;

    // Write a standard Excel data bar.
    let conditional_format = ConditionalFormatDataBar::new();

    worksheet.add_conditional_format(2, 1, 11, 1, &conditional_format)?;

    // Write a standard Excel data bar with negative data
    let conditional_format = ConditionalFormatDataBar::new();

    worksheet.add_conditional_format(2, 3, 11, 3, &conditional_format)?;

    // Write a data bar with a user defined fill color.
    let conditional_format = ConditionalFormatDataBar::new().set_fill_color("009933");

    worksheet.add_conditional_format(2, 5, 11, 5, &conditional_format)?;

    // Write a data bar with the direction changed.
    let conditional_format = ConditionalFormatDataBar::new()
        .set_direction(ConditionalFormatDataBarDirection::RightToLeft);

    worksheet.add_conditional_format(2, 7, 11, 7, &conditional_format)?;

    // -----------------------------------------------------------------------
    // Worksheet 12. Examples of icon style conditional formats.
    // -----------------------------------------------------------------------
    let caption = "Examples of icon style conditional formats.";

    // Add a worksheet to the workbook.
    let worksheet = workbook.add_worksheet();

    // Write the caption.
    worksheet.write_with_format(0, 0, caption, &bold)?;
    worksheet.write_with_format(1, 0, "Three Traffic lights - Green is highest", &indent)?;
    worksheet.write_with_format(2, 0, "Reversed - Red is highest", &indent)?;
    worksheet.write_with_format(3, 0, "Icons only - The number data is hidden", &indent)?;

    worksheet.write_with_format(4, 0, "Other three-five icon examples", &bold)?;
    worksheet.write_with_format(5, 0, "Three arrows", &indent)?;
    worksheet.write_with_format(6, 0, "Three symbols", &indent)?;
    worksheet.write_with_format(7, 0, "Three stars", &indent)?;

    worksheet.write_with_format(8, 0, "Four arrows", &indent)?;
    worksheet.write_with_format(9, 0, "Four circles - Red (highest) to Black", &indent)?;
    worksheet.write_with_format(10, 0, "Four rating histograms", &indent)?;

    worksheet.write_with_format(11, 0, "Five arrows", &indent)?;
    worksheet.write_with_format(12, 0, "Five rating histograms", &indent)?;
    worksheet.write_with_format(13, 0, "Five rating quadrants", &indent)?;

    // Set the column width for clarity.
    worksheet.set_column_width(0, 35)?;

    // Write the worksheet data.
    worksheet.write_row(1, 1, [1, 2, 3])?;
    worksheet.write_row(2, 1, [1, 2, 3])?;
    worksheet.write_row(3, 1, [1, 2, 3])?;

    worksheet.write_row(5, 1, [1, 2, 3])?;
    worksheet.write_row(6, 1, [1, 2, 3])?;
    worksheet.write_row(7, 1, [1, 2, 3])?;

    worksheet.write_row(8, 1, [1, 2, 3, 4])?;
    worksheet.write_row(9, 1, [1, 2, 3, 4])?;
    worksheet.write_row(10, 1, [1, 2, 3, 4])?;

    worksheet.write_row(11, 1, [1, 2, 3, 4, 5])?;
    worksheet.write_row(12, 1, [1, 2, 3, 4, 5])?;
    worksheet.write_row(13, 1, [1, 2, 3, 4, 5])?;

    // Three Traffic lights - Green is highest.
    let conditional_format = ConditionalFormatIconSet::new()
        .set_icon_type(ConditionalFormatIconType::ThreeTrafficLights);

    worksheet.add_conditional_format(1, 1, 1, 3, &conditional_format)?;

    // Reversed - Red is highest.
    let conditional_format = ConditionalFormatIconSet::new()
        .set_icon_type(ConditionalFormatIconType::ThreeTrafficLights)
        .reverse_icons(true);

    worksheet.add_conditional_format(2, 1, 2, 3, &conditional_format)?;

    // Icons only - The number data is hidden.
    let conditional_format = ConditionalFormatIconSet::new()
        .set_icon_type(ConditionalFormatIconType::ThreeTrafficLights)
        .show_icons_only(true);

    worksheet.add_conditional_format(3, 1, 3, 3, &conditional_format)?;

    // Three arrows.
    let conditional_format =
        ConditionalFormatIconSet::new().set_icon_type(ConditionalFormatIconType::ThreeArrows);

    worksheet.add_conditional_format(5, 1, 5, 3, &conditional_format)?;

    // Three symbols.
    let conditional_format = ConditionalFormatIconSet::new()
        .set_icon_type(ConditionalFormatIconType::ThreeSymbolsCircled);

    worksheet.add_conditional_format(6, 1, 6, 3, &conditional_format)?;

    // Three stars.
    let conditional_format =
        ConditionalFormatIconSet::new().set_icon_type(ConditionalFormatIconType::ThreeStars);

    worksheet.add_conditional_format(7, 1, 7, 3, &conditional_format)?;

    // Four Arrows.
    let conditional_format =
        ConditionalFormatIconSet::new().set_icon_type(ConditionalFormatIconType::FourArrows);

    worksheet.add_conditional_format(8, 1, 8, 4, &conditional_format)?;

    // Four circles - Red (highest) to Black (lowest).
    let conditional_format =
        ConditionalFormatIconSet::new().set_icon_type(ConditionalFormatIconType::FourRedToBlack);

    worksheet.add_conditional_format(9, 1, 9, 4, &conditional_format)?;

    // Four rating histograms.
    let conditional_format =
        ConditionalFormatIconSet::new().set_icon_type(ConditionalFormatIconType::FourHistograms);

    worksheet.add_conditional_format(10, 1, 10, 4, &conditional_format)?;

    // Four Arrows.
    let conditional_format =
        ConditionalFormatIconSet::new().set_icon_type(ConditionalFormatIconType::FiveArrows);

    worksheet.add_conditional_format(11, 1, 11, 5, &conditional_format)?;

    // Four rating histograms.
    let conditional_format =
        ConditionalFormatIconSet::new().set_icon_type(ConditionalFormatIconType::FiveHistograms);

    worksheet.add_conditional_format(12, 1, 12, 5, &conditional_format)?;

    // Four rating quadrants.
    let conditional_format =
        ConditionalFormatIconSet::new().set_icon_type(ConditionalFormatIconType::FiveQuadrants);

    worksheet.add_conditional_format(13, 1, 13, 5, &conditional_format)?;

    // -----------------------------------------------------------------------
    // Save and close the file.
    // -----------------------------------------------------------------------
    workbook.save("conditional_formats.xlsx")?;

    Ok(())
}
Example 2. Cell conditional formatting with between ranges. Values between 30 and 70 are in light red. Values outside that range are in light green.
See ConditionalFormatCell for more details.
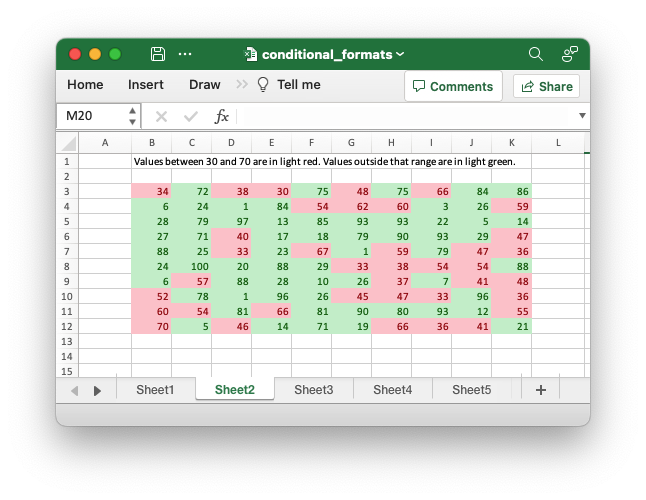
Code to generate the above example:
// SPDX-License-Identifier: MIT OR Apache-2.0
//
// Copyright 2022-2026, John McNamara, jmcnamara@cpan.org

//! Example of how to add conditional formatting to a worksheet using the
//! `rust_xlsxwriter` library.
//!
//! Conditional formatting allows you to apply a format to a cell or a range of
//! cells based on user defined rule.

use rust_xlsxwriter::{
    ConditionalFormat2ColorScale, ConditionalFormat3ColorScale, ConditionalFormatAverage,
    ConditionalFormatAverageRule, ConditionalFormatCell, ConditionalFormatCellRule,
    ConditionalFormatDataBar, ConditionalFormatDataBarDirection, ConditionalFormatDuplicate,
    ConditionalFormatFormula, ConditionalFormatIconSet, ConditionalFormatIconType,
    ConditionalFormatText, ConditionalFormatTextRule, ConditionalFormatTop, Format, Workbook,
    XlsxError,
};

fn main() -> Result<(), XlsxError> {
    // Create a new Excel file object.
    let mut workbook = Workbook::new();

    // Add a format. Light red fill with dark red text.
    let format1 = Format::new()
        .set_font_color("9C0006")
        .set_background_color("FFC7CE");

    // Add a format. Green fill with dark green text.
    let format2 = Format::new()
        .set_font_color("006100")
        .set_background_color("C6EFCE");

    // Add a format for headers.
    let bold = Format::new().set_bold();

    // Add a format for descriptions.
    let indent = Format::new().set_indent(2);

    // some sample data to run the conditional formatting against.
    let data = [
        [34, 72, 38, 30, 75, 48, 75, 66, 84, 86],
        [6, 24, 1, 84, 54, 62, 60, 3, 26, 59],
        [28, 79, 97, 13, 85, 93, 93, 22, 5, 14],
        [27, 71, 40, 17, 18, 79, 90, 93, 29, 47],
        [88, 25, 33, 23, 67, 1, 59, 79, 47, 36],
        [24, 100, 20, 88, 29, 33, 38, 54, 54, 88],
        [6, 57, 88, 28, 10, 26, 37, 7, 41, 48],
        [52, 78, 1, 96, 26, 45, 47, 33, 96, 36],
        [60, 54, 81, 66, 81, 90, 80, 93, 12, 55],
        [70, 5, 46, 14, 71, 19, 66, 36, 41, 21],
    ];

    // -----------------------------------------------------------------------
    // Worksheet 1. Cell conditional formatting.
    // -----------------------------------------------------------------------
    let caption = "Cells with values >= 50 are in light red. Values < 50 are in light green.";

    // Add a worksheet to the workbook.
    let worksheet = workbook.add_worksheet();

    // Write the caption.
    worksheet.write(0, 1, caption)?;

    // Write the worksheet data.
    worksheet.write_row_matrix(2, 1, data)?;

    // Set the column widths for clarity.
    worksheet.set_column_range_width(1, 10, 6)?;

    // Write a conditional format over a range.
    let conditional_format = ConditionalFormatCell::new()
        .set_rule(ConditionalFormatCellRule::GreaterThanOrEqualTo(50))
        .set_format(&format1);

    worksheet.add_conditional_format(2, 1, 11, 10, &conditional_format)?;

    // Write another conditional format over the same range.
    let conditional_format = ConditionalFormatCell::new()
        .set_rule(ConditionalFormatCellRule::LessThan(50))
        .set_format(&format2);

    worksheet.add_conditional_format(2, 1, 11, 10, &conditional_format)?;

    // -----------------------------------------------------------------------
    // Worksheet 2. Cell conditional formatting with between ranges.
    // -----------------------------------------------------------------------
    let caption =
        "Values between 30 and 70 are in light red. Values outside that range are in light green.";

    // Add a worksheet to the workbook.
    let worksheet = workbook.add_worksheet();

    // Write the caption.
    worksheet.write(0, 1, caption)?;

    // Write the worksheet data.
    worksheet.write_row_matrix(2, 1, data)?;

    // Set the column widths for clarity.
    worksheet.set_column_range_width(1, 10, 6)?;

    // Write a conditional format over a range.
    let conditional_format = ConditionalFormatCell::new()
        .set_rule(ConditionalFormatCellRule::Between(30, 70))
        .set_format(&format1);

    worksheet.add_conditional_format(2, 1, 11, 10, &conditional_format)?;

    // Write another conditional format over the same range.
    let conditional_format = ConditionalFormatCell::new()
        .set_rule(ConditionalFormatCellRule::NotBetween(30, 70))
        .set_format(&format2);

    worksheet.add_conditional_format(2, 1, 11, 10, &conditional_format)?;

    // -----------------------------------------------------------------------
    // Worksheet 3. Duplicate and Unique conditional formats.
    // -----------------------------------------------------------------------
    let caption = "Duplicate values are in light red. Unique values are in light green.";

    // Add a worksheet to the workbook.
    let worksheet = workbook.add_worksheet();

    // Write the caption.
    worksheet.write(0, 1, caption)?;

    // Write the worksheet data.
    worksheet.write_row_matrix(2, 1, data)?;

    // Set the column widths for clarity.
    worksheet.set_column_range_width(1, 10, 6)?;

    // Write a conditional format over a range.
    let conditional_format = ConditionalFormatDuplicate::new().set_format(&format1);

    worksheet.add_conditional_format(2, 1, 11, 10, &conditional_format)?;

    // Invert the duplicate conditional format to show unique values in the
    // same range.
    let conditional_format = ConditionalFormatDuplicate::new()
        .invert()
        .set_format(&format2);

    worksheet.add_conditional_format(2, 1, 11, 10, &conditional_format)?;

    // -----------------------------------------------------------------------
    // Worksheet 4. Above and Below Average conditional formats.
    // -----------------------------------------------------------------------
    let caption = "Above average values are in light red. Below average values are in light green.";

    // Add a worksheet to the workbook.
    let worksheet = workbook.add_worksheet();

    // Write the caption.
    worksheet.write(0, 1, caption)?;

    // Write the worksheet data.
    worksheet.write_row_matrix(2, 1, data)?;

    // Set the column widths for clarity.
    worksheet.set_column_range_width(1, 10, 6)?;

    // Write a conditional format over a range. The default criteria is Above Average.
    let conditional_format = ConditionalFormatAverage::new().set_format(&format1);

    worksheet.add_conditional_format(2, 1, 11, 10, &conditional_format)?;

    // Write another conditional format over the same range.
    let conditional_format = ConditionalFormatAverage::new()
        .set_rule(ConditionalFormatAverageRule::BelowAverage)
        .set_format(&format2);

    worksheet.add_conditional_format(2, 1, 11, 10, &conditional_format)?;

    // -----------------------------------------------------------------------
    // Worksheet 5. Top and Bottom range conditional formats.
    // -----------------------------------------------------------------------
    let caption = "Top 10 values are in light red. Bottom 10 values are in light green.";

    // Add a worksheet to the workbook.
    let worksheet = workbook.add_worksheet();

    // Write the caption.
    worksheet.write(0, 1, caption)?;

    // Write the worksheet data.
    worksheet.write_row_matrix(2, 1, data)?;

    // Set the column widths for clarity.
    worksheet.set_column_range_width(1, 10, 6)?;

    // Write a conditional format over a range.
    let conditional_format = ConditionalFormatTop::new()
        .set_rule(rust_xlsxwriter::ConditionalFormatTopRule::Top(10))
        .set_format(&format1);

    worksheet.add_conditional_format(2, 1, 11, 10, &conditional_format)?;

    // Also show the bottom values in the same range.
    let conditional_format = ConditionalFormatTop::new()
        .set_rule(rust_xlsxwriter::ConditionalFormatTopRule::Bottom(10))
        .set_format(&format2);

    worksheet.add_conditional_format(2, 1, 11, 10, &conditional_format)?;

    // -----------------------------------------------------------------------
    // Worksheet 6. Cell conditional formatting in non-contiguous range.
    // -----------------------------------------------------------------------
    let caption = "Cells with values >= 50 are in light red. Values < 50 are in light green. Non-contiguous ranges.";

    // Add a worksheet to the workbook.
    let worksheet = workbook.add_worksheet();

    // Write the caption.
    worksheet.write(0, 1, caption)?;

    // Write the worksheet data.
    worksheet.write_row_matrix(2, 1, data)?;

    // Set the column widths for clarity.
    worksheet.set_column_range_width(1, 10, 6)?;

    // Write a conditional format over a non-contiguous range.
    let conditional_format = ConditionalFormatCell::new()
        .set_rule(ConditionalFormatCellRule::GreaterThanOrEqualTo(50))
        .set_multi_range("B3:D6 I3:K6 B9:D12 I9:K12")
        .set_format(&format1);

    worksheet.add_conditional_format(2, 1, 11, 10, &conditional_format)?;

    // Write another conditional format over the same range.
    let conditional_format = ConditionalFormatCell::new()
        .set_rule(ConditionalFormatCellRule::LessThan(50))
        .set_multi_range("B3:D6 I3:K6 B9:D12 I9:K12")
        .set_format(&format2);

    worksheet.add_conditional_format(2, 1, 11, 10, &conditional_format)?;

    // -----------------------------------------------------------------------
    // Worksheet 7. Formula conditional formatting.
    // -----------------------------------------------------------------------
    let caption = "Even numbered cells are in light green. Odd numbered cells are in light red.";

    // Add a worksheet to the workbook.
    let worksheet = workbook.add_worksheet();

    // Write the caption.
    worksheet.write(0, 1, caption)?;

    // Write the worksheet data.
    worksheet.write_row_matrix(2, 1, data)?;

    // Set the column widths for clarity.
    worksheet.set_column_range_width(1, 10, 6)?;

    // Write a conditional format over a range.
    let conditional_format = ConditionalFormatFormula::new()
        .set_rule("=ISODD(B3)")
        .set_format(&format1);

    worksheet.add_conditional_format(2, 1, 11, 10, &conditional_format)?;

    // Write another conditional format over the same range.
    let conditional_format = ConditionalFormatFormula::new()
        .set_rule("=ISEVEN(B3)")
        .set_format(&format2);

    worksheet.add_conditional_format(2, 1, 11, 10, &conditional_format)?;

    // -----------------------------------------------------------------------
    // Worksheet 8. Text style conditional formats.
    // -----------------------------------------------------------------------
    let caption =
        "Column A shows words that contain the sub-word 'rust'. Column C shows words that start/end with 't'";

    // Add a worksheet to the workbook.
    let worksheet = workbook.add_worksheet();

    // Write the caption.
    worksheet.write(0, 0, caption)?;

    // Add some sample data.
    let word_list = [
        "apocrustic",
        "burstwort",
        "cloudburst",
        "crustification",
        "distrustfulness",
        "laurustine",
        "outburst",
        "rusticism",
        "thunderburst",
        "trustee",
        "trustworthiness",
        "unburstableness",
        "unfrustratable",
    ];
    worksheet.write_column(1, 0, word_list)?;
    worksheet.write_column(1, 2, word_list)?;

    // Set the column widths for clarity.
    worksheet.set_column_width(0, 20)?;
    worksheet.set_column_width(2, 20)?;

    // Write a text "containing" conditional format over a range.
    let conditional_format = ConditionalFormatText::new()
        .set_rule(ConditionalFormatTextRule::Contains("rust".to_string()))
        .set_format(&format2);

    worksheet.add_conditional_format(1, 0, 13, 0, &conditional_format)?;

    // Write a text "not containing" conditional format over the same range.
    let conditional_format = ConditionalFormatText::new()
        .set_rule(ConditionalFormatTextRule::DoesNotContain(
            "rust".to_string(),
        ))
        .set_format(&format1);

    worksheet.add_conditional_format(1, 0, 13, 0, &conditional_format)?;

    // Write a text "begins with" conditional format over a range.
    let conditional_format = ConditionalFormatText::new()
        .set_rule(ConditionalFormatTextRule::BeginsWith("t".to_string()))
        .set_format(&format2);

    worksheet.add_conditional_format(1, 2, 13, 2, &conditional_format)?;

    // Write a text "ends with" conditional format over the same range.
    let conditional_format = ConditionalFormatText::new()
        .set_rule(ConditionalFormatTextRule::EndsWith("t".to_string()))
        .set_format(&format1);

    worksheet.add_conditional_format(1, 2, 13, 2, &conditional_format)?;

    // -----------------------------------------------------------------------
    // Worksheet 9. Examples of 2 color scale conditional formats.
    // -----------------------------------------------------------------------
    let caption = "Examples of 2 color scale conditional formats";

    // Add a worksheet to the workbook.
    let worksheet = workbook.add_worksheet();

    // Write the caption.
    worksheet.write(0, 1, caption)?;

    // Write the worksheet data.
    let data = [1, 2, 3, 4, 5, 6, 7, 8, 9, 10];
    worksheet.write_column(2, 1, data)?;
    worksheet.write_column(2, 3, data)?;
    worksheet.write_column(2, 5, data)?;
    worksheet.write_column(2, 7, data)?;
    worksheet.write_column(2, 9, data)?;
    worksheet.write_column(2, 11, data)?;

    // Set the column widths for clarity.
    worksheet.set_column_range_width(0, 12, 6)?;

    // Write 2 color scale formats with standard Excel colors.
    let conditional_format = ConditionalFormat2ColorScale::new()
        .set_minimum_color("F8696B")
        .set_maximum_color("FCFCFF");

    worksheet.add_conditional_format(2, 1, 11, 1, &conditional_format)?;

    let conditional_format = ConditionalFormat2ColorScale::new()
        .set_minimum_color("FCFCFF")
        .set_maximum_color("F8696B");

    worksheet.add_conditional_format(2, 3, 11, 3, &conditional_format)?;

    let conditional_format = ConditionalFormat2ColorScale::new()
        .set_minimum_color("FCFCFF")
        .set_maximum_color("63BE7B");

    worksheet.add_conditional_format(2, 5, 11, 5, &conditional_format)?;

    let conditional_format = ConditionalFormat2ColorScale::new()
        .set_minimum_color("63BE7B")
        .set_maximum_color("FCFCFF");

    worksheet.add_conditional_format(2, 7, 11, 7, &conditional_format)?;

    let conditional_format = ConditionalFormat2ColorScale::new()
        .set_minimum_color("FFEF9C")
        .set_maximum_color("63BE7B");

    worksheet.add_conditional_format(2, 9, 11, 9, &conditional_format)?;

    let conditional_format = ConditionalFormat2ColorScale::new()
        .set_minimum_color("63BE7B")
        .set_maximum_color("FFEF9C");

    worksheet.add_conditional_format(2, 11, 11, 11, &conditional_format)?;

    // -----------------------------------------------------------------------
    // Worksheet 10. Examples of 3 color scale conditional formats.
    // -----------------------------------------------------------------------
    let caption = "Examples of 3 color scale conditional formats";

    // Add a worksheet to the workbook.
    let worksheet = workbook.add_worksheet();

    // Write the caption.
    worksheet.write(0, 1, caption)?;

    // Write the worksheet data.
    let data = [1, 2, 3, 4, 5, 6, 7, 8, 9, 10];
    worksheet.write_column(2, 1, data)?;
    worksheet.write_column(2, 3, data)?;
    worksheet.write_column(2, 5, data)?;
    worksheet.write_column(2, 7, data)?;
    worksheet.write_column(2, 9, data)?;
    worksheet.write_column(2, 11, data)?;

    // Set the column widths for clarity.
    worksheet.set_column_range_width(0, 12, 6)?;

    // Write 3 color scale formats with standard Excel colors.
    let conditional_format = ConditionalFormat3ColorScale::new()
        .set_minimum_color("F8696B")
        .set_midpoint_color("FFEB84")
        .set_maximum_color("63BE7B");

    worksheet.add_conditional_format(2, 1, 11, 1, &conditional_format)?;

    let conditional_format = ConditionalFormat3ColorScale::new()
        .set_minimum_color("63BE7B")
        .set_midpoint_color("FFEB84")
        .set_maximum_color("F8696B");

    worksheet.add_conditional_format(2, 3, 11, 3, &conditional_format)?;

    let conditional_format = ConditionalFormat3ColorScale::new()
        .set_minimum_color("F8696B")
        .set_midpoint_color("FCFCFF")
        .set_maximum_color("63BE7B");

    worksheet.add_conditional_format(2, 5, 11, 5, &conditional_format)?;

    let conditional_format = ConditionalFormat3ColorScale::new()
        .set_minimum_color("63BE7B")
        .set_midpoint_color("FCFCFF")
        .set_maximum_color("F8696B");

    worksheet.add_conditional_format(2, 7, 11, 7, &conditional_format)?;

    let conditional_format = ConditionalFormat3ColorScale::new()
        .set_minimum_color("F8696B")
        .set_midpoint_color("FCFCFF")
        .set_maximum_color("5A8AC6");

    worksheet.add_conditional_format(2, 9, 11, 9, &conditional_format)?;

    let conditional_format = ConditionalFormat3ColorScale::new()
        .set_minimum_color("5A8AC6")
        .set_midpoint_color("FCFCFF")
        .set_maximum_color("F8696B");

    worksheet.add_conditional_format(2, 11, 11, 11, &conditional_format)?;

    // -----------------------------------------------------------------------
    // Worksheet 11. Examples of data bars.
    // -----------------------------------------------------------------------
    let caption = "Examples of data bars";

    // Add a worksheet to the workbook.
    let worksheet = workbook.add_worksheet();

    // Write the caption.
    worksheet.write_with_format(0, 1, caption, &bold)?;
    worksheet.write(1, 1, "Default")?;
    worksheet.write(1, 3, "Default negative")?;
    worksheet.write(1, 5, "User color")?;
    worksheet.write(1, 7, "Changed direction")?;

    // Write the worksheet data.
    let data1 = [1, 2, 3, 4, 5, 6, 7, 8, 9, 10];
    let data2 = [6, 4, 2, -2, -4, -6, -4, -2, 2, 4];
    worksheet.write_column(2, 1, data1)?;
    worksheet.write_column(2, 3, data2)?;
    worksheet.write_column(2, 5, data1)?;
    worksheet.write_column(2, 7, data1)?;

    // Write a standard Excel data bar.
    let conditional_format = ConditionalFormatDataBar::new();

    worksheet.add_conditional_format(2, 1, 11, 1, &conditional_format)?;

    // Write a standard Excel data bar with negative data
    let conditional_format = ConditionalFormatDataBar::new();

    worksheet.add_conditional_format(2, 3, 11, 3, &conditional_format)?;

    // Write a data bar with a user defined fill color.
    let conditional_format = ConditionalFormatDataBar::new().set_fill_color("009933");

    worksheet.add_conditional_format(2, 5, 11, 5, &conditional_format)?;

    // Write a data bar with the direction changed.
    let conditional_format = ConditionalFormatDataBar::new()
        .set_direction(ConditionalFormatDataBarDirection::RightToLeft);

    worksheet.add_conditional_format(2, 7, 11, 7, &conditional_format)?;

    // -----------------------------------------------------------------------
    // Worksheet 12. Examples of icon style conditional formats.
    // -----------------------------------------------------------------------
    let caption = "Examples of icon style conditional formats.";

    // Add a worksheet to the workbook.
    let worksheet = workbook.add_worksheet();

    // Write the caption.
    worksheet.write_with_format(0, 0, caption, &bold)?;
    worksheet.write_with_format(1, 0, "Three Traffic lights - Green is highest", &indent)?;
    worksheet.write_with_format(2, 0, "Reversed - Red is highest", &indent)?;
    worksheet.write_with_format(3, 0, "Icons only - The number data is hidden", &indent)?;

    worksheet.write_with_format(4, 0, "Other three-five icon examples", &bold)?;
    worksheet.write_with_format(5, 0, "Three arrows", &indent)?;
    worksheet.write_with_format(6, 0, "Three symbols", &indent)?;
    worksheet.write_with_format(7, 0, "Three stars", &indent)?;

    worksheet.write_with_format(8, 0, "Four arrows", &indent)?;
    worksheet.write_with_format(9, 0, "Four circles - Red (highest) to Black", &indent)?;
    worksheet.write_with_format(10, 0, "Four rating histograms", &indent)?;

    worksheet.write_with_format(11, 0, "Five arrows", &indent)?;
    worksheet.write_with_format(12, 0, "Five rating histograms", &indent)?;
    worksheet.write_with_format(13, 0, "Five rating quadrants", &indent)?;

    // Set the column width for clarity.
    worksheet.set_column_width(0, 35)?;

    // Write the worksheet data.
    worksheet.write_row(1, 1, [1, 2, 3])?;
    worksheet.write_row(2, 1, [1, 2, 3])?;
    worksheet.write_row(3, 1, [1, 2, 3])?;

    worksheet.write_row(5, 1, [1, 2, 3])?;
    worksheet.write_row(6, 1, [1, 2, 3])?;
    worksheet.write_row(7, 1, [1, 2, 3])?;

    worksheet.write_row(8, 1, [1, 2, 3, 4])?;
    worksheet.write_row(9, 1, [1, 2, 3, 4])?;
    worksheet.write_row(10, 1, [1, 2, 3, 4])?;

    worksheet.write_row(11, 1, [1, 2, 3, 4, 5])?;
    worksheet.write_row(12, 1, [1, 2, 3, 4, 5])?;
    worksheet.write_row(13, 1, [1, 2, 3, 4, 5])?;

    // Three Traffic lights - Green is highest.
    let conditional_format = ConditionalFormatIconSet::new()
        .set_icon_type(ConditionalFormatIconType::ThreeTrafficLights);

    worksheet.add_conditional_format(1, 1, 1, 3, &conditional_format)?;

    // Reversed - Red is highest.
    let conditional_format = ConditionalFormatIconSet::new()
        .set_icon_type(ConditionalFormatIconType::ThreeTrafficLights)
        .reverse_icons(true);

    worksheet.add_conditional_format(2, 1, 2, 3, &conditional_format)?;

    // Icons only - The number data is hidden.
    let conditional_format = ConditionalFormatIconSet::new()
        .set_icon_type(ConditionalFormatIconType::ThreeTrafficLights)
        .show_icons_only(true);

    worksheet.add_conditional_format(3, 1, 3, 3, &conditional_format)?;

    // Three arrows.
    let conditional_format =
        ConditionalFormatIconSet::new().set_icon_type(ConditionalFormatIconType::ThreeArrows);

    worksheet.add_conditional_format(5, 1, 5, 3, &conditional_format)?;

    // Three symbols.
    let conditional_format = ConditionalFormatIconSet::new()
        .set_icon_type(ConditionalFormatIconType::ThreeSymbolsCircled);

    worksheet.add_conditional_format(6, 1, 6, 3, &conditional_format)?;

    // Three stars.
    let conditional_format =
        ConditionalFormatIconSet::new().set_icon_type(ConditionalFormatIconType::ThreeStars);

    worksheet.add_conditional_format(7, 1, 7, 3, &conditional_format)?;

    // Four Arrows.
    let conditional_format =
        ConditionalFormatIconSet::new().set_icon_type(ConditionalFormatIconType::FourArrows);

    worksheet.add_conditional_format(8, 1, 8, 4, &conditional_format)?;

    // Four circles - Red (highest) to Black (lowest).
    let conditional_format =
        ConditionalFormatIconSet::new().set_icon_type(ConditionalFormatIconType::FourRedToBlack);

    worksheet.add_conditional_format(9, 1, 9, 4, &conditional_format)?;

    // Four rating histograms.
    let conditional_format =
        ConditionalFormatIconSet::new().set_icon_type(ConditionalFormatIconType::FourHistograms);

    worksheet.add_conditional_format(10, 1, 10, 4, &conditional_format)?;

    // Four Arrows.
    let conditional_format =
        ConditionalFormatIconSet::new().set_icon_type(ConditionalFormatIconType::FiveArrows);

    worksheet.add_conditional_format(11, 1, 11, 5, &conditional_format)?;

    // Four rating histograms.
    let conditional_format =
        ConditionalFormatIconSet::new().set_icon_type(ConditionalFormatIconType::FiveHistograms);

    worksheet.add_conditional_format(12, 1, 12, 5, &conditional_format)?;

    // Four rating quadrants.
    let conditional_format =
        ConditionalFormatIconSet::new().set_icon_type(ConditionalFormatIconType::FiveQuadrants);

    worksheet.add_conditional_format(13, 1, 13, 5, &conditional_format)?;

    // -----------------------------------------------------------------------
    // Save and close the file.
    // -----------------------------------------------------------------------
    workbook.save("conditional_formats.xlsx")?;

    Ok(())
}
Example 3. Duplicate and Unique conditional formats. Duplicate values are in light red. Unique values are in light green.
See ConditionalFormatDuplicate for more details.
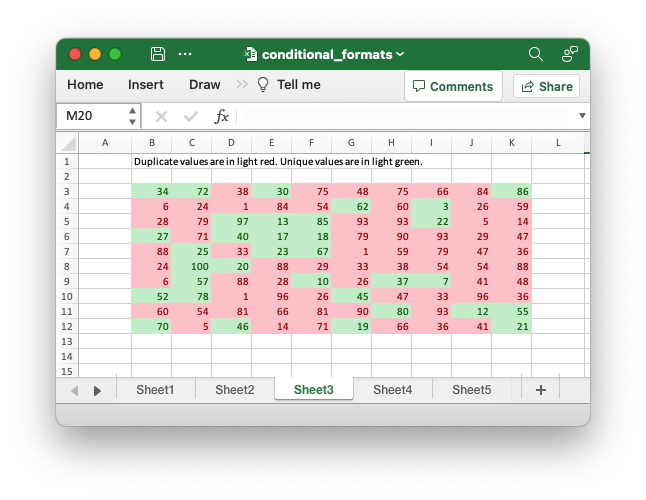
Code to generate the above example:
// SPDX-License-Identifier: MIT OR Apache-2.0
//
// Copyright 2022-2026, John McNamara, jmcnamara@cpan.org

//! Example of how to add conditional formatting to a worksheet using the
//! `rust_xlsxwriter` library.
//!
//! Conditional formatting allows you to apply a format to a cell or a range of
//! cells based on user defined rule.

use rust_xlsxwriter::{
    ConditionalFormat2ColorScale, ConditionalFormat3ColorScale, ConditionalFormatAverage,
    ConditionalFormatAverageRule, ConditionalFormatCell, ConditionalFormatCellRule,
    ConditionalFormatDataBar, ConditionalFormatDataBarDirection, ConditionalFormatDuplicate,
    ConditionalFormatFormula, ConditionalFormatIconSet, ConditionalFormatIconType,
    ConditionalFormatText, ConditionalFormatTextRule, ConditionalFormatTop, Format, Workbook,
    XlsxError,
};

fn main() -> Result<(), XlsxError> {
    // Create a new Excel file object.
    let mut workbook = Workbook::new();

    // Add a format. Light red fill with dark red text.
    let format1 = Format::new()
        .set_font_color("9C0006")
        .set_background_color("FFC7CE");

    // Add a format. Green fill with dark green text.
    let format2 = Format::new()
        .set_font_color("006100")
        .set_background_color("C6EFCE");

    // Add a format for headers.
    let bold = Format::new().set_bold();

    // Add a format for descriptions.
    let indent = Format::new().set_indent(2);

    // some sample data to run the conditional formatting against.
    let data = [
        [34, 72, 38, 30, 75, 48, 75, 66, 84, 86],
        [6, 24, 1, 84, 54, 62, 60, 3, 26, 59],
        [28, 79, 97, 13, 85, 93, 93, 22, 5, 14],
        [27, 71, 40, 17, 18, 79, 90, 93, 29, 47],
        [88, 25, 33, 23, 67, 1, 59, 79, 47, 36],
        [24, 100, 20, 88, 29, 33, 38, 54, 54, 88],
        [6, 57, 88, 28, 10, 26, 37, 7, 41, 48],
        [52, 78, 1, 96, 26, 45, 47, 33, 96, 36],
        [60, 54, 81, 66, 81, 90, 80, 93, 12, 55],
        [70, 5, 46, 14, 71, 19, 66, 36, 41, 21],
    ];

    // -----------------------------------------------------------------------
    // Worksheet 1. Cell conditional formatting.
    // -----------------------------------------------------------------------
    let caption = "Cells with values >= 50 are in light red. Values < 50 are in light green.";

    // Add a worksheet to the workbook.
    let worksheet = workbook.add_worksheet();

    // Write the caption.
    worksheet.write(0, 1, caption)?;

    // Write the worksheet data.
    worksheet.write_row_matrix(2, 1, data)?;

    // Set the column widths for clarity.
    worksheet.set_column_range_width(1, 10, 6)?;

    // Write a conditional format over a range.
    let conditional_format = ConditionalFormatCell::new()
        .set_rule(ConditionalFormatCellRule::GreaterThanOrEqualTo(50))
        .set_format(&format1);

    worksheet.add_conditional_format(2, 1, 11, 10, &conditional_format)?;

    // Write another conditional format over the same range.
    let conditional_format = ConditionalFormatCell::new()
        .set_rule(ConditionalFormatCellRule::LessThan(50))
        .set_format(&format2);

    worksheet.add_conditional_format(2, 1, 11, 10, &conditional_format)?;

    // -----------------------------------------------------------------------
    // Worksheet 2. Cell conditional formatting with between ranges.
    // -----------------------------------------------------------------------
    let caption =
        "Values between 30 and 70 are in light red. Values outside that range are in light green.";

    // Add a worksheet to the workbook.
    let worksheet = workbook.add_worksheet();

    // Write the caption.
    worksheet.write(0, 1, caption)?;

    // Write the worksheet data.
    worksheet.write_row_matrix(2, 1, data)?;

    // Set the column widths for clarity.
    worksheet.set_column_range_width(1, 10, 6)?;

    // Write a conditional format over a range.
    let conditional_format = ConditionalFormatCell::new()
        .set_rule(ConditionalFormatCellRule::Between(30, 70))
        .set_format(&format1);

    worksheet.add_conditional_format(2, 1, 11, 10, &conditional_format)?;

    // Write another conditional format over the same range.
    let conditional_format = ConditionalFormatCell::new()
        .set_rule(ConditionalFormatCellRule::NotBetween(30, 70))
        .set_format(&format2);

    worksheet.add_conditional_format(2, 1, 11, 10, &conditional_format)?;

    // -----------------------------------------------------------------------
    // Worksheet 3. Duplicate and Unique conditional formats.
    // -----------------------------------------------------------------------
    let caption = "Duplicate values are in light red. Unique values are in light green.";

    // Add a worksheet to the workbook.
    let worksheet = workbook.add_worksheet();

    // Write the caption.
    worksheet.write(0, 1, caption)?;

    // Write the worksheet data.
    worksheet.write_row_matrix(2, 1, data)?;

    // Set the column widths for clarity.
    worksheet.set_column_range_width(1, 10, 6)?;

    // Write a conditional format over a range.
    let conditional_format = ConditionalFormatDuplicate::new().set_format(&format1);

    worksheet.add_conditional_format(2, 1, 11, 10, &conditional_format)?;

    // Invert the duplicate conditional format to show unique values in the
    // same range.
    let conditional_format = ConditionalFormatDuplicate::new()
        .invert()
        .set_format(&format2);

    worksheet.add_conditional_format(2, 1, 11, 10, &conditional_format)?;

    // -----------------------------------------------------------------------
    // Worksheet 4. Above and Below Average conditional formats.
    // -----------------------------------------------------------------------
    let caption = "Above average values are in light red. Below average values are in light green.";

    // Add a worksheet to the workbook.
    let worksheet = workbook.add_worksheet();

    // Write the caption.
    worksheet.write(0, 1, caption)?;

    // Write the worksheet data.
    worksheet.write_row_matrix(2, 1, data)?;

    // Set the column widths for clarity.
    worksheet.set_column_range_width(1, 10, 6)?;

    // Write a conditional format over a range. The default criteria is Above Average.
    let conditional_format = ConditionalFormatAverage::new().set_format(&format1);

    worksheet.add_conditional_format(2, 1, 11, 10, &conditional_format)?;

    // Write another conditional format over the same range.
    let conditional_format = ConditionalFormatAverage::new()
        .set_rule(ConditionalFormatAverageRule::BelowAverage)
        .set_format(&format2);

    worksheet.add_conditional_format(2, 1, 11, 10, &conditional_format)?;

    // -----------------------------------------------------------------------
    // Worksheet 5. Top and Bottom range conditional formats.
    // -----------------------------------------------------------------------
    let caption = "Top 10 values are in light red. Bottom 10 values are in light green.";

    // Add a worksheet to the workbook.
    let worksheet = workbook.add_worksheet();

    // Write the caption.
    worksheet.write(0, 1, caption)?;

    // Write the worksheet data.
    worksheet.write_row_matrix(2, 1, data)?;

    // Set the column widths for clarity.
    worksheet.set_column_range_width(1, 10, 6)?;

    // Write a conditional format over a range.
    let conditional_format = ConditionalFormatTop::new()
        .set_rule(rust_xlsxwriter::ConditionalFormatTopRule::Top(10))
        .set_format(&format1);

    worksheet.add_conditional_format(2, 1, 11, 10, &conditional_format)?;

    // Also show the bottom values in the same range.
    let conditional_format = ConditionalFormatTop::new()
        .set_rule(rust_xlsxwriter::ConditionalFormatTopRule::Bottom(10))
        .set_format(&format2);

    worksheet.add_conditional_format(2, 1, 11, 10, &conditional_format)?;

    // -----------------------------------------------------------------------
    // Worksheet 6. Cell conditional formatting in non-contiguous range.
    // -----------------------------------------------------------------------
    let caption = "Cells with values >= 50 are in light red. Values < 50 are in light green. Non-contiguous ranges.";

    // Add a worksheet to the workbook.
    let worksheet = workbook.add_worksheet();

    // Write the caption.
    worksheet.write(0, 1, caption)?;

    // Write the worksheet data.
    worksheet.write_row_matrix(2, 1, data)?;

    // Set the column widths for clarity.
    worksheet.set_column_range_width(1, 10, 6)?;

    // Write a conditional format over a non-contiguous range.
    let conditional_format = ConditionalFormatCell::new()
        .set_rule(ConditionalFormatCellRule::GreaterThanOrEqualTo(50))
        .set_multi_range("B3:D6 I3:K6 B9:D12 I9:K12")
        .set_format(&format1);

    worksheet.add_conditional_format(2, 1, 11, 10, &conditional_format)?;

    // Write another conditional format over the same range.
    let conditional_format = ConditionalFormatCell::new()
        .set_rule(ConditionalFormatCellRule::LessThan(50))
        .set_multi_range("B3:D6 I3:K6 B9:D12 I9:K12")
        .set_format(&format2);

    worksheet.add_conditional_format(2, 1, 11, 10, &conditional_format)?;

    // -----------------------------------------------------------------------
    // Worksheet 7. Formula conditional formatting.
    // -----------------------------------------------------------------------
    let caption = "Even numbered cells are in light green. Odd numbered cells are in light red.";

    // Add a worksheet to the workbook.
    let worksheet = workbook.add_worksheet();

    // Write the caption.
    worksheet.write(0, 1, caption)?;

    // Write the worksheet data.
    worksheet.write_row_matrix(2, 1, data)?;

    // Set the column widths for clarity.
    worksheet.set_column_range_width(1, 10, 6)?;

    // Write a conditional format over a range.
    let conditional_format = ConditionalFormatFormula::new()
        .set_rule("=ISODD(B3)")
        .set_format(&format1);

    worksheet.add_conditional_format(2, 1, 11, 10, &conditional_format)?;

    // Write another conditional format over the same range.
    let conditional_format = ConditionalFormatFormula::new()
        .set_rule("=ISEVEN(B3)")
        .set_format(&format2);

    worksheet.add_conditional_format(2, 1, 11, 10, &conditional_format)?;

    // -----------------------------------------------------------------------
    // Worksheet 8. Text style conditional formats.
    // -----------------------------------------------------------------------
    let caption =
        "Column A shows words that contain the sub-word 'rust'. Column C shows words that start/end with 't'";

    // Add a worksheet to the workbook.
    let worksheet = workbook.add_worksheet();

    // Write the caption.
    worksheet.write(0, 0, caption)?;

    // Add some sample data.
    let word_list = [
        "apocrustic",
        "burstwort",
        "cloudburst",
        "crustification",
        "distrustfulness",
        "laurustine",
        "outburst",
        "rusticism",
        "thunderburst",
        "trustee",
        "trustworthiness",
        "unburstableness",
        "unfrustratable",
    ];
    worksheet.write_column(1, 0, word_list)?;
    worksheet.write_column(1, 2, word_list)?;

    // Set the column widths for clarity.
    worksheet.set_column_width(0, 20)?;
    worksheet.set_column_width(2, 20)?;

    // Write a text "containing" conditional format over a range.
    let conditional_format = ConditionalFormatText::new()
        .set_rule(ConditionalFormatTextRule::Contains("rust".to_string()))
        .set_format(&format2);

    worksheet.add_conditional_format(1, 0, 13, 0, &conditional_format)?;

    // Write a text "not containing" conditional format over the same range.
    let conditional_format = ConditionalFormatText::new()
        .set_rule(ConditionalFormatTextRule::DoesNotContain(
            "rust".to_string(),
        ))
        .set_format(&format1);

    worksheet.add_conditional_format(1, 0, 13, 0, &conditional_format)?;

    // Write a text "begins with" conditional format over a range.
    let conditional_format = ConditionalFormatText::new()
        .set_rule(ConditionalFormatTextRule::BeginsWith("t".to_string()))
        .set_format(&format2);

    worksheet.add_conditional_format(1, 2, 13, 2, &conditional_format)?;

    // Write a text "ends with" conditional format over the same range.
    let conditional_format = ConditionalFormatText::new()
        .set_rule(ConditionalFormatTextRule::EndsWith("t".to_string()))
        .set_format(&format1);

    worksheet.add_conditional_format(1, 2, 13, 2, &conditional_format)?;

    // -----------------------------------------------------------------------
    // Worksheet 9. Examples of 2 color scale conditional formats.
    // -----------------------------------------------------------------------
    let caption = "Examples of 2 color scale conditional formats";

    // Add a worksheet to the workbook.
    let worksheet = workbook.add_worksheet();

    // Write the caption.
    worksheet.write(0, 1, caption)?;

    // Write the worksheet data.
    let data = [1, 2, 3, 4, 5, 6, 7, 8, 9, 10];
    worksheet.write_column(2, 1, data)?;
    worksheet.write_column(2, 3, data)?;
    worksheet.write_column(2, 5, data)?;
    worksheet.write_column(2, 7, data)?;
    worksheet.write_column(2, 9, data)?;
    worksheet.write_column(2, 11, data)?;

    // Set the column widths for clarity.
    worksheet.set_column_range_width(0, 12, 6)?;

    // Write 2 color scale formats with standard Excel colors.
    let conditional_format = ConditionalFormat2ColorScale::new()
        .set_minimum_color("F8696B")
        .set_maximum_color("FCFCFF");

    worksheet.add_conditional_format(2, 1, 11, 1, &conditional_format)?;

    let conditional_format = ConditionalFormat2ColorScale::new()
        .set_minimum_color("FCFCFF")
        .set_maximum_color("F8696B");

    worksheet.add_conditional_format(2, 3, 11, 3, &conditional_format)?;

    let conditional_format = ConditionalFormat2ColorScale::new()
        .set_minimum_color("FCFCFF")
        .set_maximum_color("63BE7B");

    worksheet.add_conditional_format(2, 5, 11, 5, &conditional_format)?;

    let conditional_format = ConditionalFormat2ColorScale::new()
        .set_minimum_color("63BE7B")
        .set_maximum_color("FCFCFF");

    worksheet.add_conditional_format(2, 7, 11, 7, &conditional_format)?;

    let conditional_format = ConditionalFormat2ColorScale::new()
        .set_minimum_color("FFEF9C")
        .set_maximum_color("63BE7B");

    worksheet.add_conditional_format(2, 9, 11, 9, &conditional_format)?;

    let conditional_format = ConditionalFormat2ColorScale::new()
        .set_minimum_color("63BE7B")
        .set_maximum_color("FFEF9C");

    worksheet.add_conditional_format(2, 11, 11, 11, &conditional_format)?;

    // -----------------------------------------------------------------------
    // Worksheet 10. Examples of 3 color scale conditional formats.
    // -----------------------------------------------------------------------
    let caption = "Examples of 3 color scale conditional formats";

    // Add a worksheet to the workbook.
    let worksheet = workbook.add_worksheet();

    // Write the caption.
    worksheet.write(0, 1, caption)?;

    // Write the worksheet data.
    let data = [1, 2, 3, 4, 5, 6, 7, 8, 9, 10];
    worksheet.write_column(2, 1, data)?;
    worksheet.write_column(2, 3, data)?;
    worksheet.write_column(2, 5, data)?;
    worksheet.write_column(2, 7, data)?;
    worksheet.write_column(2, 9, data)?;
    worksheet.write_column(2, 11, data)?;

    // Set the column widths for clarity.
    worksheet.set_column_range_width(0, 12, 6)?;

    // Write 3 color scale formats with standard Excel colors.
    let conditional_format = ConditionalFormat3ColorScale::new()
        .set_minimum_color("F8696B")
        .set_midpoint_color("FFEB84")
        .set_maximum_color("63BE7B");

    worksheet.add_conditional_format(2, 1, 11, 1, &conditional_format)?;

    let conditional_format = ConditionalFormat3ColorScale::new()
        .set_minimum_color("63BE7B")
        .set_midpoint_color("FFEB84")
        .set_maximum_color("F8696B");

    worksheet.add_conditional_format(2, 3, 11, 3, &conditional_format)?;

    let conditional_format = ConditionalFormat3ColorScale::new()
        .set_minimum_color("F8696B")
        .set_midpoint_color("FCFCFF")
        .set_maximum_color("63BE7B");

    worksheet.add_conditional_format(2, 5, 11, 5, &conditional_format)?;

    let conditional_format = ConditionalFormat3ColorScale::new()
        .set_minimum_color("63BE7B")
        .set_midpoint_color("FCFCFF")
        .set_maximum_color("F8696B");

    worksheet.add_conditional_format(2, 7, 11, 7, &conditional_format)?;

    let conditional_format = ConditionalFormat3ColorScale::new()
        .set_minimum_color("F8696B")
        .set_midpoint_color("FCFCFF")
        .set_maximum_color("5A8AC6");

    worksheet.add_conditional_format(2, 9, 11, 9, &conditional_format)?;

    let conditional_format = ConditionalFormat3ColorScale::new()
        .set_minimum_color("5A8AC6")
        .set_midpoint_color("FCFCFF")
        .set_maximum_color("F8696B");

    worksheet.add_conditional_format(2, 11, 11, 11, &conditional_format)?;

    // -----------------------------------------------------------------------
    // Worksheet 11. Examples of data bars.
    // -----------------------------------------------------------------------
    let caption = "Examples of data bars";

    // Add a worksheet to the workbook.
    let worksheet = workbook.add_worksheet();

    // Write the caption.
    worksheet.write_with_format(0, 1, caption, &bold)?;
    worksheet.write(1, 1, "Default")?;
    worksheet.write(1, 3, "Default negative")?;
    worksheet.write(1, 5, "User color")?;
    worksheet.write(1, 7, "Changed direction")?;

    // Write the worksheet data.
    let data1 = [1, 2, 3, 4, 5, 6, 7, 8, 9, 10];
    let data2 = [6, 4, 2, -2, -4, -6, -4, -2, 2, 4];
    worksheet.write_column(2, 1, data1)?;
    worksheet.write_column(2, 3, data2)?;
    worksheet.write_column(2, 5, data1)?;
    worksheet.write_column(2, 7, data1)?;

    // Write a standard Excel data bar.
    let conditional_format = ConditionalFormatDataBar::new();

    worksheet.add_conditional_format(2, 1, 11, 1, &conditional_format)?;

    // Write a standard Excel data bar with negative data
    let conditional_format = ConditionalFormatDataBar::new();

    worksheet.add_conditional_format(2, 3, 11, 3, &conditional_format)?;

    // Write a data bar with a user defined fill color.
    let conditional_format = ConditionalFormatDataBar::new().set_fill_color("009933");

    worksheet.add_conditional_format(2, 5, 11, 5, &conditional_format)?;

    // Write a data bar with the direction changed.
    let conditional_format = ConditionalFormatDataBar::new()
        .set_direction(ConditionalFormatDataBarDirection::RightToLeft);

    worksheet.add_conditional_format(2, 7, 11, 7, &conditional_format)?;

    // -----------------------------------------------------------------------
    // Worksheet 12. Examples of icon style conditional formats.
    // -----------------------------------------------------------------------
    let caption = "Examples of icon style conditional formats.";

    // Add a worksheet to the workbook.
    let worksheet = workbook.add_worksheet();

    // Write the caption.
    worksheet.write_with_format(0, 0, caption, &bold)?;
    worksheet.write_with_format(1, 0, "Three Traffic lights - Green is highest", &indent)?;
    worksheet.write_with_format(2, 0, "Reversed - Red is highest", &indent)?;
    worksheet.write_with_format(3, 0, "Icons only - The number data is hidden", &indent)?;

    worksheet.write_with_format(4, 0, "Other three-five icon examples", &bold)?;
    worksheet.write_with_format(5, 0, "Three arrows", &indent)?;
    worksheet.write_with_format(6, 0, "Three symbols", &indent)?;
    worksheet.write_with_format(7, 0, "Three stars", &indent)?;

    worksheet.write_with_format(8, 0, "Four arrows", &indent)?;
    worksheet.write_with_format(9, 0, "Four circles - Red (highest) to Black", &indent)?;
    worksheet.write_with_format(10, 0, "Four rating histograms", &indent)?;

    worksheet.write_with_format(11, 0, "Five arrows", &indent)?;
    worksheet.write_with_format(12, 0, "Five rating histograms", &indent)?;
    worksheet.write_with_format(13, 0, "Five rating quadrants", &indent)?;

    // Set the column width for clarity.
    worksheet.set_column_width(0, 35)?;

    // Write the worksheet data.
    worksheet.write_row(1, 1, [1, 2, 3])?;
    worksheet.write_row(2, 1, [1, 2, 3])?;
    worksheet.write_row(3, 1, [1, 2, 3])?;

    worksheet.write_row(5, 1, [1, 2, 3])?;
    worksheet.write_row(6, 1, [1, 2, 3])?;
    worksheet.write_row(7, 1, [1, 2, 3])?;

    worksheet.write_row(8, 1, [1, 2, 3, 4])?;
    worksheet.write_row(9, 1, [1, 2, 3, 4])?;
    worksheet.write_row(10, 1, [1, 2, 3, 4])?;

    worksheet.write_row(11, 1, [1, 2, 3, 4, 5])?;
    worksheet.write_row(12, 1, [1, 2, 3, 4, 5])?;
    worksheet.write_row(13, 1, [1, 2, 3, 4, 5])?;

    // Three Traffic lights - Green is highest.
    let conditional_format = ConditionalFormatIconSet::new()
        .set_icon_type(ConditionalFormatIconType::ThreeTrafficLights);

    worksheet.add_conditional_format(1, 1, 1, 3, &conditional_format)?;

    // Reversed - Red is highest.
    let conditional_format = ConditionalFormatIconSet::new()
        .set_icon_type(ConditionalFormatIconType::ThreeTrafficLights)
        .reverse_icons(true);

    worksheet.add_conditional_format(2, 1, 2, 3, &conditional_format)?;

    // Icons only - The number data is hidden.
    let conditional_format = ConditionalFormatIconSet::new()
        .set_icon_type(ConditionalFormatIconType::ThreeTrafficLights)
        .show_icons_only(true);

    worksheet.add_conditional_format(3, 1, 3, 3, &conditional_format)?;

    // Three arrows.
    let conditional_format =
        ConditionalFormatIconSet::new().set_icon_type(ConditionalFormatIconType::ThreeArrows);

    worksheet.add_conditional_format(5, 1, 5, 3, &conditional_format)?;

    // Three symbols.
    let conditional_format = ConditionalFormatIconSet::new()
        .set_icon_type(ConditionalFormatIconType::ThreeSymbolsCircled);

    worksheet.add_conditional_format(6, 1, 6, 3, &conditional_format)?;

    // Three stars.
    let conditional_format =
        ConditionalFormatIconSet::new().set_icon_type(ConditionalFormatIconType::ThreeStars);

    worksheet.add_conditional_format(7, 1, 7, 3, &conditional_format)?;

    // Four Arrows.
    let conditional_format =
        ConditionalFormatIconSet::new().set_icon_type(ConditionalFormatIconType::FourArrows);

    worksheet.add_conditional_format(8, 1, 8, 4, &conditional_format)?;

    // Four circles - Red (highest) to Black (lowest).
    let conditional_format =
        ConditionalFormatIconSet::new().set_icon_type(ConditionalFormatIconType::FourRedToBlack);

    worksheet.add_conditional_format(9, 1, 9, 4, &conditional_format)?;

    // Four rating histograms.
    let conditional_format =
        ConditionalFormatIconSet::new().set_icon_type(ConditionalFormatIconType::FourHistograms);

    worksheet.add_conditional_format(10, 1, 10, 4, &conditional_format)?;

    // Four Arrows.
    let conditional_format =
        ConditionalFormatIconSet::new().set_icon_type(ConditionalFormatIconType::FiveArrows);

    worksheet.add_conditional_format(11, 1, 11, 5, &conditional_format)?;

    // Four rating histograms.
    let conditional_format =
        ConditionalFormatIconSet::new().set_icon_type(ConditionalFormatIconType::FiveHistograms);

    worksheet.add_conditional_format(12, 1, 12, 5, &conditional_format)?;

    // Four rating quadrants.
    let conditional_format =
        ConditionalFormatIconSet::new().set_icon_type(ConditionalFormatIconType::FiveQuadrants);

    worksheet.add_conditional_format(13, 1, 13, 5, &conditional_format)?;

    // -----------------------------------------------------------------------
    // Save and close the file.
    // -----------------------------------------------------------------------
    workbook.save("conditional_formats.xlsx")?;

    Ok(())
}
Example 4. Above and Below Average conditional formats. Above average values are in light red. Below average values are in light green.
See ConditionalFormatAverage for more details.
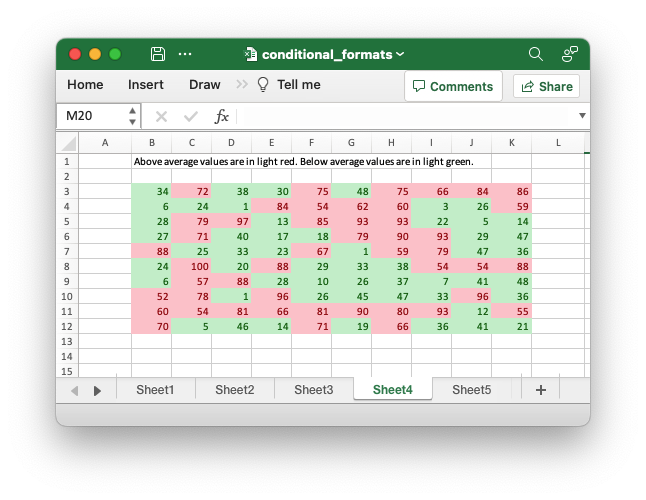
Code to generate the above example:
// SPDX-License-Identifier: MIT OR Apache-2.0
//
// Copyright 2022-2026, John McNamara, jmcnamara@cpan.org

//! Example of how to add conditional formatting to a worksheet using the
//! `rust_xlsxwriter` library.
//!
//! Conditional formatting allows you to apply a format to a cell or a range of
//! cells based on user defined rule.

use rust_xlsxwriter::{
    ConditionalFormat2ColorScale, ConditionalFormat3ColorScale, ConditionalFormatAverage,
    ConditionalFormatAverageRule, ConditionalFormatCell, ConditionalFormatCellRule,
    ConditionalFormatDataBar, ConditionalFormatDataBarDirection, ConditionalFormatDuplicate,
    ConditionalFormatFormula, ConditionalFormatIconSet, ConditionalFormatIconType,
    ConditionalFormatText, ConditionalFormatTextRule, ConditionalFormatTop, Format, Workbook,
    XlsxError,
};

fn main() -> Result<(), XlsxError> {
    // Create a new Excel file object.
    let mut workbook = Workbook::new();

    // Add a format. Light red fill with dark red text.
    let format1 = Format::new()
        .set_font_color("9C0006")
        .set_background_color("FFC7CE");

    // Add a format. Green fill with dark green text.
    let format2 = Format::new()
        .set_font_color("006100")
        .set_background_color("C6EFCE");

    // Add a format for headers.
    let bold = Format::new().set_bold();

    // Add a format for descriptions.
    let indent = Format::new().set_indent(2);

    // some sample data to run the conditional formatting against.
    let data = [
        [34, 72, 38, 30, 75, 48, 75, 66, 84, 86],
        [6, 24, 1, 84, 54, 62, 60, 3, 26, 59],
        [28, 79, 97, 13, 85, 93, 93, 22, 5, 14],
        [27, 71, 40, 17, 18, 79, 90, 93, 29, 47],
        [88, 25, 33, 23, 67, 1, 59, 79, 47, 36],
        [24, 100, 20, 88, 29, 33, 38, 54, 54, 88],
        [6, 57, 88, 28, 10, 26, 37, 7, 41, 48],
        [52, 78, 1, 96, 26, 45, 47, 33, 96, 36],
        [60, 54, 81, 66, 81, 90, 80, 93, 12, 55],
        [70, 5, 46, 14, 71, 19, 66, 36, 41, 21],
    ];

    // -----------------------------------------------------------------------
    // Worksheet 1. Cell conditional formatting.
    // -----------------------------------------------------------------------
    let caption = "Cells with values >= 50 are in light red. Values < 50 are in light green.";

    // Add a worksheet to the workbook.
    let worksheet = workbook.add_worksheet();

    // Write the caption.
    worksheet.write(0, 1, caption)?;

    // Write the worksheet data.
    worksheet.write_row_matrix(2, 1, data)?;

    // Set the column widths for clarity.
    worksheet.set_column_range_width(1, 10, 6)?;

    // Write a conditional format over a range.
    let conditional_format = ConditionalFormatCell::new()
        .set_rule(ConditionalFormatCellRule::GreaterThanOrEqualTo(50))
        .set_format(&format1);

    worksheet.add_conditional_format(2, 1, 11, 10, &conditional_format)?;

    // Write another conditional format over the same range.
    let conditional_format = ConditionalFormatCell::new()
        .set_rule(ConditionalFormatCellRule::LessThan(50))
        .set_format(&format2);

    worksheet.add_conditional_format(2, 1, 11, 10, &conditional_format)?;

    // -----------------------------------------------------------------------
    // Worksheet 2. Cell conditional formatting with between ranges.
    // -----------------------------------------------------------------------
    let caption =
        "Values between 30 and 70 are in light red. Values outside that range are in light green.";

    // Add a worksheet to the workbook.
    let worksheet = workbook.add_worksheet();

    // Write the caption.
    worksheet.write(0, 1, caption)?;

    // Write the worksheet data.
    worksheet.write_row_matrix(2, 1, data)?;

    // Set the column widths for clarity.
    worksheet.set_column_range_width(1, 10, 6)?;

    // Write a conditional format over a range.
    let conditional_format = ConditionalFormatCell::new()
        .set_rule(ConditionalFormatCellRule::Between(30, 70))
        .set_format(&format1);

    worksheet.add_conditional_format(2, 1, 11, 10, &conditional_format)?;

    // Write another conditional format over the same range.
    let conditional_format = ConditionalFormatCell::new()
        .set_rule(ConditionalFormatCellRule::NotBetween(30, 70))
        .set_format(&format2);

    worksheet.add_conditional_format(2, 1, 11, 10, &conditional_format)?;

    // -----------------------------------------------------------------------
    // Worksheet 3. Duplicate and Unique conditional formats.
    // -----------------------------------------------------------------------
    let caption = "Duplicate values are in light red. Unique values are in light green.";

    // Add a worksheet to the workbook.
    let worksheet = workbook.add_worksheet();

    // Write the caption.
    worksheet.write(0, 1, caption)?;

    // Write the worksheet data.
    worksheet.write_row_matrix(2, 1, data)?;

    // Set the column widths for clarity.
    worksheet.set_column_range_width(1, 10, 6)?;

    // Write a conditional format over a range.
    let conditional_format = ConditionalFormatDuplicate::new().set_format(&format1);

    worksheet.add_conditional_format(2, 1, 11, 10, &conditional_format)?;

    // Invert the duplicate conditional format to show unique values in the
    // same range.
    let conditional_format = ConditionalFormatDuplicate::new()
        .invert()
        .set_format(&format2);

    worksheet.add_conditional_format(2, 1, 11, 10, &conditional_format)?;

    // -----------------------------------------------------------------------
    // Worksheet 4. Above and Below Average conditional formats.
    // -----------------------------------------------------------------------
    let caption = "Above average values are in light red. Below average values are in light green.";

    // Add a worksheet to the workbook.
    let worksheet = workbook.add_worksheet();

    // Write the caption.
    worksheet.write(0, 1, caption)?;

    // Write the worksheet data.
    worksheet.write_row_matrix(2, 1, data)?;

    // Set the column widths for clarity.
    worksheet.set_column_range_width(1, 10, 6)?;

    // Write a conditional format over a range. The default criteria is Above Average.
    let conditional_format = ConditionalFormatAverage::new().set_format(&format1);

    worksheet.add_conditional_format(2, 1, 11, 10, &conditional_format)?;

    // Write another conditional format over the same range.
    let conditional_format = ConditionalFormatAverage::new()
        .set_rule(ConditionalFormatAverageRule::BelowAverage)
        .set_format(&format2);

    worksheet.add_conditional_format(2, 1, 11, 10, &conditional_format)?;

    // -----------------------------------------------------------------------
    // Worksheet 5. Top and Bottom range conditional formats.
    // -----------------------------------------------------------------------
    let caption = "Top 10 values are in light red. Bottom 10 values are in light green.";

    // Add a worksheet to the workbook.
    let worksheet = workbook.add_worksheet();

    // Write the caption.
    worksheet.write(0, 1, caption)?;

    // Write the worksheet data.
    worksheet.write_row_matrix(2, 1, data)?;

    // Set the column widths for clarity.
    worksheet.set_column_range_width(1, 10, 6)?;

    // Write a conditional format over a range.
    let conditional_format = ConditionalFormatTop::new()
        .set_rule(rust_xlsxwriter::ConditionalFormatTopRule::Top(10))
        .set_format(&format1);

    worksheet.add_conditional_format(2, 1, 11, 10, &conditional_format)?;

    // Also show the bottom values in the same range.
    let conditional_format = ConditionalFormatTop::new()
        .set_rule(rust_xlsxwriter::ConditionalFormatTopRule::Bottom(10))
        .set_format(&format2);

    worksheet.add_conditional_format(2, 1, 11, 10, &conditional_format)?;

    // -----------------------------------------------------------------------
    // Worksheet 6. Cell conditional formatting in non-contiguous range.
    // -----------------------------------------------------------------------
    let caption = "Cells with values >= 50 are in light red. Values < 50 are in light green. Non-contiguous ranges.";

    // Add a worksheet to the workbook.
    let worksheet = workbook.add_worksheet();

    // Write the caption.
    worksheet.write(0, 1, caption)?;

    // Write the worksheet data.
    worksheet.write_row_matrix(2, 1, data)?;

    // Set the column widths for clarity.
    worksheet.set_column_range_width(1, 10, 6)?;

    // Write a conditional format over a non-contiguous range.
    let conditional_format = ConditionalFormatCell::new()
        .set_rule(ConditionalFormatCellRule::GreaterThanOrEqualTo(50))
        .set_multi_range("B3:D6 I3:K6 B9:D12 I9:K12")
        .set_format(&format1);

    worksheet.add_conditional_format(2, 1, 11, 10, &conditional_format)?;

    // Write another conditional format over the same range.
    let conditional_format = ConditionalFormatCell::new()
        .set_rule(ConditionalFormatCellRule::LessThan(50))
        .set_multi_range("B3:D6 I3:K6 B9:D12 I9:K12")
        .set_format(&format2);

    worksheet.add_conditional_format(2, 1, 11, 10, &conditional_format)?;

    // -----------------------------------------------------------------------
    // Worksheet 7. Formula conditional formatting.
    // -----------------------------------------------------------------------
    let caption = "Even numbered cells are in light green. Odd numbered cells are in light red.";

    // Add a worksheet to the workbook.
    let worksheet = workbook.add_worksheet();

    // Write the caption.
    worksheet.write(0, 1, caption)?;

    // Write the worksheet data.
    worksheet.write_row_matrix(2, 1, data)?;

    // Set the column widths for clarity.
    worksheet.set_column_range_width(1, 10, 6)?;

    // Write a conditional format over a range.
    let conditional_format = ConditionalFormatFormula::new()
        .set_rule("=ISODD(B3)")
        .set_format(&format1);

    worksheet.add_conditional_format(2, 1, 11, 10, &conditional_format)?;

    // Write another conditional format over the same range.
    let conditional_format = ConditionalFormatFormula::new()
        .set_rule("=ISEVEN(B3)")
        .set_format(&format2);

    worksheet.add_conditional_format(2, 1, 11, 10, &conditional_format)?;

    // -----------------------------------------------------------------------
    // Worksheet 8. Text style conditional formats.
    // -----------------------------------------------------------------------
    let caption =
        "Column A shows words that contain the sub-word 'rust'. Column C shows words that start/end with 't'";

    // Add a worksheet to the workbook.
    let worksheet = workbook.add_worksheet();

    // Write the caption.
    worksheet.write(0, 0, caption)?;

    // Add some sample data.
    let word_list = [
        "apocrustic",
        "burstwort",
        "cloudburst",
        "crustification",
        "distrustfulness",
        "laurustine",
        "outburst",
        "rusticism",
        "thunderburst",
        "trustee",
        "trustworthiness",
        "unburstableness",
        "unfrustratable",
    ];
    worksheet.write_column(1, 0, word_list)?;
    worksheet.write_column(1, 2, word_list)?;

    // Set the column widths for clarity.
    worksheet.set_column_width(0, 20)?;
    worksheet.set_column_width(2, 20)?;

    // Write a text "containing" conditional format over a range.
    let conditional_format = ConditionalFormatText::new()
        .set_rule(ConditionalFormatTextRule::Contains("rust".to_string()))
        .set_format(&format2);

    worksheet.add_conditional_format(1, 0, 13, 0, &conditional_format)?;

    // Write a text "not containing" conditional format over the same range.
    let conditional_format = ConditionalFormatText::new()
        .set_rule(ConditionalFormatTextRule::DoesNotContain(
            "rust".to_string(),
        ))
        .set_format(&format1);

    worksheet.add_conditional_format(1, 0, 13, 0, &conditional_format)?;

    // Write a text "begins with" conditional format over a range.
    let conditional_format = ConditionalFormatText::new()
        .set_rule(ConditionalFormatTextRule::BeginsWith("t".to_string()))
        .set_format(&format2);

    worksheet.add_conditional_format(1, 2, 13, 2, &conditional_format)?;

    // Write a text "ends with" conditional format over the same range.
    let conditional_format = ConditionalFormatText::new()
        .set_rule(ConditionalFormatTextRule::EndsWith("t".to_string()))
        .set_format(&format1);

    worksheet.add_conditional_format(1, 2, 13, 2, &conditional_format)?;

    // -----------------------------------------------------------------------
    // Worksheet 9. Examples of 2 color scale conditional formats.
    // -----------------------------------------------------------------------
    let caption = "Examples of 2 color scale conditional formats";

    // Add a worksheet to the workbook.
    let worksheet = workbook.add_worksheet();

    // Write the caption.
    worksheet.write(0, 1, caption)?;

    // Write the worksheet data.
    let data = [1, 2, 3, 4, 5, 6, 7, 8, 9, 10];
    worksheet.write_column(2, 1, data)?;
    worksheet.write_column(2, 3, data)?;
    worksheet.write_column(2, 5, data)?;
    worksheet.write_column(2, 7, data)?;
    worksheet.write_column(2, 9, data)?;
    worksheet.write_column(2, 11, data)?;

    // Set the column widths for clarity.
    worksheet.set_column_range_width(0, 12, 6)?;

    // Write 2 color scale formats with standard Excel colors.
    let conditional_format = ConditionalFormat2ColorScale::new()
        .set_minimum_color("F8696B")
        .set_maximum_color("FCFCFF");

    worksheet.add_conditional_format(2, 1, 11, 1, &conditional_format)?;

    let conditional_format = ConditionalFormat2ColorScale::new()
        .set_minimum_color("FCFCFF")
        .set_maximum_color("F8696B");

    worksheet.add_conditional_format(2, 3, 11, 3, &conditional_format)?;

    let conditional_format = ConditionalFormat2ColorScale::new()
        .set_minimum_color("FCFCFF")
        .set_maximum_color("63BE7B");

    worksheet.add_conditional_format(2, 5, 11, 5, &conditional_format)?;

    let conditional_format = ConditionalFormat2ColorScale::new()
        .set_minimum_color("63BE7B")
        .set_maximum_color("FCFCFF");

    worksheet.add_conditional_format(2, 7, 11, 7, &conditional_format)?;

    let conditional_format = ConditionalFormat2ColorScale::new()
        .set_minimum_color("FFEF9C")
        .set_maximum_color("63BE7B");

    worksheet.add_conditional_format(2, 9, 11, 9, &conditional_format)?;

    let conditional_format = ConditionalFormat2ColorScale::new()
        .set_minimum_color("63BE7B")
        .set_maximum_color("FFEF9C");

    worksheet.add_conditional_format(2, 11, 11, 11, &conditional_format)?;

    // -----------------------------------------------------------------------
    // Worksheet 10. Examples of 3 color scale conditional formats.
    // -----------------------------------------------------------------------
    let caption = "Examples of 3 color scale conditional formats";

    // Add a worksheet to the workbook.
    let worksheet = workbook.add_worksheet();

    // Write the caption.
    worksheet.write(0, 1, caption)?;

    // Write the worksheet data.
    let data = [1, 2, 3, 4, 5, 6, 7, 8, 9, 10];
    worksheet.write_column(2, 1, data)?;
    worksheet.write_column(2, 3, data)?;
    worksheet.write_column(2, 5, data)?;
    worksheet.write_column(2, 7, data)?;
    worksheet.write_column(2, 9, data)?;
    worksheet.write_column(2, 11, data)?;

    // Set the column widths for clarity.
    worksheet.set_column_range_width(0, 12, 6)?;

    // Write 3 color scale formats with standard Excel colors.
    let conditional_format = ConditionalFormat3ColorScale::new()
        .set_minimum_color("F8696B")
        .set_midpoint_color("FFEB84")
        .set_maximum_color("63BE7B");

    worksheet.add_conditional_format(2, 1, 11, 1, &conditional_format)?;

    let conditional_format = ConditionalFormat3ColorScale::new()
        .set_minimum_color("63BE7B")
        .set_midpoint_color("FFEB84")
        .set_maximum_color("F8696B");

    worksheet.add_conditional_format(2, 3, 11, 3, &conditional_format)?;

    let conditional_format = ConditionalFormat3ColorScale::new()
        .set_minimum_color("F8696B")
        .set_midpoint_color("FCFCFF")
        .set_maximum_color("63BE7B");

    worksheet.add_conditional_format(2, 5, 11, 5, &conditional_format)?;

    let conditional_format = ConditionalFormat3ColorScale::new()
        .set_minimum_color("63BE7B")
        .set_midpoint_color("FCFCFF")
        .set_maximum_color("F8696B");

    worksheet.add_conditional_format(2, 7, 11, 7, &conditional_format)?;

    let conditional_format = ConditionalFormat3ColorScale::new()
        .set_minimum_color("F8696B")
        .set_midpoint_color("FCFCFF")
        .set_maximum_color("5A8AC6");

    worksheet.add_conditional_format(2, 9, 11, 9, &conditional_format)?;

    let conditional_format = ConditionalFormat3ColorScale::new()
        .set_minimum_color("5A8AC6")
        .set_midpoint_color("FCFCFF")
        .set_maximum_color("F8696B");

    worksheet.add_conditional_format(2, 11, 11, 11, &conditional_format)?;

    // -----------------------------------------------------------------------
    // Worksheet 11. Examples of data bars.
    // -----------------------------------------------------------------------
    let caption = "Examples of data bars";

    // Add a worksheet to the workbook.
    let worksheet = workbook.add_worksheet();

    // Write the caption.
    worksheet.write_with_format(0, 1, caption, &bold)?;
    worksheet.write(1, 1, "Default")?;
    worksheet.write(1, 3, "Default negative")?;
    worksheet.write(1, 5, "User color")?;
    worksheet.write(1, 7, "Changed direction")?;

    // Write the worksheet data.
    let data1 = [1, 2, 3, 4, 5, 6, 7, 8, 9, 10];
    let data2 = [6, 4, 2, -2, -4, -6, -4, -2, 2, 4];
    worksheet.write_column(2, 1, data1)?;
    worksheet.write_column(2, 3, data2)?;
    worksheet.write_column(2, 5, data1)?;
    worksheet.write_column(2, 7, data1)?;

    // Write a standard Excel data bar.
    let conditional_format = ConditionalFormatDataBar::new();

    worksheet.add_conditional_format(2, 1, 11, 1, &conditional_format)?;

    // Write a standard Excel data bar with negative data
    let conditional_format = ConditionalFormatDataBar::new();

    worksheet.add_conditional_format(2, 3, 11, 3, &conditional_format)?;

    // Write a data bar with a user defined fill color.
    let conditional_format = ConditionalFormatDataBar::new().set_fill_color("009933");

    worksheet.add_conditional_format(2, 5, 11, 5, &conditional_format)?;

    // Write a data bar with the direction changed.
    let conditional_format = ConditionalFormatDataBar::new()
        .set_direction(ConditionalFormatDataBarDirection::RightToLeft);

    worksheet.add_conditional_format(2, 7, 11, 7, &conditional_format)?;

    // -----------------------------------------------------------------------
    // Worksheet 12. Examples of icon style conditional formats.
    // -----------------------------------------------------------------------
    let caption = "Examples of icon style conditional formats.";

    // Add a worksheet to the workbook.
    let worksheet = workbook.add_worksheet();

    // Write the caption.
    worksheet.write_with_format(0, 0, caption, &bold)?;
    worksheet.write_with_format(1, 0, "Three Traffic lights - Green is highest", &indent)?;
    worksheet.write_with_format(2, 0, "Reversed - Red is highest", &indent)?;
    worksheet.write_with_format(3, 0, "Icons only - The number data is hidden", &indent)?;

    worksheet.write_with_format(4, 0, "Other three-five icon examples", &bold)?;
    worksheet.write_with_format(5, 0, "Three arrows", &indent)?;
    worksheet.write_with_format(6, 0, "Three symbols", &indent)?;
    worksheet.write_with_format(7, 0, "Three stars", &indent)?;

    worksheet.write_with_format(8, 0, "Four arrows", &indent)?;
    worksheet.write_with_format(9, 0, "Four circles - Red (highest) to Black", &indent)?;
    worksheet.write_with_format(10, 0, "Four rating histograms", &indent)?;

    worksheet.write_with_format(11, 0, "Five arrows", &indent)?;
    worksheet.write_with_format(12, 0, "Five rating histograms", &indent)?;
    worksheet.write_with_format(13, 0, "Five rating quadrants", &indent)?;

    // Set the column width for clarity.
    worksheet.set_column_width(0, 35)?;

    // Write the worksheet data.
    worksheet.write_row(1, 1, [1, 2, 3])?;
    worksheet.write_row(2, 1, [1, 2, 3])?;
    worksheet.write_row(3, 1, [1, 2, 3])?;

    worksheet.write_row(5, 1, [1, 2, 3])?;
    worksheet.write_row(6, 1, [1, 2, 3])?;
    worksheet.write_row(7, 1, [1, 2, 3])?;

    worksheet.write_row(8, 1, [1, 2, 3, 4])?;
    worksheet.write_row(9, 1, [1, 2, 3, 4])?;
    worksheet.write_row(10, 1, [1, 2, 3, 4])?;

    worksheet.write_row(11, 1, [1, 2, 3, 4, 5])?;
    worksheet.write_row(12, 1, [1, 2, 3, 4, 5])?;
    worksheet.write_row(13, 1, [1, 2, 3, 4, 5])?;

    // Three Traffic lights - Green is highest.
    let conditional_format = ConditionalFormatIconSet::new()
        .set_icon_type(ConditionalFormatIconType::ThreeTrafficLights);

    worksheet.add_conditional_format(1, 1, 1, 3, &conditional_format)?;

    // Reversed - Red is highest.
    let conditional_format = ConditionalFormatIconSet::new()
        .set_icon_type(ConditionalFormatIconType::ThreeTrafficLights)
        .reverse_icons(true);

    worksheet.add_conditional_format(2, 1, 2, 3, &conditional_format)?;

    // Icons only - The number data is hidden.
    let conditional_format = ConditionalFormatIconSet::new()
        .set_icon_type(ConditionalFormatIconType::ThreeTrafficLights)
        .show_icons_only(true);

    worksheet.add_conditional_format(3, 1, 3, 3, &conditional_format)?;

    // Three arrows.
    let conditional_format =
        ConditionalFormatIconSet::new().set_icon_type(ConditionalFormatIconType::ThreeArrows);

    worksheet.add_conditional_format(5, 1, 5, 3, &conditional_format)?;

    // Three symbols.
    let conditional_format = ConditionalFormatIconSet::new()
        .set_icon_type(ConditionalFormatIconType::ThreeSymbolsCircled);

    worksheet.add_conditional_format(6, 1, 6, 3, &conditional_format)?;

    // Three stars.
    let conditional_format =
        ConditionalFormatIconSet::new().set_icon_type(ConditionalFormatIconType::ThreeStars);

    worksheet.add_conditional_format(7, 1, 7, 3, &conditional_format)?;

    // Four Arrows.
    let conditional_format =
        ConditionalFormatIconSet::new().set_icon_type(ConditionalFormatIconType::FourArrows);

    worksheet.add_conditional_format(8, 1, 8, 4, &conditional_format)?;

    // Four circles - Red (highest) to Black (lowest).
    let conditional_format =
        ConditionalFormatIconSet::new().set_icon_type(ConditionalFormatIconType::FourRedToBlack);

    worksheet.add_conditional_format(9, 1, 9, 4, &conditional_format)?;

    // Four rating histograms.
    let conditional_format =
        ConditionalFormatIconSet::new().set_icon_type(ConditionalFormatIconType::FourHistograms);

    worksheet.add_conditional_format(10, 1, 10, 4, &conditional_format)?;

    // Four Arrows.
    let conditional_format =
        ConditionalFormatIconSet::new().set_icon_type(ConditionalFormatIconType::FiveArrows);

    worksheet.add_conditional_format(11, 1, 11, 5, &conditional_format)?;

    // Four rating histograms.
    let conditional_format =
        ConditionalFormatIconSet::new().set_icon_type(ConditionalFormatIconType::FiveHistograms);

    worksheet.add_conditional_format(12, 1, 12, 5, &conditional_format)?;

    // Four rating quadrants.
    let conditional_format =
        ConditionalFormatIconSet::new().set_icon_type(ConditionalFormatIconType::FiveQuadrants);

    worksheet.add_conditional_format(13, 1, 13, 5, &conditional_format)?;

    // -----------------------------------------------------------------------
    // Save and close the file.
    // -----------------------------------------------------------------------
    workbook.save("conditional_formats.xlsx")?;

    Ok(())
}
Example 5. Top and Bottom range conditional formats. Top 10 values are in light red. Bottom 10 values are in light green.
See ConditionalFormatTop for more details.
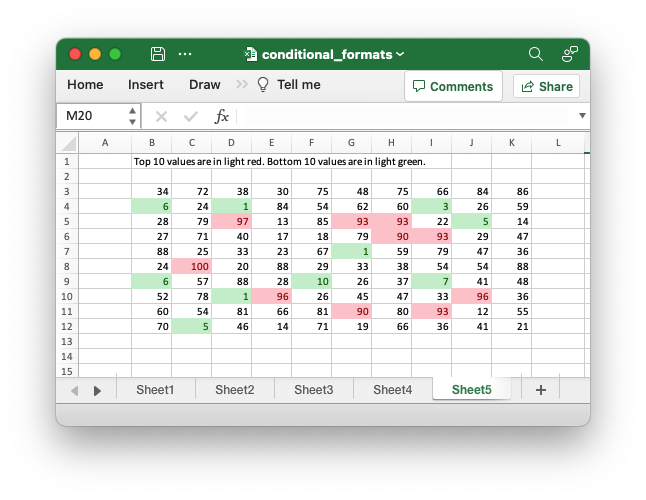
Code to generate the above example:
// SPDX-License-Identifier: MIT OR Apache-2.0
//
// Copyright 2022-2026, John McNamara, jmcnamara@cpan.org

//! Example of how to add conditional formatting to a worksheet using the
//! `rust_xlsxwriter` library.
//!
//! Conditional formatting allows you to apply a format to a cell or a range of
//! cells based on user defined rule.

use rust_xlsxwriter::{
    ConditionalFormat2ColorScale, ConditionalFormat3ColorScale, ConditionalFormatAverage,
    ConditionalFormatAverageRule, ConditionalFormatCell, ConditionalFormatCellRule,
    ConditionalFormatDataBar, ConditionalFormatDataBarDirection, ConditionalFormatDuplicate,
    ConditionalFormatFormula, ConditionalFormatIconSet, ConditionalFormatIconType,
    ConditionalFormatText, ConditionalFormatTextRule, ConditionalFormatTop, Format, Workbook,
    XlsxError,
};

fn main() -> Result<(), XlsxError> {
    // Create a new Excel file object.
    let mut workbook = Workbook::new();

    // Add a format. Light red fill with dark red text.
    let format1 = Format::new()
        .set_font_color("9C0006")
        .set_background_color("FFC7CE");

    // Add a format. Green fill with dark green text.
    let format2 = Format::new()
        .set_font_color("006100")
        .set_background_color("C6EFCE");

    // Add a format for headers.
    let bold = Format::new().set_bold();

    // Add a format for descriptions.
    let indent = Format::new().set_indent(2);

    // some sample data to run the conditional formatting against.
    let data = [
        [34, 72, 38, 30, 75, 48, 75, 66, 84, 86],
        [6, 24, 1, 84, 54, 62, 60, 3, 26, 59],
        [28, 79, 97, 13, 85, 93, 93, 22, 5, 14],
        [27, 71, 40, 17, 18, 79, 90, 93, 29, 47],
        [88, 25, 33, 23, 67, 1, 59, 79, 47, 36],
        [24, 100, 20, 88, 29, 33, 38, 54, 54, 88],
        [6, 57, 88, 28, 10, 26, 37, 7, 41, 48],
        [52, 78, 1, 96, 26, 45, 47, 33, 96, 36],
        [60, 54, 81, 66, 81, 90, 80, 93, 12, 55],
        [70, 5, 46, 14, 71, 19, 66, 36, 41, 21],
    ];

    // -----------------------------------------------------------------------
    // Worksheet 1. Cell conditional formatting.
    // -----------------------------------------------------------------------
    let caption = "Cells with values >= 50 are in light red. Values < 50 are in light green.";

    // Add a worksheet to the workbook.
    let worksheet = workbook.add_worksheet();

    // Write the caption.
    worksheet.write(0, 1, caption)?;

    // Write the worksheet data.
    worksheet.write_row_matrix(2, 1, data)?;

    // Set the column widths for clarity.
    worksheet.set_column_range_width(1, 10, 6)?;

    // Write a conditional format over a range.
    let conditional_format = ConditionalFormatCell::new()
        .set_rule(ConditionalFormatCellRule::GreaterThanOrEqualTo(50))
        .set_format(&format1);

    worksheet.add_conditional_format(2, 1, 11, 10, &conditional_format)?;

    // Write another conditional format over the same range.
    let conditional_format = ConditionalFormatCell::new()
        .set_rule(ConditionalFormatCellRule::LessThan(50))
        .set_format(&format2);

    worksheet.add_conditional_format(2, 1, 11, 10, &conditional_format)?;

    // -----------------------------------------------------------------------
    // Worksheet 2. Cell conditional formatting with between ranges.
    // -----------------------------------------------------------------------
    let caption =
        "Values between 30 and 70 are in light red. Values outside that range are in light green.";

    // Add a worksheet to the workbook.
    let worksheet = workbook.add_worksheet();

    // Write the caption.
    worksheet.write(0, 1, caption)?;

    // Write the worksheet data.
    worksheet.write_row_matrix(2, 1, data)?;

    // Set the column widths for clarity.
    worksheet.set_column_range_width(1, 10, 6)?;

    // Write a conditional format over a range.
    let conditional_format = ConditionalFormatCell::new()
        .set_rule(ConditionalFormatCellRule::Between(30, 70))
        .set_format(&format1);

    worksheet.add_conditional_format(2, 1, 11, 10, &conditional_format)?;

    // Write another conditional format over the same range.
    let conditional_format = ConditionalFormatCell::new()
        .set_rule(ConditionalFormatCellRule::NotBetween(30, 70))
        .set_format(&format2);

    worksheet.add_conditional_format(2, 1, 11, 10, &conditional_format)?;

    // -----------------------------------------------------------------------
    // Worksheet 3. Duplicate and Unique conditional formats.
    // -----------------------------------------------------------------------
    let caption = "Duplicate values are in light red. Unique values are in light green.";

    // Add a worksheet to the workbook.
    let worksheet = workbook.add_worksheet();

    // Write the caption.
    worksheet.write(0, 1, caption)?;

    // Write the worksheet data.
    worksheet.write_row_matrix(2, 1, data)?;

    // Set the column widths for clarity.
    worksheet.set_column_range_width(1, 10, 6)?;

    // Write a conditional format over a range.
    let conditional_format = ConditionalFormatDuplicate::new().set_format(&format1);

    worksheet.add_conditional_format(2, 1, 11, 10, &conditional_format)?;

    // Invert the duplicate conditional format to show unique values in the
    // same range.
    let conditional_format = ConditionalFormatDuplicate::new()
        .invert()
        .set_format(&format2);

    worksheet.add_conditional_format(2, 1, 11, 10, &conditional_format)?;

    // -----------------------------------------------------------------------
    // Worksheet 4. Above and Below Average conditional formats.
    // -----------------------------------------------------------------------
    let caption = "Above average values are in light red. Below average values are in light green.";

    // Add a worksheet to the workbook.
    let worksheet = workbook.add_worksheet();

    // Write the caption.
    worksheet.write(0, 1, caption)?;

    // Write the worksheet data.
    worksheet.write_row_matrix(2, 1, data)?;

    // Set the column widths for clarity.
    worksheet.set_column_range_width(1, 10, 6)?;

    // Write a conditional format over a range. The default criteria is Above Average.
    let conditional_format = ConditionalFormatAverage::new().set_format(&format1);

    worksheet.add_conditional_format(2, 1, 11, 10, &conditional_format)?;

    // Write another conditional format over the same range.
    let conditional_format = ConditionalFormatAverage::new()
        .set_rule(ConditionalFormatAverageRule::BelowAverage)
        .set_format(&format2);

    worksheet.add_conditional_format(2, 1, 11, 10, &conditional_format)?;

    // -----------------------------------------------------------------------
    // Worksheet 5. Top and Bottom range conditional formats.
    // -----------------------------------------------------------------------
    let caption = "Top 10 values are in light red. Bottom 10 values are in light green.";

    // Add a worksheet to the workbook.
    let worksheet = workbook.add_worksheet();

    // Write the caption.
    worksheet.write(0, 1, caption)?;

    // Write the worksheet data.
    worksheet.write_row_matrix(2, 1, data)?;

    // Set the column widths for clarity.
    worksheet.set_column_range_width(1, 10, 6)?;

    // Write a conditional format over a range.
    let conditional_format = ConditionalFormatTop::new()
        .set_rule(rust_xlsxwriter::ConditionalFormatTopRule::Top(10))
        .set_format(&format1);

    worksheet.add_conditional_format(2, 1, 11, 10, &conditional_format)?;

    // Also show the bottom values in the same range.
    let conditional_format = ConditionalFormatTop::new()
        .set_rule(rust_xlsxwriter::ConditionalFormatTopRule::Bottom(10))
        .set_format(&format2);

    worksheet.add_conditional_format(2, 1, 11, 10, &conditional_format)?;

    // -----------------------------------------------------------------------
    // Worksheet 6. Cell conditional formatting in non-contiguous range.
    // -----------------------------------------------------------------------
    let caption = "Cells with values >= 50 are in light red. Values < 50 are in light green. Non-contiguous ranges.";

    // Add a worksheet to the workbook.
    let worksheet = workbook.add_worksheet();

    // Write the caption.
    worksheet.write(0, 1, caption)?;

    // Write the worksheet data.
    worksheet.write_row_matrix(2, 1, data)?;

    // Set the column widths for clarity.
    worksheet.set_column_range_width(1, 10, 6)?;

    // Write a conditional format over a non-contiguous range.
    let conditional_format = ConditionalFormatCell::new()
        .set_rule(ConditionalFormatCellRule::GreaterThanOrEqualTo(50))
        .set_multi_range("B3:D6 I3:K6 B9:D12 I9:K12")
        .set_format(&format1);

    worksheet.add_conditional_format(2, 1, 11, 10, &conditional_format)?;

    // Write another conditional format over the same range.
    let conditional_format = ConditionalFormatCell::new()
        .set_rule(ConditionalFormatCellRule::LessThan(50))
        .set_multi_range("B3:D6 I3:K6 B9:D12 I9:K12")
        .set_format(&format2);

    worksheet.add_conditional_format(2, 1, 11, 10, &conditional_format)?;

    // -----------------------------------------------------------------------
    // Worksheet 7. Formula conditional formatting.
    // -----------------------------------------------------------------------
    let caption = "Even numbered cells are in light green. Odd numbered cells are in light red.";

    // Add a worksheet to the workbook.
    let worksheet = workbook.add_worksheet();

    // Write the caption.
    worksheet.write(0, 1, caption)?;

    // Write the worksheet data.
    worksheet.write_row_matrix(2, 1, data)?;

    // Set the column widths for clarity.
    worksheet.set_column_range_width(1, 10, 6)?;

    // Write a conditional format over a range.
    let conditional_format = ConditionalFormatFormula::new()
        .set_rule("=ISODD(B3)")
        .set_format(&format1);

    worksheet.add_conditional_format(2, 1, 11, 10, &conditional_format)?;

    // Write another conditional format over the same range.
    let conditional_format = ConditionalFormatFormula::new()
        .set_rule("=ISEVEN(B3)")
        .set_format(&format2);

    worksheet.add_conditional_format(2, 1, 11, 10, &conditional_format)?;

    // -----------------------------------------------------------------------
    // Worksheet 8. Text style conditional formats.
    // -----------------------------------------------------------------------
    let caption =
        "Column A shows words that contain the sub-word 'rust'. Column C shows words that start/end with 't'";

    // Add a worksheet to the workbook.
    let worksheet = workbook.add_worksheet();

    // Write the caption.
    worksheet.write(0, 0, caption)?;

    // Add some sample data.
    let word_list = [
        "apocrustic",
        "burstwort",
        "cloudburst",
        "crustification",
        "distrustfulness",
        "laurustine",
        "outburst",
        "rusticism",
        "thunderburst",
        "trustee",
        "trustworthiness",
        "unburstableness",
        "unfrustratable",
    ];
    worksheet.write_column(1, 0, word_list)?;
    worksheet.write_column(1, 2, word_list)?;

    // Set the column widths for clarity.
    worksheet.set_column_width(0, 20)?;
    worksheet.set_column_width(2, 20)?;

    // Write a text "containing" conditional format over a range.
    let conditional_format = ConditionalFormatText::new()
        .set_rule(ConditionalFormatTextRule::Contains("rust".to_string()))
        .set_format(&format2);

    worksheet.add_conditional_format(1, 0, 13, 0, &conditional_format)?;

    // Write a text "not containing" conditional format over the same range.
    let conditional_format = ConditionalFormatText::new()
        .set_rule(ConditionalFormatTextRule::DoesNotContain(
            "rust".to_string(),
        ))
        .set_format(&format1);

    worksheet.add_conditional_format(1, 0, 13, 0, &conditional_format)?;

    // Write a text "begins with" conditional format over a range.
    let conditional_format = ConditionalFormatText::new()
        .set_rule(ConditionalFormatTextRule::BeginsWith("t".to_string()))
        .set_format(&format2);

    worksheet.add_conditional_format(1, 2, 13, 2, &conditional_format)?;

    // Write a text "ends with" conditional format over the same range.
    let conditional_format = ConditionalFormatText::new()
        .set_rule(ConditionalFormatTextRule::EndsWith("t".to_string()))
        .set_format(&format1);

    worksheet.add_conditional_format(1, 2, 13, 2, &conditional_format)?;

    // -----------------------------------------------------------------------
    // Worksheet 9. Examples of 2 color scale conditional formats.
    // -----------------------------------------------------------------------
    let caption = "Examples of 2 color scale conditional formats";

    // Add a worksheet to the workbook.
    let worksheet = workbook.add_worksheet();

    // Write the caption.
    worksheet.write(0, 1, caption)?;

    // Write the worksheet data.
    let data = [1, 2, 3, 4, 5, 6, 7, 8, 9, 10];
    worksheet.write_column(2, 1, data)?;
    worksheet.write_column(2, 3, data)?;
    worksheet.write_column(2, 5, data)?;
    worksheet.write_column(2, 7, data)?;
    worksheet.write_column(2, 9, data)?;
    worksheet.write_column(2, 11, data)?;

    // Set the column widths for clarity.
    worksheet.set_column_range_width(0, 12, 6)?;

    // Write 2 color scale formats with standard Excel colors.
    let conditional_format = ConditionalFormat2ColorScale::new()
        .set_minimum_color("F8696B")
        .set_maximum_color("FCFCFF");

    worksheet.add_conditional_format(2, 1, 11, 1, &conditional_format)?;

    let conditional_format = ConditionalFormat2ColorScale::new()
        .set_minimum_color("FCFCFF")
        .set_maximum_color("F8696B");

    worksheet.add_conditional_format(2, 3, 11, 3, &conditional_format)?;

    let conditional_format = ConditionalFormat2ColorScale::new()
        .set_minimum_color("FCFCFF")
        .set_maximum_color("63BE7B");

    worksheet.add_conditional_format(2, 5, 11, 5, &conditional_format)?;

    let conditional_format = ConditionalFormat2ColorScale::new()
        .set_minimum_color("63BE7B")
        .set_maximum_color("FCFCFF");

    worksheet.add_conditional_format(2, 7, 11, 7, &conditional_format)?;

    let conditional_format = ConditionalFormat2ColorScale::new()
        .set_minimum_color("FFEF9C")
        .set_maximum_color("63BE7B");

    worksheet.add_conditional_format(2, 9, 11, 9, &conditional_format)?;

    let conditional_format = ConditionalFormat2ColorScale::new()
        .set_minimum_color("63BE7B")
        .set_maximum_color("FFEF9C");

    worksheet.add_conditional_format(2, 11, 11, 11, &conditional_format)?;

    // -----------------------------------------------------------------------
    // Worksheet 10. Examples of 3 color scale conditional formats.
    // -----------------------------------------------------------------------
    let caption = "Examples of 3 color scale conditional formats";

    // Add a worksheet to the workbook.
    let worksheet = workbook.add_worksheet();

    // Write the caption.
    worksheet.write(0, 1, caption)?;

    // Write the worksheet data.
    let data = [1, 2, 3, 4, 5, 6, 7, 8, 9, 10];
    worksheet.write_column(2, 1, data)?;
    worksheet.write_column(2, 3, data)?;
    worksheet.write_column(2, 5, data)?;
    worksheet.write_column(2, 7, data)?;
    worksheet.write_column(2, 9, data)?;
    worksheet.write_column(2, 11, data)?;

    // Set the column widths for clarity.
    worksheet.set_column_range_width(0, 12, 6)?;

    // Write 3 color scale formats with standard Excel colors.
    let conditional_format = ConditionalFormat3ColorScale::new()
        .set_minimum_color("F8696B")
        .set_midpoint_color("FFEB84")
        .set_maximum_color("63BE7B");

    worksheet.add_conditional_format(2, 1, 11, 1, &conditional_format)?;

    let conditional_format = ConditionalFormat3ColorScale::new()
        .set_minimum_color("63BE7B")
        .set_midpoint_color("FFEB84")
        .set_maximum_color("F8696B");

    worksheet.add_conditional_format(2, 3, 11, 3, &conditional_format)?;

    let conditional_format = ConditionalFormat3ColorScale::new()
        .set_minimum_color("F8696B")
        .set_midpoint_color("FCFCFF")
        .set_maximum_color("63BE7B");

    worksheet.add_conditional_format(2, 5, 11, 5, &conditional_format)?;

    let conditional_format = ConditionalFormat3ColorScale::new()
        .set_minimum_color("63BE7B")
        .set_midpoint_color("FCFCFF")
        .set_maximum_color("F8696B");

    worksheet.add_conditional_format(2, 7, 11, 7, &conditional_format)?;

    let conditional_format = ConditionalFormat3ColorScale::new()
        .set_minimum_color("F8696B")
        .set_midpoint_color("FCFCFF")
        .set_maximum_color("5A8AC6");

    worksheet.add_conditional_format(2, 9, 11, 9, &conditional_format)?;

    let conditional_format = ConditionalFormat3ColorScale::new()
        .set_minimum_color("5A8AC6")
        .set_midpoint_color("FCFCFF")
        .set_maximum_color("F8696B");

    worksheet.add_conditional_format(2, 11, 11, 11, &conditional_format)?;

    // -----------------------------------------------------------------------
    // Worksheet 11. Examples of data bars.
    // -----------------------------------------------------------------------
    let caption = "Examples of data bars";

    // Add a worksheet to the workbook.
    let worksheet = workbook.add_worksheet();

    // Write the caption.
    worksheet.write_with_format(0, 1, caption, &bold)?;
    worksheet.write(1, 1, "Default")?;
    worksheet.write(1, 3, "Default negative")?;
    worksheet.write(1, 5, "User color")?;
    worksheet.write(1, 7, "Changed direction")?;

    // Write the worksheet data.
    let data1 = [1, 2, 3, 4, 5, 6, 7, 8, 9, 10];
    let data2 = [6, 4, 2, -2, -4, -6, -4, -2, 2, 4];
    worksheet.write_column(2, 1, data1)?;
    worksheet.write_column(2, 3, data2)?;
    worksheet.write_column(2, 5, data1)?;
    worksheet.write_column(2, 7, data1)?;

    // Write a standard Excel data bar.
    let conditional_format = ConditionalFormatDataBar::new();

    worksheet.add_conditional_format(2, 1, 11, 1, &conditional_format)?;

    // Write a standard Excel data bar with negative data
    let conditional_format = ConditionalFormatDataBar::new();

    worksheet.add_conditional_format(2, 3, 11, 3, &conditional_format)?;

    // Write a data bar with a user defined fill color.
    let conditional_format = ConditionalFormatDataBar::new().set_fill_color("009933");

    worksheet.add_conditional_format(2, 5, 11, 5, &conditional_format)?;

    // Write a data bar with the direction changed.
    let conditional_format = ConditionalFormatDataBar::new()
        .set_direction(ConditionalFormatDataBarDirection::RightToLeft);

    worksheet.add_conditional_format(2, 7, 11, 7, &conditional_format)?;

    // -----------------------------------------------------------------------
    // Worksheet 12. Examples of icon style conditional formats.
    // -----------------------------------------------------------------------
    let caption = "Examples of icon style conditional formats.";

    // Add a worksheet to the workbook.
    let worksheet = workbook.add_worksheet();

    // Write the caption.
    worksheet.write_with_format(0, 0, caption, &bold)?;
    worksheet.write_with_format(1, 0, "Three Traffic lights - Green is highest", &indent)?;
    worksheet.write_with_format(2, 0, "Reversed - Red is highest", &indent)?;
    worksheet.write_with_format(3, 0, "Icons only - The number data is hidden", &indent)?;

    worksheet.write_with_format(4, 0, "Other three-five icon examples", &bold)?;
    worksheet.write_with_format(5, 0, "Three arrows", &indent)?;
    worksheet.write_with_format(6, 0, "Three symbols", &indent)?;
    worksheet.write_with_format(7, 0, "Three stars", &indent)?;

    worksheet.write_with_format(8, 0, "Four arrows", &indent)?;
    worksheet.write_with_format(9, 0, "Four circles - Red (highest) to Black", &indent)?;
    worksheet.write_with_format(10, 0, "Four rating histograms", &indent)?;

    worksheet.write_with_format(11, 0, "Five arrows", &indent)?;
    worksheet.write_with_format(12, 0, "Five rating histograms", &indent)?;
    worksheet.write_with_format(13, 0, "Five rating quadrants", &indent)?;

    // Set the column width for clarity.
    worksheet.set_column_width(0, 35)?;

    // Write the worksheet data.
    worksheet.write_row(1, 1, [1, 2, 3])?;
    worksheet.write_row(2, 1, [1, 2, 3])?;
    worksheet.write_row(3, 1, [1, 2, 3])?;

    worksheet.write_row(5, 1, [1, 2, 3])?;
    worksheet.write_row(6, 1, [1, 2, 3])?;
    worksheet.write_row(7, 1, [1, 2, 3])?;

    worksheet.write_row(8, 1, [1, 2, 3, 4])?;
    worksheet.write_row(9, 1, [1, 2, 3, 4])?;
    worksheet.write_row(10, 1, [1, 2, 3, 4])?;

    worksheet.write_row(11, 1, [1, 2, 3, 4, 5])?;
    worksheet.write_row(12, 1, [1, 2, 3, 4, 5])?;
    worksheet.write_row(13, 1, [1, 2, 3, 4, 5])?;

    // Three Traffic lights - Green is highest.
    let conditional_format = ConditionalFormatIconSet::new()
        .set_icon_type(ConditionalFormatIconType::ThreeTrafficLights);

    worksheet.add_conditional_format(1, 1, 1, 3, &conditional_format)?;

    // Reversed - Red is highest.
    let conditional_format = ConditionalFormatIconSet::new()
        .set_icon_type(ConditionalFormatIconType::ThreeTrafficLights)
        .reverse_icons(true);

    worksheet.add_conditional_format(2, 1, 2, 3, &conditional_format)?;

    // Icons only - The number data is hidden.
    let conditional_format = ConditionalFormatIconSet::new()
        .set_icon_type(ConditionalFormatIconType::ThreeTrafficLights)
        .show_icons_only(true);

    worksheet.add_conditional_format(3, 1, 3, 3, &conditional_format)?;

    // Three arrows.
    let conditional_format =
        ConditionalFormatIconSet::new().set_icon_type(ConditionalFormatIconType::ThreeArrows);

    worksheet.add_conditional_format(5, 1, 5, 3, &conditional_format)?;

    // Three symbols.
    let conditional_format = ConditionalFormatIconSet::new()
        .set_icon_type(ConditionalFormatIconType::ThreeSymbolsCircled);

    worksheet.add_conditional_format(6, 1, 6, 3, &conditional_format)?;

    // Three stars.
    let conditional_format =
        ConditionalFormatIconSet::new().set_icon_type(ConditionalFormatIconType::ThreeStars);

    worksheet.add_conditional_format(7, 1, 7, 3, &conditional_format)?;

    // Four Arrows.
    let conditional_format =
        ConditionalFormatIconSet::new().set_icon_type(ConditionalFormatIconType::FourArrows);

    worksheet.add_conditional_format(8, 1, 8, 4, &conditional_format)?;

    // Four circles - Red (highest) to Black (lowest).
    let conditional_format =
        ConditionalFormatIconSet::new().set_icon_type(ConditionalFormatIconType::FourRedToBlack);

    worksheet.add_conditional_format(9, 1, 9, 4, &conditional_format)?;

    // Four rating histograms.
    let conditional_format =
        ConditionalFormatIconSet::new().set_icon_type(ConditionalFormatIconType::FourHistograms);

    worksheet.add_conditional_format(10, 1, 10, 4, &conditional_format)?;

    // Four Arrows.
    let conditional_format =
        ConditionalFormatIconSet::new().set_icon_type(ConditionalFormatIconType::FiveArrows);

    worksheet.add_conditional_format(11, 1, 11, 5, &conditional_format)?;

    // Four rating histograms.
    let conditional_format =
        ConditionalFormatIconSet::new().set_icon_type(ConditionalFormatIconType::FiveHistograms);

    worksheet.add_conditional_format(12, 1, 12, 5, &conditional_format)?;

    // Four rating quadrants.
    let conditional_format =
        ConditionalFormatIconSet::new().set_icon_type(ConditionalFormatIconType::FiveQuadrants);

    worksheet.add_conditional_format(13, 1, 13, 5, &conditional_format)?;

    // -----------------------------------------------------------------------
    // Save and close the file.
    // -----------------------------------------------------------------------
    workbook.save("conditional_formats.xlsx")?;

    Ok(())
}
Example 6. Cell conditional formatting in non-contiguous range. Cells with values >= 50 are in light red. Values < 50 are in light green. Non-contiguous ranges.
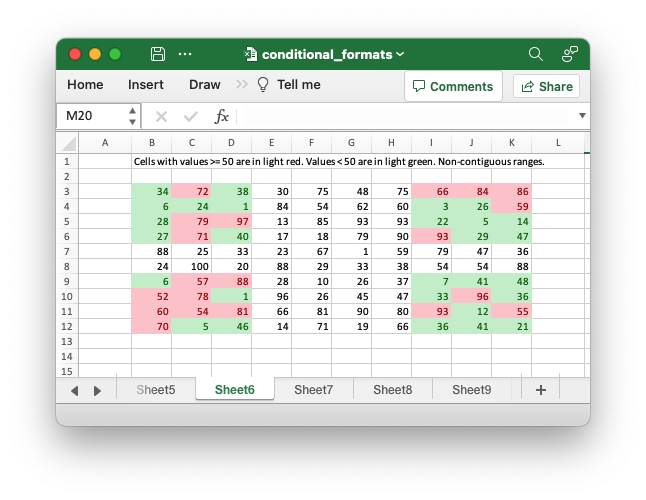
Code to generate the above example:
// SPDX-License-Identifier: MIT OR Apache-2.0
//
// Copyright 2022-2026, John McNamara, jmcnamara@cpan.org

//! Example of how to add conditional formatting to a worksheet using the
//! `rust_xlsxwriter` library.
//!
//! Conditional formatting allows you to apply a format to a cell or a range of
//! cells based on user defined rule.

use rust_xlsxwriter::{
    ConditionalFormat2ColorScale, ConditionalFormat3ColorScale, ConditionalFormatAverage,
    ConditionalFormatAverageRule, ConditionalFormatCell, ConditionalFormatCellRule,
    ConditionalFormatDataBar, ConditionalFormatDataBarDirection, ConditionalFormatDuplicate,
    ConditionalFormatFormula, ConditionalFormatIconSet, ConditionalFormatIconType,
    ConditionalFormatText, ConditionalFormatTextRule, ConditionalFormatTop, Format, Workbook,
    XlsxError,
};

fn main() -> Result<(), XlsxError> {
    // Create a new Excel file object.
    let mut workbook = Workbook::new();

    // Add a format. Light red fill with dark red text.
    let format1 = Format::new()
        .set_font_color("9C0006")
        .set_background_color("FFC7CE");

    // Add a format. Green fill with dark green text.
    let format2 = Format::new()
        .set_font_color("006100")
        .set_background_color("C6EFCE");

    // Add a format for headers.
    let bold = Format::new().set_bold();

    // Add a format for descriptions.
    let indent = Format::new().set_indent(2);

    // some sample data to run the conditional formatting against.
    let data = [
        [34, 72, 38, 30, 75, 48, 75, 66, 84, 86],
        [6, 24, 1, 84, 54, 62, 60, 3, 26, 59],
        [28, 79, 97, 13, 85, 93, 93, 22, 5, 14],
        [27, 71, 40, 17, 18, 79, 90, 93, 29, 47],
        [88, 25, 33, 23, 67, 1, 59, 79, 47, 36],
        [24, 100, 20, 88, 29, 33, 38, 54, 54, 88],
        [6, 57, 88, 28, 10, 26, 37, 7, 41, 48],
        [52, 78, 1, 96, 26, 45, 47, 33, 96, 36],
        [60, 54, 81, 66, 81, 90, 80, 93, 12, 55],
        [70, 5, 46, 14, 71, 19, 66, 36, 41, 21],
    ];

    // -----------------------------------------------------------------------
    // Worksheet 1. Cell conditional formatting.
    // -----------------------------------------------------------------------
    let caption = "Cells with values >= 50 are in light red. Values < 50 are in light green.";

    // Add a worksheet to the workbook.
    let worksheet = workbook.add_worksheet();

    // Write the caption.
    worksheet.write(0, 1, caption)?;

    // Write the worksheet data.
    worksheet.write_row_matrix(2, 1, data)?;

    // Set the column widths for clarity.
    worksheet.set_column_range_width(1, 10, 6)?;

    // Write a conditional format over a range.
    let conditional_format = ConditionalFormatCell::new()
        .set_rule(ConditionalFormatCellRule::GreaterThanOrEqualTo(50))
        .set_format(&format1);

    worksheet.add_conditional_format(2, 1, 11, 10, &conditional_format)?;

    // Write another conditional format over the same range.
    let conditional_format = ConditionalFormatCell::new()
        .set_rule(ConditionalFormatCellRule::LessThan(50))
        .set_format(&format2);

    worksheet.add_conditional_format(2, 1, 11, 10, &conditional_format)?;

    // -----------------------------------------------------------------------
    // Worksheet 2. Cell conditional formatting with between ranges.
    // -----------------------------------------------------------------------
    let caption =
        "Values between 30 and 70 are in light red. Values outside that range are in light green.";

    // Add a worksheet to the workbook.
    let worksheet = workbook.add_worksheet();

    // Write the caption.
    worksheet.write(0, 1, caption)?;

    // Write the worksheet data.
    worksheet.write_row_matrix(2, 1, data)?;

    // Set the column widths for clarity.
    worksheet.set_column_range_width(1, 10, 6)?;

    // Write a conditional format over a range.
    let conditional_format = ConditionalFormatCell::new()
        .set_rule(ConditionalFormatCellRule::Between(30, 70))
        .set_format(&format1);

    worksheet.add_conditional_format(2, 1, 11, 10, &conditional_format)?;

    // Write another conditional format over the same range.
    let conditional_format = ConditionalFormatCell::new()
        .set_rule(ConditionalFormatCellRule::NotBetween(30, 70))
        .set_format(&format2);

    worksheet.add_conditional_format(2, 1, 11, 10, &conditional_format)?;

    // -----------------------------------------------------------------------
    // Worksheet 3. Duplicate and Unique conditional formats.
    // -----------------------------------------------------------------------
    let caption = "Duplicate values are in light red. Unique values are in light green.";

    // Add a worksheet to the workbook.
    let worksheet = workbook.add_worksheet();

    // Write the caption.
    worksheet.write(0, 1, caption)?;

    // Write the worksheet data.
    worksheet.write_row_matrix(2, 1, data)?;

    // Set the column widths for clarity.
    worksheet.set_column_range_width(1, 10, 6)?;

    // Write a conditional format over a range.
    let conditional_format = ConditionalFormatDuplicate::new().set_format(&format1);

    worksheet.add_conditional_format(2, 1, 11, 10, &conditional_format)?;

    // Invert the duplicate conditional format to show unique values in the
    // same range.
    let conditional_format = ConditionalFormatDuplicate::new()
        .invert()
        .set_format(&format2);

    worksheet.add_conditional_format(2, 1, 11, 10, &conditional_format)?;

    // -----------------------------------------------------------------------
    // Worksheet 4. Above and Below Average conditional formats.
    // -----------------------------------------------------------------------
    let caption = "Above average values are in light red. Below average values are in light green.";

    // Add a worksheet to the workbook.
    let worksheet = workbook.add_worksheet();

    // Write the caption.
    worksheet.write(0, 1, caption)?;

    // Write the worksheet data.
    worksheet.write_row_matrix(2, 1, data)?;

    // Set the column widths for clarity.
    worksheet.set_column_range_width(1, 10, 6)?;

    // Write a conditional format over a range. The default criteria is Above Average.
    let conditional_format = ConditionalFormatAverage::new().set_format(&format1);

    worksheet.add_conditional_format(2, 1, 11, 10, &conditional_format)?;

    // Write another conditional format over the same range.
    let conditional_format = ConditionalFormatAverage::new()
        .set_rule(ConditionalFormatAverageRule::BelowAverage)
        .set_format(&format2);

    worksheet.add_conditional_format(2, 1, 11, 10, &conditional_format)?;

    // -----------------------------------------------------------------------
    // Worksheet 5. Top and Bottom range conditional formats.
    // -----------------------------------------------------------------------
    let caption = "Top 10 values are in light red. Bottom 10 values are in light green.";

    // Add a worksheet to the workbook.
    let worksheet = workbook.add_worksheet();

    // Write the caption.
    worksheet.write(0, 1, caption)?;

    // Write the worksheet data.
    worksheet.write_row_matrix(2, 1, data)?;

    // Set the column widths for clarity.
    worksheet.set_column_range_width(1, 10, 6)?;

    // Write a conditional format over a range.
    let conditional_format = ConditionalFormatTop::new()
        .set_rule(rust_xlsxwriter::ConditionalFormatTopRule::Top(10))
        .set_format(&format1);

    worksheet.add_conditional_format(2, 1, 11, 10, &conditional_format)?;

    // Also show the bottom values in the same range.
    let conditional_format = ConditionalFormatTop::new()
        .set_rule(rust_xlsxwriter::ConditionalFormatTopRule::Bottom(10))
        .set_format(&format2);

    worksheet.add_conditional_format(2, 1, 11, 10, &conditional_format)?;

    // -----------------------------------------------------------------------
    // Worksheet 6. Cell conditional formatting in non-contiguous range.
    // -----------------------------------------------------------------------
    let caption = "Cells with values >= 50 are in light red. Values < 50 are in light green. Non-contiguous ranges.";

    // Add a worksheet to the workbook.
    let worksheet = workbook.add_worksheet();

    // Write the caption.
    worksheet.write(0, 1, caption)?;

    // Write the worksheet data.
    worksheet.write_row_matrix(2, 1, data)?;

    // Set the column widths for clarity.
    worksheet.set_column_range_width(1, 10, 6)?;

    // Write a conditional format over a non-contiguous range.
    let conditional_format = ConditionalFormatCell::new()
        .set_rule(ConditionalFormatCellRule::GreaterThanOrEqualTo(50))
        .set_multi_range("B3:D6 I3:K6 B9:D12 I9:K12")
        .set_format(&format1);

    worksheet.add_conditional_format(2, 1, 11, 10, &conditional_format)?;

    // Write another conditional format over the same range.
    let conditional_format = ConditionalFormatCell::new()
        .set_rule(ConditionalFormatCellRule::LessThan(50))
        .set_multi_range("B3:D6 I3:K6 B9:D12 I9:K12")
        .set_format(&format2);

    worksheet.add_conditional_format(2, 1, 11, 10, &conditional_format)?;

    // -----------------------------------------------------------------------
    // Worksheet 7. Formula conditional formatting.
    // -----------------------------------------------------------------------
    let caption = "Even numbered cells are in light green. Odd numbered cells are in light red.";

    // Add a worksheet to the workbook.
    let worksheet = workbook.add_worksheet();

    // Write the caption.
    worksheet.write(0, 1, caption)?;

    // Write the worksheet data.
    worksheet.write_row_matrix(2, 1, data)?;

    // Set the column widths for clarity.
    worksheet.set_column_range_width(1, 10, 6)?;

    // Write a conditional format over a range.
    let conditional_format = ConditionalFormatFormula::new()
        .set_rule("=ISODD(B3)")
        .set_format(&format1);

    worksheet.add_conditional_format(2, 1, 11, 10, &conditional_format)?;

    // Write another conditional format over the same range.
    let conditional_format = ConditionalFormatFormula::new()
        .set_rule("=ISEVEN(B3)")
        .set_format(&format2);

    worksheet.add_conditional_format(2, 1, 11, 10, &conditional_format)?;

    // -----------------------------------------------------------------------
    // Worksheet 8. Text style conditional formats.
    // -----------------------------------------------------------------------
    let caption =
        "Column A shows words that contain the sub-word 'rust'. Column C shows words that start/end with 't'";

    // Add a worksheet to the workbook.
    let worksheet = workbook.add_worksheet();

    // Write the caption.
    worksheet.write(0, 0, caption)?;

    // Add some sample data.
    let word_list = [
        "apocrustic",
        "burstwort",
        "cloudburst",
        "crustification",
        "distrustfulness",
        "laurustine",
        "outburst",
        "rusticism",
        "thunderburst",
        "trustee",
        "trustworthiness",
        "unburstableness",
        "unfrustratable",
    ];
    worksheet.write_column(1, 0, word_list)?;
    worksheet.write_column(1, 2, word_list)?;

    // Set the column widths for clarity.
    worksheet.set_column_width(0, 20)?;
    worksheet.set_column_width(2, 20)?;

    // Write a text "containing" conditional format over a range.
    let conditional_format = ConditionalFormatText::new()
        .set_rule(ConditionalFormatTextRule::Contains("rust".to_string()))
        .set_format(&format2);

    worksheet.add_conditional_format(1, 0, 13, 0, &conditional_format)?;

    // Write a text "not containing" conditional format over the same range.
    let conditional_format = ConditionalFormatText::new()
        .set_rule(ConditionalFormatTextRule::DoesNotContain(
            "rust".to_string(),
        ))
        .set_format(&format1);

    worksheet.add_conditional_format(1, 0, 13, 0, &conditional_format)?;

    // Write a text "begins with" conditional format over a range.
    let conditional_format = ConditionalFormatText::new()
        .set_rule(ConditionalFormatTextRule::BeginsWith("t".to_string()))
        .set_format(&format2);

    worksheet.add_conditional_format(1, 2, 13, 2, &conditional_format)?;

    // Write a text "ends with" conditional format over the same range.
    let conditional_format = ConditionalFormatText::new()
        .set_rule(ConditionalFormatTextRule::EndsWith("t".to_string()))
        .set_format(&format1);

    worksheet.add_conditional_format(1, 2, 13, 2, &conditional_format)?;

    // -----------------------------------------------------------------------
    // Worksheet 9. Examples of 2 color scale conditional formats.
    // -----------------------------------------------------------------------
    let caption = "Examples of 2 color scale conditional formats";

    // Add a worksheet to the workbook.
    let worksheet = workbook.add_worksheet();

    // Write the caption.
    worksheet.write(0, 1, caption)?;

    // Write the worksheet data.
    let data = [1, 2, 3, 4, 5, 6, 7, 8, 9, 10];
    worksheet.write_column(2, 1, data)?;
    worksheet.write_column(2, 3, data)?;
    worksheet.write_column(2, 5, data)?;
    worksheet.write_column(2, 7, data)?;
    worksheet.write_column(2, 9, data)?;
    worksheet.write_column(2, 11, data)?;

    // Set the column widths for clarity.
    worksheet.set_column_range_width(0, 12, 6)?;

    // Write 2 color scale formats with standard Excel colors.
    let conditional_format = ConditionalFormat2ColorScale::new()
        .set_minimum_color("F8696B")
        .set_maximum_color("FCFCFF");

    worksheet.add_conditional_format(2, 1, 11, 1, &conditional_format)?;

    let conditional_format = ConditionalFormat2ColorScale::new()
        .set_minimum_color("FCFCFF")
        .set_maximum_color("F8696B");

    worksheet.add_conditional_format(2, 3, 11, 3, &conditional_format)?;

    let conditional_format = ConditionalFormat2ColorScale::new()
        .set_minimum_color("FCFCFF")
        .set_maximum_color("63BE7B");

    worksheet.add_conditional_format(2, 5, 11, 5, &conditional_format)?;

    let conditional_format = ConditionalFormat2ColorScale::new()
        .set_minimum_color("63BE7B")
        .set_maximum_color("FCFCFF");

    worksheet.add_conditional_format(2, 7, 11, 7, &conditional_format)?;

    let conditional_format = ConditionalFormat2ColorScale::new()
        .set_minimum_color("FFEF9C")
        .set_maximum_color("63BE7B");

    worksheet.add_conditional_format(2, 9, 11, 9, &conditional_format)?;

    let conditional_format = ConditionalFormat2ColorScale::new()
        .set_minimum_color("63BE7B")
        .set_maximum_color("FFEF9C");

    worksheet.add_conditional_format(2, 11, 11, 11, &conditional_format)?;

    // -----------------------------------------------------------------------
    // Worksheet 10. Examples of 3 color scale conditional formats.
    // -----------------------------------------------------------------------
    let caption = "Examples of 3 color scale conditional formats";

    // Add a worksheet to the workbook.
    let worksheet = workbook.add_worksheet();

    // Write the caption.
    worksheet.write(0, 1, caption)?;

    // Write the worksheet data.
    let data = [1, 2, 3, 4, 5, 6, 7, 8, 9, 10];
    worksheet.write_column(2, 1, data)?;
    worksheet.write_column(2, 3, data)?;
    worksheet.write_column(2, 5, data)?;
    worksheet.write_column(2, 7, data)?;
    worksheet.write_column(2, 9, data)?;
    worksheet.write_column(2, 11, data)?;

    // Set the column widths for clarity.
    worksheet.set_column_range_width(0, 12, 6)?;

    // Write 3 color scale formats with standard Excel colors.
    let conditional_format = ConditionalFormat3ColorScale::new()
        .set_minimum_color("F8696B")
        .set_midpoint_color("FFEB84")
        .set_maximum_color("63BE7B");

    worksheet.add_conditional_format(2, 1, 11, 1, &conditional_format)?;

    let conditional_format = ConditionalFormat3ColorScale::new()
        .set_minimum_color("63BE7B")
        .set_midpoint_color("FFEB84")
        .set_maximum_color("F8696B");

    worksheet.add_conditional_format(2, 3, 11, 3, &conditional_format)?;

    let conditional_format = ConditionalFormat3ColorScale::new()
        .set_minimum_color("F8696B")
        .set_midpoint_color("FCFCFF")
        .set_maximum_color("63BE7B");

    worksheet.add_conditional_format(2, 5, 11, 5, &conditional_format)?;

    let conditional_format = ConditionalFormat3ColorScale::new()
        .set_minimum_color("63BE7B")
        .set_midpoint_color("FCFCFF")
        .set_maximum_color("F8696B");

    worksheet.add_conditional_format(2, 7, 11, 7, &conditional_format)?;

    let conditional_format = ConditionalFormat3ColorScale::new()
        .set_minimum_color("F8696B")
        .set_midpoint_color("FCFCFF")
        .set_maximum_color("5A8AC6");

    worksheet.add_conditional_format(2, 9, 11, 9, &conditional_format)?;

    let conditional_format = ConditionalFormat3ColorScale::new()
        .set_minimum_color("5A8AC6")
        .set_midpoint_color("FCFCFF")
        .set_maximum_color("F8696B");

    worksheet.add_conditional_format(2, 11, 11, 11, &conditional_format)?;

    // -----------------------------------------------------------------------
    // Worksheet 11. Examples of data bars.
    // -----------------------------------------------------------------------
    let caption = "Examples of data bars";

    // Add a worksheet to the workbook.
    let worksheet = workbook.add_worksheet();

    // Write the caption.
    worksheet.write_with_format(0, 1, caption, &bold)?;
    worksheet.write(1, 1, "Default")?;
    worksheet.write(1, 3, "Default negative")?;
    worksheet.write(1, 5, "User color")?;
    worksheet.write(1, 7, "Changed direction")?;

    // Write the worksheet data.
    let data1 = [1, 2, 3, 4, 5, 6, 7, 8, 9, 10];
    let data2 = [6, 4, 2, -2, -4, -6, -4, -2, 2, 4];
    worksheet.write_column(2, 1, data1)?;
    worksheet.write_column(2, 3, data2)?;
    worksheet.write_column(2, 5, data1)?;
    worksheet.write_column(2, 7, data1)?;

    // Write a standard Excel data bar.
    let conditional_format = ConditionalFormatDataBar::new();

    worksheet.add_conditional_format(2, 1, 11, 1, &conditional_format)?;

    // Write a standard Excel data bar with negative data
    let conditional_format = ConditionalFormatDataBar::new();

    worksheet.add_conditional_format(2, 3, 11, 3, &conditional_format)?;

    // Write a data bar with a user defined fill color.
    let conditional_format = ConditionalFormatDataBar::new().set_fill_color("009933");

    worksheet.add_conditional_format(2, 5, 11, 5, &conditional_format)?;

    // Write a data bar with the direction changed.
    let conditional_format = ConditionalFormatDataBar::new()
        .set_direction(ConditionalFormatDataBarDirection::RightToLeft);

    worksheet.add_conditional_format(2, 7, 11, 7, &conditional_format)?;

    // -----------------------------------------------------------------------
    // Worksheet 12. Examples of icon style conditional formats.
    // -----------------------------------------------------------------------
    let caption = "Examples of icon style conditional formats.";

    // Add a worksheet to the workbook.
    let worksheet = workbook.add_worksheet();

    // Write the caption.
    worksheet.write_with_format(0, 0, caption, &bold)?;
    worksheet.write_with_format(1, 0, "Three Traffic lights - Green is highest", &indent)?;
    worksheet.write_with_format(2, 0, "Reversed - Red is highest", &indent)?;
    worksheet.write_with_format(3, 0, "Icons only - The number data is hidden", &indent)?;

    worksheet.write_with_format(4, 0, "Other three-five icon examples", &bold)?;
    worksheet.write_with_format(5, 0, "Three arrows", &indent)?;
    worksheet.write_with_format(6, 0, "Three symbols", &indent)?;
    worksheet.write_with_format(7, 0, "Three stars", &indent)?;

    worksheet.write_with_format(8, 0, "Four arrows", &indent)?;
    worksheet.write_with_format(9, 0, "Four circles - Red (highest) to Black", &indent)?;
    worksheet.write_with_format(10, 0, "Four rating histograms", &indent)?;

    worksheet.write_with_format(11, 0, "Five arrows", &indent)?;
    worksheet.write_with_format(12, 0, "Five rating histograms", &indent)?;
    worksheet.write_with_format(13, 0, "Five rating quadrants", &indent)?;

    // Set the column width for clarity.
    worksheet.set_column_width(0, 35)?;

    // Write the worksheet data.
    worksheet.write_row(1, 1, [1, 2, 3])?;
    worksheet.write_row(2, 1, [1, 2, 3])?;
    worksheet.write_row(3, 1, [1, 2, 3])?;

    worksheet.write_row(5, 1, [1, 2, 3])?;
    worksheet.write_row(6, 1, [1, 2, 3])?;
    worksheet.write_row(7, 1, [1, 2, 3])?;

    worksheet.write_row(8, 1, [1, 2, 3, 4])?;
    worksheet.write_row(9, 1, [1, 2, 3, 4])?;
    worksheet.write_row(10, 1, [1, 2, 3, 4])?;

    worksheet.write_row(11, 1, [1, 2, 3, 4, 5])?;
    worksheet.write_row(12, 1, [1, 2, 3, 4, 5])?;
    worksheet.write_row(13, 1, [1, 2, 3, 4, 5])?;

    // Three Traffic lights - Green is highest.
    let conditional_format = ConditionalFormatIconSet::new()
        .set_icon_type(ConditionalFormatIconType::ThreeTrafficLights);

    worksheet.add_conditional_format(1, 1, 1, 3, &conditional_format)?;

    // Reversed - Red is highest.
    let conditional_format = ConditionalFormatIconSet::new()
        .set_icon_type(ConditionalFormatIconType::ThreeTrafficLights)
        .reverse_icons(true);

    worksheet.add_conditional_format(2, 1, 2, 3, &conditional_format)?;

    // Icons only - The number data is hidden.
    let conditional_format = ConditionalFormatIconSet::new()
        .set_icon_type(ConditionalFormatIconType::ThreeTrafficLights)
        .show_icons_only(true);

    worksheet.add_conditional_format(3, 1, 3, 3, &conditional_format)?;

    // Three arrows.
    let conditional_format =
        ConditionalFormatIconSet::new().set_icon_type(ConditionalFormatIconType::ThreeArrows);

    worksheet.add_conditional_format(5, 1, 5, 3, &conditional_format)?;

    // Three symbols.
    let conditional_format = ConditionalFormatIconSet::new()
        .set_icon_type(ConditionalFormatIconType::ThreeSymbolsCircled);

    worksheet.add_conditional_format(6, 1, 6, 3, &conditional_format)?;

    // Three stars.
    let conditional_format =
        ConditionalFormatIconSet::new().set_icon_type(ConditionalFormatIconType::ThreeStars);

    worksheet.add_conditional_format(7, 1, 7, 3, &conditional_format)?;

    // Four Arrows.
    let conditional_format =
        ConditionalFormatIconSet::new().set_icon_type(ConditionalFormatIconType::FourArrows);

    worksheet.add_conditional_format(8, 1, 8, 4, &conditional_format)?;

    // Four circles - Red (highest) to Black (lowest).
    let conditional_format =
        ConditionalFormatIconSet::new().set_icon_type(ConditionalFormatIconType::FourRedToBlack);

    worksheet.add_conditional_format(9, 1, 9, 4, &conditional_format)?;

    // Four rating histograms.
    let conditional_format =
        ConditionalFormatIconSet::new().set_icon_type(ConditionalFormatIconType::FourHistograms);

    worksheet.add_conditional_format(10, 1, 10, 4, &conditional_format)?;

    // Four Arrows.
    let conditional_format =
        ConditionalFormatIconSet::new().set_icon_type(ConditionalFormatIconType::FiveArrows);

    worksheet.add_conditional_format(11, 1, 11, 5, &conditional_format)?;

    // Four rating histograms.
    let conditional_format =
        ConditionalFormatIconSet::new().set_icon_type(ConditionalFormatIconType::FiveHistograms);

    worksheet.add_conditional_format(12, 1, 12, 5, &conditional_format)?;

    // Four rating quadrants.
    let conditional_format =
        ConditionalFormatIconSet::new().set_icon_type(ConditionalFormatIconType::FiveQuadrants);

    worksheet.add_conditional_format(13, 1, 13, 5, &conditional_format)?;

    // -----------------------------------------------------------------------
    // Save and close the file.
    // -----------------------------------------------------------------------
    workbook.save("conditional_formats.xlsx")?;

    Ok(())
}
Example 7. Formula conditional formatting. Even numbered cells are in light green. Odd numbered cells are in light red.
See ConditionalFormatFormula for more details.
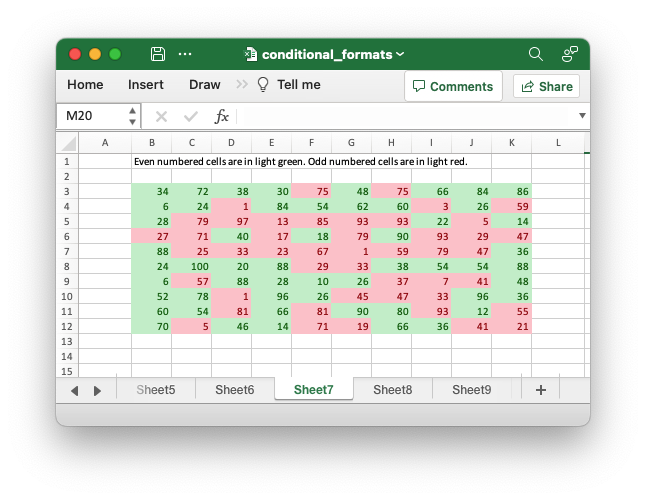
Code to generate the above example:
// SPDX-License-Identifier: MIT OR Apache-2.0
//
// Copyright 2022-2026, John McNamara, jmcnamara@cpan.org

//! Example of how to add conditional formatting to a worksheet using the
//! `rust_xlsxwriter` library.
//!
//! Conditional formatting allows you to apply a format to a cell or a range of
//! cells based on user defined rule.

use rust_xlsxwriter::{
    ConditionalFormat2ColorScale, ConditionalFormat3ColorScale, ConditionalFormatAverage,
    ConditionalFormatAverageRule, ConditionalFormatCell, ConditionalFormatCellRule,
    ConditionalFormatDataBar, ConditionalFormatDataBarDirection, ConditionalFormatDuplicate,
    ConditionalFormatFormula, ConditionalFormatIconSet, ConditionalFormatIconType,
    ConditionalFormatText, ConditionalFormatTextRule, ConditionalFormatTop, Format, Workbook,
    XlsxError,
};

fn main() -> Result<(), XlsxError> {
    // Create a new Excel file object.
    let mut workbook = Workbook::new();

    // Add a format. Light red fill with dark red text.
    let format1 = Format::new()
        .set_font_color("9C0006")
        .set_background_color("FFC7CE");

    // Add a format. Green fill with dark green text.
    let format2 = Format::new()
        .set_font_color("006100")
        .set_background_color("C6EFCE");

    // Add a format for headers.
    let bold = Format::new().set_bold();

    // Add a format for descriptions.
    let indent = Format::new().set_indent(2);

    // some sample data to run the conditional formatting against.
    let data = [
        [34, 72, 38, 30, 75, 48, 75, 66, 84, 86],
        [6, 24, 1, 84, 54, 62, 60, 3, 26, 59],
        [28, 79, 97, 13, 85, 93, 93, 22, 5, 14],
        [27, 71, 40, 17, 18, 79, 90, 93, 29, 47],
        [88, 25, 33, 23, 67, 1, 59, 79, 47, 36],
        [24, 100, 20, 88, 29, 33, 38, 54, 54, 88],
        [6, 57, 88, 28, 10, 26, 37, 7, 41, 48],
        [52, 78, 1, 96, 26, 45, 47, 33, 96, 36],
        [60, 54, 81, 66, 81, 90, 80, 93, 12, 55],
        [70, 5, 46, 14, 71, 19, 66, 36, 41, 21],
    ];

    // -----------------------------------------------------------------------
    // Worksheet 1. Cell conditional formatting.
    // -----------------------------------------------------------------------
    let caption = "Cells with values >= 50 are in light red. Values < 50 are in light green.";

    // Add a worksheet to the workbook.
    let worksheet = workbook.add_worksheet();

    // Write the caption.
    worksheet.write(0, 1, caption)?;

    // Write the worksheet data.
    worksheet.write_row_matrix(2, 1, data)?;

    // Set the column widths for clarity.
    worksheet.set_column_range_width(1, 10, 6)?;

    // Write a conditional format over a range.
    let conditional_format = ConditionalFormatCell::new()
        .set_rule(ConditionalFormatCellRule::GreaterThanOrEqualTo(50))
        .set_format(&format1);

    worksheet.add_conditional_format(2, 1, 11, 10, &conditional_format)?;

    // Write another conditional format over the same range.
    let conditional_format = ConditionalFormatCell::new()
        .set_rule(ConditionalFormatCellRule::LessThan(50))
        .set_format(&format2);

    worksheet.add_conditional_format(2, 1, 11, 10, &conditional_format)?;

    // -----------------------------------------------------------------------
    // Worksheet 2. Cell conditional formatting with between ranges.
    // -----------------------------------------------------------------------
    let caption =
        "Values between 30 and 70 are in light red. Values outside that range are in light green.";

    // Add a worksheet to the workbook.
    let worksheet = workbook.add_worksheet();

    // Write the caption.
    worksheet.write(0, 1, caption)?;

    // Write the worksheet data.
    worksheet.write_row_matrix(2, 1, data)?;

    // Set the column widths for clarity.
    worksheet.set_column_range_width(1, 10, 6)?;

    // Write a conditional format over a range.
    let conditional_format = ConditionalFormatCell::new()
        .set_rule(ConditionalFormatCellRule::Between(30, 70))
        .set_format(&format1);

    worksheet.add_conditional_format(2, 1, 11, 10, &conditional_format)?;

    // Write another conditional format over the same range.
    let conditional_format = ConditionalFormatCell::new()
        .set_rule(ConditionalFormatCellRule::NotBetween(30, 70))
        .set_format(&format2);

    worksheet.add_conditional_format(2, 1, 11, 10, &conditional_format)?;

    // -----------------------------------------------------------------------
    // Worksheet 3. Duplicate and Unique conditional formats.
    // -----------------------------------------------------------------------
    let caption = "Duplicate values are in light red. Unique values are in light green.";

    // Add a worksheet to the workbook.
    let worksheet = workbook.add_worksheet();

    // Write the caption.
    worksheet.write(0, 1, caption)?;

    // Write the worksheet data.
    worksheet.write_row_matrix(2, 1, data)?;

    // Set the column widths for clarity.
    worksheet.set_column_range_width(1, 10, 6)?;

    // Write a conditional format over a range.
    let conditional_format = ConditionalFormatDuplicate::new().set_format(&format1);

    worksheet.add_conditional_format(2, 1, 11, 10, &conditional_format)?;

    // Invert the duplicate conditional format to show unique values in the
    // same range.
    let conditional_format = ConditionalFormatDuplicate::new()
        .invert()
        .set_format(&format2);

    worksheet.add_conditional_format(2, 1, 11, 10, &conditional_format)?;

    // -----------------------------------------------------------------------
    // Worksheet 4. Above and Below Average conditional formats.
    // -----------------------------------------------------------------------
    let caption = "Above average values are in light red. Below average values are in light green.";

    // Add a worksheet to the workbook.
    let worksheet = workbook.add_worksheet();

    // Write the caption.
    worksheet.write(0, 1, caption)?;

    // Write the worksheet data.
    worksheet.write_row_matrix(2, 1, data)?;

    // Set the column widths for clarity.
    worksheet.set_column_range_width(1, 10, 6)?;

    // Write a conditional format over a range. The default criteria is Above Average.
    let conditional_format = ConditionalFormatAverage::new().set_format(&format1);

    worksheet.add_conditional_format(2, 1, 11, 10, &conditional_format)?;

    // Write another conditional format over the same range.
    let conditional_format = ConditionalFormatAverage::new()
        .set_rule(ConditionalFormatAverageRule::BelowAverage)
        .set_format(&format2);

    worksheet.add_conditional_format(2, 1, 11, 10, &conditional_format)?;

    // -----------------------------------------------------------------------
    // Worksheet 5. Top and Bottom range conditional formats.
    // -----------------------------------------------------------------------
    let caption = "Top 10 values are in light red. Bottom 10 values are in light green.";

    // Add a worksheet to the workbook.
    let worksheet = workbook.add_worksheet();

    // Write the caption.
    worksheet.write(0, 1, caption)?;

    // Write the worksheet data.
    worksheet.write_row_matrix(2, 1, data)?;

    // Set the column widths for clarity.
    worksheet.set_column_range_width(1, 10, 6)?;

    // Write a conditional format over a range.
    let conditional_format = ConditionalFormatTop::new()
        .set_rule(rust_xlsxwriter::ConditionalFormatTopRule::Top(10))
        .set_format(&format1);

    worksheet.add_conditional_format(2, 1, 11, 10, &conditional_format)?;

    // Also show the bottom values in the same range.
    let conditional_format = ConditionalFormatTop::new()
        .set_rule(rust_xlsxwriter::ConditionalFormatTopRule::Bottom(10))
        .set_format(&format2);

    worksheet.add_conditional_format(2, 1, 11, 10, &conditional_format)?;

    // -----------------------------------------------------------------------
    // Worksheet 6. Cell conditional formatting in non-contiguous range.
    // -----------------------------------------------------------------------
    let caption = "Cells with values >= 50 are in light red. Values < 50 are in light green. Non-contiguous ranges.";

    // Add a worksheet to the workbook.
    let worksheet = workbook.add_worksheet();

    // Write the caption.
    worksheet.write(0, 1, caption)?;

    // Write the worksheet data.
    worksheet.write_row_matrix(2, 1, data)?;

    // Set the column widths for clarity.
    worksheet.set_column_range_width(1, 10, 6)?;

    // Write a conditional format over a non-contiguous range.
    let conditional_format = ConditionalFormatCell::new()
        .set_rule(ConditionalFormatCellRule::GreaterThanOrEqualTo(50))
        .set_multi_range("B3:D6 I3:K6 B9:D12 I9:K12")
        .set_format(&format1);

    worksheet.add_conditional_format(2, 1, 11, 10, &conditional_format)?;

    // Write another conditional format over the same range.
    let conditional_format = ConditionalFormatCell::new()
        .set_rule(ConditionalFormatCellRule::LessThan(50))
        .set_multi_range("B3:D6 I3:K6 B9:D12 I9:K12")
        .set_format(&format2);

    worksheet.add_conditional_format(2, 1, 11, 10, &conditional_format)?;

    // -----------------------------------------------------------------------
    // Worksheet 7. Formula conditional formatting.
    // -----------------------------------------------------------------------
    let caption = "Even numbered cells are in light green. Odd numbered cells are in light red.";

    // Add a worksheet to the workbook.
    let worksheet = workbook.add_worksheet();

    // Write the caption.
    worksheet.write(0, 1, caption)?;

    // Write the worksheet data.
    worksheet.write_row_matrix(2, 1, data)?;

    // Set the column widths for clarity.
    worksheet.set_column_range_width(1, 10, 6)?;

    // Write a conditional format over a range.
    let conditional_format = ConditionalFormatFormula::new()
        .set_rule("=ISODD(B3)")
        .set_format(&format1);

    worksheet.add_conditional_format(2, 1, 11, 10, &conditional_format)?;

    // Write another conditional format over the same range.
    let conditional_format = ConditionalFormatFormula::new()
        .set_rule("=ISEVEN(B3)")
        .set_format(&format2);

    worksheet.add_conditional_format(2, 1, 11, 10, &conditional_format)?;

    // -----------------------------------------------------------------------
    // Worksheet 8. Text style conditional formats.
    // -----------------------------------------------------------------------
    let caption =
        "Column A shows words that contain the sub-word 'rust'. Column C shows words that start/end with 't'";

    // Add a worksheet to the workbook.
    let worksheet = workbook.add_worksheet();

    // Write the caption.
    worksheet.write(0, 0, caption)?;

    // Add some sample data.
    let word_list = [
        "apocrustic",
        "burstwort",
        "cloudburst",
        "crustification",
        "distrustfulness",
        "laurustine",
        "outburst",
        "rusticism",
        "thunderburst",
        "trustee",
        "trustworthiness",
        "unburstableness",
        "unfrustratable",
    ];
    worksheet.write_column(1, 0, word_list)?;
    worksheet.write_column(1, 2, word_list)?;

    // Set the column widths for clarity.
    worksheet.set_column_width(0, 20)?;
    worksheet.set_column_width(2, 20)?;

    // Write a text "containing" conditional format over a range.
    let conditional_format = ConditionalFormatText::new()
        .set_rule(ConditionalFormatTextRule::Contains("rust".to_string()))
        .set_format(&format2);

    worksheet.add_conditional_format(1, 0, 13, 0, &conditional_format)?;

    // Write a text "not containing" conditional format over the same range.
    let conditional_format = ConditionalFormatText::new()
        .set_rule(ConditionalFormatTextRule::DoesNotContain(
            "rust".to_string(),
        ))
        .set_format(&format1);

    worksheet.add_conditional_format(1, 0, 13, 0, &conditional_format)?;

    // Write a text "begins with" conditional format over a range.
    let conditional_format = ConditionalFormatText::new()
        .set_rule(ConditionalFormatTextRule::BeginsWith("t".to_string()))
        .set_format(&format2);

    worksheet.add_conditional_format(1, 2, 13, 2, &conditional_format)?;

    // Write a text "ends with" conditional format over the same range.
    let conditional_format = ConditionalFormatText::new()
        .set_rule(ConditionalFormatTextRule::EndsWith("t".to_string()))
        .set_format(&format1);

    worksheet.add_conditional_format(1, 2, 13, 2, &conditional_format)?;

    // -----------------------------------------------------------------------
    // Worksheet 9. Examples of 2 color scale conditional formats.
    // -----------------------------------------------------------------------
    let caption = "Examples of 2 color scale conditional formats";

    // Add a worksheet to the workbook.
    let worksheet = workbook.add_worksheet();

    // Write the caption.
    worksheet.write(0, 1, caption)?;

    // Write the worksheet data.
    let data = [1, 2, 3, 4, 5, 6, 7, 8, 9, 10];
    worksheet.write_column(2, 1, data)?;
    worksheet.write_column(2, 3, data)?;
    worksheet.write_column(2, 5, data)?;
    worksheet.write_column(2, 7, data)?;
    worksheet.write_column(2, 9, data)?;
    worksheet.write_column(2, 11, data)?;

    // Set the column widths for clarity.
    worksheet.set_column_range_width(0, 12, 6)?;

    // Write 2 color scale formats with standard Excel colors.
    let conditional_format = ConditionalFormat2ColorScale::new()
        .set_minimum_color("F8696B")
        .set_maximum_color("FCFCFF");

    worksheet.add_conditional_format(2, 1, 11, 1, &conditional_format)?;

    let conditional_format = ConditionalFormat2ColorScale::new()
        .set_minimum_color("FCFCFF")
        .set_maximum_color("F8696B");

    worksheet.add_conditional_format(2, 3, 11, 3, &conditional_format)?;

    let conditional_format = ConditionalFormat2ColorScale::new()
        .set_minimum_color("FCFCFF")
        .set_maximum_color("63BE7B");

    worksheet.add_conditional_format(2, 5, 11, 5, &conditional_format)?;

    let conditional_format = ConditionalFormat2ColorScale::new()
        .set_minimum_color("63BE7B")
        .set_maximum_color("FCFCFF");

    worksheet.add_conditional_format(2, 7, 11, 7, &conditional_format)?;

    let conditional_format = ConditionalFormat2ColorScale::new()
        .set_minimum_color("FFEF9C")
        .set_maximum_color("63BE7B");

    worksheet.add_conditional_format(2, 9, 11, 9, &conditional_format)?;

    let conditional_format = ConditionalFormat2ColorScale::new()
        .set_minimum_color("63BE7B")
        .set_maximum_color("FFEF9C");

    worksheet.add_conditional_format(2, 11, 11, 11, &conditional_format)?;

    // -----------------------------------------------------------------------
    // Worksheet 10. Examples of 3 color scale conditional formats.
    // -----------------------------------------------------------------------
    let caption = "Examples of 3 color scale conditional formats";

    // Add a worksheet to the workbook.
    let worksheet = workbook.add_worksheet();

    // Write the caption.
    worksheet.write(0, 1, caption)?;

    // Write the worksheet data.
    let data = [1, 2, 3, 4, 5, 6, 7, 8, 9, 10];
    worksheet.write_column(2, 1, data)?;
    worksheet.write_column(2, 3, data)?;
    worksheet.write_column(2, 5, data)?;
    worksheet.write_column(2, 7, data)?;
    worksheet.write_column(2, 9, data)?;
    worksheet.write_column(2, 11, data)?;

    // Set the column widths for clarity.
    worksheet.set_column_range_width(0, 12, 6)?;

    // Write 3 color scale formats with standard Excel colors.
    let conditional_format = ConditionalFormat3ColorScale::new()
        .set_minimum_color("F8696B")
        .set_midpoint_color("FFEB84")
        .set_maximum_color("63BE7B");

    worksheet.add_conditional_format(2, 1, 11, 1, &conditional_format)?;

    let conditional_format = ConditionalFormat3ColorScale::new()
        .set_minimum_color("63BE7B")
        .set_midpoint_color("FFEB84")
        .set_maximum_color("F8696B");

    worksheet.add_conditional_format(2, 3, 11, 3, &conditional_format)?;

    let conditional_format = ConditionalFormat3ColorScale::new()
        .set_minimum_color("F8696B")
        .set_midpoint_color("FCFCFF")
        .set_maximum_color("63BE7B");

    worksheet.add_conditional_format(2, 5, 11, 5, &conditional_format)?;

    let conditional_format = ConditionalFormat3ColorScale::new()
        .set_minimum_color("63BE7B")
        .set_midpoint_color("FCFCFF")
        .set_maximum_color("F8696B");

    worksheet.add_conditional_format(2, 7, 11, 7, &conditional_format)?;

    let conditional_format = ConditionalFormat3ColorScale::new()
        .set_minimum_color("F8696B")
        .set_midpoint_color("FCFCFF")
        .set_maximum_color("5A8AC6");

    worksheet.add_conditional_format(2, 9, 11, 9, &conditional_format)?;

    let conditional_format = ConditionalFormat3ColorScale::new()
        .set_minimum_color("5A8AC6")
        .set_midpoint_color("FCFCFF")
        .set_maximum_color("F8696B");

    worksheet.add_conditional_format(2, 11, 11, 11, &conditional_format)?;

    // -----------------------------------------------------------------------
    // Worksheet 11. Examples of data bars.
    // -----------------------------------------------------------------------
    let caption = "Examples of data bars";

    // Add a worksheet to the workbook.
    let worksheet = workbook.add_worksheet();

    // Write the caption.
    worksheet.write_with_format(0, 1, caption, &bold)?;
    worksheet.write(1, 1, "Default")?;
    worksheet.write(1, 3, "Default negative")?;
    worksheet.write(1, 5, "User color")?;
    worksheet.write(1, 7, "Changed direction")?;

    // Write the worksheet data.
    let data1 = [1, 2, 3, 4, 5, 6, 7, 8, 9, 10];
    let data2 = [6, 4, 2, -2, -4, -6, -4, -2, 2, 4];
    worksheet.write_column(2, 1, data1)?;
    worksheet.write_column(2, 3, data2)?;
    worksheet.write_column(2, 5, data1)?;
    worksheet.write_column(2, 7, data1)?;

    // Write a standard Excel data bar.
    let conditional_format = ConditionalFormatDataBar::new();

    worksheet.add_conditional_format(2, 1, 11, 1, &conditional_format)?;

    // Write a standard Excel data bar with negative data
    let conditional_format = ConditionalFormatDataBar::new();

    worksheet.add_conditional_format(2, 3, 11, 3, &conditional_format)?;

    // Write a data bar with a user defined fill color.
    let conditional_format = ConditionalFormatDataBar::new().set_fill_color("009933");

    worksheet.add_conditional_format(2, 5, 11, 5, &conditional_format)?;

    // Write a data bar with the direction changed.
    let conditional_format = ConditionalFormatDataBar::new()
        .set_direction(ConditionalFormatDataBarDirection::RightToLeft);

    worksheet.add_conditional_format(2, 7, 11, 7, &conditional_format)?;

    // -----------------------------------------------------------------------
    // Worksheet 12. Examples of icon style conditional formats.
    // -----------------------------------------------------------------------
    let caption = "Examples of icon style conditional formats.";

    // Add a worksheet to the workbook.
    let worksheet = workbook.add_worksheet();

    // Write the caption.
    worksheet.write_with_format(0, 0, caption, &bold)?;
    worksheet.write_with_format(1, 0, "Three Traffic lights - Green is highest", &indent)?;
    worksheet.write_with_format(2, 0, "Reversed - Red is highest", &indent)?;
    worksheet.write_with_format(3, 0, "Icons only - The number data is hidden", &indent)?;

    worksheet.write_with_format(4, 0, "Other three-five icon examples", &bold)?;
    worksheet.write_with_format(5, 0, "Three arrows", &indent)?;
    worksheet.write_with_format(6, 0, "Three symbols", &indent)?;
    worksheet.write_with_format(7, 0, "Three stars", &indent)?;

    worksheet.write_with_format(8, 0, "Four arrows", &indent)?;
    worksheet.write_with_format(9, 0, "Four circles - Red (highest) to Black", &indent)?;
    worksheet.write_with_format(10, 0, "Four rating histograms", &indent)?;

    worksheet.write_with_format(11, 0, "Five arrows", &indent)?;
    worksheet.write_with_format(12, 0, "Five rating histograms", &indent)?;
    worksheet.write_with_format(13, 0, "Five rating quadrants", &indent)?;

    // Set the column width for clarity.
    worksheet.set_column_width(0, 35)?;

    // Write the worksheet data.
    worksheet.write_row(1, 1, [1, 2, 3])?;
    worksheet.write_row(2, 1, [1, 2, 3])?;
    worksheet.write_row(3, 1, [1, 2, 3])?;

    worksheet.write_row(5, 1, [1, 2, 3])?;
    worksheet.write_row(6, 1, [1, 2, 3])?;
    worksheet.write_row(7, 1, [1, 2, 3])?;

    worksheet.write_row(8, 1, [1, 2, 3, 4])?;
    worksheet.write_row(9, 1, [1, 2, 3, 4])?;
    worksheet.write_row(10, 1, [1, 2, 3, 4])?;

    worksheet.write_row(11, 1, [1, 2, 3, 4, 5])?;
    worksheet.write_row(12, 1, [1, 2, 3, 4, 5])?;
    worksheet.write_row(13, 1, [1, 2, 3, 4, 5])?;

    // Three Traffic lights - Green is highest.
    let conditional_format = ConditionalFormatIconSet::new()
        .set_icon_type(ConditionalFormatIconType::ThreeTrafficLights);

    worksheet.add_conditional_format(1, 1, 1, 3, &conditional_format)?;

    // Reversed - Red is highest.
    let conditional_format = ConditionalFormatIconSet::new()
        .set_icon_type(ConditionalFormatIconType::ThreeTrafficLights)
        .reverse_icons(true);

    worksheet.add_conditional_format(2, 1, 2, 3, &conditional_format)?;

    // Icons only - The number data is hidden.
    let conditional_format = ConditionalFormatIconSet::new()
        .set_icon_type(ConditionalFormatIconType::ThreeTrafficLights)
        .show_icons_only(true);

    worksheet.add_conditional_format(3, 1, 3, 3, &conditional_format)?;

    // Three arrows.
    let conditional_format =
        ConditionalFormatIconSet::new().set_icon_type(ConditionalFormatIconType::ThreeArrows);

    worksheet.add_conditional_format(5, 1, 5, 3, &conditional_format)?;

    // Three symbols.
    let conditional_format = ConditionalFormatIconSet::new()
        .set_icon_type(ConditionalFormatIconType::ThreeSymbolsCircled);

    worksheet.add_conditional_format(6, 1, 6, 3, &conditional_format)?;

    // Three stars.
    let conditional_format =
        ConditionalFormatIconSet::new().set_icon_type(ConditionalFormatIconType::ThreeStars);

    worksheet.add_conditional_format(7, 1, 7, 3, &conditional_format)?;

    // Four Arrows.
    let conditional_format =
        ConditionalFormatIconSet::new().set_icon_type(ConditionalFormatIconType::FourArrows);

    worksheet.add_conditional_format(8, 1, 8, 4, &conditional_format)?;

    // Four circles - Red (highest) to Black (lowest).
    let conditional_format =
        ConditionalFormatIconSet::new().set_icon_type(ConditionalFormatIconType::FourRedToBlack);

    worksheet.add_conditional_format(9, 1, 9, 4, &conditional_format)?;

    // Four rating histograms.
    let conditional_format =
        ConditionalFormatIconSet::new().set_icon_type(ConditionalFormatIconType::FourHistograms);

    worksheet.add_conditional_format(10, 1, 10, 4, &conditional_format)?;

    // Four Arrows.
    let conditional_format =
        ConditionalFormatIconSet::new().set_icon_type(ConditionalFormatIconType::FiveArrows);

    worksheet.add_conditional_format(11, 1, 11, 5, &conditional_format)?;

    // Four rating histograms.
    let conditional_format =
        ConditionalFormatIconSet::new().set_icon_type(ConditionalFormatIconType::FiveHistograms);

    worksheet.add_conditional_format(12, 1, 12, 5, &conditional_format)?;

    // Four rating quadrants.
    let conditional_format =
        ConditionalFormatIconSet::new().set_icon_type(ConditionalFormatIconType::FiveQuadrants);

    worksheet.add_conditional_format(13, 1, 13, 5, &conditional_format)?;

    // -----------------------------------------------------------------------
    // Save and close the file.
    // -----------------------------------------------------------------------
    workbook.save("conditional_formats.xlsx")?;

    Ok(())
}
Example 8. Text style conditional formats. Column A shows words that contain the sub-word 'rust'. Column C shows words that start/end with 't'
See ConditionalFormatText for more details.
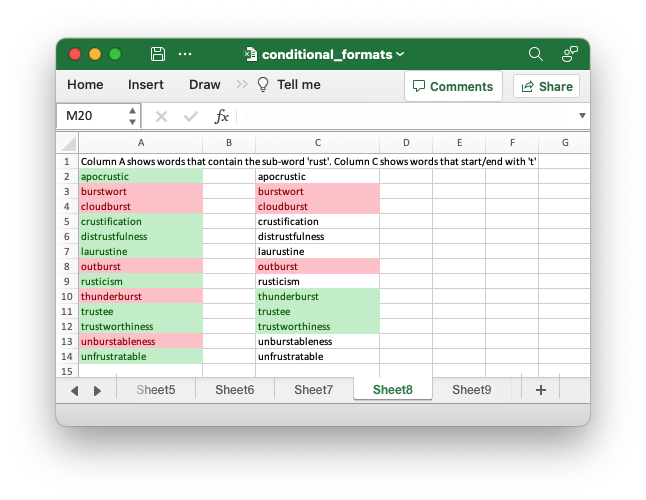
Code to generate the above example:
// SPDX-License-Identifier: MIT OR Apache-2.0
//
// Copyright 2022-2026, John McNamara, jmcnamara@cpan.org

//! Example of how to add conditional formatting to a worksheet using the
//! `rust_xlsxwriter` library.
//!
//! Conditional formatting allows you to apply a format to a cell or a range of
//! cells based on user defined rule.

use rust_xlsxwriter::{
    ConditionalFormat2ColorScale, ConditionalFormat3ColorScale, ConditionalFormatAverage,
    ConditionalFormatAverageRule, ConditionalFormatCell, ConditionalFormatCellRule,
    ConditionalFormatDataBar, ConditionalFormatDataBarDirection, ConditionalFormatDuplicate,
    ConditionalFormatFormula, ConditionalFormatIconSet, ConditionalFormatIconType,
    ConditionalFormatText, ConditionalFormatTextRule, ConditionalFormatTop, Format, Workbook,
    XlsxError,
};

fn main() -> Result<(), XlsxError> {
    // Create a new Excel file object.
    let mut workbook = Workbook::new();

    // Add a format. Light red fill with dark red text.
    let format1 = Format::new()
        .set_font_color("9C0006")
        .set_background_color("FFC7CE");

    // Add a format. Green fill with dark green text.
    let format2 = Format::new()
        .set_font_color("006100")
        .set_background_color("C6EFCE");

    // Add a format for headers.
    let bold = Format::new().set_bold();

    // Add a format for descriptions.
    let indent = Format::new().set_indent(2);

    // some sample data to run the conditional formatting against.
    let data = [
        [34, 72, 38, 30, 75, 48, 75, 66, 84, 86],
        [6, 24, 1, 84, 54, 62, 60, 3, 26, 59],
        [28, 79, 97, 13, 85, 93, 93, 22, 5, 14],
        [27, 71, 40, 17, 18, 79, 90, 93, 29, 47],
        [88, 25, 33, 23, 67, 1, 59, 79, 47, 36],
        [24, 100, 20, 88, 29, 33, 38, 54, 54, 88],
        [6, 57, 88, 28, 10, 26, 37, 7, 41, 48],
        [52, 78, 1, 96, 26, 45, 47, 33, 96, 36],
        [60, 54, 81, 66, 81, 90, 80, 93, 12, 55],
        [70, 5, 46, 14, 71, 19, 66, 36, 41, 21],
    ];

    // -----------------------------------------------------------------------
    // Worksheet 1. Cell conditional formatting.
    // -----------------------------------------------------------------------
    let caption = "Cells with values >= 50 are in light red. Values < 50 are in light green.";

    // Add a worksheet to the workbook.
    let worksheet = workbook.add_worksheet();

    // Write the caption.
    worksheet.write(0, 1, caption)?;

    // Write the worksheet data.
    worksheet.write_row_matrix(2, 1, data)?;

    // Set the column widths for clarity.
    worksheet.set_column_range_width(1, 10, 6)?;

    // Write a conditional format over a range.
    let conditional_format = ConditionalFormatCell::new()
        .set_rule(ConditionalFormatCellRule::GreaterThanOrEqualTo(50))
        .set_format(&format1);

    worksheet.add_conditional_format(2, 1, 11, 10, &conditional_format)?;

    // Write another conditional format over the same range.
    let conditional_format = ConditionalFormatCell::new()
        .set_rule(ConditionalFormatCellRule::LessThan(50))
        .set_format(&format2);

    worksheet.add_conditional_format(2, 1, 11, 10, &conditional_format)?;

    // -----------------------------------------------------------------------
    // Worksheet 2. Cell conditional formatting with between ranges.
    // -----------------------------------------------------------------------
    let caption =
        "Values between 30 and 70 are in light red. Values outside that range are in light green.";

    // Add a worksheet to the workbook.
    let worksheet = workbook.add_worksheet();

    // Write the caption.
    worksheet.write(0, 1, caption)?;

    // Write the worksheet data.
    worksheet.write_row_matrix(2, 1, data)?;

    // Set the column widths for clarity.
    worksheet.set_column_range_width(1, 10, 6)?;

    // Write a conditional format over a range.
    let conditional_format = ConditionalFormatCell::new()
        .set_rule(ConditionalFormatCellRule::Between(30, 70))
        .set_format(&format1);

    worksheet.add_conditional_format(2, 1, 11, 10, &conditional_format)?;

    // Write another conditional format over the same range.
    let conditional_format = ConditionalFormatCell::new()
        .set_rule(ConditionalFormatCellRule::NotBetween(30, 70))
        .set_format(&format2);

    worksheet.add_conditional_format(2, 1, 11, 10, &conditional_format)?;

    // -----------------------------------------------------------------------
    // Worksheet 3. Duplicate and Unique conditional formats.
    // -----------------------------------------------------------------------
    let caption = "Duplicate values are in light red. Unique values are in light green.";

    // Add a worksheet to the workbook.
    let worksheet = workbook.add_worksheet();

    // Write the caption.
    worksheet.write(0, 1, caption)?;

    // Write the worksheet data.
    worksheet.write_row_matrix(2, 1, data)?;

    // Set the column widths for clarity.
    worksheet.set_column_range_width(1, 10, 6)?;

    // Write a conditional format over a range.
    let conditional_format = ConditionalFormatDuplicate::new().set_format(&format1);

    worksheet.add_conditional_format(2, 1, 11, 10, &conditional_format)?;

    // Invert the duplicate conditional format to show unique values in the
    // same range.
    let conditional_format = ConditionalFormatDuplicate::new()
        .invert()
        .set_format(&format2);

    worksheet.add_conditional_format(2, 1, 11, 10, &conditional_format)?;

    // -----------------------------------------------------------------------
    // Worksheet 4. Above and Below Average conditional formats.
    // -----------------------------------------------------------------------
    let caption = "Above average values are in light red. Below average values are in light green.";

    // Add a worksheet to the workbook.
    let worksheet = workbook.add_worksheet();

    // Write the caption.
    worksheet.write(0, 1, caption)?;

    // Write the worksheet data.
    worksheet.write_row_matrix(2, 1, data)?;

    // Set the column widths for clarity.
    worksheet.set_column_range_width(1, 10, 6)?;

    // Write a conditional format over a range. The default criteria is Above Average.
    let conditional_format = ConditionalFormatAverage::new().set_format(&format1);

    worksheet.add_conditional_format(2, 1, 11, 10, &conditional_format)?;

    // Write another conditional format over the same range.
    let conditional_format = ConditionalFormatAverage::new()
        .set_rule(ConditionalFormatAverageRule::BelowAverage)
        .set_format(&format2);

    worksheet.add_conditional_format(2, 1, 11, 10, &conditional_format)?;

    // -----------------------------------------------------------------------
    // Worksheet 5. Top and Bottom range conditional formats.
    // -----------------------------------------------------------------------
    let caption = "Top 10 values are in light red. Bottom 10 values are in light green.";

    // Add a worksheet to the workbook.
    let worksheet = workbook.add_worksheet();

    // Write the caption.
    worksheet.write(0, 1, caption)?;

    // Write the worksheet data.
    worksheet.write_row_matrix(2, 1, data)?;

    // Set the column widths for clarity.
    worksheet.set_column_range_width(1, 10, 6)?;

    // Write a conditional format over a range.
    let conditional_format = ConditionalFormatTop::new()
        .set_rule(rust_xlsxwriter::ConditionalFormatTopRule::Top(10))
        .set_format(&format1);

    worksheet.add_conditional_format(2, 1, 11, 10, &conditional_format)?;

    // Also show the bottom values in the same range.
    let conditional_format = ConditionalFormatTop::new()
        .set_rule(rust_xlsxwriter::ConditionalFormatTopRule::Bottom(10))
        .set_format(&format2);

    worksheet.add_conditional_format(2, 1, 11, 10, &conditional_format)?;

    // -----------------------------------------------------------------------
    // Worksheet 6. Cell conditional formatting in non-contiguous range.
    // -----------------------------------------------------------------------
    let caption = "Cells with values >= 50 are in light red. Values < 50 are in light green. Non-contiguous ranges.";

    // Add a worksheet to the workbook.
    let worksheet = workbook.add_worksheet();

    // Write the caption.
    worksheet.write(0, 1, caption)?;

    // Write the worksheet data.
    worksheet.write_row_matrix(2, 1, data)?;

    // Set the column widths for clarity.
    worksheet.set_column_range_width(1, 10, 6)?;

    // Write a conditional format over a non-contiguous range.
    let conditional_format = ConditionalFormatCell::new()
        .set_rule(ConditionalFormatCellRule::GreaterThanOrEqualTo(50))
        .set_multi_range("B3:D6 I3:K6 B9:D12 I9:K12")
        .set_format(&format1);

    worksheet.add_conditional_format(2, 1, 11, 10, &conditional_format)?;

    // Write another conditional format over the same range.
    let conditional_format = ConditionalFormatCell::new()
        .set_rule(ConditionalFormatCellRule::LessThan(50))
        .set_multi_range("B3:D6 I3:K6 B9:D12 I9:K12")
        .set_format(&format2);

    worksheet.add_conditional_format(2, 1, 11, 10, &conditional_format)?;

    // -----------------------------------------------------------------------
    // Worksheet 7. Formula conditional formatting.
    // -----------------------------------------------------------------------
    let caption = "Even numbered cells are in light green. Odd numbered cells are in light red.";

    // Add a worksheet to the workbook.
    let worksheet = workbook.add_worksheet();

    // Write the caption.
    worksheet.write(0, 1, caption)?;

    // Write the worksheet data.
    worksheet.write_row_matrix(2, 1, data)?;

    // Set the column widths for clarity.
    worksheet.set_column_range_width(1, 10, 6)?;

    // Write a conditional format over a range.
    let conditional_format = ConditionalFormatFormula::new()
        .set_rule("=ISODD(B3)")
        .set_format(&format1);

    worksheet.add_conditional_format(2, 1, 11, 10, &conditional_format)?;

    // Write another conditional format over the same range.
    let conditional_format = ConditionalFormatFormula::new()
        .set_rule("=ISEVEN(B3)")
        .set_format(&format2);

    worksheet.add_conditional_format(2, 1, 11, 10, &conditional_format)?;

    // -----------------------------------------------------------------------
    // Worksheet 8. Text style conditional formats.
    // -----------------------------------------------------------------------
    let caption =
        "Column A shows words that contain the sub-word 'rust'. Column C shows words that start/end with 't'";

    // Add a worksheet to the workbook.
    let worksheet = workbook.add_worksheet();

    // Write the caption.
    worksheet.write(0, 0, caption)?;

    // Add some sample data.
    let word_list = [
        "apocrustic",
        "burstwort",
        "cloudburst",
        "crustification",
        "distrustfulness",
        "laurustine",
        "outburst",
        "rusticism",
        "thunderburst",
        "trustee",
        "trustworthiness",
        "unburstableness",
        "unfrustratable",
    ];
    worksheet.write_column(1, 0, word_list)?;
    worksheet.write_column(1, 2, word_list)?;

    // Set the column widths for clarity.
    worksheet.set_column_width(0, 20)?;
    worksheet.set_column_width(2, 20)?;

    // Write a text "containing" conditional format over a range.
    let conditional_format = ConditionalFormatText::new()
        .set_rule(ConditionalFormatTextRule::Contains("rust".to_string()))
        .set_format(&format2);

    worksheet.add_conditional_format(1, 0, 13, 0, &conditional_format)?;

    // Write a text "not containing" conditional format over the same range.
    let conditional_format = ConditionalFormatText::new()
        .set_rule(ConditionalFormatTextRule::DoesNotContain(
            "rust".to_string(),
        ))
        .set_format(&format1);

    worksheet.add_conditional_format(1, 0, 13, 0, &conditional_format)?;

    // Write a text "begins with" conditional format over a range.
    let conditional_format = ConditionalFormatText::new()
        .set_rule(ConditionalFormatTextRule::BeginsWith("t".to_string()))
        .set_format(&format2);

    worksheet.add_conditional_format(1, 2, 13, 2, &conditional_format)?;

    // Write a text "ends with" conditional format over the same range.
    let conditional_format = ConditionalFormatText::new()
        .set_rule(ConditionalFormatTextRule::EndsWith("t".to_string()))
        .set_format(&format1);

    worksheet.add_conditional_format(1, 2, 13, 2, &conditional_format)?;

    // -----------------------------------------------------------------------
    // Worksheet 9. Examples of 2 color scale conditional formats.
    // -----------------------------------------------------------------------
    let caption = "Examples of 2 color scale conditional formats";

    // Add a worksheet to the workbook.
    let worksheet = workbook.add_worksheet();

    // Write the caption.
    worksheet.write(0, 1, caption)?;

    // Write the worksheet data.
    let data = [1, 2, 3, 4, 5, 6, 7, 8, 9, 10];
    worksheet.write_column(2, 1, data)?;
    worksheet.write_column(2, 3, data)?;
    worksheet.write_column(2, 5, data)?;
    worksheet.write_column(2, 7, data)?;
    worksheet.write_column(2, 9, data)?;
    worksheet.write_column(2, 11, data)?;

    // Set the column widths for clarity.
    worksheet.set_column_range_width(0, 12, 6)?;

    // Write 2 color scale formats with standard Excel colors.
    let conditional_format = ConditionalFormat2ColorScale::new()
        .set_minimum_color("F8696B")
        .set_maximum_color("FCFCFF");

    worksheet.add_conditional_format(2, 1, 11, 1, &conditional_format)?;

    let conditional_format = ConditionalFormat2ColorScale::new()
        .set_minimum_color("FCFCFF")
        .set_maximum_color("F8696B");

    worksheet.add_conditional_format(2, 3, 11, 3, &conditional_format)?;

    let conditional_format = ConditionalFormat2ColorScale::new()
        .set_minimum_color("FCFCFF")
        .set_maximum_color("63BE7B");

    worksheet.add_conditional_format(2, 5, 11, 5, &conditional_format)?;

    let conditional_format = ConditionalFormat2ColorScale::new()
        .set_minimum_color("63BE7B")
        .set_maximum_color("FCFCFF");

    worksheet.add_conditional_format(2, 7, 11, 7, &conditional_format)?;

    let conditional_format = ConditionalFormat2ColorScale::new()
        .set_minimum_color("FFEF9C")
        .set_maximum_color("63BE7B");

    worksheet.add_conditional_format(2, 9, 11, 9, &conditional_format)?;

    let conditional_format = ConditionalFormat2ColorScale::new()
        .set_minimum_color("63BE7B")
        .set_maximum_color("FFEF9C");

    worksheet.add_conditional_format(2, 11, 11, 11, &conditional_format)?;

    // -----------------------------------------------------------------------
    // Worksheet 10. Examples of 3 color scale conditional formats.
    // -----------------------------------------------------------------------
    let caption = "Examples of 3 color scale conditional formats";

    // Add a worksheet to the workbook.
    let worksheet = workbook.add_worksheet();

    // Write the caption.
    worksheet.write(0, 1, caption)?;

    // Write the worksheet data.
    let data = [1, 2, 3, 4, 5, 6, 7, 8, 9, 10];
    worksheet.write_column(2, 1, data)?;
    worksheet.write_column(2, 3, data)?;
    worksheet.write_column(2, 5, data)?;
    worksheet.write_column(2, 7, data)?;
    worksheet.write_column(2, 9, data)?;
    worksheet.write_column(2, 11, data)?;

    // Set the column widths for clarity.
    worksheet.set_column_range_width(0, 12, 6)?;

    // Write 3 color scale formats with standard Excel colors.
    let conditional_format = ConditionalFormat3ColorScale::new()
        .set_minimum_color("F8696B")
        .set_midpoint_color("FFEB84")
        .set_maximum_color("63BE7B");

    worksheet.add_conditional_format(2, 1, 11, 1, &conditional_format)?;

    let conditional_format = ConditionalFormat3ColorScale::new()
        .set_minimum_color("63BE7B")
        .set_midpoint_color("FFEB84")
        .set_maximum_color("F8696B");

    worksheet.add_conditional_format(2, 3, 11, 3, &conditional_format)?;

    let conditional_format = ConditionalFormat3ColorScale::new()
        .set_minimum_color("F8696B")
        .set_midpoint_color("FCFCFF")
        .set_maximum_color("63BE7B");

    worksheet.add_conditional_format(2, 5, 11, 5, &conditional_format)?;

    let conditional_format = ConditionalFormat3ColorScale::new()
        .set_minimum_color("63BE7B")
        .set_midpoint_color("FCFCFF")
        .set_maximum_color("F8696B");

    worksheet.add_conditional_format(2, 7, 11, 7, &conditional_format)?;

    let conditional_format = ConditionalFormat3ColorScale::new()
        .set_minimum_color("F8696B")
        .set_midpoint_color("FCFCFF")
        .set_maximum_color("5A8AC6");

    worksheet.add_conditional_format(2, 9, 11, 9, &conditional_format)?;

    let conditional_format = ConditionalFormat3ColorScale::new()
        .set_minimum_color("5A8AC6")
        .set_midpoint_color("FCFCFF")
        .set_maximum_color("F8696B");

    worksheet.add_conditional_format(2, 11, 11, 11, &conditional_format)?;

    // -----------------------------------------------------------------------
    // Worksheet 11. Examples of data bars.
    // -----------------------------------------------------------------------
    let caption = "Examples of data bars";

    // Add a worksheet to the workbook.
    let worksheet = workbook.add_worksheet();

    // Write the caption.
    worksheet.write_with_format(0, 1, caption, &bold)?;
    worksheet.write(1, 1, "Default")?;
    worksheet.write(1, 3, "Default negative")?;
    worksheet.write(1, 5, "User color")?;
    worksheet.write(1, 7, "Changed direction")?;

    // Write the worksheet data.
    let data1 = [1, 2, 3, 4, 5, 6, 7, 8, 9, 10];
    let data2 = [6, 4, 2, -2, -4, -6, -4, -2, 2, 4];
    worksheet.write_column(2, 1, data1)?;
    worksheet.write_column(2, 3, data2)?;
    worksheet.write_column(2, 5, data1)?;
    worksheet.write_column(2, 7, data1)?;

    // Write a standard Excel data bar.
    let conditional_format = ConditionalFormatDataBar::new();

    worksheet.add_conditional_format(2, 1, 11, 1, &conditional_format)?;

    // Write a standard Excel data bar with negative data
    let conditional_format = ConditionalFormatDataBar::new();

    worksheet.add_conditional_format(2, 3, 11, 3, &conditional_format)?;

    // Write a data bar with a user defined fill color.
    let conditional_format = ConditionalFormatDataBar::new().set_fill_color("009933");

    worksheet.add_conditional_format(2, 5, 11, 5, &conditional_format)?;

    // Write a data bar with the direction changed.
    let conditional_format = ConditionalFormatDataBar::new()
        .set_direction(ConditionalFormatDataBarDirection::RightToLeft);

    worksheet.add_conditional_format(2, 7, 11, 7, &conditional_format)?;

    // -----------------------------------------------------------------------
    // Worksheet 12. Examples of icon style conditional formats.
    // -----------------------------------------------------------------------
    let caption = "Examples of icon style conditional formats.";

    // Add a worksheet to the workbook.
    let worksheet = workbook.add_worksheet();

    // Write the caption.
    worksheet.write_with_format(0, 0, caption, &bold)?;
    worksheet.write_with_format(1, 0, "Three Traffic lights - Green is highest", &indent)?;
    worksheet.write_with_format(2, 0, "Reversed - Red is highest", &indent)?;
    worksheet.write_with_format(3, 0, "Icons only - The number data is hidden", &indent)?;

    worksheet.write_with_format(4, 0, "Other three-five icon examples", &bold)?;
    worksheet.write_with_format(5, 0, "Three arrows", &indent)?;
    worksheet.write_with_format(6, 0, "Three symbols", &indent)?;
    worksheet.write_with_format(7, 0, "Three stars", &indent)?;

    worksheet.write_with_format(8, 0, "Four arrows", &indent)?;
    worksheet.write_with_format(9, 0, "Four circles - Red (highest) to Black", &indent)?;
    worksheet.write_with_format(10, 0, "Four rating histograms", &indent)?;

    worksheet.write_with_format(11, 0, "Five arrows", &indent)?;
    worksheet.write_with_format(12, 0, "Five rating histograms", &indent)?;
    worksheet.write_with_format(13, 0, "Five rating quadrants", &indent)?;

    // Set the column width for clarity.
    worksheet.set_column_width(0, 35)?;

    // Write the worksheet data.
    worksheet.write_row(1, 1, [1, 2, 3])?;
    worksheet.write_row(2, 1, [1, 2, 3])?;
    worksheet.write_row(3, 1, [1, 2, 3])?;

    worksheet.write_row(5, 1, [1, 2, 3])?;
    worksheet.write_row(6, 1, [1, 2, 3])?;
    worksheet.write_row(7, 1, [1, 2, 3])?;

    worksheet.write_row(8, 1, [1, 2, 3, 4])?;
    worksheet.write_row(9, 1, [1, 2, 3, 4])?;
    worksheet.write_row(10, 1, [1, 2, 3, 4])?;

    worksheet.write_row(11, 1, [1, 2, 3, 4, 5])?;
    worksheet.write_row(12, 1, [1, 2, 3, 4, 5])?;
    worksheet.write_row(13, 1, [1, 2, 3, 4, 5])?;

    // Three Traffic lights - Green is highest.
    let conditional_format = ConditionalFormatIconSet::new()
        .set_icon_type(ConditionalFormatIconType::ThreeTrafficLights);

    worksheet.add_conditional_format(1, 1, 1, 3, &conditional_format)?;

    // Reversed - Red is highest.
    let conditional_format = ConditionalFormatIconSet::new()
        .set_icon_type(ConditionalFormatIconType::ThreeTrafficLights)
        .reverse_icons(true);

    worksheet.add_conditional_format(2, 1, 2, 3, &conditional_format)?;

    // Icons only - The number data is hidden.
    let conditional_format = ConditionalFormatIconSet::new()
        .set_icon_type(ConditionalFormatIconType::ThreeTrafficLights)
        .show_icons_only(true);

    worksheet.add_conditional_format(3, 1, 3, 3, &conditional_format)?;

    // Three arrows.
    let conditional_format =
        ConditionalFormatIconSet::new().set_icon_type(ConditionalFormatIconType::ThreeArrows);

    worksheet.add_conditional_format(5, 1, 5, 3, &conditional_format)?;

    // Three symbols.
    let conditional_format = ConditionalFormatIconSet::new()
        .set_icon_type(ConditionalFormatIconType::ThreeSymbolsCircled);

    worksheet.add_conditional_format(6, 1, 6, 3, &conditional_format)?;

    // Three stars.
    let conditional_format =
        ConditionalFormatIconSet::new().set_icon_type(ConditionalFormatIconType::ThreeStars);

    worksheet.add_conditional_format(7, 1, 7, 3, &conditional_format)?;

    // Four Arrows.
    let conditional_format =
        ConditionalFormatIconSet::new().set_icon_type(ConditionalFormatIconType::FourArrows);

    worksheet.add_conditional_format(8, 1, 8, 4, &conditional_format)?;

    // Four circles - Red (highest) to Black (lowest).
    let conditional_format =
        ConditionalFormatIconSet::new().set_icon_type(ConditionalFormatIconType::FourRedToBlack);

    worksheet.add_conditional_format(9, 1, 9, 4, &conditional_format)?;

    // Four rating histograms.
    let conditional_format =
        ConditionalFormatIconSet::new().set_icon_type(ConditionalFormatIconType::FourHistograms);

    worksheet.add_conditional_format(10, 1, 10, 4, &conditional_format)?;

    // Four Arrows.
    let conditional_format =
        ConditionalFormatIconSet::new().set_icon_type(ConditionalFormatIconType::FiveArrows);

    worksheet.add_conditional_format(11, 1, 11, 5, &conditional_format)?;

    // Four rating histograms.
    let conditional_format =
        ConditionalFormatIconSet::new().set_icon_type(ConditionalFormatIconType::FiveHistograms);

    worksheet.add_conditional_format(12, 1, 12, 5, &conditional_format)?;

    // Four rating quadrants.
    let conditional_format =
        ConditionalFormatIconSet::new().set_icon_type(ConditionalFormatIconType::FiveQuadrants);

    worksheet.add_conditional_format(13, 1, 13, 5, &conditional_format)?;

    // -----------------------------------------------------------------------
    // Save and close the file.
    // -----------------------------------------------------------------------
    workbook.save("conditional_formats.xlsx")?;

    Ok(())
}
Example 9. Examples of 2 color scale conditional formats.
See ConditionalFormat2ColorScale for more details.
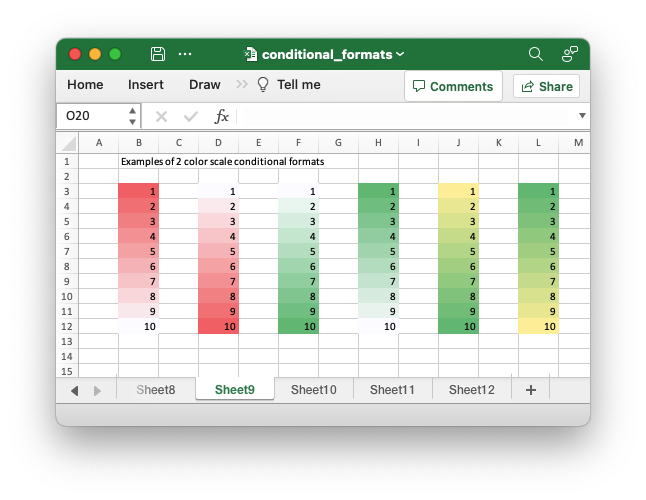
Code to generate the above example:
// SPDX-License-Identifier: MIT OR Apache-2.0
//
// Copyright 2022-2026, John McNamara, jmcnamara@cpan.org

//! Example of how to add conditional formatting to a worksheet using the
//! `rust_xlsxwriter` library.
//!
//! Conditional formatting allows you to apply a format to a cell or a range of
//! cells based on user defined rule.

use rust_xlsxwriter::{
    ConditionalFormat2ColorScale, ConditionalFormat3ColorScale, ConditionalFormatAverage,
    ConditionalFormatAverageRule, ConditionalFormatCell, ConditionalFormatCellRule,
    ConditionalFormatDataBar, ConditionalFormatDataBarDirection, ConditionalFormatDuplicate,
    ConditionalFormatFormula, ConditionalFormatIconSet, ConditionalFormatIconType,
    ConditionalFormatText, ConditionalFormatTextRule, ConditionalFormatTop, Format, Workbook,
    XlsxError,
};

fn main() -> Result<(), XlsxError> {
    // Create a new Excel file object.
    let mut workbook = Workbook::new();

    // Add a format. Light red fill with dark red text.
    let format1 = Format::new()
        .set_font_color("9C0006")
        .set_background_color("FFC7CE");

    // Add a format. Green fill with dark green text.
    let format2 = Format::new()
        .set_font_color("006100")
        .set_background_color("C6EFCE");

    // Add a format for headers.
    let bold = Format::new().set_bold();

    // Add a format for descriptions.
    let indent = Format::new().set_indent(2);

    // some sample data to run the conditional formatting against.
    let data = [
        [34, 72, 38, 30, 75, 48, 75, 66, 84, 86],
        [6, 24, 1, 84, 54, 62, 60, 3, 26, 59],
        [28, 79, 97, 13, 85, 93, 93, 22, 5, 14],
        [27, 71, 40, 17, 18, 79, 90, 93, 29, 47],
        [88, 25, 33, 23, 67, 1, 59, 79, 47, 36],
        [24, 100, 20, 88, 29, 33, 38, 54, 54, 88],
        [6, 57, 88, 28, 10, 26, 37, 7, 41, 48],
        [52, 78, 1, 96, 26, 45, 47, 33, 96, 36],
        [60, 54, 81, 66, 81, 90, 80, 93, 12, 55],
        [70, 5, 46, 14, 71, 19, 66, 36, 41, 21],
    ];

    // -----------------------------------------------------------------------
    // Worksheet 1. Cell conditional formatting.
    // -----------------------------------------------------------------------
    let caption = "Cells with values >= 50 are in light red. Values < 50 are in light green.";

    // Add a worksheet to the workbook.
    let worksheet = workbook.add_worksheet();

    // Write the caption.
    worksheet.write(0, 1, caption)?;

    // Write the worksheet data.
    worksheet.write_row_matrix(2, 1, data)?;

    // Set the column widths for clarity.
    worksheet.set_column_range_width(1, 10, 6)?;

    // Write a conditional format over a range.
    let conditional_format = ConditionalFormatCell::new()
        .set_rule(ConditionalFormatCellRule::GreaterThanOrEqualTo(50))
        .set_format(&format1);

    worksheet.add_conditional_format(2, 1, 11, 10, &conditional_format)?;

    // Write another conditional format over the same range.
    let conditional_format = ConditionalFormatCell::new()
        .set_rule(ConditionalFormatCellRule::LessThan(50))
        .set_format(&format2);

    worksheet.add_conditional_format(2, 1, 11, 10, &conditional_format)?;

    // -----------------------------------------------------------------------
    // Worksheet 2. Cell conditional formatting with between ranges.
    // -----------------------------------------------------------------------
    let caption =
        "Values between 30 and 70 are in light red. Values outside that range are in light green.";

    // Add a worksheet to the workbook.
    let worksheet = workbook.add_worksheet();

    // Write the caption.
    worksheet.write(0, 1, caption)?;

    // Write the worksheet data.
    worksheet.write_row_matrix(2, 1, data)?;

    // Set the column widths for clarity.
    worksheet.set_column_range_width(1, 10, 6)?;

    // Write a conditional format over a range.
    let conditional_format = ConditionalFormatCell::new()
        .set_rule(ConditionalFormatCellRule::Between(30, 70))
        .set_format(&format1);

    worksheet.add_conditional_format(2, 1, 11, 10, &conditional_format)?;

    // Write another conditional format over the same range.
    let conditional_format = ConditionalFormatCell::new()
        .set_rule(ConditionalFormatCellRule::NotBetween(30, 70))
        .set_format(&format2);

    worksheet.add_conditional_format(2, 1, 11, 10, &conditional_format)?;

    // -----------------------------------------------------------------------
    // Worksheet 3. Duplicate and Unique conditional formats.
    // -----------------------------------------------------------------------
    let caption = "Duplicate values are in light red. Unique values are in light green.";

    // Add a worksheet to the workbook.
    let worksheet = workbook.add_worksheet();

    // Write the caption.
    worksheet.write(0, 1, caption)?;

    // Write the worksheet data.
    worksheet.write_row_matrix(2, 1, data)?;

    // Set the column widths for clarity.
    worksheet.set_column_range_width(1, 10, 6)?;

    // Write a conditional format over a range.
    let conditional_format = ConditionalFormatDuplicate::new().set_format(&format1);

    worksheet.add_conditional_format(2, 1, 11, 10, &conditional_format)?;

    // Invert the duplicate conditional format to show unique values in the
    // same range.
    let conditional_format = ConditionalFormatDuplicate::new()
        .invert()
        .set_format(&format2);

    worksheet.add_conditional_format(2, 1, 11, 10, &conditional_format)?;

    // -----------------------------------------------------------------------
    // Worksheet 4. Above and Below Average conditional formats.
    // -----------------------------------------------------------------------
    let caption = "Above average values are in light red. Below average values are in light green.";

    // Add a worksheet to the workbook.
    let worksheet = workbook.add_worksheet();

    // Write the caption.
    worksheet.write(0, 1, caption)?;

    // Write the worksheet data.
    worksheet.write_row_matrix(2, 1, data)?;

    // Set the column widths for clarity.
    worksheet.set_column_range_width(1, 10, 6)?;

    // Write a conditional format over a range. The default criteria is Above Average.
    let conditional_format = ConditionalFormatAverage::new().set_format(&format1);

    worksheet.add_conditional_format(2, 1, 11, 10, &conditional_format)?;

    // Write another conditional format over the same range.
    let conditional_format = ConditionalFormatAverage::new()
        .set_rule(ConditionalFormatAverageRule::BelowAverage)
        .set_format(&format2);

    worksheet.add_conditional_format(2, 1, 11, 10, &conditional_format)?;

    // -----------------------------------------------------------------------
    // Worksheet 5. Top and Bottom range conditional formats.
    // -----------------------------------------------------------------------
    let caption = "Top 10 values are in light red. Bottom 10 values are in light green.";

    // Add a worksheet to the workbook.
    let worksheet = workbook.add_worksheet();

    // Write the caption.
    worksheet.write(0, 1, caption)?;

    // Write the worksheet data.
    worksheet.write_row_matrix(2, 1, data)?;

    // Set the column widths for clarity.
    worksheet.set_column_range_width(1, 10, 6)?;

    // Write a conditional format over a range.
    let conditional_format = ConditionalFormatTop::new()
        .set_rule(rust_xlsxwriter::ConditionalFormatTopRule::Top(10))
        .set_format(&format1);

    worksheet.add_conditional_format(2, 1, 11, 10, &conditional_format)?;

    // Also show the bottom values in the same range.
    let conditional_format = ConditionalFormatTop::new()
        .set_rule(rust_xlsxwriter::ConditionalFormatTopRule::Bottom(10))
        .set_format(&format2);

    worksheet.add_conditional_format(2, 1, 11, 10, &conditional_format)?;

    // -----------------------------------------------------------------------
    // Worksheet 6. Cell conditional formatting in non-contiguous range.
    // -----------------------------------------------------------------------
    let caption = "Cells with values >= 50 are in light red. Values < 50 are in light green. Non-contiguous ranges.";

    // Add a worksheet to the workbook.
    let worksheet = workbook.add_worksheet();

    // Write the caption.
    worksheet.write(0, 1, caption)?;

    // Write the worksheet data.
    worksheet.write_row_matrix(2, 1, data)?;

    // Set the column widths for clarity.
    worksheet.set_column_range_width(1, 10, 6)?;

    // Write a conditional format over a non-contiguous range.
    let conditional_format = ConditionalFormatCell::new()
        .set_rule(ConditionalFormatCellRule::GreaterThanOrEqualTo(50))
        .set_multi_range("B3:D6 I3:K6 B9:D12 I9:K12")
        .set_format(&format1);

    worksheet.add_conditional_format(2, 1, 11, 10, &conditional_format)?;

    // Write another conditional format over the same range.
    let conditional_format = ConditionalFormatCell::new()
        .set_rule(ConditionalFormatCellRule::LessThan(50))
        .set_multi_range("B3:D6 I3:K6 B9:D12 I9:K12")
        .set_format(&format2);

    worksheet.add_conditional_format(2, 1, 11, 10, &conditional_format)?;

    // -----------------------------------------------------------------------
    // Worksheet 7. Formula conditional formatting.
    // -----------------------------------------------------------------------
    let caption = "Even numbered cells are in light green. Odd numbered cells are in light red.";

    // Add a worksheet to the workbook.
    let worksheet = workbook.add_worksheet();

    // Write the caption.
    worksheet.write(0, 1, caption)?;

    // Write the worksheet data.
    worksheet.write_row_matrix(2, 1, data)?;

    // Set the column widths for clarity.
    worksheet.set_column_range_width(1, 10, 6)?;

    // Write a conditional format over a range.
    let conditional_format = ConditionalFormatFormula::new()
        .set_rule("=ISODD(B3)")
        .set_format(&format1);

    worksheet.add_conditional_format(2, 1, 11, 10, &conditional_format)?;

    // Write another conditional format over the same range.
    let conditional_format = ConditionalFormatFormula::new()
        .set_rule("=ISEVEN(B3)")
        .set_format(&format2);

    worksheet.add_conditional_format(2, 1, 11, 10, &conditional_format)?;

    // -----------------------------------------------------------------------
    // Worksheet 8. Text style conditional formats.
    // -----------------------------------------------------------------------
    let caption =
        "Column A shows words that contain the sub-word 'rust'. Column C shows words that start/end with 't'";

    // Add a worksheet to the workbook.
    let worksheet = workbook.add_worksheet();

    // Write the caption.
    worksheet.write(0, 0, caption)?;

    // Add some sample data.
    let word_list = [
        "apocrustic",
        "burstwort",
        "cloudburst",
        "crustification",
        "distrustfulness",
        "laurustine",
        "outburst",
        "rusticism",
        "thunderburst",
        "trustee",
        "trustworthiness",
        "unburstableness",
        "unfrustratable",
    ];
    worksheet.write_column(1, 0, word_list)?;
    worksheet.write_column(1, 2, word_list)?;

    // Set the column widths for clarity.
    worksheet.set_column_width(0, 20)?;
    worksheet.set_column_width(2, 20)?;

    // Write a text "containing" conditional format over a range.
    let conditional_format = ConditionalFormatText::new()
        .set_rule(ConditionalFormatTextRule::Contains("rust".to_string()))
        .set_format(&format2);

    worksheet.add_conditional_format(1, 0, 13, 0, &conditional_format)?;

    // Write a text "not containing" conditional format over the same range.
    let conditional_format = ConditionalFormatText::new()
        .set_rule(ConditionalFormatTextRule::DoesNotContain(
            "rust".to_string(),
        ))
        .set_format(&format1);

    worksheet.add_conditional_format(1, 0, 13, 0, &conditional_format)?;

    // Write a text "begins with" conditional format over a range.
    let conditional_format = ConditionalFormatText::new()
        .set_rule(ConditionalFormatTextRule::BeginsWith("t".to_string()))
        .set_format(&format2);

    worksheet.add_conditional_format(1, 2, 13, 2, &conditional_format)?;

    // Write a text "ends with" conditional format over the same range.
    let conditional_format = ConditionalFormatText::new()
        .set_rule(ConditionalFormatTextRule::EndsWith("t".to_string()))
        .set_format(&format1);

    worksheet.add_conditional_format(1, 2, 13, 2, &conditional_format)?;

    // -----------------------------------------------------------------------
    // Worksheet 9. Examples of 2 color scale conditional formats.
    // -----------------------------------------------------------------------
    let caption = "Examples of 2 color scale conditional formats";

    // Add a worksheet to the workbook.
    let worksheet = workbook.add_worksheet();

    // Write the caption.
    worksheet.write(0, 1, caption)?;

    // Write the worksheet data.
    let data = [1, 2, 3, 4, 5, 6, 7, 8, 9, 10];
    worksheet.write_column(2, 1, data)?;
    worksheet.write_column(2, 3, data)?;
    worksheet.write_column(2, 5, data)?;
    worksheet.write_column(2, 7, data)?;
    worksheet.write_column(2, 9, data)?;
    worksheet.write_column(2, 11, data)?;

    // Set the column widths for clarity.
    worksheet.set_column_range_width(0, 12, 6)?;

    // Write 2 color scale formats with standard Excel colors.
    let conditional_format = ConditionalFormat2ColorScale::new()
        .set_minimum_color("F8696B")
        .set_maximum_color("FCFCFF");

    worksheet.add_conditional_format(2, 1, 11, 1, &conditional_format)?;

    let conditional_format = ConditionalFormat2ColorScale::new()
        .set_minimum_color("FCFCFF")
        .set_maximum_color("F8696B");

    worksheet.add_conditional_format(2, 3, 11, 3, &conditional_format)?;

    let conditional_format = ConditionalFormat2ColorScale::new()
        .set_minimum_color("FCFCFF")
        .set_maximum_color("63BE7B");

    worksheet.add_conditional_format(2, 5, 11, 5, &conditional_format)?;

    let conditional_format = ConditionalFormat2ColorScale::new()
        .set_minimum_color("63BE7B")
        .set_maximum_color("FCFCFF");

    worksheet.add_conditional_format(2, 7, 11, 7, &conditional_format)?;

    let conditional_format = ConditionalFormat2ColorScale::new()
        .set_minimum_color("FFEF9C")
        .set_maximum_color("63BE7B");

    worksheet.add_conditional_format(2, 9, 11, 9, &conditional_format)?;

    let conditional_format = ConditionalFormat2ColorScale::new()
        .set_minimum_color("63BE7B")
        .set_maximum_color("FFEF9C");

    worksheet.add_conditional_format(2, 11, 11, 11, &conditional_format)?;

    // -----------------------------------------------------------------------
    // Worksheet 10. Examples of 3 color scale conditional formats.
    // -----------------------------------------------------------------------
    let caption = "Examples of 3 color scale conditional formats";

    // Add a worksheet to the workbook.
    let worksheet = workbook.add_worksheet();

    // Write the caption.
    worksheet.write(0, 1, caption)?;

    // Write the worksheet data.
    let data = [1, 2, 3, 4, 5, 6, 7, 8, 9, 10];
    worksheet.write_column(2, 1, data)?;
    worksheet.write_column(2, 3, data)?;
    worksheet.write_column(2, 5, data)?;
    worksheet.write_column(2, 7, data)?;
    worksheet.write_column(2, 9, data)?;
    worksheet.write_column(2, 11, data)?;

    // Set the column widths for clarity.
    worksheet.set_column_range_width(0, 12, 6)?;

    // Write 3 color scale formats with standard Excel colors.
    let conditional_format = ConditionalFormat3ColorScale::new()
        .set_minimum_color("F8696B")
        .set_midpoint_color("FFEB84")
        .set_maximum_color("63BE7B");

    worksheet.add_conditional_format(2, 1, 11, 1, &conditional_format)?;

    let conditional_format = ConditionalFormat3ColorScale::new()
        .set_minimum_color("63BE7B")
        .set_midpoint_color("FFEB84")
        .set_maximum_color("F8696B");

    worksheet.add_conditional_format(2, 3, 11, 3, &conditional_format)?;

    let conditional_format = ConditionalFormat3ColorScale::new()
        .set_minimum_color("F8696B")
        .set_midpoint_color("FCFCFF")
        .set_maximum_color("63BE7B");

    worksheet.add_conditional_format(2, 5, 11, 5, &conditional_format)?;

    let conditional_format = ConditionalFormat3ColorScale::new()
        .set_minimum_color("63BE7B")
        .set_midpoint_color("FCFCFF")
        .set_maximum_color("F8696B");

    worksheet.add_conditional_format(2, 7, 11, 7, &conditional_format)?;

    let conditional_format = ConditionalFormat3ColorScale::new()
        .set_minimum_color("F8696B")
        .set_midpoint_color("FCFCFF")
        .set_maximum_color("5A8AC6");

    worksheet.add_conditional_format(2, 9, 11, 9, &conditional_format)?;

    let conditional_format = ConditionalFormat3ColorScale::new()
        .set_minimum_color("5A8AC6")
        .set_midpoint_color("FCFCFF")
        .set_maximum_color("F8696B");

    worksheet.add_conditional_format(2, 11, 11, 11, &conditional_format)?;

    // -----------------------------------------------------------------------
    // Worksheet 11. Examples of data bars.
    // -----------------------------------------------------------------------
    let caption = "Examples of data bars";

    // Add a worksheet to the workbook.
    let worksheet = workbook.add_worksheet();

    // Write the caption.
    worksheet.write_with_format(0, 1, caption, &bold)?;
    worksheet.write(1, 1, "Default")?;
    worksheet.write(1, 3, "Default negative")?;
    worksheet.write(1, 5, "User color")?;
    worksheet.write(1, 7, "Changed direction")?;

    // Write the worksheet data.
    let data1 = [1, 2, 3, 4, 5, 6, 7, 8, 9, 10];
    let data2 = [6, 4, 2, -2, -4, -6, -4, -2, 2, 4];
    worksheet.write_column(2, 1, data1)?;
    worksheet.write_column(2, 3, data2)?;
    worksheet.write_column(2, 5, data1)?;
    worksheet.write_column(2, 7, data1)?;

    // Write a standard Excel data bar.
    let conditional_format = ConditionalFormatDataBar::new();

    worksheet.add_conditional_format(2, 1, 11, 1, &conditional_format)?;

    // Write a standard Excel data bar with negative data
    let conditional_format = ConditionalFormatDataBar::new();

    worksheet.add_conditional_format(2, 3, 11, 3, &conditional_format)?;

    // Write a data bar with a user defined fill color.
    let conditional_format = ConditionalFormatDataBar::new().set_fill_color("009933");

    worksheet.add_conditional_format(2, 5, 11, 5, &conditional_format)?;

    // Write a data bar with the direction changed.
    let conditional_format = ConditionalFormatDataBar::new()
        .set_direction(ConditionalFormatDataBarDirection::RightToLeft);

    worksheet.add_conditional_format(2, 7, 11, 7, &conditional_format)?;

    // -----------------------------------------------------------------------
    // Worksheet 12. Examples of icon style conditional formats.
    // -----------------------------------------------------------------------
    let caption = "Examples of icon style conditional formats.";

    // Add a worksheet to the workbook.
    let worksheet = workbook.add_worksheet();

    // Write the caption.
    worksheet.write_with_format(0, 0, caption, &bold)?;
    worksheet.write_with_format(1, 0, "Three Traffic lights - Green is highest", &indent)?;
    worksheet.write_with_format(2, 0, "Reversed - Red is highest", &indent)?;
    worksheet.write_with_format(3, 0, "Icons only - The number data is hidden", &indent)?;

    worksheet.write_with_format(4, 0, "Other three-five icon examples", &bold)?;
    worksheet.write_with_format(5, 0, "Three arrows", &indent)?;
    worksheet.write_with_format(6, 0, "Three symbols", &indent)?;
    worksheet.write_with_format(7, 0, "Three stars", &indent)?;

    worksheet.write_with_format(8, 0, "Four arrows", &indent)?;
    worksheet.write_with_format(9, 0, "Four circles - Red (highest) to Black", &indent)?;
    worksheet.write_with_format(10, 0, "Four rating histograms", &indent)?;

    worksheet.write_with_format(11, 0, "Five arrows", &indent)?;
    worksheet.write_with_format(12, 0, "Five rating histograms", &indent)?;
    worksheet.write_with_format(13, 0, "Five rating quadrants", &indent)?;

    // Set the column width for clarity.
    worksheet.set_column_width(0, 35)?;

    // Write the worksheet data.
    worksheet.write_row(1, 1, [1, 2, 3])?;
    worksheet.write_row(2, 1, [1, 2, 3])?;
    worksheet.write_row(3, 1, [1, 2, 3])?;

    worksheet.write_row(5, 1, [1, 2, 3])?;
    worksheet.write_row(6, 1, [1, 2, 3])?;
    worksheet.write_row(7, 1, [1, 2, 3])?;

    worksheet.write_row(8, 1, [1, 2, 3, 4])?;
    worksheet.write_row(9, 1, [1, 2, 3, 4])?;
    worksheet.write_row(10, 1, [1, 2, 3, 4])?;

    worksheet.write_row(11, 1, [1, 2, 3, 4, 5])?;
    worksheet.write_row(12, 1, [1, 2, 3, 4, 5])?;
    worksheet.write_row(13, 1, [1, 2, 3, 4, 5])?;

    // Three Traffic lights - Green is highest.
    let conditional_format = ConditionalFormatIconSet::new()
        .set_icon_type(ConditionalFormatIconType::ThreeTrafficLights);

    worksheet.add_conditional_format(1, 1, 1, 3, &conditional_format)?;

    // Reversed - Red is highest.
    let conditional_format = ConditionalFormatIconSet::new()
        .set_icon_type(ConditionalFormatIconType::ThreeTrafficLights)
        .reverse_icons(true);

    worksheet.add_conditional_format(2, 1, 2, 3, &conditional_format)?;

    // Icons only - The number data is hidden.
    let conditional_format = ConditionalFormatIconSet::new()
        .set_icon_type(ConditionalFormatIconType::ThreeTrafficLights)
        .show_icons_only(true);

    worksheet.add_conditional_format(3, 1, 3, 3, &conditional_format)?;

    // Three arrows.
    let conditional_format =
        ConditionalFormatIconSet::new().set_icon_type(ConditionalFormatIconType::ThreeArrows);

    worksheet.add_conditional_format(5, 1, 5, 3, &conditional_format)?;

    // Three symbols.
    let conditional_format = ConditionalFormatIconSet::new()
        .set_icon_type(ConditionalFormatIconType::ThreeSymbolsCircled);

    worksheet.add_conditional_format(6, 1, 6, 3, &conditional_format)?;

    // Three stars.
    let conditional_format =
        ConditionalFormatIconSet::new().set_icon_type(ConditionalFormatIconType::ThreeStars);

    worksheet.add_conditional_format(7, 1, 7, 3, &conditional_format)?;

    // Four Arrows.
    let conditional_format =
        ConditionalFormatIconSet::new().set_icon_type(ConditionalFormatIconType::FourArrows);

    worksheet.add_conditional_format(8, 1, 8, 4, &conditional_format)?;

    // Four circles - Red (highest) to Black (lowest).
    let conditional_format =
        ConditionalFormatIconSet::new().set_icon_type(ConditionalFormatIconType::FourRedToBlack);

    worksheet.add_conditional_format(9, 1, 9, 4, &conditional_format)?;

    // Four rating histograms.
    let conditional_format =
        ConditionalFormatIconSet::new().set_icon_type(ConditionalFormatIconType::FourHistograms);

    worksheet.add_conditional_format(10, 1, 10, 4, &conditional_format)?;

    // Four Arrows.
    let conditional_format =
        ConditionalFormatIconSet::new().set_icon_type(ConditionalFormatIconType::FiveArrows);

    worksheet.add_conditional_format(11, 1, 11, 5, &conditional_format)?;

    // Four rating histograms.
    let conditional_format =
        ConditionalFormatIconSet::new().set_icon_type(ConditionalFormatIconType::FiveHistograms);

    worksheet.add_conditional_format(12, 1, 12, 5, &conditional_format)?;

    // Four rating quadrants.
    let conditional_format =
        ConditionalFormatIconSet::new().set_icon_type(ConditionalFormatIconType::FiveQuadrants);

    worksheet.add_conditional_format(13, 1, 13, 5, &conditional_format)?;

    // -----------------------------------------------------------------------
    // Save and close the file.
    // -----------------------------------------------------------------------
    workbook.save("conditional_formats.xlsx")?;

    Ok(())
}
Example 10. Examples of 3 color scale conditional formats.
See ConditionalFormat3ColorScale for more details.
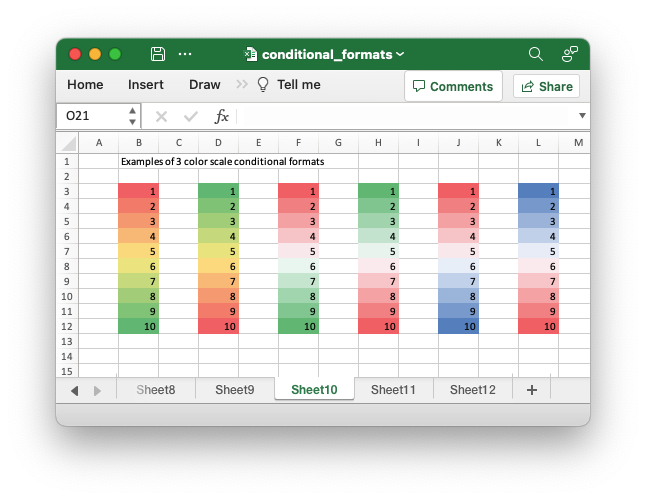
Code to generate the above example:
// SPDX-License-Identifier: MIT OR Apache-2.0
//
// Copyright 2022-2026, John McNamara, jmcnamara@cpan.org

//! Example of how to add conditional formatting to a worksheet using the
//! `rust_xlsxwriter` library.
//!
//! Conditional formatting allows you to apply a format to a cell or a range of
//! cells based on user defined rule.

use rust_xlsxwriter::{
    ConditionalFormat2ColorScale, ConditionalFormat3ColorScale, ConditionalFormatAverage,
    ConditionalFormatAverageRule, ConditionalFormatCell, ConditionalFormatCellRule,
    ConditionalFormatDataBar, ConditionalFormatDataBarDirection, ConditionalFormatDuplicate,
    ConditionalFormatFormula, ConditionalFormatIconSet, ConditionalFormatIconType,
    ConditionalFormatText, ConditionalFormatTextRule, ConditionalFormatTop, Format, Workbook,
    XlsxError,
};

fn main() -> Result<(), XlsxError> {
    // Create a new Excel file object.
    let mut workbook = Workbook::new();

    // Add a format. Light red fill with dark red text.
    let format1 = Format::new()
        .set_font_color("9C0006")
        .set_background_color("FFC7CE");

    // Add a format. Green fill with dark green text.
    let format2 = Format::new()
        .set_font_color("006100")
        .set_background_color("C6EFCE");

    // Add a format for headers.
    let bold = Format::new().set_bold();

    // Add a format for descriptions.
    let indent = Format::new().set_indent(2);

    // some sample data to run the conditional formatting against.
    let data = [
        [34, 72, 38, 30, 75, 48, 75, 66, 84, 86],
        [6, 24, 1, 84, 54, 62, 60, 3, 26, 59],
        [28, 79, 97, 13, 85, 93, 93, 22, 5, 14],
        [27, 71, 40, 17, 18, 79, 90, 93, 29, 47],
        [88, 25, 33, 23, 67, 1, 59, 79, 47, 36],
        [24, 100, 20, 88, 29, 33, 38, 54, 54, 88],
        [6, 57, 88, 28, 10, 26, 37, 7, 41, 48],
        [52, 78, 1, 96, 26, 45, 47, 33, 96, 36],
        [60, 54, 81, 66, 81, 90, 80, 93, 12, 55],
        [70, 5, 46, 14, 71, 19, 66, 36, 41, 21],
    ];

    // -----------------------------------------------------------------------
    // Worksheet 1. Cell conditional formatting.
    // -----------------------------------------------------------------------
    let caption = "Cells with values >= 50 are in light red. Values < 50 are in light green.";

    // Add a worksheet to the workbook.
    let worksheet = workbook.add_worksheet();

    // Write the caption.
    worksheet.write(0, 1, caption)?;

    // Write the worksheet data.
    worksheet.write_row_matrix(2, 1, data)?;

    // Set the column widths for clarity.
    worksheet.set_column_range_width(1, 10, 6)?;

    // Write a conditional format over a range.
    let conditional_format = ConditionalFormatCell::new()
        .set_rule(ConditionalFormatCellRule::GreaterThanOrEqualTo(50))
        .set_format(&format1);

    worksheet.add_conditional_format(2, 1, 11, 10, &conditional_format)?;

    // Write another conditional format over the same range.
    let conditional_format = ConditionalFormatCell::new()
        .set_rule(ConditionalFormatCellRule::LessThan(50))
        .set_format(&format2);

    worksheet.add_conditional_format(2, 1, 11, 10, &conditional_format)?;

    // -----------------------------------------------------------------------
    // Worksheet 2. Cell conditional formatting with between ranges.
    // -----------------------------------------------------------------------
    let caption =
        "Values between 30 and 70 are in light red. Values outside that range are in light green.";

    // Add a worksheet to the workbook.
    let worksheet = workbook.add_worksheet();

    // Write the caption.
    worksheet.write(0, 1, caption)?;

    // Write the worksheet data.
    worksheet.write_row_matrix(2, 1, data)?;

    // Set the column widths for clarity.
    worksheet.set_column_range_width(1, 10, 6)?;

    // Write a conditional format over a range.
    let conditional_format = ConditionalFormatCell::new()
        .set_rule(ConditionalFormatCellRule::Between(30, 70))
        .set_format(&format1);

    worksheet.add_conditional_format(2, 1, 11, 10, &conditional_format)?;

    // Write another conditional format over the same range.
    let conditional_format = ConditionalFormatCell::new()
        .set_rule(ConditionalFormatCellRule::NotBetween(30, 70))
        .set_format(&format2);

    worksheet.add_conditional_format(2, 1, 11, 10, &conditional_format)?;

    // -----------------------------------------------------------------------
    // Worksheet 3. Duplicate and Unique conditional formats.
    // -----------------------------------------------------------------------
    let caption = "Duplicate values are in light red. Unique values are in light green.";

    // Add a worksheet to the workbook.
    let worksheet = workbook.add_worksheet();

    // Write the caption.
    worksheet.write(0, 1, caption)?;

    // Write the worksheet data.
    worksheet.write_row_matrix(2, 1, data)?;

    // Set the column widths for clarity.
    worksheet.set_column_range_width(1, 10, 6)?;

    // Write a conditional format over a range.
    let conditional_format = ConditionalFormatDuplicate::new().set_format(&format1);

    worksheet.add_conditional_format(2, 1, 11, 10, &conditional_format)?;

    // Invert the duplicate conditional format to show unique values in the
    // same range.
    let conditional_format = ConditionalFormatDuplicate::new()
        .invert()
        .set_format(&format2);

    worksheet.add_conditional_format(2, 1, 11, 10, &conditional_format)?;

    // -----------------------------------------------------------------------
    // Worksheet 4. Above and Below Average conditional formats.
    // -----------------------------------------------------------------------
    let caption = "Above average values are in light red. Below average values are in light green.";

    // Add a worksheet to the workbook.
    let worksheet = workbook.add_worksheet();

    // Write the caption.
    worksheet.write(0, 1, caption)?;

    // Write the worksheet data.
    worksheet.write_row_matrix(2, 1, data)?;

    // Set the column widths for clarity.
    worksheet.set_column_range_width(1, 10, 6)?;

    // Write a conditional format over a range. The default criteria is Above Average.
    let conditional_format = ConditionalFormatAverage::new().set_format(&format1);

    worksheet.add_conditional_format(2, 1, 11, 10, &conditional_format)?;

    // Write another conditional format over the same range.
    let conditional_format = ConditionalFormatAverage::new()
        .set_rule(ConditionalFormatAverageRule::BelowAverage)
        .set_format(&format2);

    worksheet.add_conditional_format(2, 1, 11, 10, &conditional_format)?;

    // -----------------------------------------------------------------------
    // Worksheet 5. Top and Bottom range conditional formats.
    // -----------------------------------------------------------------------
    let caption = "Top 10 values are in light red. Bottom 10 values are in light green.";

    // Add a worksheet to the workbook.
    let worksheet = workbook.add_worksheet();

    // Write the caption.
    worksheet.write(0, 1, caption)?;

    // Write the worksheet data.
    worksheet.write_row_matrix(2, 1, data)?;

    // Set the column widths for clarity.
    worksheet.set_column_range_width(1, 10, 6)?;

    // Write a conditional format over a range.
    let conditional_format = ConditionalFormatTop::new()
        .set_rule(rust_xlsxwriter::ConditionalFormatTopRule::Top(10))
        .set_format(&format1);

    worksheet.add_conditional_format(2, 1, 11, 10, &conditional_format)?;

    // Also show the bottom values in the same range.
    let conditional_format = ConditionalFormatTop::new()
        .set_rule(rust_xlsxwriter::ConditionalFormatTopRule::Bottom(10))
        .set_format(&format2);

    worksheet.add_conditional_format(2, 1, 11, 10, &conditional_format)?;

    // -----------------------------------------------------------------------
    // Worksheet 6. Cell conditional formatting in non-contiguous range.
    // -----------------------------------------------------------------------
    let caption = "Cells with values >= 50 are in light red. Values < 50 are in light green. Non-contiguous ranges.";

    // Add a worksheet to the workbook.
    let worksheet = workbook.add_worksheet();

    // Write the caption.
    worksheet.write(0, 1, caption)?;

    // Write the worksheet data.
    worksheet.write_row_matrix(2, 1, data)?;

    // Set the column widths for clarity.
    worksheet.set_column_range_width(1, 10, 6)?;

    // Write a conditional format over a non-contiguous range.
    let conditional_format = ConditionalFormatCell::new()
        .set_rule(ConditionalFormatCellRule::GreaterThanOrEqualTo(50))
        .set_multi_range("B3:D6 I3:K6 B9:D12 I9:K12")
        .set_format(&format1);

    worksheet.add_conditional_format(2, 1, 11, 10, &conditional_format)?;

    // Write another conditional format over the same range.
    let conditional_format = ConditionalFormatCell::new()
        .set_rule(ConditionalFormatCellRule::LessThan(50))
        .set_multi_range("B3:D6 I3:K6 B9:D12 I9:K12")
        .set_format(&format2);

    worksheet.add_conditional_format(2, 1, 11, 10, &conditional_format)?;

    // -----------------------------------------------------------------------
    // Worksheet 7. Formula conditional formatting.
    // -----------------------------------------------------------------------
    let caption = "Even numbered cells are in light green. Odd numbered cells are in light red.";

    // Add a worksheet to the workbook.
    let worksheet = workbook.add_worksheet();

    // Write the caption.
    worksheet.write(0, 1, caption)?;

    // Write the worksheet data.
    worksheet.write_row_matrix(2, 1, data)?;

    // Set the column widths for clarity.
    worksheet.set_column_range_width(1, 10, 6)?;

    // Write a conditional format over a range.
    let conditional_format = ConditionalFormatFormula::new()
        .set_rule("=ISODD(B3)")
        .set_format(&format1);

    worksheet.add_conditional_format(2, 1, 11, 10, &conditional_format)?;

    // Write another conditional format over the same range.
    let conditional_format = ConditionalFormatFormula::new()
        .set_rule("=ISEVEN(B3)")
        .set_format(&format2);

    worksheet.add_conditional_format(2, 1, 11, 10, &conditional_format)?;

    // -----------------------------------------------------------------------
    // Worksheet 8. Text style conditional formats.
    // -----------------------------------------------------------------------
    let caption =
        "Column A shows words that contain the sub-word 'rust'. Column C shows words that start/end with 't'";

    // Add a worksheet to the workbook.
    let worksheet = workbook.add_worksheet();

    // Write the caption.
    worksheet.write(0, 0, caption)?;

    // Add some sample data.
    let word_list = [
        "apocrustic",
        "burstwort",
        "cloudburst",
        "crustification",
        "distrustfulness",
        "laurustine",
        "outburst",
        "rusticism",
        "thunderburst",
        "trustee",
        "trustworthiness",
        "unburstableness",
        "unfrustratable",
    ];
    worksheet.write_column(1, 0, word_list)?;
    worksheet.write_column(1, 2, word_list)?;

    // Set the column widths for clarity.
    worksheet.set_column_width(0, 20)?;
    worksheet.set_column_width(2, 20)?;

    // Write a text "containing" conditional format over a range.
    let conditional_format = ConditionalFormatText::new()
        .set_rule(ConditionalFormatTextRule::Contains("rust".to_string()))
        .set_format(&format2);

    worksheet.add_conditional_format(1, 0, 13, 0, &conditional_format)?;

    // Write a text "not containing" conditional format over the same range.
    let conditional_format = ConditionalFormatText::new()
        .set_rule(ConditionalFormatTextRule::DoesNotContain(
            "rust".to_string(),
        ))
        .set_format(&format1);

    worksheet.add_conditional_format(1, 0, 13, 0, &conditional_format)?;

    // Write a text "begins with" conditional format over a range.
    let conditional_format = ConditionalFormatText::new()
        .set_rule(ConditionalFormatTextRule::BeginsWith("t".to_string()))
        .set_format(&format2);

    worksheet.add_conditional_format(1, 2, 13, 2, &conditional_format)?;

    // Write a text "ends with" conditional format over the same range.
    let conditional_format = ConditionalFormatText::new()
        .set_rule(ConditionalFormatTextRule::EndsWith("t".to_string()))
        .set_format(&format1);

    worksheet.add_conditional_format(1, 2, 13, 2, &conditional_format)?;

    // -----------------------------------------------------------------------
    // Worksheet 9. Examples of 2 color scale conditional formats.
    // -----------------------------------------------------------------------
    let caption = "Examples of 2 color scale conditional formats";

    // Add a worksheet to the workbook.
    let worksheet = workbook.add_worksheet();

    // Write the caption.
    worksheet.write(0, 1, caption)?;

    // Write the worksheet data.
    let data = [1, 2, 3, 4, 5, 6, 7, 8, 9, 10];
    worksheet.write_column(2, 1, data)?;
    worksheet.write_column(2, 3, data)?;
    worksheet.write_column(2, 5, data)?;
    worksheet.write_column(2, 7, data)?;
    worksheet.write_column(2, 9, data)?;
    worksheet.write_column(2, 11, data)?;

    // Set the column widths for clarity.
    worksheet.set_column_range_width(0, 12, 6)?;

    // Write 2 color scale formats with standard Excel colors.
    let conditional_format = ConditionalFormat2ColorScale::new()
        .set_minimum_color("F8696B")
        .set_maximum_color("FCFCFF");

    worksheet.add_conditional_format(2, 1, 11, 1, &conditional_format)?;

    let conditional_format = ConditionalFormat2ColorScale::new()
        .set_minimum_color("FCFCFF")
        .set_maximum_color("F8696B");

    worksheet.add_conditional_format(2, 3, 11, 3, &conditional_format)?;

    let conditional_format = ConditionalFormat2ColorScale::new()
        .set_minimum_color("FCFCFF")
        .set_maximum_color("63BE7B");

    worksheet.add_conditional_format(2, 5, 11, 5, &conditional_format)?;

    let conditional_format = ConditionalFormat2ColorScale::new()
        .set_minimum_color("63BE7B")
        .set_maximum_color("FCFCFF");

    worksheet.add_conditional_format(2, 7, 11, 7, &conditional_format)?;

    let conditional_format = ConditionalFormat2ColorScale::new()
        .set_minimum_color("FFEF9C")
        .set_maximum_color("63BE7B");

    worksheet.add_conditional_format(2, 9, 11, 9, &conditional_format)?;

    let conditional_format = ConditionalFormat2ColorScale::new()
        .set_minimum_color("63BE7B")
        .set_maximum_color("FFEF9C");

    worksheet.add_conditional_format(2, 11, 11, 11, &conditional_format)?;

    // -----------------------------------------------------------------------
    // Worksheet 10. Examples of 3 color scale conditional formats.
    // -----------------------------------------------------------------------
    let caption = "Examples of 3 color scale conditional formats";

    // Add a worksheet to the workbook.
    let worksheet = workbook.add_worksheet();

    // Write the caption.
    worksheet.write(0, 1, caption)?;

    // Write the worksheet data.
    let data = [1, 2, 3, 4, 5, 6, 7, 8, 9, 10];
    worksheet.write_column(2, 1, data)?;
    worksheet.write_column(2, 3, data)?;
    worksheet.write_column(2, 5, data)?;
    worksheet.write_column(2, 7, data)?;
    worksheet.write_column(2, 9, data)?;
    worksheet.write_column(2, 11, data)?;

    // Set the column widths for clarity.
    worksheet.set_column_range_width(0, 12, 6)?;

    // Write 3 color scale formats with standard Excel colors.
    let conditional_format = ConditionalFormat3ColorScale::new()
        .set_minimum_color("F8696B")
        .set_midpoint_color("FFEB84")
        .set_maximum_color("63BE7B");

    worksheet.add_conditional_format(2, 1, 11, 1, &conditional_format)?;

    let conditional_format = ConditionalFormat3ColorScale::new()
        .set_minimum_color("63BE7B")
        .set_midpoint_color("FFEB84")
        .set_maximum_color("F8696B");

    worksheet.add_conditional_format(2, 3, 11, 3, &conditional_format)?;

    let conditional_format = ConditionalFormat3ColorScale::new()
        .set_minimum_color("F8696B")
        .set_midpoint_color("FCFCFF")
        .set_maximum_color("63BE7B");

    worksheet.add_conditional_format(2, 5, 11, 5, &conditional_format)?;

    let conditional_format = ConditionalFormat3ColorScale::new()
        .set_minimum_color("63BE7B")
        .set_midpoint_color("FCFCFF")
        .set_maximum_color("F8696B");

    worksheet.add_conditional_format(2, 7, 11, 7, &conditional_format)?;

    let conditional_format = ConditionalFormat3ColorScale::new()
        .set_minimum_color("F8696B")
        .set_midpoint_color("FCFCFF")
        .set_maximum_color("5A8AC6");

    worksheet.add_conditional_format(2, 9, 11, 9, &conditional_format)?;

    let conditional_format = ConditionalFormat3ColorScale::new()
        .set_minimum_color("5A8AC6")
        .set_midpoint_color("FCFCFF")
        .set_maximum_color("F8696B");

    worksheet.add_conditional_format(2, 11, 11, 11, &conditional_format)?;

    // -----------------------------------------------------------------------
    // Worksheet 11. Examples of data bars.
    // -----------------------------------------------------------------------
    let caption = "Examples of data bars";

    // Add a worksheet to the workbook.
    let worksheet = workbook.add_worksheet();

    // Write the caption.
    worksheet.write_with_format(0, 1, caption, &bold)?;
    worksheet.write(1, 1, "Default")?;
    worksheet.write(1, 3, "Default negative")?;
    worksheet.write(1, 5, "User color")?;
    worksheet.write(1, 7, "Changed direction")?;

    // Write the worksheet data.
    let data1 = [1, 2, 3, 4, 5, 6, 7, 8, 9, 10];
    let data2 = [6, 4, 2, -2, -4, -6, -4, -2, 2, 4];
    worksheet.write_column(2, 1, data1)?;
    worksheet.write_column(2, 3, data2)?;
    worksheet.write_column(2, 5, data1)?;
    worksheet.write_column(2, 7, data1)?;

    // Write a standard Excel data bar.
    let conditional_format = ConditionalFormatDataBar::new();

    worksheet.add_conditional_format(2, 1, 11, 1, &conditional_format)?;

    // Write a standard Excel data bar with negative data
    let conditional_format = ConditionalFormatDataBar::new();

    worksheet.add_conditional_format(2, 3, 11, 3, &conditional_format)?;

    // Write a data bar with a user defined fill color.
    let conditional_format = ConditionalFormatDataBar::new().set_fill_color("009933");

    worksheet.add_conditional_format(2, 5, 11, 5, &conditional_format)?;

    // Write a data bar with the direction changed.
    let conditional_format = ConditionalFormatDataBar::new()
        .set_direction(ConditionalFormatDataBarDirection::RightToLeft);

    worksheet.add_conditional_format(2, 7, 11, 7, &conditional_format)?;

    // -----------------------------------------------------------------------
    // Worksheet 12. Examples of icon style conditional formats.
    // -----------------------------------------------------------------------
    let caption = "Examples of icon style conditional formats.";

    // Add a worksheet to the workbook.
    let worksheet = workbook.add_worksheet();

    // Write the caption.
    worksheet.write_with_format(0, 0, caption, &bold)?;
    worksheet.write_with_format(1, 0, "Three Traffic lights - Green is highest", &indent)?;
    worksheet.write_with_format(2, 0, "Reversed - Red is highest", &indent)?;
    worksheet.write_with_format(3, 0, "Icons only - The number data is hidden", &indent)?;

    worksheet.write_with_format(4, 0, "Other three-five icon examples", &bold)?;
    worksheet.write_with_format(5, 0, "Three arrows", &indent)?;
    worksheet.write_with_format(6, 0, "Three symbols", &indent)?;
    worksheet.write_with_format(7, 0, "Three stars", &indent)?;

    worksheet.write_with_format(8, 0, "Four arrows", &indent)?;
    worksheet.write_with_format(9, 0, "Four circles - Red (highest) to Black", &indent)?;
    worksheet.write_with_format(10, 0, "Four rating histograms", &indent)?;

    worksheet.write_with_format(11, 0, "Five arrows", &indent)?;
    worksheet.write_with_format(12, 0, "Five rating histograms", &indent)?;
    worksheet.write_with_format(13, 0, "Five rating quadrants", &indent)?;

    // Set the column width for clarity.
    worksheet.set_column_width(0, 35)?;

    // Write the worksheet data.
    worksheet.write_row(1, 1, [1, 2, 3])?;
    worksheet.write_row(2, 1, [1, 2, 3])?;
    worksheet.write_row(3, 1, [1, 2, 3])?;

    worksheet.write_row(5, 1, [1, 2, 3])?;
    worksheet.write_row(6, 1, [1, 2, 3])?;
    worksheet.write_row(7, 1, [1, 2, 3])?;

    worksheet.write_row(8, 1, [1, 2, 3, 4])?;
    worksheet.write_row(9, 1, [1, 2, 3, 4])?;
    worksheet.write_row(10, 1, [1, 2, 3, 4])?;

    worksheet.write_row(11, 1, [1, 2, 3, 4, 5])?;
    worksheet.write_row(12, 1, [1, 2, 3, 4, 5])?;
    worksheet.write_row(13, 1, [1, 2, 3, 4, 5])?;

    // Three Traffic lights - Green is highest.
    let conditional_format = ConditionalFormatIconSet::new()
        .set_icon_type(ConditionalFormatIconType::ThreeTrafficLights);

    worksheet.add_conditional_format(1, 1, 1, 3, &conditional_format)?;

    // Reversed - Red is highest.
    let conditional_format = ConditionalFormatIconSet::new()
        .set_icon_type(ConditionalFormatIconType::ThreeTrafficLights)
        .reverse_icons(true);

    worksheet.add_conditional_format(2, 1, 2, 3, &conditional_format)?;

    // Icons only - The number data is hidden.
    let conditional_format = ConditionalFormatIconSet::new()
        .set_icon_type(ConditionalFormatIconType::ThreeTrafficLights)
        .show_icons_only(true);

    worksheet.add_conditional_format(3, 1, 3, 3, &conditional_format)?;

    // Three arrows.
    let conditional_format =
        ConditionalFormatIconSet::new().set_icon_type(ConditionalFormatIconType::ThreeArrows);

    worksheet.add_conditional_format(5, 1, 5, 3, &conditional_format)?;

    // Three symbols.
    let conditional_format = ConditionalFormatIconSet::new()
        .set_icon_type(ConditionalFormatIconType::ThreeSymbolsCircled);

    worksheet.add_conditional_format(6, 1, 6, 3, &conditional_format)?;

    // Three stars.
    let conditional_format =
        ConditionalFormatIconSet::new().set_icon_type(ConditionalFormatIconType::ThreeStars);

    worksheet.add_conditional_format(7, 1, 7, 3, &conditional_format)?;

    // Four Arrows.
    let conditional_format =
        ConditionalFormatIconSet::new().set_icon_type(ConditionalFormatIconType::FourArrows);

    worksheet.add_conditional_format(8, 1, 8, 4, &conditional_format)?;

    // Four circles - Red (highest) to Black (lowest).
    let conditional_format =
        ConditionalFormatIconSet::new().set_icon_type(ConditionalFormatIconType::FourRedToBlack);

    worksheet.add_conditional_format(9, 1, 9, 4, &conditional_format)?;

    // Four rating histograms.
    let conditional_format =
        ConditionalFormatIconSet::new().set_icon_type(ConditionalFormatIconType::FourHistograms);

    worksheet.add_conditional_format(10, 1, 10, 4, &conditional_format)?;

    // Four Arrows.
    let conditional_format =
        ConditionalFormatIconSet::new().set_icon_type(ConditionalFormatIconType::FiveArrows);

    worksheet.add_conditional_format(11, 1, 11, 5, &conditional_format)?;

    // Four rating histograms.
    let conditional_format =
        ConditionalFormatIconSet::new().set_icon_type(ConditionalFormatIconType::FiveHistograms);

    worksheet.add_conditional_format(12, 1, 12, 5, &conditional_format)?;

    // Four rating quadrants.
    let conditional_format =
        ConditionalFormatIconSet::new().set_icon_type(ConditionalFormatIconType::FiveQuadrants);

    worksheet.add_conditional_format(13, 1, 13, 5, &conditional_format)?;

    // -----------------------------------------------------------------------
    // Save and close the file.
    // -----------------------------------------------------------------------
    workbook.save("conditional_formats.xlsx")?;

    Ok(())
}
Example 11. Examples of data bars.
See ConditionalFormatDataBar for more details.
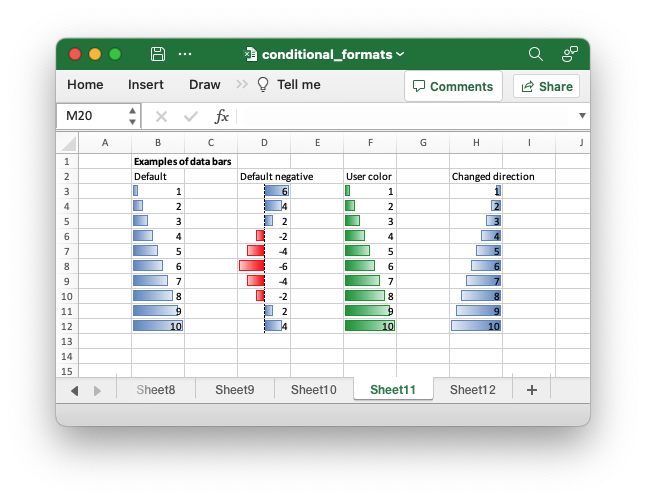
Code to generate the above example:
// SPDX-License-Identifier: MIT OR Apache-2.0
//
// Copyright 2022-2026, John McNamara, jmcnamara@cpan.org

//! Example of how to add conditional formatting to a worksheet using the
//! `rust_xlsxwriter` library.
//!
//! Conditional formatting allows you to apply a format to a cell or a range of
//! cells based on user defined rule.

use rust_xlsxwriter::{
    ConditionalFormat2ColorScale, ConditionalFormat3ColorScale, ConditionalFormatAverage,
    ConditionalFormatAverageRule, ConditionalFormatCell, ConditionalFormatCellRule,
    ConditionalFormatDataBar, ConditionalFormatDataBarDirection, ConditionalFormatDuplicate,
    ConditionalFormatFormula, ConditionalFormatIconSet, ConditionalFormatIconType,
    ConditionalFormatText, ConditionalFormatTextRule, ConditionalFormatTop, Format, Workbook,
    XlsxError,
};

fn main() -> Result<(), XlsxError> {
    // Create a new Excel file object.
    let mut workbook = Workbook::new();

    // Add a format. Light red fill with dark red text.
    let format1 = Format::new()
        .set_font_color("9C0006")
        .set_background_color("FFC7CE");

    // Add a format. Green fill with dark green text.
    let format2 = Format::new()
        .set_font_color("006100")
        .set_background_color("C6EFCE");

    // Add a format for headers.
    let bold = Format::new().set_bold();

    // Add a format for descriptions.
    let indent = Format::new().set_indent(2);

    // some sample data to run the conditional formatting against.
    let data = [
        [34, 72, 38, 30, 75, 48, 75, 66, 84, 86],
        [6, 24, 1, 84, 54, 62, 60, 3, 26, 59],
        [28, 79, 97, 13, 85, 93, 93, 22, 5, 14],
        [27, 71, 40, 17, 18, 79, 90, 93, 29, 47],
        [88, 25, 33, 23, 67, 1, 59, 79, 47, 36],
        [24, 100, 20, 88, 29, 33, 38, 54, 54, 88],
        [6, 57, 88, 28, 10, 26, 37, 7, 41, 48],
        [52, 78, 1, 96, 26, 45, 47, 33, 96, 36],
        [60, 54, 81, 66, 81, 90, 80, 93, 12, 55],
        [70, 5, 46, 14, 71, 19, 66, 36, 41, 21],
    ];

    // -----------------------------------------------------------------------
    // Worksheet 1. Cell conditional formatting.
    // -----------------------------------------------------------------------
    let caption = "Cells with values >= 50 are in light red. Values < 50 are in light green.";

    // Add a worksheet to the workbook.
    let worksheet = workbook.add_worksheet();

    // Write the caption.
    worksheet.write(0, 1, caption)?;

    // Write the worksheet data.
    worksheet.write_row_matrix(2, 1, data)?;

    // Set the column widths for clarity.
    worksheet.set_column_range_width(1, 10, 6)?;

    // Write a conditional format over a range.
    let conditional_format = ConditionalFormatCell::new()
        .set_rule(ConditionalFormatCellRule::GreaterThanOrEqualTo(50))
        .set_format(&format1);

    worksheet.add_conditional_format(2, 1, 11, 10, &conditional_format)?;

    // Write another conditional format over the same range.
    let conditional_format = ConditionalFormatCell::new()
        .set_rule(ConditionalFormatCellRule::LessThan(50))
        .set_format(&format2);

    worksheet.add_conditional_format(2, 1, 11, 10, &conditional_format)?;

    // -----------------------------------------------------------------------
    // Worksheet 2. Cell conditional formatting with between ranges.
    // -----------------------------------------------------------------------
    let caption =
        "Values between 30 and 70 are in light red. Values outside that range are in light green.";

    // Add a worksheet to the workbook.
    let worksheet = workbook.add_worksheet();

    // Write the caption.
    worksheet.write(0, 1, caption)?;

    // Write the worksheet data.
    worksheet.write_row_matrix(2, 1, data)?;

    // Set the column widths for clarity.
    worksheet.set_column_range_width(1, 10, 6)?;

    // Write a conditional format over a range.
    let conditional_format = ConditionalFormatCell::new()
        .set_rule(ConditionalFormatCellRule::Between(30, 70))
        .set_format(&format1);

    worksheet.add_conditional_format(2, 1, 11, 10, &conditional_format)?;

    // Write another conditional format over the same range.
    let conditional_format = ConditionalFormatCell::new()
        .set_rule(ConditionalFormatCellRule::NotBetween(30, 70))
        .set_format(&format2);

    worksheet.add_conditional_format(2, 1, 11, 10, &conditional_format)?;

    // -----------------------------------------------------------------------
    // Worksheet 3. Duplicate and Unique conditional formats.
    // -----------------------------------------------------------------------
    let caption = "Duplicate values are in light red. Unique values are in light green.";

    // Add a worksheet to the workbook.
    let worksheet = workbook.add_worksheet();

    // Write the caption.
    worksheet.write(0, 1, caption)?;

    // Write the worksheet data.
    worksheet.write_row_matrix(2, 1, data)?;

    // Set the column widths for clarity.
    worksheet.set_column_range_width(1, 10, 6)?;

    // Write a conditional format over a range.
    let conditional_format = ConditionalFormatDuplicate::new().set_format(&format1);

    worksheet.add_conditional_format(2, 1, 11, 10, &conditional_format)?;

    // Invert the duplicate conditional format to show unique values in the
    // same range.
    let conditional_format = ConditionalFormatDuplicate::new()
        .invert()
        .set_format(&format2);

    worksheet.add_conditional_format(2, 1, 11, 10, &conditional_format)?;

    // -----------------------------------------------------------------------
    // Worksheet 4. Above and Below Average conditional formats.
    // -----------------------------------------------------------------------
    let caption = "Above average values are in light red. Below average values are in light green.";

    // Add a worksheet to the workbook.
    let worksheet = workbook.add_worksheet();

    // Write the caption.
    worksheet.write(0, 1, caption)?;

    // Write the worksheet data.
    worksheet.write_row_matrix(2, 1, data)?;

    // Set the column widths for clarity.
    worksheet.set_column_range_width(1, 10, 6)?;

    // Write a conditional format over a range. The default criteria is Above Average.
    let conditional_format = ConditionalFormatAverage::new().set_format(&format1);

    worksheet.add_conditional_format(2, 1, 11, 10, &conditional_format)?;

    // Write another conditional format over the same range.
    let conditional_format = ConditionalFormatAverage::new()
        .set_rule(ConditionalFormatAverageRule::BelowAverage)
        .set_format(&format2);

    worksheet.add_conditional_format(2, 1, 11, 10, &conditional_format)?;

    // -----------------------------------------------------------------------
    // Worksheet 5. Top and Bottom range conditional formats.
    // -----------------------------------------------------------------------
    let caption = "Top 10 values are in light red. Bottom 10 values are in light green.";

    // Add a worksheet to the workbook.
    let worksheet = workbook.add_worksheet();

    // Write the caption.
    worksheet.write(0, 1, caption)?;

    // Write the worksheet data.
    worksheet.write_row_matrix(2, 1, data)?;

    // Set the column widths for clarity.
    worksheet.set_column_range_width(1, 10, 6)?;

    // Write a conditional format over a range.
    let conditional_format = ConditionalFormatTop::new()
        .set_rule(rust_xlsxwriter::ConditionalFormatTopRule::Top(10))
        .set_format(&format1);

    worksheet.add_conditional_format(2, 1, 11, 10, &conditional_format)?;

    // Also show the bottom values in the same range.
    let conditional_format = ConditionalFormatTop::new()
        .set_rule(rust_xlsxwriter::ConditionalFormatTopRule::Bottom(10))
        .set_format(&format2);

    worksheet.add_conditional_format(2, 1, 11, 10, &conditional_format)?;

    // -----------------------------------------------------------------------
    // Worksheet 6. Cell conditional formatting in non-contiguous range.
    // -----------------------------------------------------------------------
    let caption = "Cells with values >= 50 are in light red. Values < 50 are in light green. Non-contiguous ranges.";

    // Add a worksheet to the workbook.
    let worksheet = workbook.add_worksheet();

    // Write the caption.
    worksheet.write(0, 1, caption)?;

    // Write the worksheet data.
    worksheet.write_row_matrix(2, 1, data)?;

    // Set the column widths for clarity.
    worksheet.set_column_range_width(1, 10, 6)?;

    // Write a conditional format over a non-contiguous range.
    let conditional_format = ConditionalFormatCell::new()
        .set_rule(ConditionalFormatCellRule::GreaterThanOrEqualTo(50))
        .set_multi_range("B3:D6 I3:K6 B9:D12 I9:K12")
        .set_format(&format1);

    worksheet.add_conditional_format(2, 1, 11, 10, &conditional_format)?;

    // Write another conditional format over the same range.
    let conditional_format = ConditionalFormatCell::new()
        .set_rule(ConditionalFormatCellRule::LessThan(50))
        .set_multi_range("B3:D6 I3:K6 B9:D12 I9:K12")
        .set_format(&format2);

    worksheet.add_conditional_format(2, 1, 11, 10, &conditional_format)?;

    // -----------------------------------------------------------------------
    // Worksheet 7. Formula conditional formatting.
    // -----------------------------------------------------------------------
    let caption = "Even numbered cells are in light green. Odd numbered cells are in light red.";

    // Add a worksheet to the workbook.
    let worksheet = workbook.add_worksheet();

    // Write the caption.
    worksheet.write(0, 1, caption)?;

    // Write the worksheet data.
    worksheet.write_row_matrix(2, 1, data)?;

    // Set the column widths for clarity.
    worksheet.set_column_range_width(1, 10, 6)?;

    // Write a conditional format over a range.
    let conditional_format = ConditionalFormatFormula::new()
        .set_rule("=ISODD(B3)")
        .set_format(&format1);

    worksheet.add_conditional_format(2, 1, 11, 10, &conditional_format)?;

    // Write another conditional format over the same range.
    let conditional_format = ConditionalFormatFormula::new()
        .set_rule("=ISEVEN(B3)")
        .set_format(&format2);

    worksheet.add_conditional_format(2, 1, 11, 10, &conditional_format)?;

    // -----------------------------------------------------------------------
    // Worksheet 8. Text style conditional formats.
    // -----------------------------------------------------------------------
    let caption =
        "Column A shows words that contain the sub-word 'rust'. Column C shows words that start/end with 't'";

    // Add a worksheet to the workbook.
    let worksheet = workbook.add_worksheet();

    // Write the caption.
    worksheet.write(0, 0, caption)?;

    // Add some sample data.
    let word_list = [
        "apocrustic",
        "burstwort",
        "cloudburst",
        "crustification",
        "distrustfulness",
        "laurustine",
        "outburst",
        "rusticism",
        "thunderburst",
        "trustee",
        "trustworthiness",
        "unburstableness",
        "unfrustratable",
    ];
    worksheet.write_column(1, 0, word_list)?;
    worksheet.write_column(1, 2, word_list)?;

    // Set the column widths for clarity.
    worksheet.set_column_width(0, 20)?;
    worksheet.set_column_width(2, 20)?;

    // Write a text "containing" conditional format over a range.
    let conditional_format = ConditionalFormatText::new()
        .set_rule(ConditionalFormatTextRule::Contains("rust".to_string()))
        .set_format(&format2);

    worksheet.add_conditional_format(1, 0, 13, 0, &conditional_format)?;

    // Write a text "not containing" conditional format over the same range.
    let conditional_format = ConditionalFormatText::new()
        .set_rule(ConditionalFormatTextRule::DoesNotContain(
            "rust".to_string(),
        ))
        .set_format(&format1);

    worksheet.add_conditional_format(1, 0, 13, 0, &conditional_format)?;

    // Write a text "begins with" conditional format over a range.
    let conditional_format = ConditionalFormatText::new()
        .set_rule(ConditionalFormatTextRule::BeginsWith("t".to_string()))
        .set_format(&format2);

    worksheet.add_conditional_format(1, 2, 13, 2, &conditional_format)?;

    // Write a text "ends with" conditional format over the same range.
    let conditional_format = ConditionalFormatText::new()
        .set_rule(ConditionalFormatTextRule::EndsWith("t".to_string()))
        .set_format(&format1);

    worksheet.add_conditional_format(1, 2, 13, 2, &conditional_format)?;

    // -----------------------------------------------------------------------
    // Worksheet 9. Examples of 2 color scale conditional formats.
    // -----------------------------------------------------------------------
    let caption = "Examples of 2 color scale conditional formats";

    // Add a worksheet to the workbook.
    let worksheet = workbook.add_worksheet();

    // Write the caption.
    worksheet.write(0, 1, caption)?;

    // Write the worksheet data.
    let data = [1, 2, 3, 4, 5, 6, 7, 8, 9, 10];
    worksheet.write_column(2, 1, data)?;
    worksheet.write_column(2, 3, data)?;
    worksheet.write_column(2, 5, data)?;
    worksheet.write_column(2, 7, data)?;
    worksheet.write_column(2, 9, data)?;
    worksheet.write_column(2, 11, data)?;

    // Set the column widths for clarity.
    worksheet.set_column_range_width(0, 12, 6)?;

    // Write 2 color scale formats with standard Excel colors.
    let conditional_format = ConditionalFormat2ColorScale::new()
        .set_minimum_color("F8696B")
        .set_maximum_color("FCFCFF");

    worksheet.add_conditional_format(2, 1, 11, 1, &conditional_format)?;

    let conditional_format = ConditionalFormat2ColorScale::new()
        .set_minimum_color("FCFCFF")
        .set_maximum_color("F8696B");

    worksheet.add_conditional_format(2, 3, 11, 3, &conditional_format)?;

    let conditional_format = ConditionalFormat2ColorScale::new()
        .set_minimum_color("FCFCFF")
        .set_maximum_color("63BE7B");

    worksheet.add_conditional_format(2, 5, 11, 5, &conditional_format)?;

    let conditional_format = ConditionalFormat2ColorScale::new()
        .set_minimum_color("63BE7B")
        .set_maximum_color("FCFCFF");

    worksheet.add_conditional_format(2, 7, 11, 7, &conditional_format)?;

    let conditional_format = ConditionalFormat2ColorScale::new()
        .set_minimum_color("FFEF9C")
        .set_maximum_color("63BE7B");

    worksheet.add_conditional_format(2, 9, 11, 9, &conditional_format)?;

    let conditional_format = ConditionalFormat2ColorScale::new()
        .set_minimum_color("63BE7B")
        .set_maximum_color("FFEF9C");

    worksheet.add_conditional_format(2, 11, 11, 11, &conditional_format)?;

    // -----------------------------------------------------------------------
    // Worksheet 10. Examples of 3 color scale conditional formats.
    // -----------------------------------------------------------------------
    let caption = "Examples of 3 color scale conditional formats";

    // Add a worksheet to the workbook.
    let worksheet = workbook.add_worksheet();

    // Write the caption.
    worksheet.write(0, 1, caption)?;

    // Write the worksheet data.
    let data = [1, 2, 3, 4, 5, 6, 7, 8, 9, 10];
    worksheet.write_column(2, 1, data)?;
    worksheet.write_column(2, 3, data)?;
    worksheet.write_column(2, 5, data)?;
    worksheet.write_column(2, 7, data)?;
    worksheet.write_column(2, 9, data)?;
    worksheet.write_column(2, 11, data)?;

    // Set the column widths for clarity.
    worksheet.set_column_range_width(0, 12, 6)?;

    // Write 3 color scale formats with standard Excel colors.
    let conditional_format = ConditionalFormat3ColorScale::new()
        .set_minimum_color("F8696B")
        .set_midpoint_color("FFEB84")
        .set_maximum_color("63BE7B");

    worksheet.add_conditional_format(2, 1, 11, 1, &conditional_format)?;

    let conditional_format = ConditionalFormat3ColorScale::new()
        .set_minimum_color("63BE7B")
        .set_midpoint_color("FFEB84")
        .set_maximum_color("F8696B");

    worksheet.add_conditional_format(2, 3, 11, 3, &conditional_format)?;

    let conditional_format = ConditionalFormat3ColorScale::new()
        .set_minimum_color("F8696B")
        .set_midpoint_color("FCFCFF")
        .set_maximum_color("63BE7B");

    worksheet.add_conditional_format(2, 5, 11, 5, &conditional_format)?;

    let conditional_format = ConditionalFormat3ColorScale::new()
        .set_minimum_color("63BE7B")
        .set_midpoint_color("FCFCFF")
        .set_maximum_color("F8696B");

    worksheet.add_conditional_format(2, 7, 11, 7, &conditional_format)?;

    let conditional_format = ConditionalFormat3ColorScale::new()
        .set_minimum_color("F8696B")
        .set_midpoint_color("FCFCFF")
        .set_maximum_color("5A8AC6");

    worksheet.add_conditional_format(2, 9, 11, 9, &conditional_format)?;

    let conditional_format = ConditionalFormat3ColorScale::new()
        .set_minimum_color("5A8AC6")
        .set_midpoint_color("FCFCFF")
        .set_maximum_color("F8696B");

    worksheet.add_conditional_format(2, 11, 11, 11, &conditional_format)?;

    // -----------------------------------------------------------------------
    // Worksheet 11. Examples of data bars.
    // -----------------------------------------------------------------------
    let caption = "Examples of data bars";

    // Add a worksheet to the workbook.
    let worksheet = workbook.add_worksheet();

    // Write the caption.
    worksheet.write_with_format(0, 1, caption, &bold)?;
    worksheet.write(1, 1, "Default")?;
    worksheet.write(1, 3, "Default negative")?;
    worksheet.write(1, 5, "User color")?;
    worksheet.write(1, 7, "Changed direction")?;

    // Write the worksheet data.
    let data1 = [1, 2, 3, 4, 5, 6, 7, 8, 9, 10];
    let data2 = [6, 4, 2, -2, -4, -6, -4, -2, 2, 4];
    worksheet.write_column(2, 1, data1)?;
    worksheet.write_column(2, 3, data2)?;
    worksheet.write_column(2, 5, data1)?;
    worksheet.write_column(2, 7, data1)?;

    // Write a standard Excel data bar.
    let conditional_format = ConditionalFormatDataBar::new();

    worksheet.add_conditional_format(2, 1, 11, 1, &conditional_format)?;

    // Write a standard Excel data bar with negative data
    let conditional_format = ConditionalFormatDataBar::new();

    worksheet.add_conditional_format(2, 3, 11, 3, &conditional_format)?;

    // Write a data bar with a user defined fill color.
    let conditional_format = ConditionalFormatDataBar::new().set_fill_color("009933");

    worksheet.add_conditional_format(2, 5, 11, 5, &conditional_format)?;

    // Write a data bar with the direction changed.
    let conditional_format = ConditionalFormatDataBar::new()
        .set_direction(ConditionalFormatDataBarDirection::RightToLeft);

    worksheet.add_conditional_format(2, 7, 11, 7, &conditional_format)?;

    // -----------------------------------------------------------------------
    // Worksheet 12. Examples of icon style conditional formats.
    // -----------------------------------------------------------------------
    let caption = "Examples of icon style conditional formats.";

    // Add a worksheet to the workbook.
    let worksheet = workbook.add_worksheet();

    // Write the caption.
    worksheet.write_with_format(0, 0, caption, &bold)?;
    worksheet.write_with_format(1, 0, "Three Traffic lights - Green is highest", &indent)?;
    worksheet.write_with_format(2, 0, "Reversed - Red is highest", &indent)?;
    worksheet.write_with_format(3, 0, "Icons only - The number data is hidden", &indent)?;

    worksheet.write_with_format(4, 0, "Other three-five icon examples", &bold)?;
    worksheet.write_with_format(5, 0, "Three arrows", &indent)?;
    worksheet.write_with_format(6, 0, "Three symbols", &indent)?;
    worksheet.write_with_format(7, 0, "Three stars", &indent)?;

    worksheet.write_with_format(8, 0, "Four arrows", &indent)?;
    worksheet.write_with_format(9, 0, "Four circles - Red (highest) to Black", &indent)?;
    worksheet.write_with_format(10, 0, "Four rating histograms", &indent)?;

    worksheet.write_with_format(11, 0, "Five arrows", &indent)?;
    worksheet.write_with_format(12, 0, "Five rating histograms", &indent)?;
    worksheet.write_with_format(13, 0, "Five rating quadrants", &indent)?;

    // Set the column width for clarity.
    worksheet.set_column_width(0, 35)?;

    // Write the worksheet data.
    worksheet.write_row(1, 1, [1, 2, 3])?;
    worksheet.write_row(2, 1, [1, 2, 3])?;
    worksheet.write_row(3, 1, [1, 2, 3])?;

    worksheet.write_row(5, 1, [1, 2, 3])?;
    worksheet.write_row(6, 1, [1, 2, 3])?;
    worksheet.write_row(7, 1, [1, 2, 3])?;

    worksheet.write_row(8, 1, [1, 2, 3, 4])?;
    worksheet.write_row(9, 1, [1, 2, 3, 4])?;
    worksheet.write_row(10, 1, [1, 2, 3, 4])?;

    worksheet.write_row(11, 1, [1, 2, 3, 4, 5])?;
    worksheet.write_row(12, 1, [1, 2, 3, 4, 5])?;
    worksheet.write_row(13, 1, [1, 2, 3, 4, 5])?;

    // Three Traffic lights - Green is highest.
    let conditional_format = ConditionalFormatIconSet::new()
        .set_icon_type(ConditionalFormatIconType::ThreeTrafficLights);

    worksheet.add_conditional_format(1, 1, 1, 3, &conditional_format)?;

    // Reversed - Red is highest.
    let conditional_format = ConditionalFormatIconSet::new()
        .set_icon_type(ConditionalFormatIconType::ThreeTrafficLights)
        .reverse_icons(true);

    worksheet.add_conditional_format(2, 1, 2, 3, &conditional_format)?;

    // Icons only - The number data is hidden.
    let conditional_format = ConditionalFormatIconSet::new()
        .set_icon_type(ConditionalFormatIconType::ThreeTrafficLights)
        .show_icons_only(true);

    worksheet.add_conditional_format(3, 1, 3, 3, &conditional_format)?;

    // Three arrows.
    let conditional_format =
        ConditionalFormatIconSet::new().set_icon_type(ConditionalFormatIconType::ThreeArrows);

    worksheet.add_conditional_format(5, 1, 5, 3, &conditional_format)?;

    // Three symbols.
    let conditional_format = ConditionalFormatIconSet::new()
        .set_icon_type(ConditionalFormatIconType::ThreeSymbolsCircled);

    worksheet.add_conditional_format(6, 1, 6, 3, &conditional_format)?;

    // Three stars.
    let conditional_format =
        ConditionalFormatIconSet::new().set_icon_type(ConditionalFormatIconType::ThreeStars);

    worksheet.add_conditional_format(7, 1, 7, 3, &conditional_format)?;

    // Four Arrows.
    let conditional_format =
        ConditionalFormatIconSet::new().set_icon_type(ConditionalFormatIconType::FourArrows);

    worksheet.add_conditional_format(8, 1, 8, 4, &conditional_format)?;

    // Four circles - Red (highest) to Black (lowest).
    let conditional_format =
        ConditionalFormatIconSet::new().set_icon_type(ConditionalFormatIconType::FourRedToBlack);

    worksheet.add_conditional_format(9, 1, 9, 4, &conditional_format)?;

    // Four rating histograms.
    let conditional_format =
        ConditionalFormatIconSet::new().set_icon_type(ConditionalFormatIconType::FourHistograms);

    worksheet.add_conditional_format(10, 1, 10, 4, &conditional_format)?;

    // Four Arrows.
    let conditional_format =
        ConditionalFormatIconSet::new().set_icon_type(ConditionalFormatIconType::FiveArrows);

    worksheet.add_conditional_format(11, 1, 11, 5, &conditional_format)?;

    // Four rating histograms.
    let conditional_format =
        ConditionalFormatIconSet::new().set_icon_type(ConditionalFormatIconType::FiveHistograms);

    worksheet.add_conditional_format(12, 1, 12, 5, &conditional_format)?;

    // Four rating quadrants.
    let conditional_format =
        ConditionalFormatIconSet::new().set_icon_type(ConditionalFormatIconType::FiveQuadrants);

    worksheet.add_conditional_format(13, 1, 13, 5, &conditional_format)?;

    // -----------------------------------------------------------------------
    // Save and close the file.
    // -----------------------------------------------------------------------
    workbook.save("conditional_formats.xlsx")?;

    Ok(())
}
Example 12. Examples of icon style conditional formats.
See ConditionalFormatIconSet for more details.
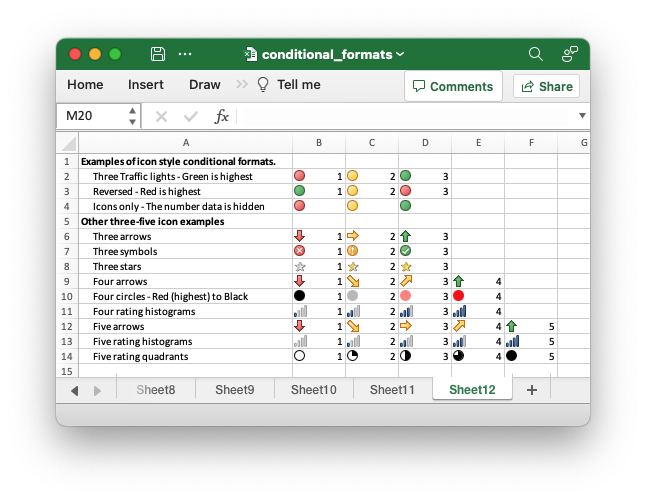
Code to generate the above example:
// SPDX-License-Identifier: MIT OR Apache-2.0
//
// Copyright 2022-2026, John McNamara, jmcnamara@cpan.org

//! Example of how to add conditional formatting to a worksheet using the
//! `rust_xlsxwriter` library.
//!
//! Conditional formatting allows you to apply a format to a cell or a range of
//! cells based on user defined rule.

use rust_xlsxwriter::{
    ConditionalFormat2ColorScale, ConditionalFormat3ColorScale, ConditionalFormatAverage,
    ConditionalFormatAverageRule, ConditionalFormatCell, ConditionalFormatCellRule,
    ConditionalFormatDataBar, ConditionalFormatDataBarDirection, ConditionalFormatDuplicate,
    ConditionalFormatFormula, ConditionalFormatIconSet, ConditionalFormatIconType,
    ConditionalFormatText, ConditionalFormatTextRule, ConditionalFormatTop, Format, Workbook,
    XlsxError,
};

fn main() -> Result<(), XlsxError> {
    // Create a new Excel file object.
    let mut workbook = Workbook::new();

    // Add a format. Light red fill with dark red text.
    let format1 = Format::new()
        .set_font_color("9C0006")
        .set_background_color("FFC7CE");

    // Add a format. Green fill with dark green text.
    let format2 = Format::new()
        .set_font_color("006100")
        .set_background_color("C6EFCE");

    // Add a format for headers.
    let bold = Format::new().set_bold();

    // Add a format for descriptions.
    let indent = Format::new().set_indent(2);

    // some sample data to run the conditional formatting against.
    let data = [
        [34, 72, 38, 30, 75, 48, 75, 66, 84, 86],
        [6, 24, 1, 84, 54, 62, 60, 3, 26, 59],
        [28, 79, 97, 13, 85, 93, 93, 22, 5, 14],
        [27, 71, 40, 17, 18, 79, 90, 93, 29, 47],
        [88, 25, 33, 23, 67, 1, 59, 79, 47, 36],
        [24, 100, 20, 88, 29, 33, 38, 54, 54, 88],
        [6, 57, 88, 28, 10, 26, 37, 7, 41, 48],
        [52, 78, 1, 96, 26, 45, 47, 33, 96, 36],
        [60, 54, 81, 66, 81, 90, 80, 93, 12, 55],
        [70, 5, 46, 14, 71, 19, 66, 36, 41, 21],
    ];

    // -----------------------------------------------------------------------
    // Worksheet 1. Cell conditional formatting.
    // -----------------------------------------------------------------------
    let caption = "Cells with values >= 50 are in light red. Values < 50 are in light green.";

    // Add a worksheet to the workbook.
    let worksheet = workbook.add_worksheet();

    // Write the caption.
    worksheet.write(0, 1, caption)?;

    // Write the worksheet data.
    worksheet.write_row_matrix(2, 1, data)?;

    // Set the column widths for clarity.
    worksheet.set_column_range_width(1, 10, 6)?;

    // Write a conditional format over a range.
    let conditional_format = ConditionalFormatCell::new()
        .set_rule(ConditionalFormatCellRule::GreaterThanOrEqualTo(50))
        .set_format(&format1);

    worksheet.add_conditional_format(2, 1, 11, 10, &conditional_format)?;

    // Write another conditional format over the same range.
    let conditional_format = ConditionalFormatCell::new()
        .set_rule(ConditionalFormatCellRule::LessThan(50))
        .set_format(&format2);

    worksheet.add_conditional_format(2, 1, 11, 10, &conditional_format)?;

    // -----------------------------------------------------------------------
    // Worksheet 2. Cell conditional formatting with between ranges.
    // -----------------------------------------------------------------------
    let caption =
        "Values between 30 and 70 are in light red. Values outside that range are in light green.";

    // Add a worksheet to the workbook.
    let worksheet = workbook.add_worksheet();

    // Write the caption.
    worksheet.write(0, 1, caption)?;

    // Write the worksheet data.
    worksheet.write_row_matrix(2, 1, data)?;

    // Set the column widths for clarity.
    worksheet.set_column_range_width(1, 10, 6)?;

    // Write a conditional format over a range.
    let conditional_format = ConditionalFormatCell::new()
        .set_rule(ConditionalFormatCellRule::Between(30, 70))
        .set_format(&format1);

    worksheet.add_conditional_format(2, 1, 11, 10, &conditional_format)?;

    // Write another conditional format over the same range.
    let conditional_format = ConditionalFormatCell::new()
        .set_rule(ConditionalFormatCellRule::NotBetween(30, 70))
        .set_format(&format2);

    worksheet.add_conditional_format(2, 1, 11, 10, &conditional_format)?;

    // -----------------------------------------------------------------------
    // Worksheet 3. Duplicate and Unique conditional formats.
    // -----------------------------------------------------------------------
    let caption = "Duplicate values are in light red. Unique values are in light green.";

    // Add a worksheet to the workbook.
    let worksheet = workbook.add_worksheet();

    // Write the caption.
    worksheet.write(0, 1, caption)?;

    // Write the worksheet data.
    worksheet.write_row_matrix(2, 1, data)?;

    // Set the column widths for clarity.
    worksheet.set_column_range_width(1, 10, 6)?;

    // Write a conditional format over a range.
    let conditional_format = ConditionalFormatDuplicate::new().set_format(&format1);

    worksheet.add_conditional_format(2, 1, 11, 10, &conditional_format)?;

    // Invert the duplicate conditional format to show unique values in the
    // same range.
    let conditional_format = ConditionalFormatDuplicate::new()
        .invert()
        .set_format(&format2);

    worksheet.add_conditional_format(2, 1, 11, 10, &conditional_format)?;

    // -----------------------------------------------------------------------
    // Worksheet 4. Above and Below Average conditional formats.
    // -----------------------------------------------------------------------
    let caption = "Above average values are in light red. Below average values are in light green.";

    // Add a worksheet to the workbook.
    let worksheet = workbook.add_worksheet();

    // Write the caption.
    worksheet.write(0, 1, caption)?;

    // Write the worksheet data.
    worksheet.write_row_matrix(2, 1, data)?;

    // Set the column widths for clarity.
    worksheet.set_column_range_width(1, 10, 6)?;

    // Write a conditional format over a range. The default criteria is Above Average.
    let conditional_format = ConditionalFormatAverage::new().set_format(&format1);

    worksheet.add_conditional_format(2, 1, 11, 10, &conditional_format)?;

    // Write another conditional format over the same range.
    let conditional_format = ConditionalFormatAverage::new()
        .set_rule(ConditionalFormatAverageRule::BelowAverage)
        .set_format(&format2);

    worksheet.add_conditional_format(2, 1, 11, 10, &conditional_format)?;

    // -----------------------------------------------------------------------
    // Worksheet 5. Top and Bottom range conditional formats.
    // -----------------------------------------------------------------------
    let caption = "Top 10 values are in light red. Bottom 10 values are in light green.";

    // Add a worksheet to the workbook.
    let worksheet = workbook.add_worksheet();

    // Write the caption.
    worksheet.write(0, 1, caption)?;

    // Write the worksheet data.
    worksheet.write_row_matrix(2, 1, data)?;

    // Set the column widths for clarity.
    worksheet.set_column_range_width(1, 10, 6)?;

    // Write a conditional format over a range.
    let conditional_format = ConditionalFormatTop::new()
        .set_rule(rust_xlsxwriter::ConditionalFormatTopRule::Top(10))
        .set_format(&format1);

    worksheet.add_conditional_format(2, 1, 11, 10, &conditional_format)?;

    // Also show the bottom values in the same range.
    let conditional_format = ConditionalFormatTop::new()
        .set_rule(rust_xlsxwriter::ConditionalFormatTopRule::Bottom(10))
        .set_format(&format2);

    worksheet.add_conditional_format(2, 1, 11, 10, &conditional_format)?;

    // -----------------------------------------------------------------------
    // Worksheet 6. Cell conditional formatting in non-contiguous range.
    // -----------------------------------------------------------------------
    let caption = "Cells with values >= 50 are in light red. Values < 50 are in light green. Non-contiguous ranges.";

    // Add a worksheet to the workbook.
    let worksheet = workbook.add_worksheet();

    // Write the caption.
    worksheet.write(0, 1, caption)?;

    // Write the worksheet data.
    worksheet.write_row_matrix(2, 1, data)?;

    // Set the column widths for clarity.
    worksheet.set_column_range_width(1, 10, 6)?;

    // Write a conditional format over a non-contiguous range.
    let conditional_format = ConditionalFormatCell::new()
        .set_rule(ConditionalFormatCellRule::GreaterThanOrEqualTo(50))
        .set_multi_range("B3:D6 I3:K6 B9:D12 I9:K12")
        .set_format(&format1);

    worksheet.add_conditional_format(2, 1, 11, 10, &conditional_format)?;

    // Write another conditional format over the same range.
    let conditional_format = ConditionalFormatCell::new()
        .set_rule(ConditionalFormatCellRule::LessThan(50))
        .set_multi_range("B3:D6 I3:K6 B9:D12 I9:K12")
        .set_format(&format2);

    worksheet.add_conditional_format(2, 1, 11, 10, &conditional_format)?;

    // -----------------------------------------------------------------------
    // Worksheet 7. Formula conditional formatting.
    // -----------------------------------------------------------------------
    let caption = "Even numbered cells are in light green. Odd numbered cells are in light red.";

    // Add a worksheet to the workbook.
    let worksheet = workbook.add_worksheet();

    // Write the caption.
    worksheet.write(0, 1, caption)?;

    // Write the worksheet data.
    worksheet.write_row_matrix(2, 1, data)?;

    // Set the column widths for clarity.
    worksheet.set_column_range_width(1, 10, 6)?;

    // Write a conditional format over a range.
    let conditional_format = ConditionalFormatFormula::new()
        .set_rule("=ISODD(B3)")
        .set_format(&format1);

    worksheet.add_conditional_format(2, 1, 11, 10, &conditional_format)?;

    // Write another conditional format over the same range.
    let conditional_format = ConditionalFormatFormula::new()
        .set_rule("=ISEVEN(B3)")
        .set_format(&format2);

    worksheet.add_conditional_format(2, 1, 11, 10, &conditional_format)?;

    // -----------------------------------------------------------------------
    // Worksheet 8. Text style conditional formats.
    // -----------------------------------------------------------------------
    let caption =
        "Column A shows words that contain the sub-word 'rust'. Column C shows words that start/end with 't'";

    // Add a worksheet to the workbook.
    let worksheet = workbook.add_worksheet();

    // Write the caption.
    worksheet.write(0, 0, caption)?;

    // Add some sample data.
    let word_list = [
        "apocrustic",
        "burstwort",
        "cloudburst",
        "crustification",
        "distrustfulness",
        "laurustine",
        "outburst",
        "rusticism",
        "thunderburst",
        "trustee",
        "trustworthiness",
        "unburstableness",
        "unfrustratable",
    ];
    worksheet.write_column(1, 0, word_list)?;
    worksheet.write_column(1, 2, word_list)?;

    // Set the column widths for clarity.
    worksheet.set_column_width(0, 20)?;
    worksheet.set_column_width(2, 20)?;

    // Write a text "containing" conditional format over a range.
    let conditional_format = ConditionalFormatText::new()
        .set_rule(ConditionalFormatTextRule::Contains("rust".to_string()))
        .set_format(&format2);

    worksheet.add_conditional_format(1, 0, 13, 0, &conditional_format)?;

    // Write a text "not containing" conditional format over the same range.
    let conditional_format = ConditionalFormatText::new()
        .set_rule(ConditionalFormatTextRule::DoesNotContain(
            "rust".to_string(),
        ))
        .set_format(&format1);

    worksheet.add_conditional_format(1, 0, 13, 0, &conditional_format)?;

    // Write a text "begins with" conditional format over a range.
    let conditional_format = ConditionalFormatText::new()
        .set_rule(ConditionalFormatTextRule::BeginsWith("t".to_string()))
        .set_format(&format2);

    worksheet.add_conditional_format(1, 2, 13, 2, &conditional_format)?;

    // Write a text "ends with" conditional format over the same range.
    let conditional_format = ConditionalFormatText::new()
        .set_rule(ConditionalFormatTextRule::EndsWith("t".to_string()))
        .set_format(&format1);

    worksheet.add_conditional_format(1, 2, 13, 2, &conditional_format)?;

    // -----------------------------------------------------------------------
    // Worksheet 9. Examples of 2 color scale conditional formats.
    // -----------------------------------------------------------------------
    let caption = "Examples of 2 color scale conditional formats";

    // Add a worksheet to the workbook.
    let worksheet = workbook.add_worksheet();

    // Write the caption.
    worksheet.write(0, 1, caption)?;

    // Write the worksheet data.
    let data = [1, 2, 3, 4, 5, 6, 7, 8, 9, 10];
    worksheet.write_column(2, 1, data)?;
    worksheet.write_column(2, 3, data)?;
    worksheet.write_column(2, 5, data)?;
    worksheet.write_column(2, 7, data)?;
    worksheet.write_column(2, 9, data)?;
    worksheet.write_column(2, 11, data)?;

    // Set the column widths for clarity.
    worksheet.set_column_range_width(0, 12, 6)?;

    // Write 2 color scale formats with standard Excel colors.
    let conditional_format = ConditionalFormat2ColorScale::new()
        .set_minimum_color("F8696B")
        .set_maximum_color("FCFCFF");

    worksheet.add_conditional_format(2, 1, 11, 1, &conditional_format)?;

    let conditional_format = ConditionalFormat2ColorScale::new()
        .set_minimum_color("FCFCFF")
        .set_maximum_color("F8696B");

    worksheet.add_conditional_format(2, 3, 11, 3, &conditional_format)?;

    let conditional_format = ConditionalFormat2ColorScale::new()
        .set_minimum_color("FCFCFF")
        .set_maximum_color("63BE7B");

    worksheet.add_conditional_format(2, 5, 11, 5, &conditional_format)?;

    let conditional_format = ConditionalFormat2ColorScale::new()
        .set_minimum_color("63BE7B")
        .set_maximum_color("FCFCFF");

    worksheet.add_conditional_format(2, 7, 11, 7, &conditional_format)?;

    let conditional_format = ConditionalFormat2ColorScale::new()
        .set_minimum_color("FFEF9C")
        .set_maximum_color("63BE7B");

    worksheet.add_conditional_format(2, 9, 11, 9, &conditional_format)?;

    let conditional_format = ConditionalFormat2ColorScale::new()
        .set_minimum_color("63BE7B")
        .set_maximum_color("FFEF9C");

    worksheet.add_conditional_format(2, 11, 11, 11, &conditional_format)?;

    // -----------------------------------------------------------------------
    // Worksheet 10. Examples of 3 color scale conditional formats.
    // -----------------------------------------------------------------------
    let caption = "Examples of 3 color scale conditional formats";

    // Add a worksheet to the workbook.
    let worksheet = workbook.add_worksheet();

    // Write the caption.
    worksheet.write(0, 1, caption)?;

    // Write the worksheet data.
    let data = [1, 2, 3, 4, 5, 6, 7, 8, 9, 10];
    worksheet.write_column(2, 1, data)?;
    worksheet.write_column(2, 3, data)?;
    worksheet.write_column(2, 5, data)?;
    worksheet.write_column(2, 7, data)?;
    worksheet.write_column(2, 9, data)?;
    worksheet.write_column(2, 11, data)?;

    // Set the column widths for clarity.
    worksheet.set_column_range_width(0, 12, 6)?;

    // Write 3 color scale formats with standard Excel colors.
    let conditional_format = ConditionalFormat3ColorScale::new()
        .set_minimum_color("F8696B")
        .set_midpoint_color("FFEB84")
        .set_maximum_color("63BE7B");

    worksheet.add_conditional_format(2, 1, 11, 1, &conditional_format)?;

    let conditional_format = ConditionalFormat3ColorScale::new()
        .set_minimum_color("63BE7B")
        .set_midpoint_color("FFEB84")
        .set_maximum_color("F8696B");

    worksheet.add_conditional_format(2, 3, 11, 3, &conditional_format)?;

    let conditional_format = ConditionalFormat3ColorScale::new()
        .set_minimum_color("F8696B")
        .set_midpoint_color("FCFCFF")
        .set_maximum_color("63BE7B");

    worksheet.add_conditional_format(2, 5, 11, 5, &conditional_format)?;

    let conditional_format = ConditionalFormat3ColorScale::new()
        .set_minimum_color("63BE7B")
        .set_midpoint_color("FCFCFF")
        .set_maximum_color("F8696B");

    worksheet.add_conditional_format(2, 7, 11, 7, &conditional_format)?;

    let conditional_format = ConditionalFormat3ColorScale::new()
        .set_minimum_color("F8696B")
        .set_midpoint_color("FCFCFF")
        .set_maximum_color("5A8AC6");

    worksheet.add_conditional_format(2, 9, 11, 9, &conditional_format)?;

    let conditional_format = ConditionalFormat3ColorScale::new()
        .set_minimum_color("5A8AC6")
        .set_midpoint_color("FCFCFF")
        .set_maximum_color("F8696B");

    worksheet.add_conditional_format(2, 11, 11, 11, &conditional_format)?;

    // -----------------------------------------------------------------------
    // Worksheet 11. Examples of data bars.
    // -----------------------------------------------------------------------
    let caption = "Examples of data bars";

    // Add a worksheet to the workbook.
    let worksheet = workbook.add_worksheet();

    // Write the caption.
    worksheet.write_with_format(0, 1, caption, &bold)?;
    worksheet.write(1, 1, "Default")?;
    worksheet.write(1, 3, "Default negative")?;
    worksheet.write(1, 5, "User color")?;
    worksheet.write(1, 7, "Changed direction")?;

    // Write the worksheet data.
    let data1 = [1, 2, 3, 4, 5, 6, 7, 8, 9, 10];
    let data2 = [6, 4, 2, -2, -4, -6, -4, -2, 2, 4];
    worksheet.write_column(2, 1, data1)?;
    worksheet.write_column(2, 3, data2)?;
    worksheet.write_column(2, 5, data1)?;
    worksheet.write_column(2, 7, data1)?;

    // Write a standard Excel data bar.
    let conditional_format = ConditionalFormatDataBar::new();

    worksheet.add_conditional_format(2, 1, 11, 1, &conditional_format)?;

    // Write a standard Excel data bar with negative data
    let conditional_format = ConditionalFormatDataBar::new();

    worksheet.add_conditional_format(2, 3, 11, 3, &conditional_format)?;

    // Write a data bar with a user defined fill color.
    let conditional_format = ConditionalFormatDataBar::new().set_fill_color("009933");

    worksheet.add_conditional_format(2, 5, 11, 5, &conditional_format)?;

    // Write a data bar with the direction changed.
    let conditional_format = ConditionalFormatDataBar::new()
        .set_direction(ConditionalFormatDataBarDirection::RightToLeft);

    worksheet.add_conditional_format(2, 7, 11, 7, &conditional_format)?;

    // -----------------------------------------------------------------------
    // Worksheet 12. Examples of icon style conditional formats.
    // -----------------------------------------------------------------------
    let caption = "Examples of icon style conditional formats.";

    // Add a worksheet to the workbook.
    let worksheet = workbook.add_worksheet();

    // Write the caption.
    worksheet.write_with_format(0, 0, caption, &bold)?;
    worksheet.write_with_format(1, 0, "Three Traffic lights - Green is highest", &indent)?;
    worksheet.write_with_format(2, 0, "Reversed - Red is highest", &indent)?;
    worksheet.write_with_format(3, 0, "Icons only - The number data is hidden", &indent)?;

    worksheet.write_with_format(4, 0, "Other three-five icon examples", &bold)?;
    worksheet.write_with_format(5, 0, "Three arrows", &indent)?;
    worksheet.write_with_format(6, 0, "Three symbols", &indent)?;
    worksheet.write_with_format(7, 0, "Three stars", &indent)?;

    worksheet.write_with_format(8, 0, "Four arrows", &indent)?;
    worksheet.write_with_format(9, 0, "Four circles - Red (highest) to Black", &indent)?;
    worksheet.write_with_format(10, 0, "Four rating histograms", &indent)?;

    worksheet.write_with_format(11, 0, "Five arrows", &indent)?;
    worksheet.write_with_format(12, 0, "Five rating histograms", &indent)?;
    worksheet.write_with_format(13, 0, "Five rating quadrants", &indent)?;

    // Set the column width for clarity.
    worksheet.set_column_width(0, 35)?;

    // Write the worksheet data.
    worksheet.write_row(1, 1, [1, 2, 3])?;
    worksheet.write_row(2, 1, [1, 2, 3])?;
    worksheet.write_row(3, 1, [1, 2, 3])?;

    worksheet.write_row(5, 1, [1, 2, 3])?;
    worksheet.write_row(6, 1, [1, 2, 3])?;
    worksheet.write_row(7, 1, [1, 2, 3])?;

    worksheet.write_row(8, 1, [1, 2, 3, 4])?;
    worksheet.write_row(9, 1, [1, 2, 3, 4])?;
    worksheet.write_row(10, 1, [1, 2, 3, 4])?;

    worksheet.write_row(11, 1, [1, 2, 3, 4, 5])?;
    worksheet.write_row(12, 1, [1, 2, 3, 4, 5])?;
    worksheet.write_row(13, 1, [1, 2, 3, 4, 5])?;

    // Three Traffic lights - Green is highest.
    let conditional_format = ConditionalFormatIconSet::new()
        .set_icon_type(ConditionalFormatIconType::ThreeTrafficLights);

    worksheet.add_conditional_format(1, 1, 1, 3, &conditional_format)?;

    // Reversed - Red is highest.
    let conditional_format = ConditionalFormatIconSet::new()
        .set_icon_type(ConditionalFormatIconType::ThreeTrafficLights)
        .reverse_icons(true);

    worksheet.add_conditional_format(2, 1, 2, 3, &conditional_format)?;

    // Icons only - The number data is hidden.
    let conditional_format = ConditionalFormatIconSet::new()
        .set_icon_type(ConditionalFormatIconType::ThreeTrafficLights)
        .show_icons_only(true);

    worksheet.add_conditional_format(3, 1, 3, 3, &conditional_format)?;

    // Three arrows.
    let conditional_format =
        ConditionalFormatIconSet::new().set_icon_type(ConditionalFormatIconType::ThreeArrows);

    worksheet.add_conditional_format(5, 1, 5, 3, &conditional_format)?;

    // Three symbols.
    let conditional_format = ConditionalFormatIconSet::new()
        .set_icon_type(ConditionalFormatIconType::ThreeSymbolsCircled);

    worksheet.add_conditional_format(6, 1, 6, 3, &conditional_format)?;

    // Three stars.
    let conditional_format =
        ConditionalFormatIconSet::new().set_icon_type(ConditionalFormatIconType::ThreeStars);

    worksheet.add_conditional_format(7, 1, 7, 3, &conditional_format)?;

    // Four Arrows.
    let conditional_format =
        ConditionalFormatIconSet::new().set_icon_type(ConditionalFormatIconType::FourArrows);

    worksheet.add_conditional_format(8, 1, 8, 4, &conditional_format)?;

    // Four circles - Red (highest) to Black (lowest).
    let conditional_format =
        ConditionalFormatIconSet::new().set_icon_type(ConditionalFormatIconType::FourRedToBlack);

    worksheet.add_conditional_format(9, 1, 9, 4, &conditional_format)?;

    // Four rating histograms.
    let conditional_format =
        ConditionalFormatIconSet::new().set_icon_type(ConditionalFormatIconType::FourHistograms);

    worksheet.add_conditional_format(10, 1, 10, 4, &conditional_format)?;

    // Four Arrows.
    let conditional_format =
        ConditionalFormatIconSet::new().set_icon_type(ConditionalFormatIconType::FiveArrows);

    worksheet.add_conditional_format(11, 1, 11, 5, &conditional_format)?;

    // Four rating histograms.
    let conditional_format =
        ConditionalFormatIconSet::new().set_icon_type(ConditionalFormatIconType::FiveHistograms);

    worksheet.add_conditional_format(12, 1, 12, 5, &conditional_format)?;

    // Four rating quadrants.
    let conditional_format =
        ConditionalFormatIconSet::new().set_icon_type(ConditionalFormatIconType::FiveQuadrants);

    worksheet.add_conditional_format(13, 1, 13, 5, &conditional_format)?;

    // -----------------------------------------------------------------------
    // Save and close the file.
    // -----------------------------------------------------------------------
    workbook.save("conditional_formats.xlsx")?;

    Ok(())
}
Data Validation: Add cell validation and dropdowns
Example of how to add data validation and dropdown lists using the
rust_xlsxwriter library.
Data validation is a feature of Excel which allows you to restrict the data that a user enters in a cell and to display help and warning messages. It also allows you to restrict input to values in a drop down list.
Image of the output file:
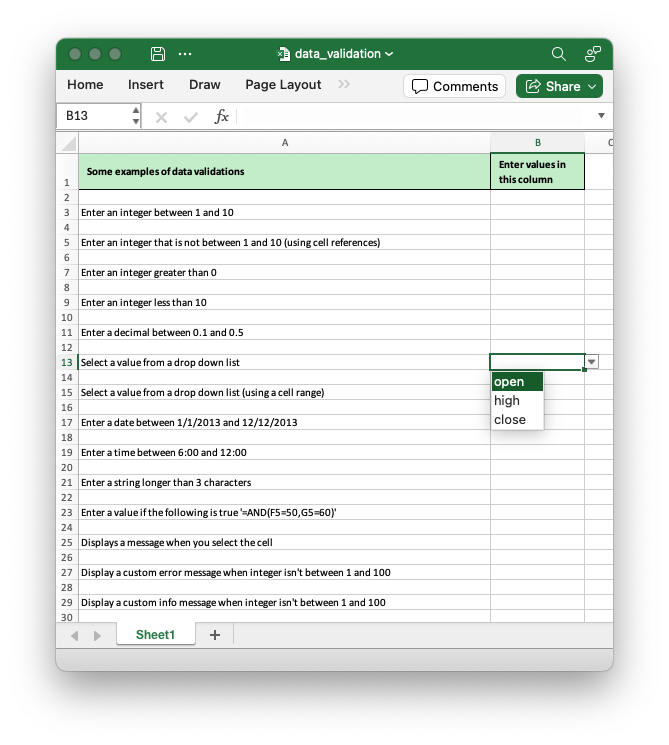
Code to generate the output file:
// SPDX-License-Identifier: MIT OR Apache-2.0
//
// Copyright 2022-2026, John McNamara, jmcnamara@cpan.org

//! Example of how to add data validation and dropdown lists using the
//! `rust_xlsxwriter` library.
//!
//! Data validation is a feature of Excel which allows you to restrict the data
//! that a user enters in a cell and to display help and warning messages. It
//! also allows you to restrict input to values in a drop down list.

use rust_xlsxwriter::{
    DataValidation, DataValidationErrorStyle, DataValidationRule, ExcelDateTime, Format,
    FormatAlign, FormatBorder, Formula, Workbook, XlsxError,
};

fn main() -> Result<(), XlsxError> {
    // Create a new Excel file object.
    let mut workbook = Workbook::new();

    // Add a worksheet to the workbook.
    let worksheet = workbook.add_worksheet();

    // Add a format for the header cells.
    let header_format = Format::new()
        .set_background_color("C6EFCE")
        .set_border(FormatBorder::Thin)
        .set_bold()
        .set_indent(1)
        .set_text_wrap()
        .set_align(FormatAlign::VerticalCenter);

    // Set up layout of the worksheet.
    worksheet.set_column_width(0, 68)?;
    worksheet.set_column_width(1, 15)?;
    worksheet.set_column_width(3, 15)?;
    worksheet.set_row_height(0, 36)?;

    // Write the header cells and some data that will be used in the examples.
    let heading1 = "Some examples of data validations";
    let heading2 = "Enter values in this column";
    let heading3 = "Sample Data";

    worksheet.write_with_format(0, 0, heading1, &header_format)?;
    worksheet.write_with_format(0, 1, heading2, &header_format)?;
    worksheet.write_with_format(0, 3, heading3, &header_format)?;

    worksheet.write(2, 3, "Integers")?;
    worksheet.write(2, 4, 1)?;
    worksheet.write(2, 5, 10)?;

    worksheet.write_row(3, 3, ["List data", "open", "high", "close"])?;

    worksheet.write(4, 3, "Formula")?;
    worksheet.write(4, 4, Formula::new("=AND(F5=50,G5=60)"))?;
    worksheet.write(4, 5, 50)?;
    worksheet.write(4, 6, 60)?;

    // -----------------------------------------------------------------------
    // Example 1. Limiting input to an integer in a fixed range.
    // -----------------------------------------------------------------------
    let text = "Enter an integer between 1 and 10";
    worksheet.write(2, 0, text)?;

    let data_validation =
        DataValidation::new().allow_whole_number(DataValidationRule::Between(1, 10));

    worksheet.add_data_validation(2, 1, 2, 1, &data_validation)?;

    // -----------------------------------------------------------------------
    // Example 2. Limiting input to an integer outside a fixed range.
    // -----------------------------------------------------------------------
    let text = "Enter an integer that is not between 1 and 10 (using cell references)";
    worksheet.write(4, 0, text)?;

    let data_validation = DataValidation::new()
        .allow_whole_number_formula(DataValidationRule::NotBetween("=E3".into(), "=F3".into()));

    worksheet.add_data_validation(4, 1, 4, 1, &data_validation)?;

    // -----------------------------------------------------------------------
    // Example 3. Limiting input to an integer greater than a fixed value.
    // -----------------------------------------------------------------------
    let text = "Enter an integer greater than 0";
    worksheet.write(6, 0, text)?;

    let data_validation =
        DataValidation::new().allow_whole_number(DataValidationRule::GreaterThan(0));

    worksheet.add_data_validation(6, 1, 6, 1, &data_validation)?;

    // -----------------------------------------------------------------------
    // Example 4. Limiting input to an integer less than a fixed value.
    // -----------------------------------------------------------------------
    let text = "Enter an integer less than 10";
    worksheet.write(8, 0, text)?;

    let data_validation =
        DataValidation::new().allow_whole_number(DataValidationRule::LessThan(10));

    worksheet.add_data_validation(8, 1, 8, 1, &data_validation)?;

    // -----------------------------------------------------------------------
    // Example 5. Limiting input to a decimal in a fixed range.
    // -----------------------------------------------------------------------
    let text = "Enter a decimal between 0.1 and 0.5";
    worksheet.write(10, 0, text)?;

    let data_validation =
        DataValidation::new().allow_decimal_number(DataValidationRule::Between(0.1, 0.5));

    worksheet.add_data_validation(10, 1, 10, 1, &data_validation)?;

    // -----------------------------------------------------------------------
    // Example 6. Limiting input to a value in a dropdown list.
    // -----------------------------------------------------------------------
    let text = "Select a value from a drop down list";
    worksheet.write(12, 0, text)?;

    let data_validation = DataValidation::new().allow_list_strings(&["open", "high", "close"])?;

    worksheet.add_data_validation(12, 1, 12, 1, &data_validation)?;

    // -----------------------------------------------------------------------
    // Example 7. Limiting input to a value in a dropdown list.
    // -----------------------------------------------------------------------
    let text = "Select a value from a drop down list (using a cell range)";
    worksheet.write(14, 0, text)?;

    let data_validation = DataValidation::new().allow_list_formula("=$E$4:$G$4".into());

    worksheet.add_data_validation(14, 1, 14, 1, &data_validation)?;

    // -----------------------------------------------------------------------
    // Example 8. Limiting input to a date in a fixed range.
    // -----------------------------------------------------------------------
    let text = "Enter a date between 1/1/2025 and 12/12/2025";
    worksheet.write(16, 0, text)?;

    let data_validation = DataValidation::new().allow_date(DataValidationRule::Between(
        ExcelDateTime::parse_from_str("2025-01-01")?,
        ExcelDateTime::parse_from_str("2025-12-12")?,
    ));

    worksheet.add_data_validation(16, 1, 16, 1, &data_validation)?;

    // -----------------------------------------------------------------------
    // Example 9. Limiting input to a time in a fixed range.
    // -----------------------------------------------------------------------
    let text = "Enter a time between 6:00 and 12:00";
    worksheet.write(18, 0, text)?;

    let data_validation = DataValidation::new().allow_time(DataValidationRule::Between(
        ExcelDateTime::parse_from_str("6:00")?,
        ExcelDateTime::parse_from_str("12:00")?,
    ));

    worksheet.add_data_validation(18, 1, 18, 1, &data_validation)?;

    // -----------------------------------------------------------------------
    // Example 10. Limiting input to a string greater than a fixed length.
    // -----------------------------------------------------------------------
    let text = "Enter a string longer than 3 characters";
    worksheet.write(20, 0, text)?;

    let data_validation =
        DataValidation::new().allow_text_length(DataValidationRule::GreaterThan(3));

    worksheet.add_data_validation(20, 1, 20, 1, &data_validation)?;

    // -----------------------------------------------------------------------
    // Example 11. Limiting input based on a formula.
    // -----------------------------------------------------------------------
    let text = "Enter a value if the following is true '=AND(F5=50,G5=60)'";
    worksheet.write(22, 0, text)?;

    let data_validation = DataValidation::new().allow_custom("=AND(F5=50,G5=60)".into());

    worksheet.add_data_validation(22, 1, 22, 1, &data_validation)?;

    // -----------------------------------------------------------------------
    // Example 12. Displaying and modifying data validation messages.
    // -----------------------------------------------------------------------
    let text = "Displays a message when you select the cell";
    worksheet.write(24, 0, text)?;

    let data_validation = DataValidation::new()
        .allow_whole_number(DataValidationRule::Between(1, 100))
        .set_input_title("Enter an integer:")?
        .set_input_message("between 1 and 100")?;

    worksheet.add_data_validation(24, 1, 24, 1, &data_validation)?;

    // -----------------------------------------------------------------------
    // Example 13. Displaying and modifying data validation messages.
    // -----------------------------------------------------------------------
    let text = "Display a custom error message when integer isn't between 1 and 100";
    worksheet.write(26, 0, text)?;

    let data_validation = DataValidation::new()
        .allow_whole_number(DataValidationRule::Between(1, 100))
        .set_input_title("Enter an integer:")?
        .set_input_message("between 1 and 100")?
        .set_error_title("Input value is not valid!")?
        .set_error_message("It should be an integer between 1 and 100")?;

    worksheet.add_data_validation(26, 1, 26, 1, &data_validation)?;

    // -----------------------------------------------------------------------
    // Example 14. Displaying and modifying data validation messages.
    // -----------------------------------------------------------------------
    let text = "Display a custom info message when integer isn't between 1 and 100";
    worksheet.write(28, 0, text)?;

    let data_validation = DataValidation::new()
        .allow_whole_number(DataValidationRule::Between(1, 100))
        .set_input_title("Enter an integer:")?
        .set_input_message("between 1 and 100")?
        .set_error_title("Input value is not valid!")?
        .set_error_message("It should be an integer between 1 and 100")?
        .set_error_style(DataValidationErrorStyle::Information);

    worksheet.add_data_validation(28, 1, 28, 1, &data_validation)?;

    // -----------------------------------------------------------------------
    // Save and close the file.
    // -----------------------------------------------------------------------
    workbook.save("data_validation.xlsx")?;

    Ok(())
}
Notes: Adding notes to worksheet cells
An example of writing cell Notes to a worksheet.
A Note is a post-it style message that is revealed when the user mouses over a worksheet cell. The presence of a Note is indicated by a small red triangle in the upper right-hand corner of the cell.
Image of the output file:
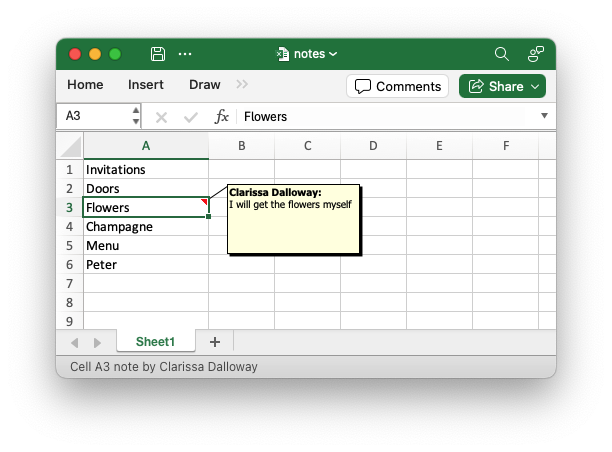
Code to generate the output file:
use rust_xlsxwriter::{Note, Workbook, XlsxError};
fn main() -> Result<(), XlsxError> {
// Create a new Excel file object.
let mut workbook = Workbook::new();
// Add a worksheet to the workbook.
let worksheet = workbook.add_worksheet();
// Widen the first column for clarity.
worksheet.set_column_width(0, 16)?;
// Write some data.
let party_items = [
"Invitations",
"Doors",
"Flowers",
"Champagne",
"Menu",
"Peter",
];
worksheet.write_column(0, 0, party_items)?;
// Create a new worksheet Note.
let note = Note::new("I will get the flowers myself").set_author("Clarissa Dalloway");
// Add the note to a cell.
worksheet.insert_note(2, 0, ¬e)?;
// Save the file to disk.
workbook.save("notes.xlsx")?;
Ok(())
}Traits: Extending generic write() to handle user data types
Example of how to extend the the rust_xlsxwriterWorksheet::write() method using the
IntoExcelData trait to handle arbitrary user data that can be mapped to one
of the main Excel data types.
For this example we create a simple struct type to represent a Unix Time. This
is the number of elapsed seconds since the epoch of January 1970 (UTC). Note,
this is for demonstration purposes only. The ExcelDateTime struct in
rust_xlsxwriter can handle Unix timestamps.
Image of the output file:
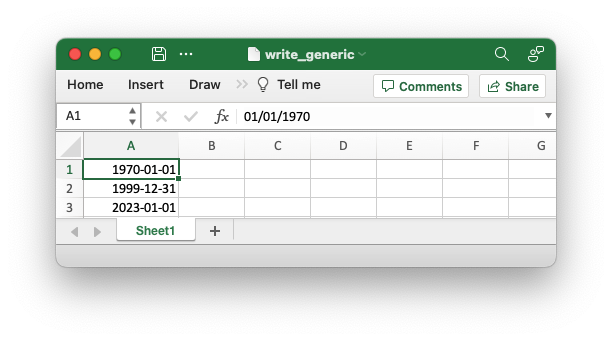
Code to generate the output file:
// SPDX-License-Identifier: MIT OR Apache-2.0
//
// Copyright 2022-2026, John McNamara, jmcnamara@cpan.org

//! Example of how to extend the the `rust_xlsxwriter` `write()` method using
//! the IntoExcelData trait to handle arbitrary user data that can be mapped to
//! one of the main Excel data types.

use rust_xlsxwriter::*;

fn main() -> Result<(), XlsxError> {
    // Create a new Excel file object.
    let mut workbook = Workbook::new();

    // Add a worksheet to the workbook.
    let worksheet = workbook.add_worksheet();

    // Add a format for the dates.
    let format = Format::new().set_num_format("yyyy-mm-dd");

    // Make the first column wider for clarity.
    worksheet.set_column_width(0, 12)?;

    // Write user defined type instances that implement the IntoExcelData trait.
    worksheet.write_with_format(0, 0, UnixTime::new(0), &format)?;
    worksheet.write_with_format(1, 0, UnixTime::new(946598400), &format)?;
    worksheet.write_with_format(2, 0, UnixTime::new(1672531200), &format)?;

    // Save the file to disk.
    workbook.save("write_generic.xlsx")?;

    Ok(())
}

// For this example we create a simple struct type to represent a Unix time.
// This is the number of elapsed seconds since the epoch of January 1970 (UTC).
// See https://en.wikipedia.org/wiki/Unix_time. Note, this is for demonstration
// purposes only. The `ExcelDateTime` struct in `rust_xlsxwriter` can handle
// Unix timestamps.
pub struct UnixTime {
    seconds: u64,
}

impl UnixTime {
    pub fn new(seconds: u64) -> UnixTime {
        UnixTime { seconds }
    }
}

// Implement the IntoExcelData trait to map our new UnixTime struct into an
// Excel type.
//
// The relevant Excel type is f64 which is used to store dates and times (along
// with a number format). The Unix 1970 epoch equates to a date/number of
// 25569.0. For Unix times beyond that we divide by the number of seconds in the
// day (24 * 60 * 60) to get the Excel serial date.
//
// We need to implement two methods for the trait in order to write data with
// and without a format.
//
impl IntoExcelData for UnixTime {
    fn write(
        self,
        worksheet: &mut Worksheet,
        row: RowNum,
        col: ColNum,
    ) -> Result<&mut Worksheet, XlsxError> {
        // Convert the Unix time to an Excel datetime.
        let datetime = 25569.0 + (self.seconds as f64 / (24.0 * 60.0 * 60.0));

        // Write the date as a number with a format.
        worksheet.write_number(row, col, datetime)
    }

    fn write_with_format<'a>(
        self,
        worksheet: &'a mut Worksheet,
        row: RowNum,
        col: ColNum,
        format: &Format,
    ) -> Result<&'a mut Worksheet, XlsxError> {
        // Convert the Unix time to an Excel datetime.
        let datetime = 25569.0 + (self.seconds as f64 / (24.0 * 60.0 * 60.0));

        // Write the date with the user supplied format.
        worksheet.write_number_with_format(row, col, datetime, format)
    }
}
Rich strings: Add multi-font rich strings to a worksheet
An example of writing "rich" multi-format strings to worksheet cells.
Image of the output file:
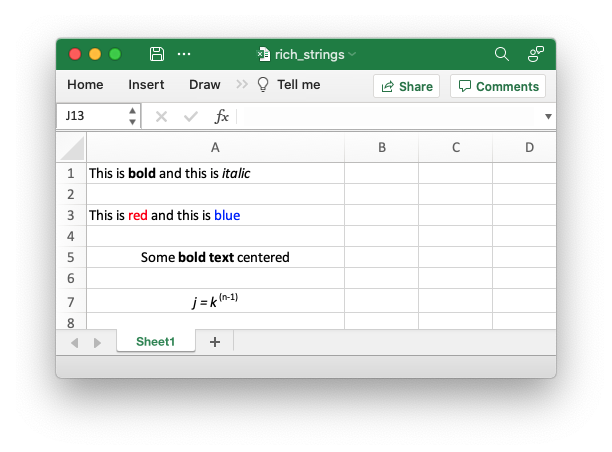
Code to generate the output file:
// SPDX-License-Identifier: MIT OR Apache-2.0
//
// Copyright 2022-2026, John McNamara, jmcnamara@cpan.org
//! An example of using the `rust_xlsxwriter` library to write "rich" multi-format
//! strings in worksheet cells.
use rust_xlsxwriter::{Color, Format, FormatAlign, FormatScript, Workbook, XlsxError};
fn main() -> Result<(), XlsxError> {
// Create a new Excel file object.
let mut workbook = Workbook::new();
// Add a worksheet to the workbook.
let worksheet = workbook.add_worksheet();
worksheet.set_column_width(0, 30)?;
// Add some formats to use in the rich strings.
let default = Format::default();
let red = Format::new().set_font_color(Color::Red);
let blue = Format::new().set_font_color(Color::Blue);
let bold = Format::new().set_bold();
let italic = Format::new().set_italic();
let center = Format::new().set_align(FormatAlign::Center);
let superscript = Format::new().set_font_script(FormatScript::Superscript);
// Write some rich strings with multiple formats.
let segments = [
(&default, "This is "),
(&bold, "bold"),
(&default, " and this is "),
(&italic, "italic"),
];
worksheet.write_rich_string(0, 0, &segments)?;
let segments = [
(&default, "This is "),
(&red, "red"),
(&default, " and this is "),
(&blue, "blue"),
];
worksheet.write_rich_string(2, 0, &segments)?;
let segments = [
(&default, "Some "),
(&bold, "bold text"),
(&default, " centered"),
];
worksheet.write_rich_string_with_format(4, 0, &segments, ¢er)?;
let segments = [(&italic, "j = k"), (&superscript, "(n-1)")];
worksheet.write_rich_string_with_format(6, 0, &segments, ¢er)?;
// It is possible, and idiomatic, to use slices as the string segments.
let text = "This is blue and this is red";
let segments = [
(&default, &text[..8]),
(&blue, &text[8..12]),
(&default, &text[12..25]),
(&red, &text[25..]),
];
worksheet.write_rich_string(8, 0, &segments)?;
// Save the file to disk.
workbook.save("rich_strings.xlsx")?;
Ok(())
}Format colors: Create a palette of the available colors
This example create a sample palette of the the defined colors, some user
defined RGB colors, and the theme palette color available in therust_xlsxwriter
library.
See also Working with Colors.
Images of the output file:

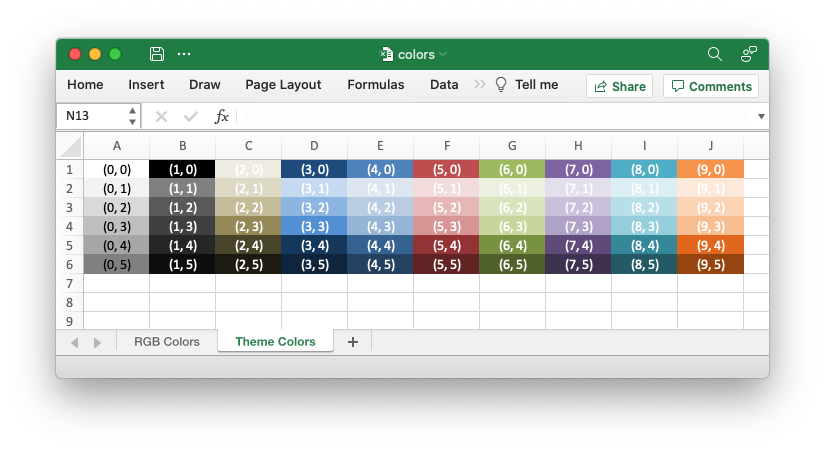
Code to generate the output file:
// SPDX-License-Identifier: MIT OR Apache-2.0
//
// Copyright 2022-2026, John McNamara, jmcnamara@cpan.org

//! A demonstration of the RGB and Theme colors palettes available in the
//! `rust_xlsxwriter` library.

use rust_xlsxwriter::*;

fn main() -> Result<(), XlsxError> {
    // Create a new Excel file object.
    let mut workbook = Workbook::new();

    // Add a worksheet for the RGB colors.
    let worksheet = workbook.add_worksheet().set_name("RGB Colors")?;

    // Write some enum defined colors to cells.
    let color_format = Format::new().set_background_color(Color::Black);
    worksheet.write_string(0, 0, "Black")?;
    worksheet.write_blank(0, 1, &color_format)?;

    let color_format = Format::new().set_background_color(Color::Blue);
    worksheet.write_string(1, 0, "Blue")?;
    worksheet.write_blank(1, 1, &color_format)?;

    let color_format = Format::new().set_background_color(Color::Brown);
    worksheet.write_string(2, 0, "Brown")?;
    worksheet.write_blank(2, 1, &color_format)?;

    let color_format = Format::new().set_background_color(Color::Cyan);
    worksheet.write_string(3, 0, "Cyan")?;
    worksheet.write_blank(3, 1, &color_format)?;

    let color_format = Format::new().set_background_color(Color::Gray);
    worksheet.write_string(4, 0, "Gray")?;
    worksheet.write_blank(4, 1, &color_format)?;

    let color_format = Format::new().set_background_color(Color::Green);
    worksheet.write_string(5, 0, "Green")?;
    worksheet.write_blank(5, 1, &color_format)?;

    let color_format = Format::new().set_background_color(Color::Lime);
    worksheet.write_string(6, 0, "Lime")?;
    worksheet.write_blank(6, 1, &color_format)?;

    let color_format = Format::new().set_background_color(Color::Magenta);
    worksheet.write_string(7, 0, "Magenta")?;
    worksheet.write_blank(7, 1, &color_format)?;

    let color_format = Format::new().set_background_color(Color::Navy);
    worksheet.write_string(8, 0, "Navy")?;
    worksheet.write_blank(8, 1, &color_format)?;

    let color_format = Format::new().set_background_color(Color::Orange);
    worksheet.write_string(9, 0, "Orange")?;
    worksheet.write_blank(9, 1, &color_format)?;

    let color_format = Format::new().set_background_color(Color::Pink);
    worksheet.write_string(10, 0, "Pink")?;
    worksheet.write_blank(10, 1, &color_format)?;

    let color_format = Format::new().set_background_color(Color::Purple);
    worksheet.write_string(11, 0, "Purple")?;
    worksheet.write_blank(11, 1, &color_format)?;

    let color_format = Format::new().set_background_color(Color::Red);
    worksheet.write_string(12, 0, "Red")?;
    worksheet.write_blank(12, 1, &color_format)?;

    let color_format = Format::new().set_background_color(Color::Silver);
    worksheet.write_string(13, 0, "Silver")?;
    worksheet.write_blank(13, 1, &color_format)?;

    let color_format = Format::new().set_background_color(Color::White);
    worksheet.write_string(14, 0, "White")?;
    worksheet.write_blank(14, 1, &color_format)?;

    let color_format = Format::new().set_background_color(Color::Yellow);
    worksheet.write_string(15, 0, "Yellow")?;
    worksheet.write_blank(15, 1, &color_format)?;

    // Write some user defined RGB colors to cells.
    let color_format = Format::new().set_background_color(Color::RGB(0xFF7F50));
    worksheet.write_string(16, 0, "#FF7F50")?;
    worksheet.write_blank(16, 1, &color_format)?;

    let color_format = Format::new().set_background_color(Color::RGB(0xDCDCDC));
    worksheet.write_string(17, 0, "#DCDCDC")?;
    worksheet.write_blank(17, 1, &color_format)?;

    // Write a RGB color with the shorter Html string variant.
    let color_format = Format::new().set_background_color("#6495ED");
    worksheet.write_string(18, 0, "#6495ED")?;
    worksheet.write_blank(18, 1, &color_format)?;

    // Write a RGB color with the optional u32 variant.
    let color_format = Format::new().set_background_color(0xDAA520);
    worksheet.write_string(19, 0, "#DAA520")?;
    worksheet.write_blank(19, 1, &color_format)?;

    // Add a worksheet for the Theme colors.
    let worksheet = workbook.add_worksheet().set_name("Theme Colors")?;

    // Create a cell with each of the theme colors.
    for row in 0..=5u32 {
        for col in 0..=9u16 {
            let color = col as u8;
            let shade = row as u8;
            let theme_color = Color::Theme(color, shade);
            let text = format!("({col}, {row})");

            let mut font_color = Color::White;
            if col == 0 {
                font_color = Color::Default;
            }

            let color_format = Format::new()
                .set_background_color(theme_color)
                .set_font_color(font_color)
                .set_align(FormatAlign::Center);

            worksheet.write_string_with_format(row, col, &text, &color_format)?;
        }
    }

    // Save the file to disk.
    workbook.save("colors.xlsx")?;

    Ok(())
}
Theme: Use a custom workbook theme
An example of setting the default theme for a workbook to a user supplied custom
theme using the rust_xlsxwriter library. This example uses an Excel .thmx
file but it can also be an .xlsx file or a theme xml file extracted from an
Excel xlsx file.
Note that the default font has changed to "Arial (body) 11".
Image of the output file:
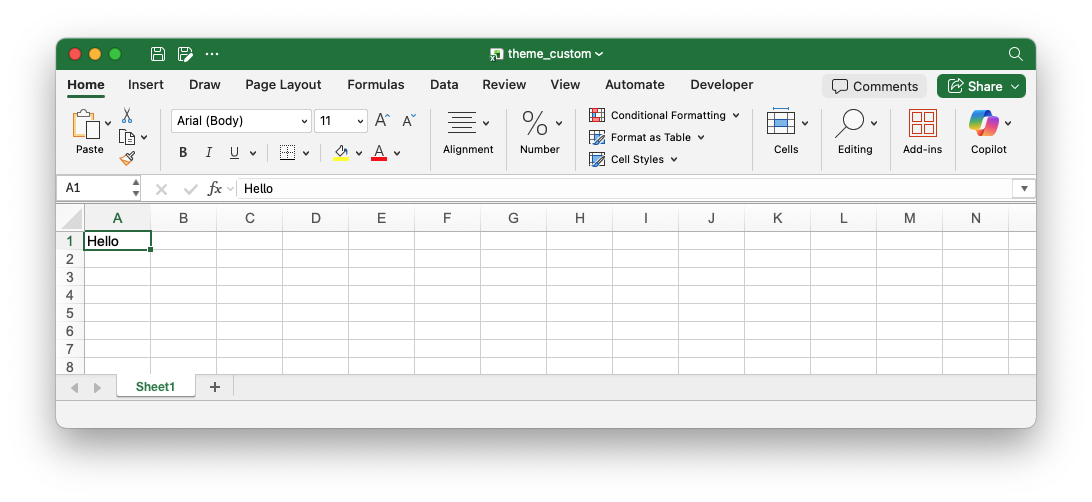
Code to generate the output file:
// SPDX-License-Identifier: MIT OR Apache-2.0
//
// Copyright 2022-2026, John McNamara, jmcnamara@cpan.org

//! Example of setting the default theme for a workbook to a user supplied
//! custom theme using the `rust_xlsxwriter` library. This example uses an Excel
//! `.thmx` file but it can also be an `.xlsx` file or a theme xml file
//! extracted from an Excel xlsx file.

use rust_xlsxwriter::{FontScheme, Format, Workbook, XlsxError};

fn main() -> Result<(), XlsxError> {
    let mut workbook = Workbook::new();

    // Add a custom theme to the workbook.
    workbook.use_custom_theme("tests/input/themes/Technic.thmx")?;

    // Create a new default format to match the custom theme. Note, that the
    // scheme is set to "Body" to indicate that the font is part of the theme.
    let format = Format::new()
        .set_font_name("Arial")
        .set_font_size(11)
        .set_font_scheme(FontScheme::Body);

    // Add the default format for the workbook.
    workbook.set_default_format(&format, 19, 72)?;

    // Add a worksheet to the workbook.
    let worksheet = workbook.add_worksheet();

    // Write some text to demonstrate the changed theme.
    worksheet.write(0, 0, "Hello")?;

    // Save the workbook to disk.
    workbook.save("theme_custom.xlsx")?;

    Ok(())
}
Theme: Use the Excel 2023/Aptos theme
An example of changing the default theme for a workbook using the
rust_xlsxwriter library. The example uses the Excel 2023 Office/Aptos theme.
Note that the default font has changed to "Aptos Narrow (body) 11".
Image of the output file:
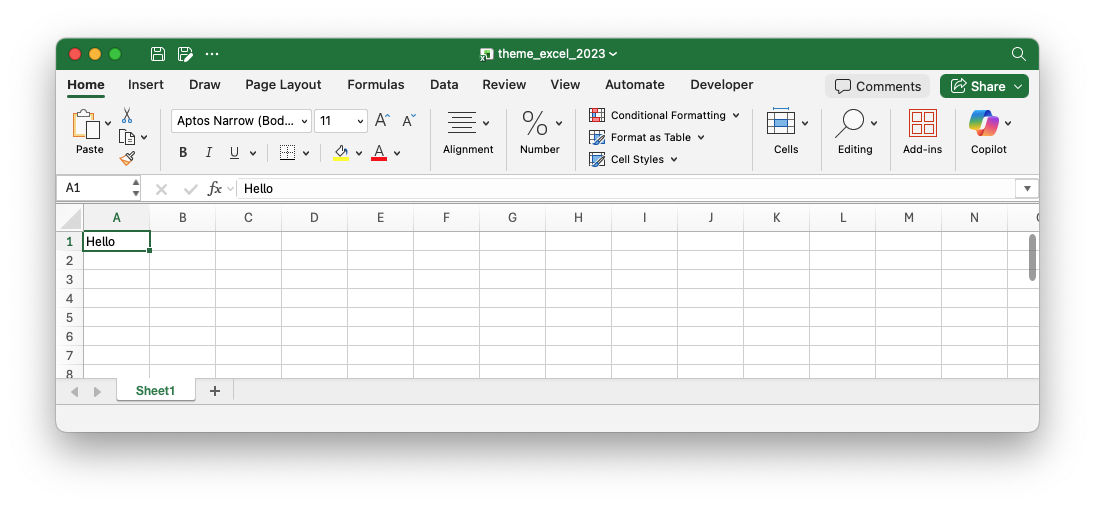
Code to generate the output file:
// SPDX-License-Identifier: MIT OR Apache-2.0
//
// Copyright 2022-2026, John McNamara, jmcnamara@cpan.org

//! Example of changing the default theme for a workbook using the
//! `rust_xlsxwriter` library. The example uses the Excel 2023 Office/Aptos
//! theme.

use rust_xlsxwriter::{Workbook, XlsxError};

fn main() -> Result<(), XlsxError> {
    let mut workbook = Workbook::new();

    // Use the Excel 2023 Office/Aptos theme in the workbook.
    workbook.use_excel_2023_theme()?;

    // Add a worksheet to the workbook.
    let worksheet = workbook.add_worksheet();

    // Write some text to demonstrate the changed theme.
    worksheet.write(0, 0, "Hello")?;

    // Save the workbook to disk.
    workbook.save("theme_excel_2023.xlsx")?;

    Ok(())
}
Hyperlinks: Add hyperlinks to a worksheet
This is an example of a program to create demonstrate creating links in a
worksheet using the rust_xlsxwriter library.
The links can be to external urls, to external files or internally to cells in the workbook.
Image of the output file:
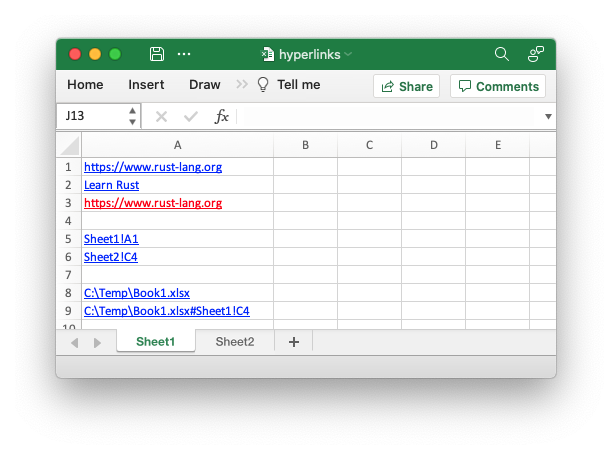
Code to generate the output file:
// SPDX-License-Identifier: MIT OR Apache-2.0
//
// Copyright 2022-2026, John McNamara, jmcnamara@cpan.org

//! An example of some of the features of URLs/hyperlinks using the
//! `rust_xlsxwriter` library.

use rust_xlsxwriter::{Color, Format, FormatUnderline, Workbook, XlsxError};

fn main() -> Result<(), XlsxError> {
    // Create a new Excel file object.
    let mut workbook = Workbook::new();

    // Create a format to use in the worksheet.
    let link_format = Format::new()
        .set_font_color(Color::Red)
        .set_underline(FormatUnderline::Single);

    // Add a worksheet to the workbook.
    let worksheet1 = workbook.add_worksheet();

    // Set the column width for clarity.
    worksheet1.set_column_width(0, 26)?;

    // Write some URL links.
    worksheet1.write_url(0, 0, "https://www.rust-lang.org")?;
    worksheet1.write_url_with_text(1, 0, "https://www.rust-lang.org", "Learn Rust")?;
    worksheet1.write_url_with_format(2, 0, "https://www.rust-lang.org", &link_format)?;

    // Write some internal links.
    worksheet1.write_url(4, 0, "internal:Sheet1!A1")?;
    worksheet1.write_url(5, 0, "internal:Sheet2!C4")?;

    // Write some external links.
    worksheet1.write_url(7, 0, r"file:///C:\Temp\Book1.xlsx")?;
    worksheet1.write_url(8, 0, r"file:///C:\Temp\Book1.xlsx#Sheet1!C4")?;

    // Add another sheet to link to.
    let worksheet2 = workbook.add_worksheet();
    worksheet2.write_string(3, 2, "Here I am")?;
    worksheet2.write_url_with_text(4, 2, "internal:Sheet1!A6", "Go back")?;

    // Save the file to disk.
    workbook.save("hyperlinks.xlsx")?;

    Ok(())
}
Chart: Simple: Simple getting started chart example
Getting started example of creating simple Excel charts.
Image of the output file:

Code to generate the output file:
// SPDX-License-Identifier: MIT OR Apache-2.0
//
// Copyright 2022-2026, John McNamara, jmcnamara@cpan.org

//! A simple chart example using the `rust_xlsxwriter` library.

use rust_xlsxwriter::{Chart, ChartType, Workbook, XlsxError};

fn main() -> Result<(), XlsxError> {
    let mut workbook = Workbook::new();
    let worksheet = workbook.add_worksheet();

    // Add some test data for the charts.
    let data = [[1, 2, 3, 4, 5], [2, 4, 6, 8, 10], [3, 6, 9, 12, 15]];
    for (col_num, col_data) in data.iter().enumerate() {
        for (row_num, row_data) in col_data.iter().enumerate() {
            worksheet.write(row_num as u32, col_num as u16, *row_data)?;
        }
    }

    // -----------------------------------------------------------------------
    // Create a new chart.
    // -----------------------------------------------------------------------
    let mut chart = Chart::new(ChartType::Column);

    // Add data series using Excel formula syntax to describe the range.
    chart.add_series().set_values("Sheet1!$A$1:$A$5");
    chart.add_series().set_values("Sheet1!$B$1:$B$5");
    chart.add_series().set_values("Sheet1!$C$1:$C$5");

    // Add the chart to the worksheet.
    worksheet.insert_chart(0, 4, &chart)?;

    // -----------------------------------------------------------------------
    // Create another chart to plot the same data as a Line chart.
    // -----------------------------------------------------------------------
    let mut chart = Chart::new(ChartType::Line);

    // Add data series to the chart using a tuple syntax to describe the range.
    // This method is better when you need to create the ranges programmatically
    // to match the data range in the worksheet.
    let row_min = 0;
    let row_max = data[0].len() as u32 - 1;
    chart
        .add_series()
        .set_values(("Sheet1", row_min, 0, row_max, 0));
    chart
        .add_series()
        .set_values(("Sheet1", row_min, 1, row_max, 1));
    chart
        .add_series()
        .set_values(("Sheet1", row_min, 2, row_max, 2));

    // Add the chart to the worksheet.
    worksheet.insert_chart(16, 4, &chart)?;

    workbook.save("chart.xlsx")?;

    Ok(())
}
Chart: Styles: Example of setting default chart styles
An example showing all 48 default chart styles available in Excel 2007 using the
chart set_style() method.
Image of the output file:
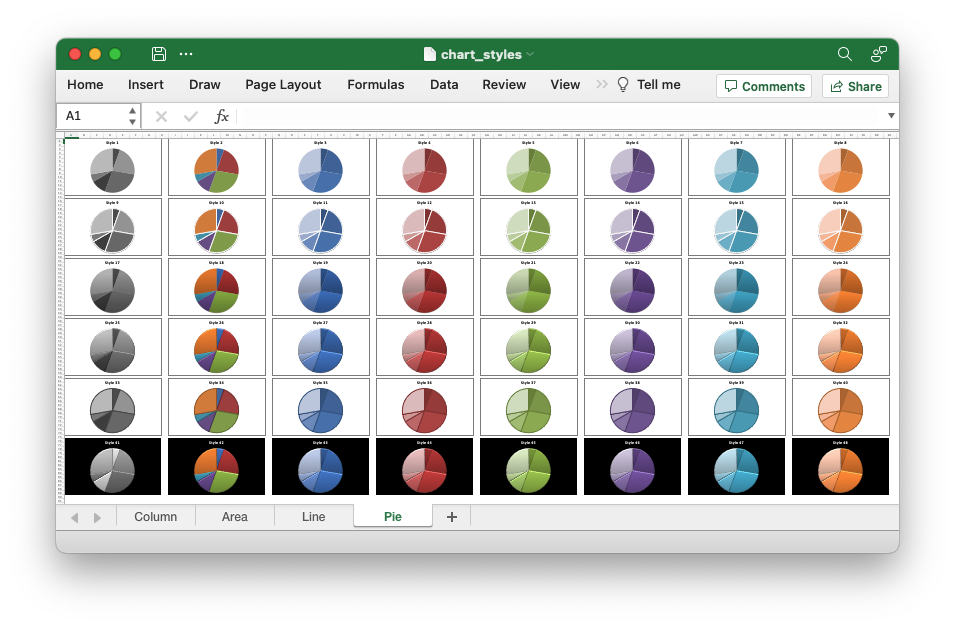
Code to generate the output file:
// SPDX-License-Identifier: MIT OR Apache-2.0
//
// Copyright 2022-2026, John McNamara, jmcnamara@cpan.org

//! An example showing all 48 default chart styles available in Excel 2007
//! using `rust_xlsxwriter`. Note, these styles are not the same as the styles
//! available in Excel 2013 and later.

use rust_xlsxwriter::{Chart, ChartType, Workbook, XlsxError};

fn main() -> Result<(), XlsxError> {
    let mut workbook = Workbook::new();

    let chart_types = vec![
        ("Column", ChartType::Column),
        ("Area", ChartType::Area),
        ("Line", ChartType::Line),
        ("Pie", ChartType::Pie),
    ];

    // Create a worksheet with 48 charts in each of the available styles, for
    // each of the chart types above.
    for (name, chart_type) in chart_types {
        let worksheet = workbook.add_worksheet().set_name(name)?.set_zoom(30);
        let mut chart = Chart::new(chart_type);
        chart.add_series().set_values("Data!$A$1:$A$6");
        let mut style = 1;

        for row_num in (0..90).step_by(15) {
            for col_num in (0..64).step_by(8) {
                chart.set_style(style);
                chart.title().set_name(&format!("Style {style}"));
                chart.legend().set_hidden();
                worksheet.insert_chart(row_num as u32, col_num as u16, &chart)?;
                style += 1;
            }
        }
    }

    // Create a worksheet with data for the charts.
    let data_worksheet = workbook.add_worksheet().set_name("Data")?;
    data_worksheet.write(0, 0, 10)?;
    data_worksheet.write(1, 0, 40)?;
    data_worksheet.write(2, 0, 50)?;
    data_worksheet.write(3, 0, 20)?;
    data_worksheet.write(4, 0, 10)?;
    data_worksheet.write(5, 0, 50)?;
    data_worksheet.set_hidden(true);

    workbook.save("chart_styles.xlsx")?;

    Ok(())
}
Chart: Area: Excel Area chart example
Example of creating Excel Area charts.
Image of the output file:
Chart 1 in the following example is a default area chart:
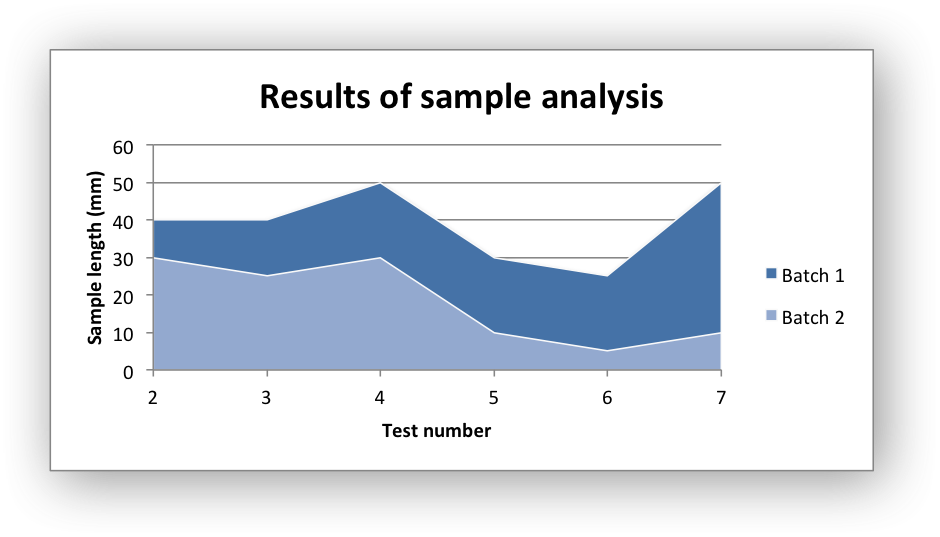
Chart 2 is a stacked area chart:
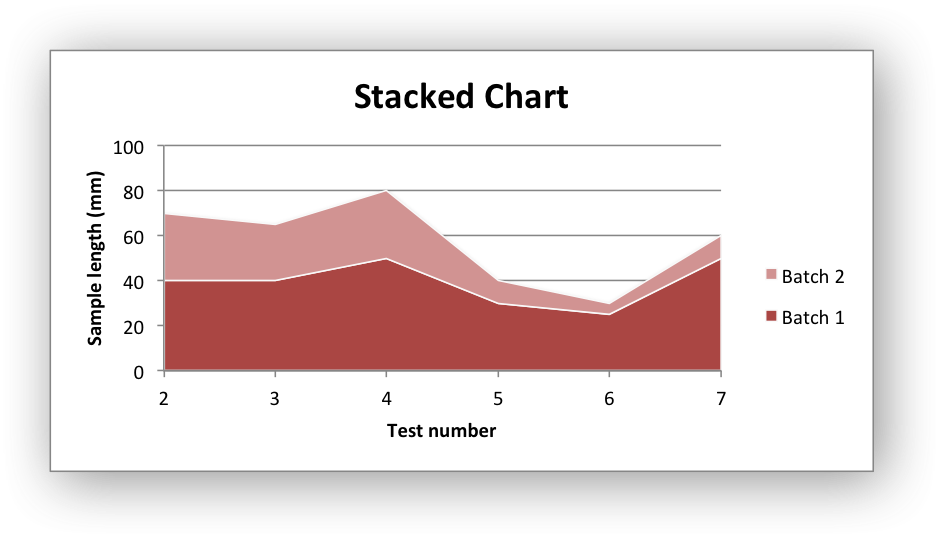
Chart 3 is a percentage stacked area chart:
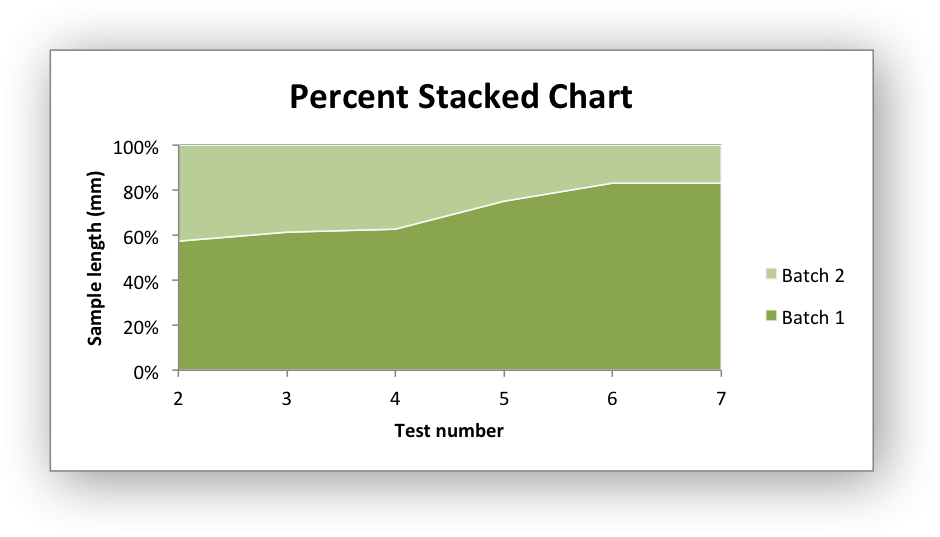
Code to generate the output file:
// SPDX-License-Identifier: MIT OR Apache-2.0
//
// Copyright 2022-2026, John McNamara, jmcnamara@cpan.org

//! An example of creating area charts using the `rust_xlsxwriter` library.

use rust_xlsxwriter::{Chart, ChartType, Format, Workbook, XlsxError};

fn main() -> Result<(), XlsxError> {
    let mut workbook = Workbook::new();
    let worksheet = workbook.add_worksheet();
    let bold = Format::new().set_bold();

    // Add the worksheet data that the charts will refer to.
    worksheet.write_with_format(0, 0, "Number", &bold)?;
    worksheet.write_with_format(0, 1, "Batch 1", &bold)?;
    worksheet.write_with_format(0, 2, "Batch 2", &bold)?;

    let data = [
        [2, 3, 4, 5, 6, 7],
        [40, 40, 50, 30, 25, 50],
        [30, 25, 30, 10, 5, 10],
    ];
    for (col_num, col_data) in data.iter().enumerate() {
        for (row_num, row_data) in col_data.iter().enumerate() {
            worksheet.write(row_num as u32 + 1, col_num as u16, *row_data)?;
        }
    }

    // -----------------------------------------------------------------------
    // Create a new area chart.
    // -----------------------------------------------------------------------
    let mut chart = Chart::new(ChartType::Area);

    // Configure the first data series for the chart.
    chart
        .add_series()
        .set_categories("Sheet1!$A$2:$A$7")
        .set_values("Sheet1!$B$2:$B$7")
        .set_name("Sheet1!$B$1");

    // Add another data series to the chart using the alternative tuple syntax
    // to describe the range. This method is better when you need to create the
    // ranges programmatically to match the data range in the worksheet.
    let row_min = 1;
    let row_max = data[0].len() as u32;
    chart
        .add_series()
        .set_categories(("Sheet1", row_min, 0, row_max, 0))
        .set_values(("Sheet1", row_min, 2, row_max, 2))
        .set_name(("Sheet1", 0, 2));

    // Add a chart title and some axis labels.
    chart.title().set_name("Results of sample analysis");
    chart.x_axis().set_name("Test number");
    chart.y_axis().set_name("Sample length (mm)");

    // Set an Excel chart style.
    chart.set_style(11);

    // Add the chart to the worksheet.
    worksheet.insert_chart_with_offset(1, 3, &chart, 25, 10)?;

    // -----------------------------------------------------------------------
    // Create a stacked chart sub-type.
    // -----------------------------------------------------------------------
    let mut chart = Chart::new(ChartType::AreaStacked);

    // Configure the first series.
    chart
        .add_series()
        .set_categories("Sheet1!$A$2:$A$7")
        .set_values("Sheet1!$B$2:$B$7")
        .set_name("Sheet1!$B$1");

    // Configure the second series.
    chart
        .add_series()
        .set_categories("Sheet1!$A$2:$A$7")
        .set_values("Sheet1!$C$2:$C$7")
        .set_name("Sheet1!$C$1");

    // Add a chart title and some axis labels.
    chart.title().set_name("Stacked Chart");
    chart.x_axis().set_name("Test number");
    chart.y_axis().set_name("Sample length (mm)");

    // Set an Excel chart style.
    chart.set_style(12);

    // Add the chart to the worksheet.
    worksheet.insert_chart_with_offset(17, 3, &chart, 25, 10)?;

    // -----------------------------------------------------------------------
    // Create a percentage stacked chart sub-type.
    // -----------------------------------------------------------------------
    let mut chart = Chart::new(ChartType::AreaPercentStacked);

    // Configure the first series.
    chart
        .add_series()
        .set_categories("Sheet1!$A$2:$A$7")
        .set_values("Sheet1!$B$2:$B$7")
        .set_name("Sheet1!$B$1");

    // Configure the second series.
    chart
        .add_series()
        .set_categories("Sheet1!$A$2:$A$7")
        .set_values("Sheet1!$C$2:$C$7")
        .set_name("Sheet1!$C$1");

    // Add a chart title and some axis labels.
    chart.title().set_name("Percent Stacked Chart");
    chart.x_axis().set_name("Test number");
    chart.y_axis().set_name("Sample length (mm)");

    // Set an Excel chart style.
    chart.set_style(13);

    // Add the chart to the worksheet.
    worksheet.insert_chart_with_offset(33, 3, &chart, 25, 10)?;

    workbook.save("chart_area.xlsx")?;

    Ok(())
}
Chart: Bar: Excel Bar chart example
Example of creating Excel Bar charts.
Image of the output file:
Chart 1 in the following example is a default bar chart:
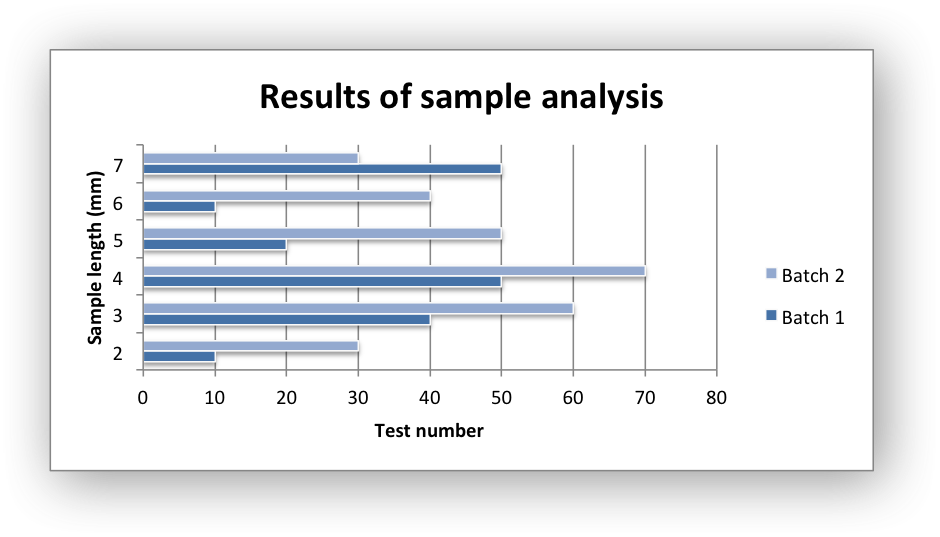
Chart 2 is a stacked bar chart:
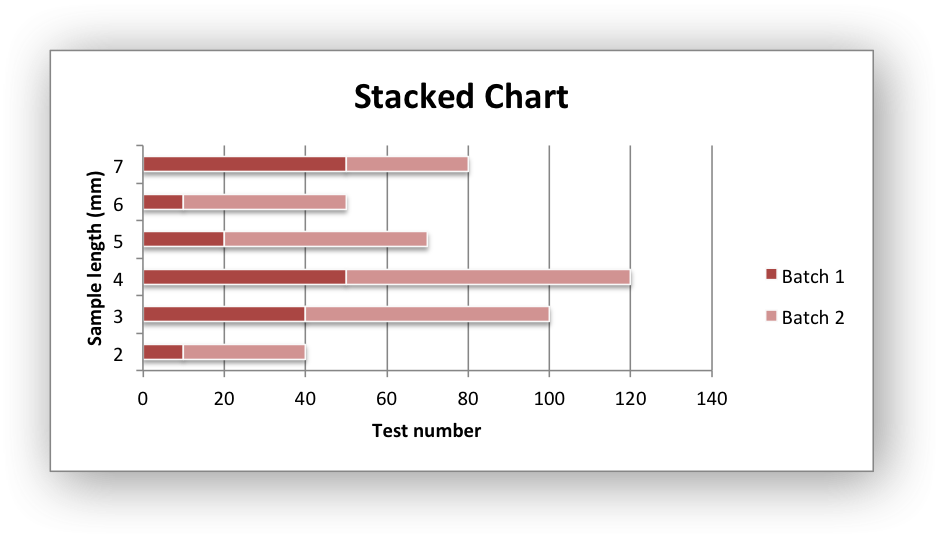
Chart 3 is a percentage stacked bar chart:
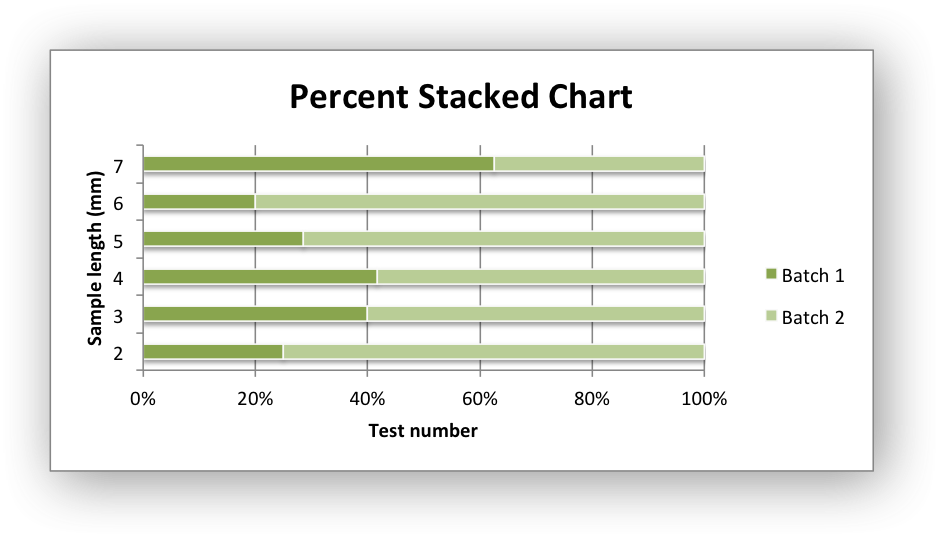
Code to generate the output file:
// SPDX-License-Identifier: MIT OR Apache-2.0
//
// Copyright 2022-2026, John McNamara, jmcnamara@cpan.org

//! An example of creating bar charts using the `rust_xlsxwriter` library.

use rust_xlsxwriter::{Chart, ChartType, Format, Workbook, XlsxError};

fn main() -> Result<(), XlsxError> {
    let mut workbook = Workbook::new();
    let worksheet = workbook.add_worksheet();
    let bold = Format::new().set_bold();

    // Add the worksheet data that the charts will refer to.
    worksheet.write_with_format(0, 0, "Number", &bold)?;
    worksheet.write_with_format(0, 1, "Batch 1", &bold)?;
    worksheet.write_with_format(0, 2, "Batch 2", &bold)?;

    let data = [
        [2, 3, 4, 5, 6, 7],
        [10, 40, 50, 20, 10, 50],
        [30, 60, 70, 50, 40, 30],
    ];
    for (col_num, col_data) in data.iter().enumerate() {
        for (row_num, row_data) in col_data.iter().enumerate() {
            worksheet.write(row_num as u32 + 1, col_num as u16, *row_data)?;
        }
    }

    // -----------------------------------------------------------------------
    // Create a new bar chart.
    // -----------------------------------------------------------------------
    let mut chart = Chart::new(ChartType::Bar);

    // Configure the first data series for the chart.
    chart
        .add_series()
        .set_categories("Sheet1!$A$2:$A$7")
        .set_values("Sheet1!$B$2:$B$7")
        .set_name("Sheet1!$B$1");

    // Add another data series to the chart using the alternative tuple syntax
    // to describe the range. This method is better when you need to create the
    // ranges programmatically to match the data range in the worksheet.
    let row_min = 1;
    let row_max = data[0].len() as u32;
    chart
        .add_series()
        .set_categories(("Sheet1", row_min, 0, row_max, 0))
        .set_values(("Sheet1", row_min, 2, row_max, 2))
        .set_name(("Sheet1", 0, 2));

    // Add a chart title and some axis labels.
    chart.title().set_name("Results of sample analysis");
    chart.x_axis().set_name("Test number");
    chart.y_axis().set_name("Sample length (mm)");

    // Set an Excel chart style.
    chart.set_style(11);

    // Add the chart to the worksheet.
    worksheet.insert_chart_with_offset(1, 3, &chart, 25, 10)?;

    // -----------------------------------------------------------------------
    // Create a stacked chart sub-type.
    // -----------------------------------------------------------------------
    let mut chart = Chart::new(ChartType::BarStacked);

    // Configure the first series.
    chart
        .add_series()
        .set_categories("Sheet1!$A$2:$A$7")
        .set_values("Sheet1!$B$2:$B$7")
        .set_name("Sheet1!$B$1");

    // Configure the second series.
    chart
        .add_series()
        .set_categories("Sheet1!$A$2:$A$7")
        .set_values("Sheet1!$C$2:$C$7")
        .set_name("Sheet1!$C$1");

    // Add a chart title and some axis labels.
    chart.title().set_name("Stacked Chart");
    chart.x_axis().set_name("Test number");
    chart.y_axis().set_name("Sample length (mm)");

    // Set an Excel chart style.
    chart.set_style(12);

    // Add the chart to the worksheet.
    worksheet.insert_chart_with_offset(17, 3, &chart, 25, 10)?;

    // -----------------------------------------------------------------------
    // Create a percentage stacked chart sub-type.
    // -----------------------------------------------------------------------
    let mut chart = Chart::new(ChartType::BarPercentStacked);

    // Configure the first series.
    chart
        .add_series()
        .set_categories("Sheet1!$A$2:$A$7")
        .set_values("Sheet1!$B$2:$B$7")
        .set_name("Sheet1!$B$1");

    // Configure the second series.
    chart
        .add_series()
        .set_categories("Sheet1!$A$2:$A$7")
        .set_values("Sheet1!$C$2:$C$7")
        .set_name("Sheet1!$C$1");

    // Add a chart title and some axis labels.
    chart.title().set_name("Percent Stacked Chart");
    chart.x_axis().set_name("Test number");
    chart.y_axis().set_name("Sample length (mm)");

    // Set an Excel chart style.
    chart.set_style(13);

    // Add the chart to the worksheet.
    worksheet.insert_chart_with_offset(33, 3, &chart, 25, 10)?;

    workbook.save("chart_bar.xlsx")?;

    Ok(())
}
Chart: Column: Excel Column chart example
Example of creating Excel Column charts.
Image of the output file:
Chart 1 in the following example is a default column chart:
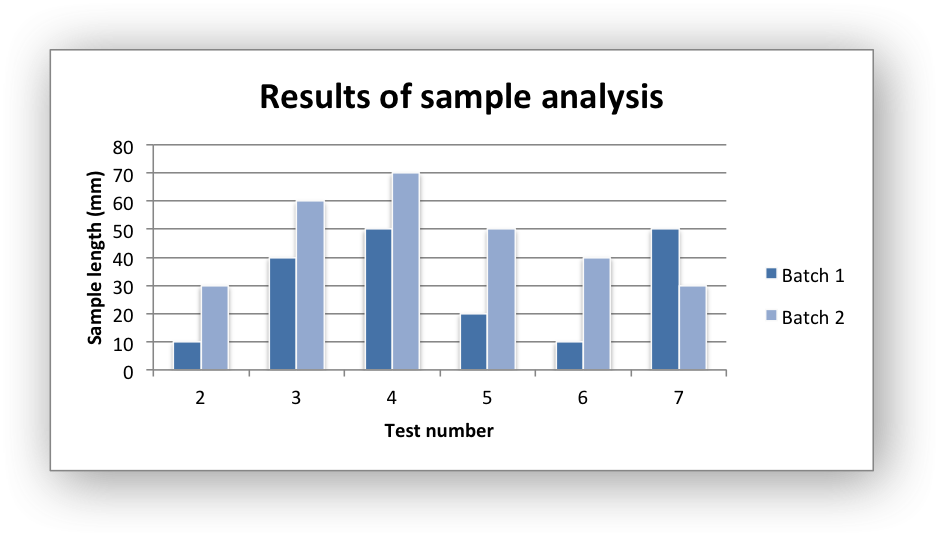
Chart 2 is a stacked column chart:
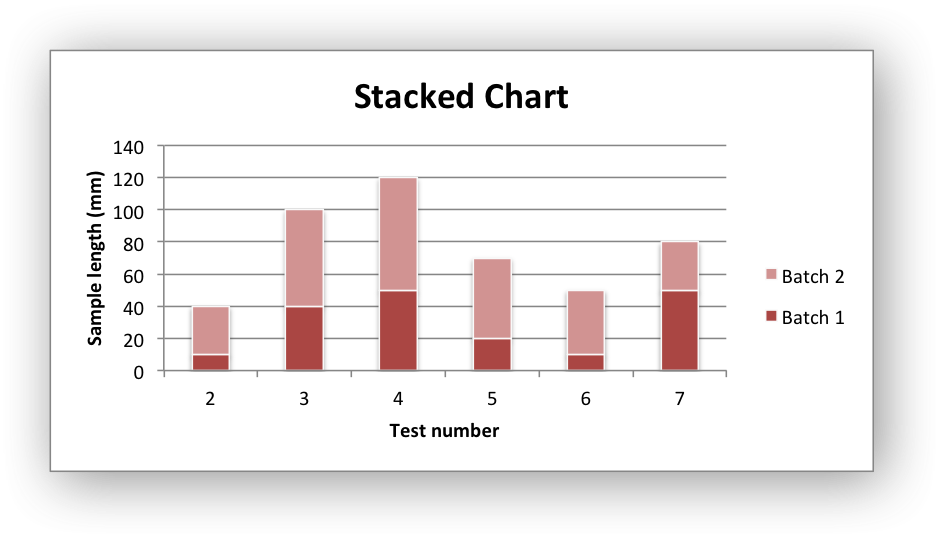
Chart 3 is a percentage stacked column chart:
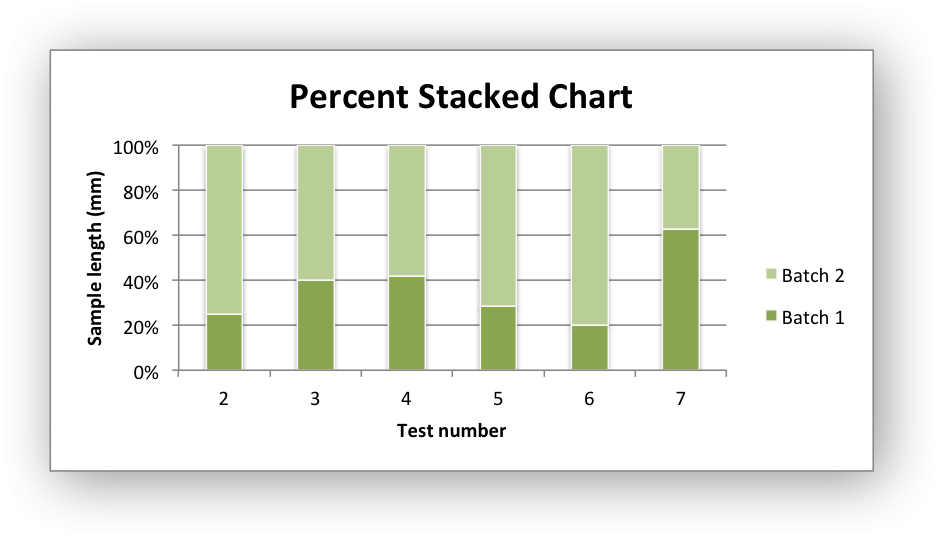
Code to generate the output file:
// SPDX-License-Identifier: MIT OR Apache-2.0
//
// Copyright 2022-2026, John McNamara, jmcnamara@cpan.org

//! An example of creating column charts using the `rust_xlsxwriter` library.

use rust_xlsxwriter::{Chart, ChartType, Format, Workbook, XlsxError};

fn main() -> Result<(), XlsxError> {
    let mut workbook = Workbook::new();
    let worksheet = workbook.add_worksheet();
    let bold = Format::new().set_bold();

    // Add the worksheet data that the charts will refer to.
    worksheet.write_with_format(0, 0, "Number", &bold)?;
    worksheet.write_with_format(0, 1, "Batch 1", &bold)?;
    worksheet.write_with_format(0, 2, "Batch 2", &bold)?;

    let data = [
        [2, 3, 4, 5, 6, 7],
        [10, 40, 50, 20, 10, 50],
        [30, 60, 70, 50, 40, 30],
    ];
    for (col_num, col_data) in data.iter().enumerate() {
        for (row_num, row_data) in col_data.iter().enumerate() {
            worksheet.write(row_num as u32 + 1, col_num as u16, *row_data)?;
        }
    }

    // -----------------------------------------------------------------------
    // Create a new column chart.
    // -----------------------------------------------------------------------
    let mut chart = Chart::new(ChartType::Column);

    // Configure the first data series for the chart.
    chart
        .add_series()
        .set_categories("Sheet1!$A$2:$A$7")
        .set_values("Sheet1!$B$2:$B$7")
        .set_name("Sheet1!$B$1");

    // Add another data series to the chart using the alternative tuple syntax
    // to describe the range. This method is better when you need to create the
    // ranges programmatically to match the data range in the worksheet.
    let row_min = 1;
    let row_max = data[0].len() as u32;
    chart
        .add_series()
        .set_categories(("Sheet1", row_min, 0, row_max, 0))
        .set_values(("Sheet1", row_min, 2, row_max, 2))
        .set_name(("Sheet1", 0, 2));

    // Add a chart title and some axis labels.
    chart.title().set_name("Results of sample analysis");
    chart.x_axis().set_name("Test number");
    chart.y_axis().set_name("Sample length (mm)");

    // Set an Excel chart style.
    chart.set_style(11);

    // Add the chart to the worksheet.
    worksheet.insert_chart_with_offset(1, 3, &chart, 25, 10)?;

    // -----------------------------------------------------------------------
    // Create a stacked chart sub-type.
    // -----------------------------------------------------------------------
    let mut chart = Chart::new(ChartType::ColumnStacked);

    // Configure the first series.
    chart
        .add_series()
        .set_categories("Sheet1!$A$2:$A$7")
        .set_values("Sheet1!$B$2:$B$7")
        .set_name("Sheet1!$B$1");

    // Configure the second series.
    chart
        .add_series()
        .set_categories("Sheet1!$A$2:$A$7")
        .set_values("Sheet1!$C$2:$C$7")
        .set_name("Sheet1!$C$1");

    // Add a chart title and some axis labels.
    chart.title().set_name("Stacked Chart");
    chart.x_axis().set_name("Test number");
    chart.y_axis().set_name("Sample length (mm)");

    // Set an Excel chart style.
    chart.set_style(12);

    // Add the chart to the worksheet.
    worksheet.insert_chart_with_offset(17, 3, &chart, 25, 10)?;

    // -----------------------------------------------------------------------
    // Create a percentage stacked chart sub-type.
    // -----------------------------------------------------------------------
    let mut chart = Chart::new(ChartType::ColumnPercentStacked);

    // Configure the first series.
    chart
        .add_series()
        .set_categories("Sheet1!$A$2:$A$7")
        .set_values("Sheet1!$B$2:$B$7")
        .set_name("Sheet1!$B$1");

    // Configure the second series.
    chart
        .add_series()
        .set_categories("Sheet1!$A$2:$A$7")
        .set_values("Sheet1!$C$2:$C$7")
        .set_name("Sheet1!$C$1");

    // Add a chart title and some axis labels.
    chart.title().set_name("Percent Stacked Chart");
    chart.x_axis().set_name("Test number");
    chart.y_axis().set_name("Sample length (mm)");

    // Set an Excel chart style.
    chart.set_style(13);

    // Add the chart to the worksheet.
    worksheet.insert_chart_with_offset(33, 3, &chart, 25, 10)?;

    workbook.save("chart_column.xlsx")?;

    Ok(())
}
Chart: Line: Excel Line chart example
Example of creating Excel Line charts.
Image of the output file:
Chart 1 in the following example is a default line chart:
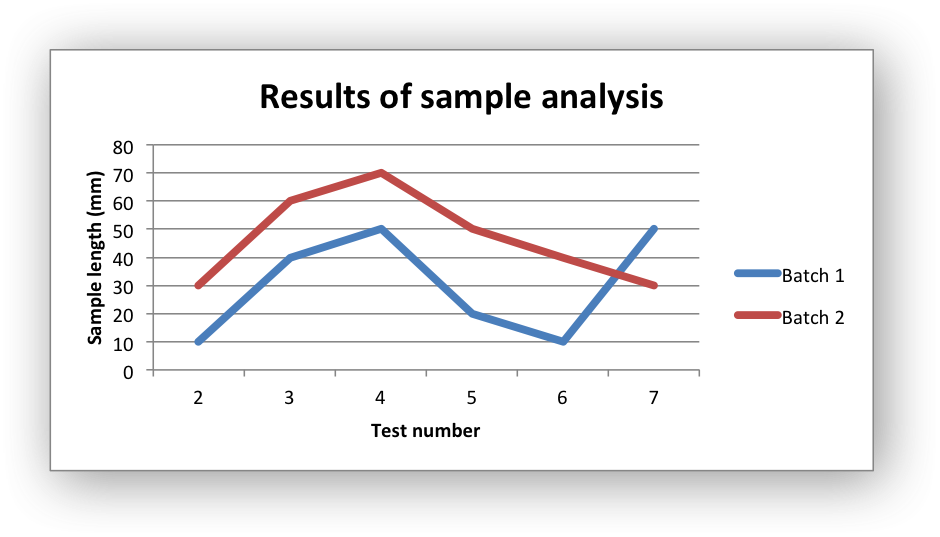
Chart 2 is a stacked line chart:
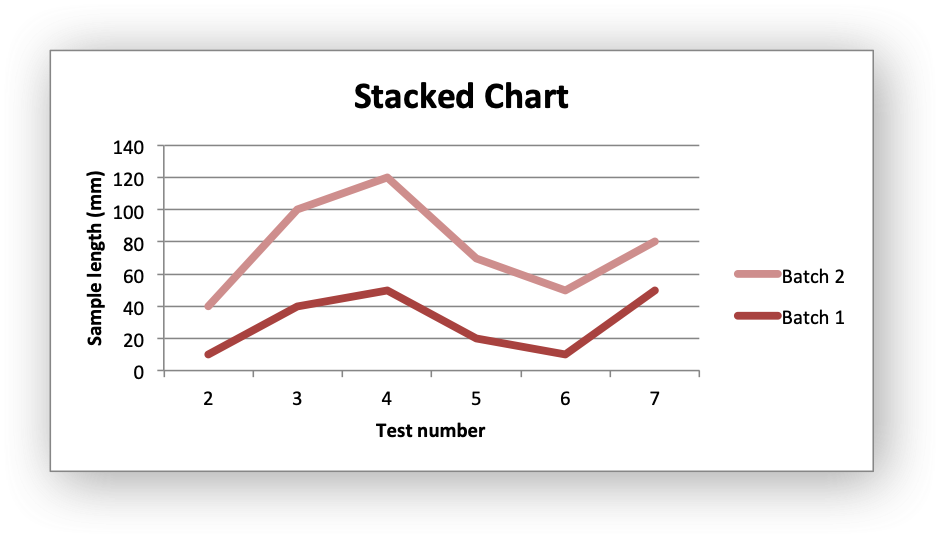
Chart 3 is a percentage stacked line chart:
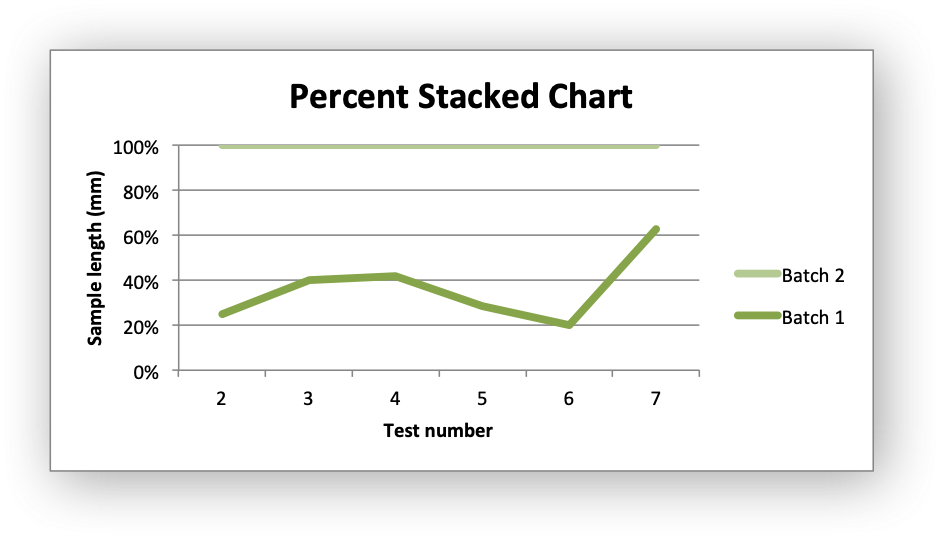
Code to generate the output file:
// SPDX-License-Identifier: MIT OR Apache-2.0
//
// Copyright 2022-2026, John McNamara, jmcnamara@cpan.org

//! An example of creating line charts using the `rust_xlsxwriter` library.

use rust_xlsxwriter::{Chart, ChartType, Format, Workbook, XlsxError};

fn main() -> Result<(), XlsxError> {
    let mut workbook = Workbook::new();
    let worksheet = workbook.add_worksheet();
    let bold = Format::new().set_bold();

    // Add the worksheet data that the charts will refer to.
    worksheet.write_with_format(0, 0, "Number", &bold)?;
    worksheet.write_with_format(0, 1, "Batch 1", &bold)?;
    worksheet.write_with_format(0, 2, "Batch 2", &bold)?;

    let data = [
        [2, 3, 4, 5, 6, 7],
        [10, 40, 50, 20, 10, 50],
        [30, 60, 70, 50, 40, 30],
    ];
    for (col_num, col_data) in data.iter().enumerate() {
        for (row_num, row_data) in col_data.iter().enumerate() {
            worksheet.write(row_num as u32 + 1, col_num as u16, *row_data)?;
        }
    }

    // -----------------------------------------------------------------------
    // Create a new line chart.
    // -----------------------------------------------------------------------
    let mut chart = Chart::new(ChartType::Line);

    // Configure the first data series for the chart.
    chart
        .add_series()
        .set_categories("Sheet1!$A$2:$A$7")
        .set_values("Sheet1!$B$2:$B$7")
        .set_name("Sheet1!$B$1");

    // Add another data series to the chart using the alternative tuple syntax
    // to describe the range. This method is better when you need to create the
    // ranges programmatically to match the data range in the worksheet.
    let row_min = 1;
    let row_max = data[0].len() as u32;
    chart
        .add_series()
        .set_categories(("Sheet1", row_min, 0, row_max, 0))
        .set_values(("Sheet1", row_min, 2, row_max, 2))
        .set_name(("Sheet1", 0, 2));

    // Add a chart title and some axis labels.
    chart.title().set_name("Results of sample analysis");
    chart.x_axis().set_name("Test number");
    chart.y_axis().set_name("Sample length (mm)");

    // Set an Excel chart style.
    chart.set_style(10);

    // Add the chart to the worksheet.
    worksheet.insert_chart_with_offset(1, 3, &chart, 25, 10)?;

    // -----------------------------------------------------------------------
    // Create a stacked chart sub-type.
    // -----------------------------------------------------------------------
    let mut chart = Chart::new(ChartType::LineStacked);

    // Configure the first series.
    chart
        .add_series()
        .set_categories("Sheet1!$A$2:$A$7")
        .set_values("Sheet1!$B$2:$B$7")
        .set_name("Sheet1!$B$1");

    // Configure the second series.
    chart
        .add_series()
        .set_categories("Sheet1!$A$2:$A$7")
        .set_values("Sheet1!$C$2:$C$7")
        .set_name("Sheet1!$C$1");

    // Add a chart title and some axis labels.
    chart.title().set_name("Stacked Chart");
    chart.x_axis().set_name("Test number");
    chart.y_axis().set_name("Sample length (mm)");

    // Set an Excel chart style.
    chart.set_style(12);

    // Add the chart to the worksheet.
    worksheet.insert_chart_with_offset(17, 3, &chart, 25, 10)?;

    // -----------------------------------------------------------------------
    // Create a percentage stacked chart sub-type.
    // -----------------------------------------------------------------------
    let mut chart = Chart::new(ChartType::LinePercentStacked);

    // Configure the first series.
    chart
        .add_series()
        .set_categories("Sheet1!$A$2:$A$7")
        .set_values("Sheet1!$B$2:$B$7")
        .set_name("Sheet1!$B$1");

    // Configure the second series.
    chart
        .add_series()
        .set_categories("Sheet1!$A$2:$A$7")
        .set_values("Sheet1!$C$2:$C$7")
        .set_name("Sheet1!$C$1");

    // Add a chart title and some axis labels.
    chart.title().set_name("Percent Stacked Chart");
    chart.x_axis().set_name("Test number");
    chart.y_axis().set_name("Sample length (mm)");

    // Set an Excel chart style.
    chart.set_style(13);

    // Add the chart to the worksheet.
    worksheet.insert_chart_with_offset(33, 3, &chart, 25, 10)?;

    workbook.save("chart_line.xlsx")?;

    Ok(())
}
Chart: Scatter: Excel Scatter chart example
Example of creating Excel Scatter charts.
Image of the output file:
Chart 1 in the following example is a default scatter chart:
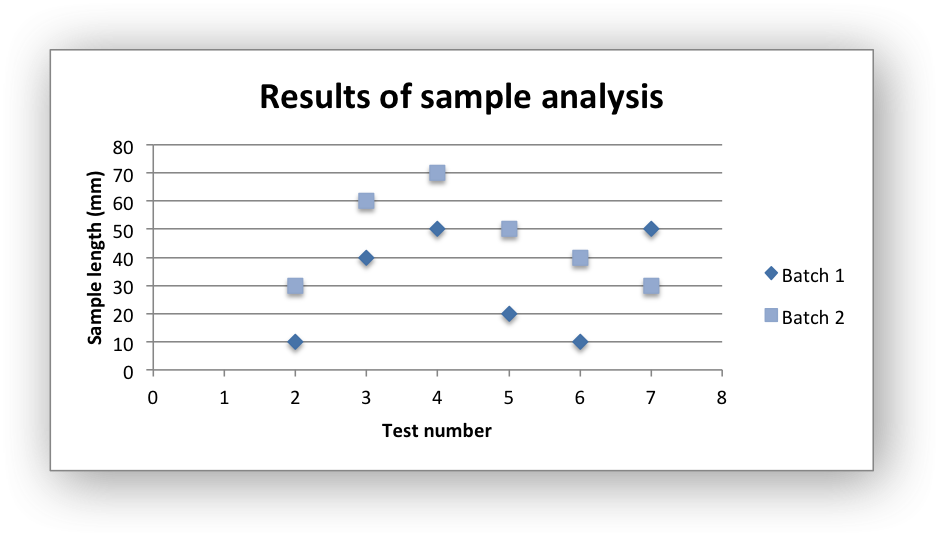
Chart 2 is a scatter chart with straight lines and markers:
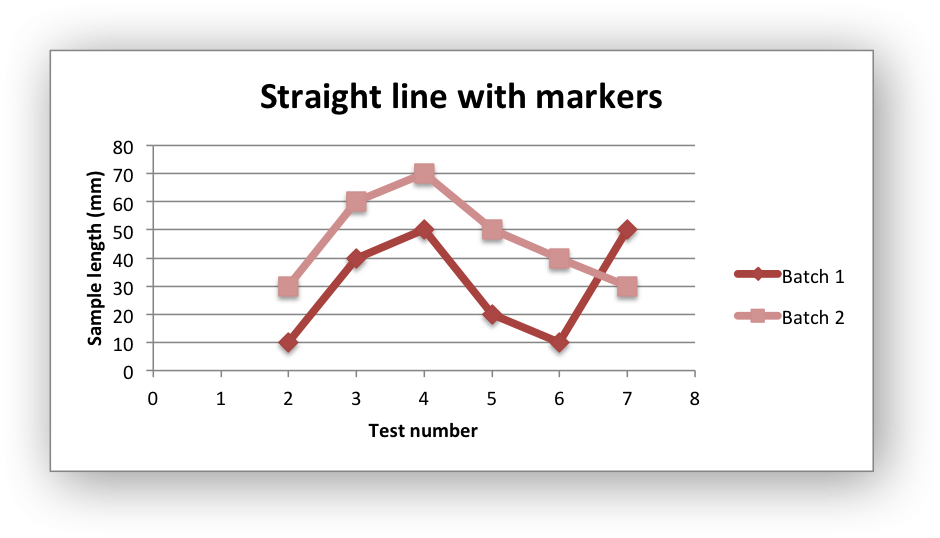
Chart 3 is a scatter chart with straight lines and no markers:
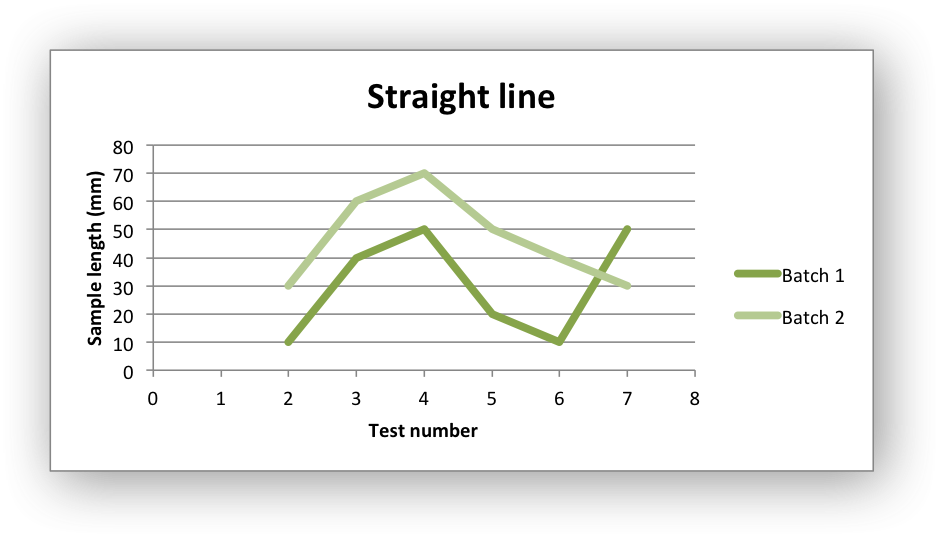
Chart 4 is a scatter chart with smooth lines and markers:
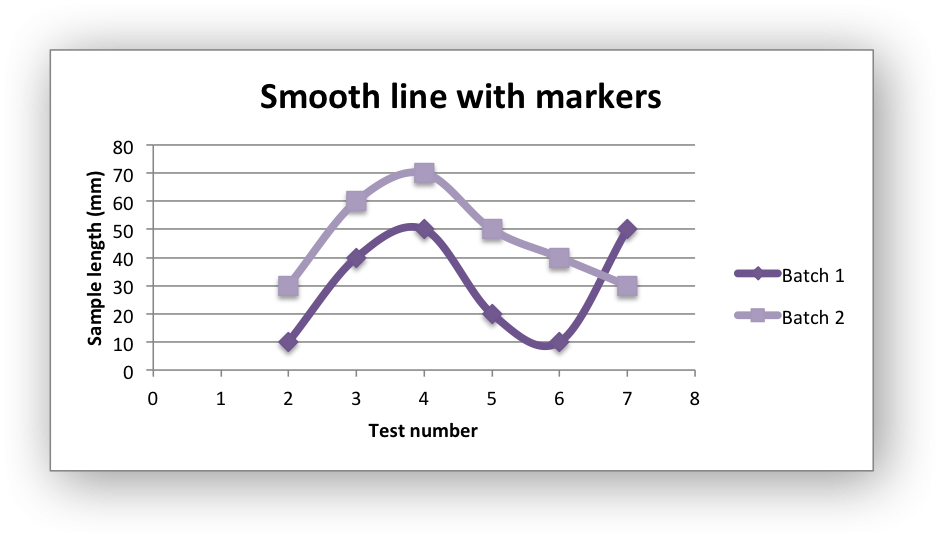
Chart 5 is a scatter chart with smooth lines and no markers:
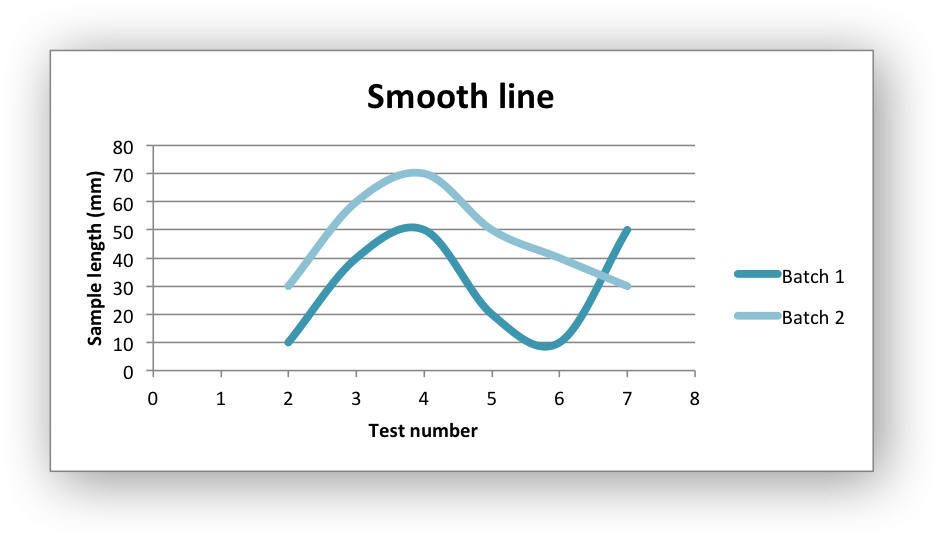
Code to generate the output file:
// SPDX-License-Identifier: MIT OR Apache-2.0
//
// Copyright 2022-2026, John McNamara, jmcnamara@cpan.org

//! An example of creating scatter charts using the `rust_xlsxwriter` library.

use rust_xlsxwriter::{Chart, ChartType, Format, Workbook, XlsxError};

fn main() -> Result<(), XlsxError> {
    let mut workbook = Workbook::new();
    let worksheet = workbook.add_worksheet();
    let bold = Format::new().set_bold();

    // Add the worksheet data that the charts will refer to.
    worksheet.write_with_format(0, 0, "Number", &bold)?;
    worksheet.write_with_format(0, 1, "Batch 1", &bold)?;
    worksheet.write_with_format(0, 2, "Batch 2", &bold)?;

    let data = [
        [2, 3, 4, 5, 6, 7],
        [10, 40, 50, 20, 10, 50],
        [30, 60, 70, 50, 40, 30],
    ];
    for (col_num, col_data) in data.iter().enumerate() {
        for (row_num, row_data) in col_data.iter().enumerate() {
            worksheet.write(row_num as u32 + 1, col_num as u16, *row_data)?;
        }
    }

    // -----------------------------------------------------------------------
    // Create a new scatter chart.
    // -----------------------------------------------------------------------
    let mut chart = Chart::new(ChartType::Scatter);

    // Configure the first data series for the chart.
    chart
        .add_series()
        .set_categories("Sheet1!$A$2:$A$7")
        .set_values("Sheet1!$B$2:$B$7")
        .set_name("Sheet1!$B$1");

    // Add another data series to the chart using the alternative tuple syntax
    // to describe the range. This method is better when you need to create the
    // ranges programmatically to match the data range in the worksheet.
    let row_min = 1;
    let row_max = data[0].len() as u32;
    chart
        .add_series()
        .set_categories(("Sheet1", row_min, 0, row_max, 0))
        .set_values(("Sheet1", row_min, 2, row_max, 2))
        .set_name(("Sheet1", 0, 2));

    // Add a chart title and some axis labels.
    chart.title().set_name("Results of sample analysis");
    chart.x_axis().set_name("Test number");
    chart.y_axis().set_name("Sample length (mm)");

    // Set an Excel chart style.
    chart.set_style(11);

    // Add the chart to the worksheet.
    worksheet.insert_chart_with_offset(1, 3, &chart, 25, 10)?;

    // -----------------------------------------------------------------------
    // Create a scatter chart sub-type with straight lines and markers.
    // -----------------------------------------------------------------------
    let mut chart = Chart::new(ChartType::ScatterStraightWithMarkers);

    // Configure the first series.
    chart
        .add_series()
        .set_categories("Sheet1!$A$2:$A$7")
        .set_values("Sheet1!$B$2:$B$7")
        .set_name("Sheet1!$B$1");

    // Configure the second series.
    chart
        .add_series()
        .set_categories("Sheet1!$A$2:$A$7")
        .set_values("Sheet1!$C$2:$C$7")
        .set_name("Sheet1!$C$1");

    // Add a chart title and some axis labels.
    chart.title().set_name("Straight line with markers");
    chart.x_axis().set_name("Test number");
    chart.y_axis().set_name("Sample length (mm)");

    // Set an Excel chart style.
    chart.set_style(12);

    // Add the chart to the worksheet.
    worksheet.insert_chart_with_offset(17, 3, &chart, 25, 10)?;

    // -----------------------------------------------------------------------
    // Create a scatter chart sub-type with straight lines and no markers.
    // -----------------------------------------------------------------------
    let mut chart = Chart::new(ChartType::ScatterStraight);

    // Configure the first series.
    chart
        .add_series()
        .set_categories("Sheet1!$A$2:$A$7")
        .set_values("Sheet1!$B$2:$B$7")
        .set_name("Sheet1!$B$1");

    // Configure the second series.
    chart
        .add_series()
        .set_categories("Sheet1!$A$2:$A$7")
        .set_values("Sheet1!$C$2:$C$7")
        .set_name("Sheet1!$C$1");

    // Add a chart title and some axis labels.
    chart.title().set_name("Straight line");
    chart.x_axis().set_name("Test number");
    chart.y_axis().set_name("Sample length (mm)");

    // Set an Excel chart style.
    chart.set_style(13);

    // Add the chart to the worksheet.
    worksheet.insert_chart_with_offset(33, 3, &chart, 25, 10)?;

    // -----------------------------------------------------------------------
    // Create a scatter chart sub-type with smooth lines and markers.
    // -----------------------------------------------------------------------
    let mut chart = Chart::new(ChartType::ScatterSmoothWithMarkers);

    // Configure the first series.
    chart
        .add_series()
        .set_categories("Sheet1!$A$2:$A$7")
        .set_values("Sheet1!$B$2:$B$7")
        .set_name("Sheet1!$B$1");

    // Configure the second series.
    chart
        .add_series()
        .set_categories("Sheet1!$A$2:$A$7")
        .set_values("Sheet1!$C$2:$C$7")
        .set_name("Sheet1!$C$1");

    // Add a chart title and some axis labels.
    chart.title().set_name("Smooth line with markers");
    chart.x_axis().set_name("Test number");
    chart.y_axis().set_name("Sample length (mm)");

    // Set an Excel chart style.
    chart.set_style(14);

    // Add the chart to the worksheet.
    worksheet.insert_chart_with_offset(49, 3, &chart, 25, 10)?;

    // -----------------------------------------------------------------------
    // Create a scatter chart sub-type with smooth lines and no markers.
    // -----------------------------------------------------------------------
    let mut chart = Chart::new(ChartType::ScatterSmooth);

    // Configure the first series.
    chart
        .add_series()
        .set_categories("Sheet1!$A$2:$A$7")
        .set_values("Sheet1!$B$2:$B$7")
        .set_name("Sheet1!$B$1");

    // Configure the second series.
    chart
        .add_series()
        .set_categories("Sheet1!$A$2:$A$7")
        .set_values("Sheet1!$C$2:$C$7")
        .set_name("Sheet1!$C$1");

    // Add a chart title and some axis labels.
    chart.title().set_name("Smooth line");
    chart.x_axis().set_name("Test number");
    chart.y_axis().set_name("Sample length (mm)");

    // Set an Excel chart style.
    chart.set_style(15);

    // Add the chart to the worksheet.
    worksheet.insert_chart_with_offset(65, 3, &chart, 25, 10)?;

    workbook.save("chart_scatter.xlsx")?;

    Ok(())
}
Chart: Radar: Excel Radar chart example
Example of creating Excel Radar charts.
Image of the output file:
Chart 1 in the following example is a default radar chart:
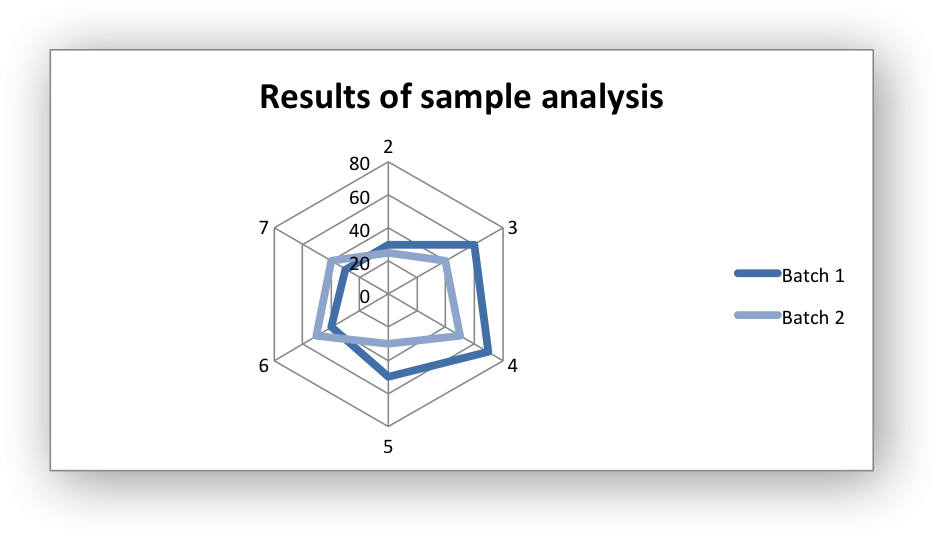
Chart 2 in the following example is a radar chart with markers:
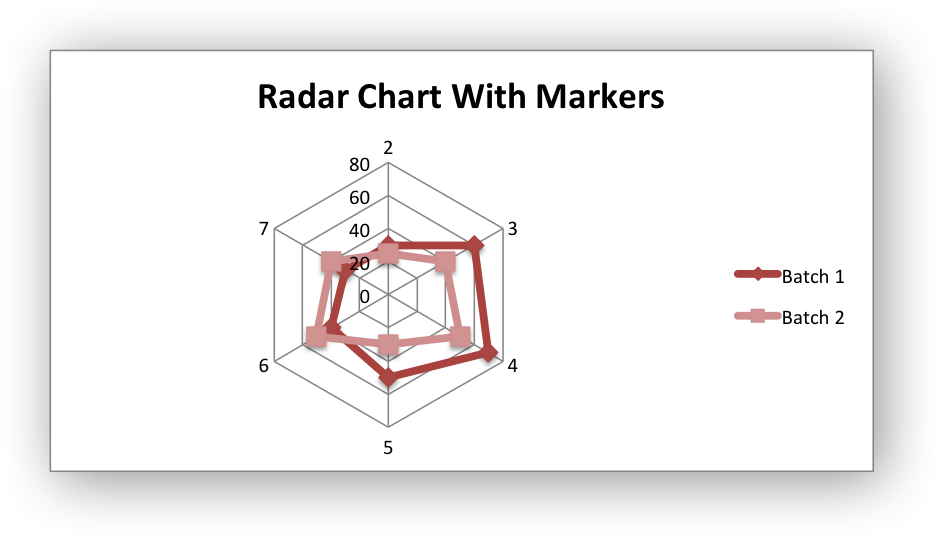
Chart 3 in the following example is a filled radar chart:
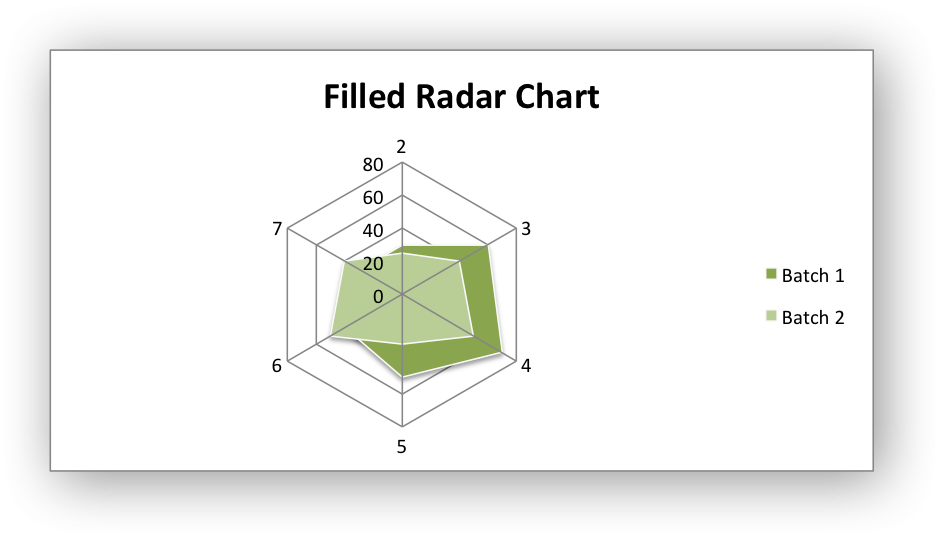
Code to generate the output file:
// SPDX-License-Identifier: MIT OR Apache-2.0
//
// Copyright 2022-2026, John McNamara, jmcnamara@cpan.org

//! An example of creating radar charts using the `rust_xlsxwriter` library.

use rust_xlsxwriter::{Chart, ChartType, Format, Workbook, XlsxError};

fn main() -> Result<(), XlsxError> {
    let mut workbook = Workbook::new();
    let worksheet = workbook.add_worksheet();
    let bold = Format::new().set_bold();

    // Add the worksheet data that the charts will refer to.
    worksheet.write_with_format(0, 0, "Number", &bold)?;
    worksheet.write_with_format(0, 1, "Batch 1", &bold)?;
    worksheet.write_with_format(0, 2, "Batch 2", &bold)?;

    let data = [
        [2, 3, 4, 5, 6, 7],
        [30, 60, 70, 50, 40, 30],
        [25, 40, 50, 30, 50, 40],
    ];
    for (col_num, col_data) in data.iter().enumerate() {
        for (row_num, row_data) in col_data.iter().enumerate() {
            worksheet.write(row_num as u32 + 1, col_num as u16, *row_data)?;
        }
    }

    // -----------------------------------------------------------------------
    // Create a new radar chart.
    // -----------------------------------------------------------------------
    let mut chart = Chart::new(ChartType::Radar);

    // Configure the first data series for the chart.
    chart
        .add_series()
        .set_categories("Sheet1!$A$2:$A$7")
        .set_values("Sheet1!$B$2:$B$7")
        .set_name("Sheet1!$B$1");

    // Add another data series to the chart using the alternative tuple syntax
    // to describe the range. This method is better when you need to create the
    // ranges programmatically to match the data range in the worksheet.
    let row_min = 1;
    let row_max = data[0].len() as u32;
    chart
        .add_series()
        .set_categories(("Sheet1", row_min, 0, row_max, 0))
        .set_values(("Sheet1", row_min, 2, row_max, 2))
        .set_name(("Sheet1", 0, 2));

    // Add a chart title.
    chart.title().set_name("Results of sample analysis");

    // Set an Excel chart style.
    chart.set_style(11);

    // Add the chart to the worksheet.
    worksheet.insert_chart_with_offset(1, 3, &chart, 25, 10)?;

    // -----------------------------------------------------------------------
    // Create a radar chart with markers.
    // -----------------------------------------------------------------------
    let mut chart = Chart::new(ChartType::RadarWithMarkers);

    // Configure the first series.
    chart
        .add_series()
        .set_categories("Sheet1!$A$2:$A$7")
        .set_values("Sheet1!$B$2:$B$7")
        .set_name("Sheet1!$B$1");

    // Configure the second series.
    chart
        .add_series()
        .set_categories("Sheet1!$A$2:$A$7")
        .set_values("Sheet1!$C$2:$C$7")
        .set_name("Sheet1!$C$1");

    // Add a chart title.
    chart.title().set_name("Radar Chart With Markers");

    // Set an Excel chart style.
    chart.set_style(12);

    // Add the chart to the worksheet.
    worksheet.insert_chart_with_offset(17, 3, &chart, 25, 10)?;

    // -----------------------------------------------------------------------
    // Create a filled radar chart.
    // -----------------------------------------------------------------------
    let mut chart = Chart::new(ChartType::RadarFilled);

    // Configure the first series.
    chart
        .add_series()
        .set_categories("Sheet1!$A$2:$A$7")
        .set_values("Sheet1!$B$2:$B$7")
        .set_name("Sheet1!$B$1");

    // Configure the second series.
    chart
        .add_series()
        .set_categories("Sheet1!$A$2:$A$7")
        .set_values("Sheet1!$C$2:$C$7")
        .set_name("Sheet1!$C$1");

    // Add a chart title.
    chart.title().set_name("Filled Radar Chart");

    // Set an Excel chart style.
    chart.set_style(13);

    // Add the chart to the worksheet.
    worksheet.insert_chart_with_offset(33, 3, &chart, 25, 10)?;

    workbook.save("chart_radar.xlsx")?;

    Ok(())
}
Chart: Pie: Excel Pie chart example
Example of creating Excel Pie charts.
Image of the output file:
Chart 1 in the following example is a default pie chart:
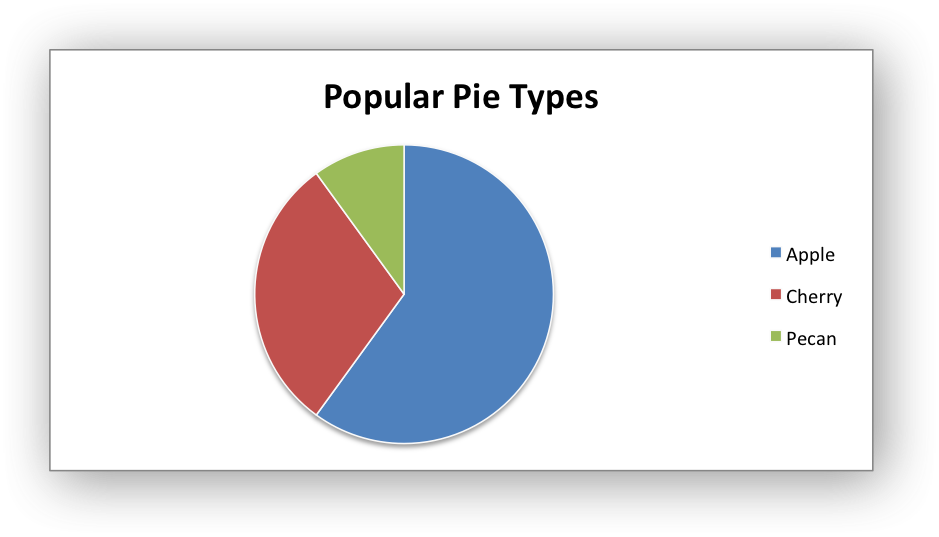
Chart 2 shows how to set segment colors.
It is possible to define chart colors for most types of rust_xlsxwritercharts via
the add_series() method. However, Pie charts are a special case since each
segment is represented as a point and as such it is necessary to assign
formatting to each point in the series.
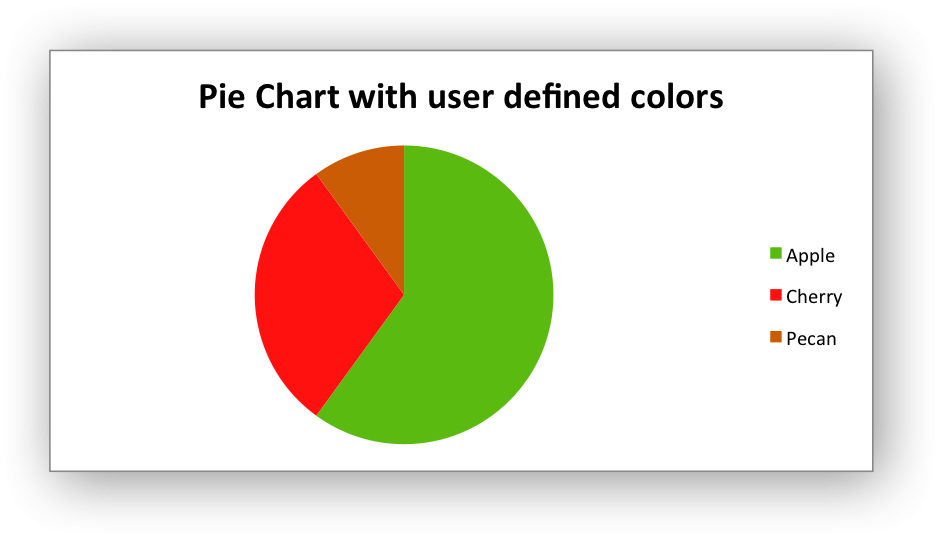
Chart 3 shows how to rotate the segments of the chart:
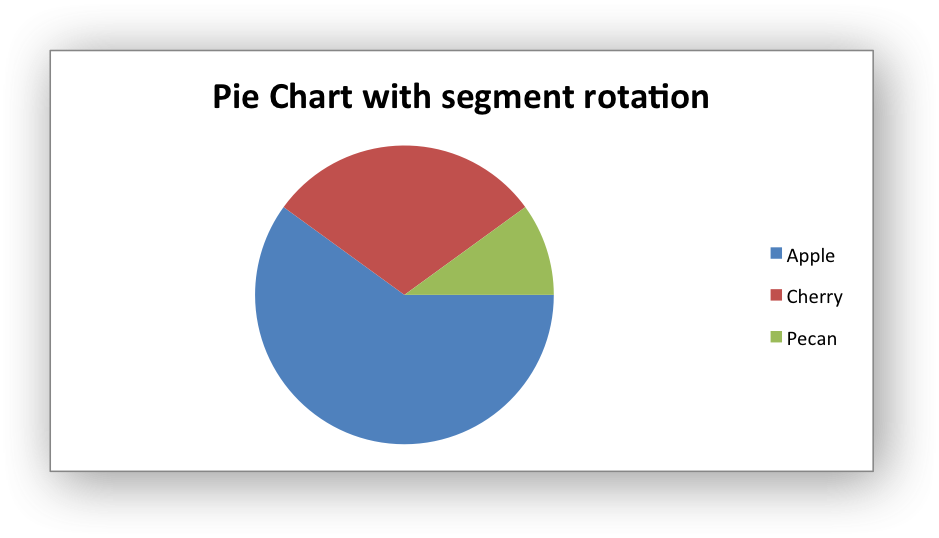
Code to generate the output file:
// SPDX-License-Identifier: MIT OR Apache-2.0
//
// Copyright 2022-2026, John McNamara, jmcnamara@cpan.org

//! An example of creating pie charts using the `rust_xlsxwriter` library.

use rust_xlsxwriter::{Chart, Format, Workbook, XlsxError};

fn main() -> Result<(), XlsxError> {
    let mut workbook = Workbook::new();
    let worksheet = workbook.add_worksheet();
    let bold = Format::new().set_bold();

    // Add the worksheet data that the charts will refer to.
    worksheet.write_with_format(0, 0, "Category", &bold)?;
    worksheet.write_with_format(0, 1, "Values", &bold)?;

    worksheet.write(1, 0, "Apple")?;
    worksheet.write(2, 0, "Cherry")?;
    worksheet.write(3, 0, "Pecan")?;

    worksheet.write(1, 1, 60)?;
    worksheet.write(2, 1, 30)?;
    worksheet.write(3, 1, 10)?;

    // -----------------------------------------------------------------------
    // Create a new pie chart.
    // -----------------------------------------------------------------------
    let mut chart = Chart::new_pie();

    // Configure the data series for the chart.
    chart
        .add_series()
        .set_categories("Sheet1!$A$2:$A$4")
        .set_values("Sheet1!$B$2:$B$4")
        .set_name("Pie sales data");

    // Add a chart title.
    chart.title().set_name("Popular Pie Types");

    // Set an Excel chart style.
    chart.set_style(10);

    // Add the chart to the worksheet.
    worksheet.insert_chart_with_offset(1, 2, &chart, 25, 10)?;

    // -----------------------------------------------------------------------
    // Create a Pie chart with user defined segment colors.
    // -----------------------------------------------------------------------
    let mut chart = Chart::new_pie();

    // Configure the data series for the chart.
    chart
        .add_series()
        .set_categories("Sheet1!$A$2:$A$4")
        .set_values("Sheet1!$B$2:$B$4")
        .set_name("Pie sales data")
        .set_point_colors(&["#5ABA10", "#FE110E", "#CA5C05"]);

    // Add a chart title.
    chart.title().set_name("Pie Chart with user defined colors");

    // Add the chart to the worksheet.
    worksheet.insert_chart_with_offset(17, 2, &chart, 25, 10)?;

    // -----------------------------------------------------------------------
    // Create a Pie chart with rotation of the segments.
    // -----------------------------------------------------------------------
    let mut chart = Chart::new_pie();

    // Configure the data series for the chart.
    chart
        .add_series()
        .set_categories("Sheet1!$A$2:$A$4")
        .set_values("Sheet1!$B$2:$B$4")
        .set_name("Pie sales data");

    // Change the angle/rotation of the first segment.
    chart.set_rotation(90);

    // Add a chart title.
    chart.title().set_name("Pie Chart with segment rotation");

    // Add the chart to the worksheet.
    worksheet.insert_chart_with_offset(33, 2, &chart, 25, 10)?;

    workbook.save("chart_pie.xlsx")?;

    Ok(())
}
Chart: Stock: Excel Stock chart example
Example of creating Excel Stock charts.
Note, Volume variants of the Excel stock charts aren't currently supported but will be in a future release.
Image of the output file:
Chart 1 in the following example is an example of a High-Low-Close Stock chart.
To create a chart similar to a default Excel High-Low-Close Stock chart you need to do the following steps:
- Create a
Stocktype chart. - Add 3 series for High, Low and Close, in that order.
- Hide the default lines in all 3 series.
- Hide the default markers for the High and Low series.
- Set a dash marker for the Close series.
- Turn on the chart High-Low bars.
- Format any other chart or axis property you need.
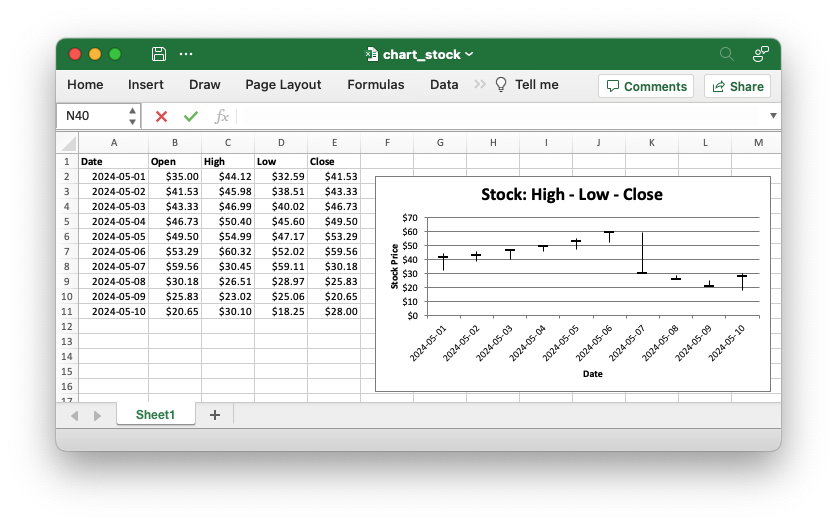
Chart 2 in the following example is an example of an Open-High-Low-Close Stock chart.
To create a chart similar to a default Excel Open-High-Low-Close Stock chart you need to do the following steps:
- Create a
Stocktype chart. - Add 4 series for Open, High, Low and Close, in that order.
- Hide the default lines in all 4 series.
- Turn on the chart High-Low bars.
- Turn on the chart Up-Down bars.
- Format any other chart or axis property you need.
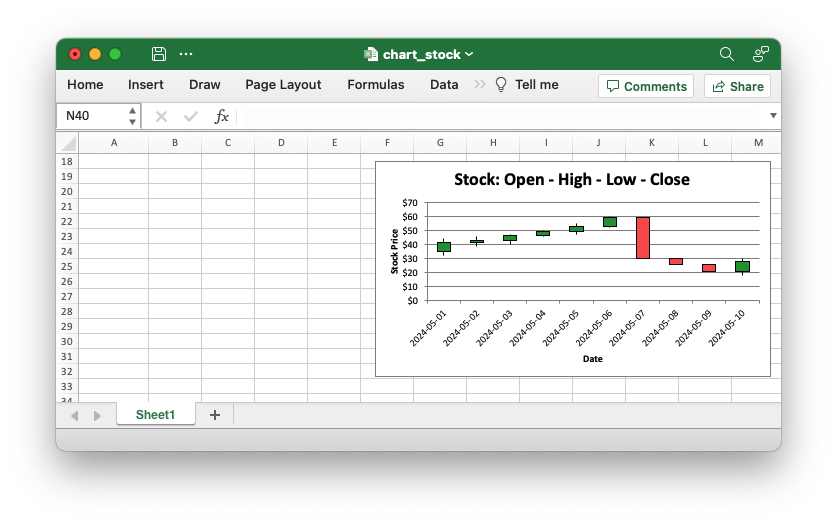
Code to generate the output file:
// SPDX-License-Identifier: MIT OR Apache-2.0
//
// Copyright 2022-2026, John McNamara, jmcnamara@cpan.org

//! An example of creating Stock charts using the `rust_xlsxwriter` library.
//!
//! Note, Volume variants of the Excel stock charts aren't currently supported
//! but will be in a future release.

use rust_xlsxwriter::{
    Chart, ChartFormat, ChartLine, ChartMarker, ChartMarkerType, ChartSolidFill, ChartType,
    ExcelDateTime, Format, Workbook, XlsxError,
};

fn main() -> Result<(), XlsxError> {
    let mut workbook = Workbook::new();
    let worksheet = workbook.add_worksheet();

    // Create some formatting to use for the worksheet data.
    let bold = Format::new().set_bold();
    let date_format = Format::new().set_num_format("yyyy-mm-dd");
    let money_format = Format::new().set_num_format("[$$-en-US]#,##0.00");

    // -----------------------------------------------------------------------
    // Create some simulated stock data for the chart.
    //
    let dates = [
        "2024-05-01",
        "2024-05-02",
        "2024-05-03",
        "2024-05-04",
        "2024-05-05",
        "2024-05-06",
        "2024-05-07",
        "2024-05-08",
        "2024-05-09",
        "2024-05-10",
    ];

    // Map the string dates to ExcelDateTime objects, while capturing any
    // potential conversion errors.
    let dates: Result<Vec<ExcelDateTime>, XlsxError> = dates
        .into_iter()
        .map(ExcelDateTime::parse_from_str)
        .collect();
    let dates = dates?;

    let open_data = [
        35.00, 41.53, 43.33, 46.73, 49.50, 53.29, 59.56, 30.18, 25.83, 20.65,
    ];

    let high_data = [
        44.12, 45.98, 46.99, 50.40, 54.99, 60.32, 30.45, 26.51, 23.02, 30.10,
    ];

    let low_low = [
        32.59, 38.51, 40.02, 45.60, 47.17, 52.02, 59.11, 28.97, 25.06, 18.25,
    ];

    let close_data = [
        41.53, 43.33, 46.73, 49.50, 53.29, 59.56, 30.18, 25.83, 20.65, 28.00,
    ];

    // -----------------------------------------------------------------------
    // Define variables so that the chart can change dynamically with the data.
    //
    let header_row = 0;
    let start_row = header_row + 1;
    let end_row = start_row + (dates.len() as u32) - 1;
    let date_col = 0;
    let open_col = date_col + 1;
    let high_col = date_col + 2;
    let low_col = date_col + 3;
    let close_col = date_col + 4;

    // -----------------------------------------------------------------------
    // Write the data to the worksheet, with formatting.
    //
    worksheet.write_with_format(header_row, date_col, "Date", &bold)?;
    worksheet.write_with_format(header_row, open_col, "Open", &bold)?;
    worksheet.write_with_format(header_row, high_col, "High", &bold)?;
    worksheet.write_with_format(header_row, low_col, "Low", &bold)?;
    worksheet.write_with_format(header_row, close_col, "Close", &bold)?;

    worksheet.write_column_with_format(start_row, date_col, dates, &date_format)?;
    worksheet.write_column_with_format(start_row, open_col, open_data, &money_format)?;
    worksheet.write_column_with_format(start_row, high_col, high_data, &money_format)?;
    worksheet.write_column_with_format(start_row, low_col, low_low, &money_format)?;
    worksheet.write_column_with_format(start_row, close_col, close_data, &money_format)?;

    // Change the width of the date column, for clarity.
    worksheet.set_column_width(date_col, 11)?;

    // -----------------------------------------------------------------------
    // Create a new High-Low-Close Stock chart.
    //
    // To create a chart similar to a default Excel High-Low-Close Stock chart
    // you need to do the following steps:
    //
    // 1. Create a `Stock` type chart.
    // 2. Add 3 series for High, Low and Close, in that order.
    // 3. Hide the default lines in all 3 series.
    // 4. Hide the default markers for the High and Low series.
    // 5. Set a dash marker for the Close series.
    // 6. Turn on the chart High-Low bars.
    // 7. Format any other chart or axis property you need.
    //
    let mut chart = Chart::new(ChartType::Stock);

    // Add the High series.
    chart
        .add_series()
        .set_categories(("Sheet1", start_row, date_col, end_row, date_col))
        .set_values(("Sheet1", start_row, high_col, end_row, high_col))
        .set_format(ChartLine::new().set_hidden(true))
        .set_marker(ChartMarker::new().set_none());

    // Add the Low series.
    chart
        .add_series()
        .set_categories(("Sheet1", start_row, date_col, end_row, date_col))
        .set_values(("Sheet1", start_row, low_col, end_row, low_col))
        .set_format(ChartLine::new().set_hidden(true))
        .set_marker(ChartMarker::new().set_none());

    // Add the Close series.
    chart
        .add_series()
        .set_categories(("Sheet1", start_row, date_col, end_row, date_col))
        .set_values(("Sheet1", start_row, close_col, end_row, close_col))
        .set_format(ChartLine::new().set_hidden(true))
        .set_marker(
            ChartMarker::new()
                .set_type(ChartMarkerType::LongDash)
                .set_size(10)
                .set_format(
                    ChartFormat::new()
                        .set_border(ChartLine::new().set_color("#000000"))
                        .set_solid_fill(ChartSolidFill::new().set_color("#000000")),
                ),
        );

    // Set the High-Low lines.
    chart.set_high_low_lines(true);

    // Add a chart title and some axis labels.
    chart.title().set_name("Stock: High - Low - Close");
    chart.x_axis().set_name("Date");
    chart.y_axis().set_name("Stock Price");

    // Format the price axis number format.
    chart.y_axis().set_num_format("[$$-en-US]#,##0");

    // Turn off the chart legend.
    chart.legend().set_hidden();

    // Insert the chart into the worksheet.
    worksheet.insert_chart_with_offset(start_row, close_col + 1, &chart, 20, 10)?;

    // -----------------------------------------------------------------------
    // Create a new Open-High-Low-Close Stock chart.
    //
    // To create a chart similar to a default Excel Open-High-Low-Close Stock
    // chart you need to do the following steps:
    //
    // 1. Create a `Stock` type chart.
    // 2. Add 4 series for Open, High, Low and Close, in that order.
    // 3. Hide the default lines in all 4 series.
    // 4. Turn on the chart High-Low bars.
    // 5. Turn on the chart Up-Down bars.
    // 6. Format any other chart or axis property you need.
    //
    let mut chart = Chart::new(ChartType::Stock);

    // Add the Open series.
    chart
        .add_series()
        .set_categories(("Sheet1", start_row, date_col, end_row, date_col))
        .set_values(("Sheet1", start_row, open_col, end_row, open_col))
        .set_format(ChartLine::new().set_hidden(true))
        .set_marker(ChartMarker::new().set_none());

    // Add the High series.
    chart
        .add_series()
        .set_categories(("Sheet1", start_row, date_col, end_row, date_col))
        .set_values(("Sheet1", start_row, high_col, end_row, high_col))
        .set_format(ChartLine::new().set_hidden(true))
        .set_marker(ChartMarker::new().set_none());

    // Add the Low series.
    chart
        .add_series()
        .set_categories(("Sheet1", start_row, date_col, end_row, date_col))
        .set_values(("Sheet1", start_row, low_col, end_row, low_col))
        .set_format(ChartLine::new().set_hidden(true))
        .set_marker(ChartMarker::new().set_none());

    // Add the Close series.
    chart
        .add_series()
        .set_categories(("Sheet1", start_row, date_col, end_row, date_col))
        .set_values(("Sheet1", start_row, close_col, end_row, close_col))
        .set_format(ChartLine::new().set_hidden(true))
        .set_marker(ChartMarker::new().set_none());

    // Set the High-Low lines.
    chart.set_high_low_lines(true);

    // Turn on and format the Up-Down bars.
    chart.set_up_down_bars(true);
    chart.set_up_bar_format(ChartSolidFill::new().set_color("#009933"));
    chart.set_down_bar_format(ChartSolidFill::new().set_color("#FF5050"));

    // Add a chart title and some axis labels.
    chart.title().set_name("Stock: Open - High - Low - Close");
    chart.x_axis().set_name("Date");
    chart.y_axis().set_name("Stock Price");

    // Format the price axis number format.
    chart.y_axis().set_num_format("[$$-en-US]#,##0");

    // Turn off the chart legend.
    chart.legend().set_hidden();

    // Insert the chart into the worksheet.
    worksheet.insert_chart_with_offset(start_row + 16, close_col + 1, &chart, 20, 10)?;

    // -----------------------------------------------------------------------
    // Save and close the file.
    // -----------------------------------------------------------------------
    workbook.save("chart_stock.xlsx")?;

    Ok(())
}
Chart: Doughnut: Excel Doughnut chart example
Example of creating Excel Doughnut charts.
Image of the output file:
Chart 1 in the following example is a default doughnut chart:
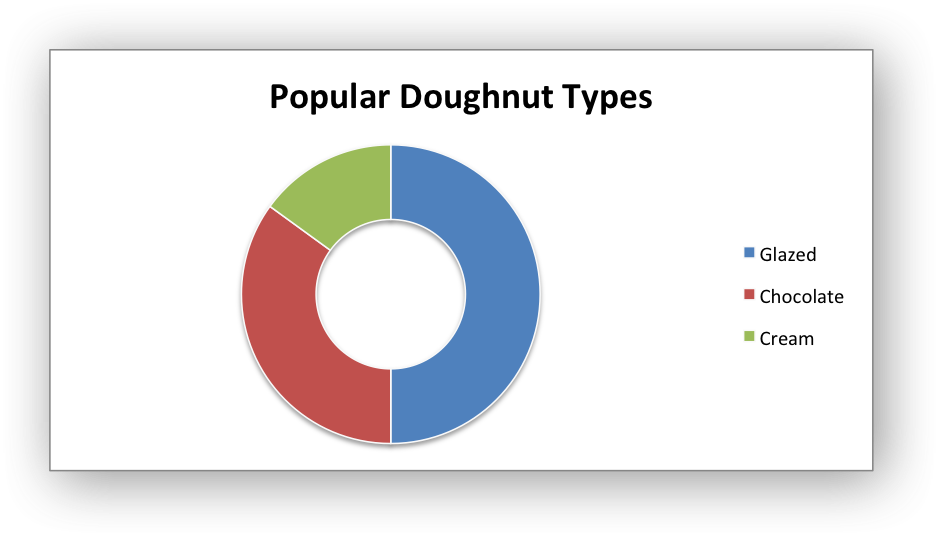
Chart 4 shows how to set segment colors and other options.
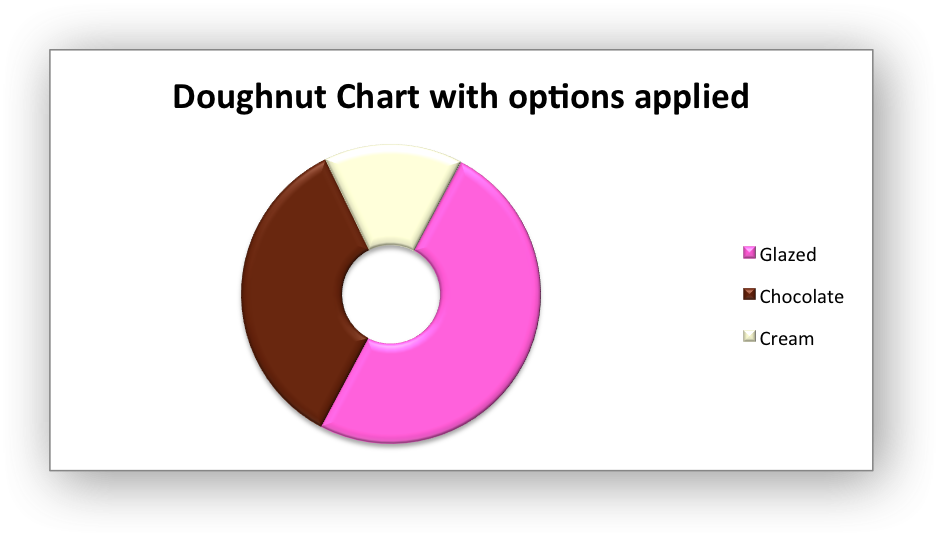
Code to generate the output file:
// SPDX-License-Identifier: MIT OR Apache-2.0
//
// Copyright 2022-2026, John McNamara, jmcnamara@cpan.org

//! An example of creating doughnut charts using the `rust_xlsxwriter` library.

use rust_xlsxwriter::{Chart, Format, Workbook, XlsxError};

fn main() -> Result<(), XlsxError> {
    let mut workbook = Workbook::new();
    let worksheet = workbook.add_worksheet();
    let bold = Format::new().set_bold();

    // Add the worksheet data that the charts will refer to.
    worksheet.write_with_format(0, 0, "Category", &bold)?;
    worksheet.write_with_format(0, 1, "Values", &bold)?;

    worksheet.write(1, 0, "Glazed")?;
    worksheet.write(2, 0, "Chocolate")?;
    worksheet.write(3, 0, "Cream")?;

    worksheet.write(1, 1, 50)?;
    worksheet.write(2, 1, 35)?;
    worksheet.write(3, 1, 15)?;

    // -----------------------------------------------------------------------
    // Create a new doughnut chart.
    // -----------------------------------------------------------------------
    let mut chart = Chart::new_doughnut();

    // Configure the data series for the chart.
    chart
        .add_series()
        .set_categories("Sheet1!$A$2:$A$4")
        .set_values("Sheet1!$B$2:$B$4")
        .set_name("Doughnut sales data");

    // Add a chart title.
    chart.title().set_name("Popular Doughnut Types");

    // Set an Excel chart style.
    chart.set_style(10);

    // Add the chart to the worksheet.
    worksheet.insert_chart_with_offset(1, 2, &chart, 25, 10)?;

    // -----------------------------------------------------------------------
    // Create a Doughnut chart with user defined segment colors.
    // -----------------------------------------------------------------------
    let mut chart = Chart::new_doughnut();

    // Configure the data series for the chart.
    chart
        .add_series()
        .set_categories("Sheet1!$A$2:$A$4")
        .set_values("Sheet1!$B$2:$B$4")
        .set_name("Doughnut sales data")
        .set_point_colors(&["#FA58D0", "#61210B", "#F5F6CE"]);

    // Add a chart title.
    chart
        .title()
        .set_name("Doughnut Chart with user defined colors");

    // Add the chart to the worksheet.
    worksheet.insert_chart_with_offset(17, 2, &chart, 25, 10)?;

    // -----------------------------------------------------------------------
    // Create a Doughnut chart with rotation of the segments.
    // -----------------------------------------------------------------------
    let mut chart = Chart::new_doughnut();

    // Configure the data series for the chart.
    chart
        .add_series()
        .set_categories("Sheet1!$A$2:$A$4")
        .set_values("Sheet1!$B$2:$B$4")
        .set_name("Doughnut sales data");

    // Change the angle/rotation of the first segment.
    chart.set_rotation(90);

    // Add a chart title.
    chart
        .title()
        .set_name("Doughnut Chart with segment rotation");

    // Add the chart to the worksheet.
    worksheet.insert_chart_with_offset(33, 2, &chart, 25, 10)?;

    // -----------------------------------------------------------------------
    // Create a Doughnut chart with user defined hole size and other options.
    // -----------------------------------------------------------------------
    let mut chart = Chart::new_doughnut();

    // Configure the data series for the chart.
    chart
        .add_series()
        .set_categories("Sheet1!$A$2:$A$4")
        .set_values("Sheet1!$B$2:$B$4")
        .set_name("Doughnut sales data")
        .set_point_colors(&["#FA58D0", "#61210B", "#F5F6CE"]);

    // Add a chart title.
    chart
        .title()
        .set_name("Doughnut Chart with options applied");

    // Change the angle/rotation of the first segment.
    chart.set_rotation(28);

    // Change the hole size.
    chart.set_hole_size(33);

    // Set a 3D style.
    chart.set_style(26);

    // Add the chart to the worksheet.
    worksheet.insert_chart_with_offset(49, 2, &chart, 25, 10)?;

    workbook.save("chart_doughnut.xlsx")?;

    Ok(())
}
Chart: Using a secondary axis
Example of creating an Excel Line chart with a secondary axis by setting the
ChartSeries::set_secondary_axis() property for one of more series in the
chart.
Image of the output file:
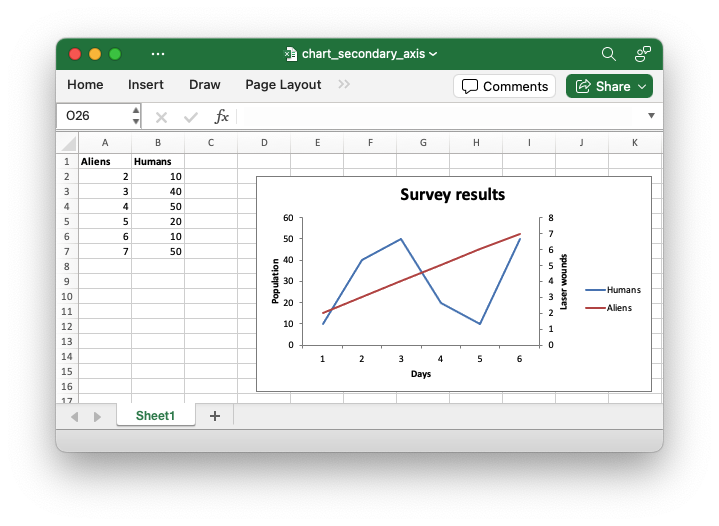
Code to generate the output file:
// SPDX-License-Identifier: MIT OR Apache-2.0
//
// Copyright 2022-2026, John McNamara, jmcnamara@cpan.org

//! An example of creating an Excel Line chart with a secondary axis using the
//! `rust_xlsxwriter` library.

use rust_xlsxwriter::{Chart, ChartType, Format, Workbook, XlsxError};

fn main() -> Result<(), XlsxError> {
    let mut workbook = Workbook::new();
    let worksheet = workbook.add_worksheet();
    let bold = Format::new().set_bold();

    // Add the worksheet data that the charts will refer to.
    worksheet.write_with_format(0, 0, "Aliens", &bold)?;
    worksheet.write_with_format(0, 1, "Humans", &bold)?;
    worksheet.write_column(1, 0, [2, 3, 4, 5, 6, 7])?;
    worksheet.write_column(1, 1, [10, 40, 50, 20, 10, 50])?;

    // Create a new line chart.
    let mut chart = Chart::new(ChartType::Line);

    // Configure a series with a secondary axis.
    chart
        .add_series()
        .set_name("Sheet1!$A$1")
        .set_values("Sheet1!$A$2:$A$7")
        .set_secondary_axis(true);

    // Configure another series that defaults to the primary axis.
    chart
        .add_series()
        .set_name("Sheet1!$B$1")
        .set_values("Sheet1!$B$2:$B$7");

    // Add a chart title and some axis labels.
    chart.title().set_name("Survey results");
    chart.x_axis().set_name("Days");
    chart.y_axis().set_name("Population");
    chart.y2_axis().set_name("Laser wounds");
    chart.y_axis().set_major_gridlines(false);

    // Add the chart to the worksheet.
    worksheet.insert_chart_with_offset(1, 3, &chart, 25, 10)?;

    workbook.save("chart_secondary_axis.xlsx")?;

    Ok(())
}
In general secondary axes are used for displaying different Y values for the same category range. However it is also possible to display a secondary X axis for series that use a different category range. See the example below.
Image of the output file:
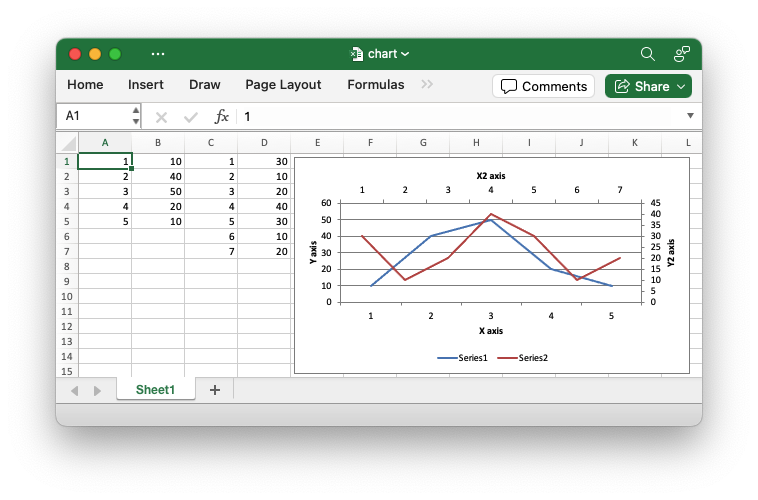
Code to generate the output file:
// SPDX-License-Identifier: MIT OR Apache-2.0
//
// Copyright 2022-2026, John McNamara, jmcnamara@cpan.org

//! A chart example demonstrating using a secondary X and Y axis. The secondary
//! X axis is only available for chart series that have a category range that is
//! different from the primary category range.

use rust_xlsxwriter::{
    Chart, ChartAxisCrossing, ChartAxisLabelPosition, ChartLegendPosition, ChartType, Workbook,
    XlsxError,
};

fn main() -> Result<(), XlsxError> {
    let mut workbook = Workbook::new();
    let worksheet = workbook.add_worksheet();

    // Add the worksheet data that the charts will refer to.
    worksheet.write_column(0, 0, [1, 2, 3, 4, 5])?;
    worksheet.write_column(0, 1, [10, 40, 50, 20, 10])?;
    worksheet.write_column(0, 2, [1, 2, 3, 4, 5, 6, 7])?;
    worksheet.write_column(0, 3, [30, 10, 20, 40, 30, 10, 20])?;

    // Create a new line chart.
    let mut chart = Chart::new(ChartType::Line);

    // Configure a series that defaults to the primary axis.
    chart
        .add_series()
        .set_categories(("Sheet1", 0, 0, 4, 0))
        .set_values(("Sheet1", 0, 1, 4, 1));

    // Configure another series with a secondary axis. Note that the category
    // range is different to the primary axes series.
    chart
        .add_series()
        .set_categories(("Sheet1", 0, 2, 6, 2))
        .set_values(("Sheet1", 0, 3, 6, 3))
        .set_secondary_axis(true);

    // Make the secondary X axis visible (it is hidden by default) and also
    // position the labels so they are next to the axis and therefore visible.
    chart
        .x2_axis()
        .set_hidden(false)
        .set_label_position(ChartAxisLabelPosition::NextTo);

    // Set the X2 axis to cross the Y2 axis at the max value so it appears at
    // the top of the chart.
    chart.y2_axis().set_crossing(ChartAxisCrossing::Max);

    // Add some axis labels.
    chart.x_axis().set_name("X axis");
    chart.y_axis().set_name("Y axis");
    chart.x2_axis().set_name("X2 axis");
    chart.y2_axis().set_name("Y2 axis");

    // Move the legend to the bottom for clarity.
    chart.legend().set_position(ChartLegendPosition::Bottom);

    // Add the chart to the worksheet.
    worksheet.insert_chart_with_offset(0, 4, &chart, 5, 5)?;

    workbook.save("chart.xlsx")?;

    Ok(())
}
Chart: Create a combined chart
Example of creating combined Excel charts from two different chart types.
Image of the output file:
In the first example we create a combined column and line chart that share the same X and Y axes:
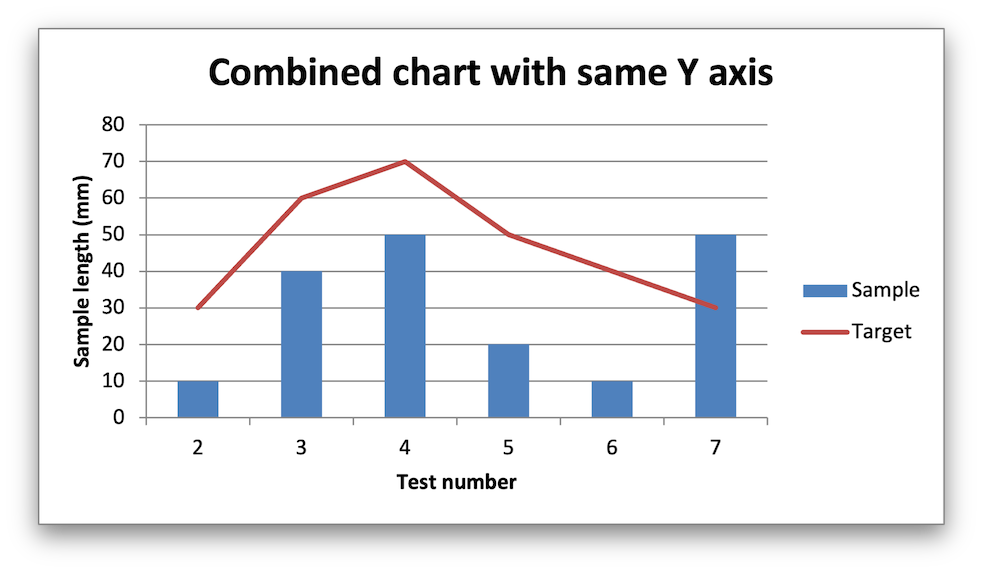
In the second example we create a similar combined column and line chart except that the secondary chart has a secondary Y axis:
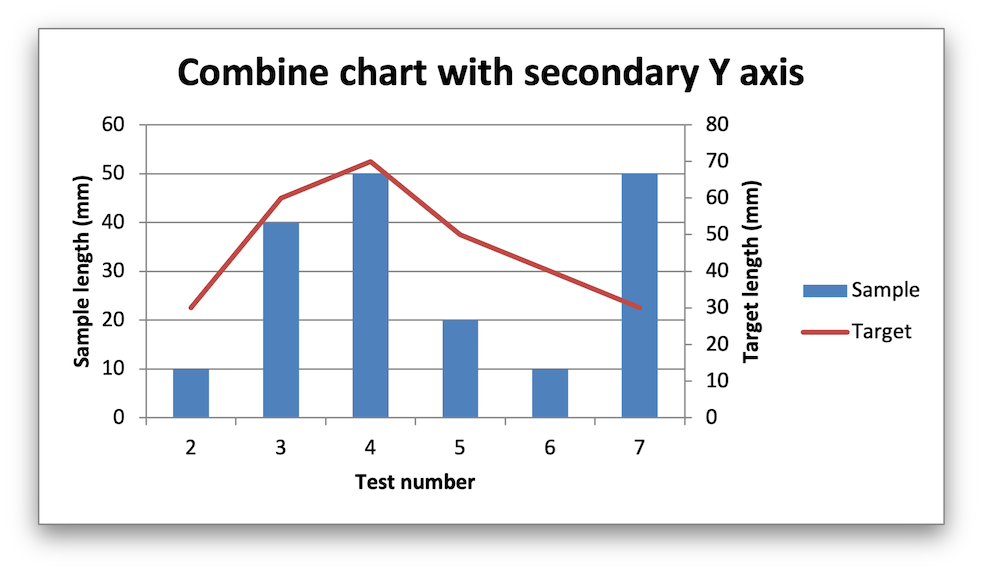
Code to generate the output file:
// SPDX-License-Identifier: MIT OR Apache-2.0
//
// Copyright 2022-2026, John McNamara, jmcnamara@cpan.org

//! An example of creating combined charts using the `rust_xlsxwriter` library.

use rust_xlsxwriter::{Chart, ChartType, Format, Workbook, XlsxError};

fn main() -> Result<(), XlsxError> {
    let mut workbook = Workbook::new();
    let worksheet = workbook.add_worksheet();
    let bold = Format::new().set_bold();

    // Add the worksheet data that the charts will refer to.
    let headings = ["Number", "Sample", "Target"];
    worksheet.write_row_with_format(0, 0, headings, &bold)?;

    let data = [
        [2, 3, 4, 5, 6, 7],
        [10, 40, 50, 20, 10, 50],
        [30, 60, 70, 50, 40, 30],
    ];
    worksheet.write_column_matrix(1, 0, data)?;

    // -----------------------------------------------------------------------
    // In the first example we will create a combined column and line chart.
    // The charts will share the same X and Y axes.
    // -----------------------------------------------------------------------
    let mut column_chart = Chart::new(ChartType::Column);

    // Configure the data series for the primary chart.
    column_chart
        .add_series()
        .set_name("Sheet1!$B$1")
        .set_categories("Sheet1!$A$2:$A$7")
        .set_values("Sheet1!$B$2:$B$7");

    // Create a new line chart. This will use this as the secondary chart.
    let mut line_chart = Chart::new(ChartType::Line);

    // Configure the data series for the secondary chart.
    line_chart
        .add_series()
        .set_name("Sheet1!$C$1")
        .set_categories("Sheet1!$A$2:$A$7")
        .set_values("Sheet1!$C$2:$C$7");

    // Combine the charts.
    column_chart.combine(&line_chart);

    // Add a chart title and some axis labels. Note, this is done via the
    // primary chart.
    column_chart
        .title()
        .set_name("Combined chart with same Y axis");
    column_chart.x_axis().set_name("Test number");
    column_chart.y_axis().set_name("Sample length (mm)");

    // Add the primary chart to the worksheet.
    worksheet.insert_chart(1, 4, &column_chart)?;

    // -----------------------------------------------------------------------
    // In the second example we will create a similar combined column and line
    // chart except that the secondary chart will have a secondary Y axis.
    // -----------------------------------------------------------------------
    let mut column_chart = Chart::new(ChartType::Column);

    // Configure the data series for the primary chart.
    column_chart
        .add_series()
        .set_name("Sheet1!$B$1")
        .set_categories("Sheet1!$A$2:$A$7")
        .set_values("Sheet1!$B$2:$B$7");

    // Create a new line chart. This will use this as the secondary chart.
    let mut line_chart = Chart::new(ChartType::Line);

    // Configure the data series for the secondary chart.
    line_chart
        .add_series()
        .set_name("Sheet1!$C$1")
        .set_categories("Sheet1!$A$2:$A$7")
        .set_values("Sheet1!$C$2:$C$7")
        .set_secondary_axis(true);

    // Combine the charts.
    column_chart.combine(&line_chart);

    // Configure the data series for the secondary chart. We also set a
    // secondary Y axis via (y2_axis). This is the only difference between
    // this and the first example, apart from the axis label below.
    column_chart
        .title()
        .set_name("Combine chart with secondary Y axis");
    column_chart.x_axis().set_name("Test number");
    column_chart.y_axis().set_name("Sample length (mm)");

    // Note: the y2 properties are set via the primary chart.
    column_chart.y2_axis().set_name("Target length (mm)");

    // Add the primary chart to the worksheet.
    worksheet.insert_chart(17, 4, &column_chart)?;

    // Save the file to disk.
    workbook.save("chart_combined.xlsx")?;

    Ok(())
}
Chart: Create a combined pareto chart
Example of creating a Pareto chart with a secondary chart and axis.
A Pareto chart is a type of chart that combines a Column/Histogram chart and a Chart. Individual values are represented in descending order by the columns and the cumulative total is represented by the line approaching 100% on a second axis.
Image of the output file:
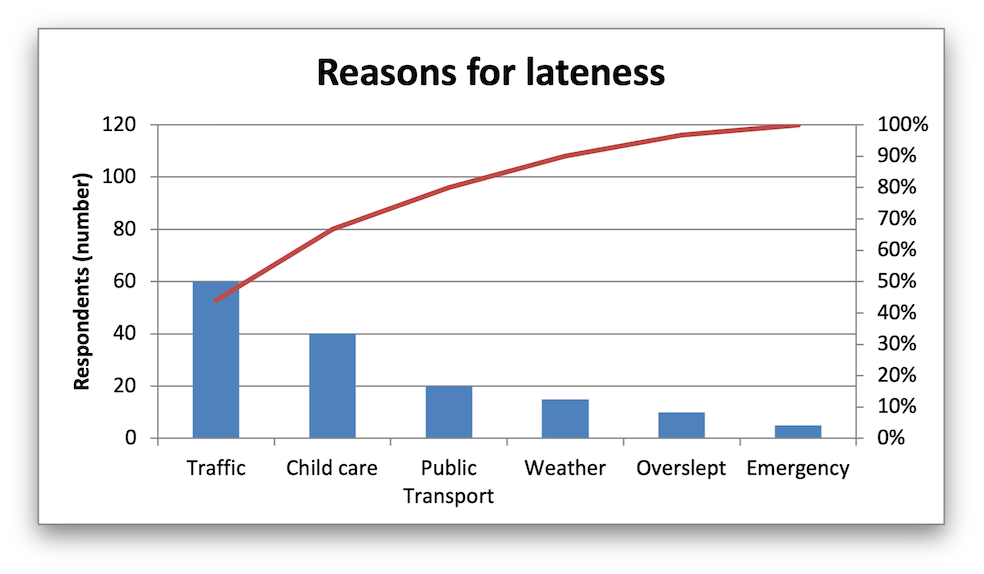
Code to generate the output file:
// SPDX-License-Identifier: MIT OR Apache-2.0
//
// Copyright 2022-2026, John McNamara, jmcnamara@cpan.org

//! An example of creating a Pareto chart using the `rust_xlsxwriter` library.

use rust_xlsxwriter::{Chart, ChartType, Format, Workbook, XlsxError};

fn main() -> Result<(), XlsxError> {
    let mut workbook = Workbook::new();
    let worksheet = workbook.add_worksheet();

    // Formats used in the workbook.
    let bold = Format::new().set_bold();
    let percent_format = Format::new().set_num_format("0%");

    // Add the worksheet data that the charts will refer to.
    let headings = ["Reason", "Number", "Percentage"];

    let reasons = [
        "Traffic",
        "Child care",
        "Public Transport",
        "Weather",
        "Overslept",
        "Emergency",
    ];

    let numbers = [60, 40, 20, 15, 10, 5];
    let percents = [0.440, 0.667, 0.800, 0.900, 0.967, 1.00];

    worksheet.write_row_with_format(0, 0, headings, &bold)?;
    worksheet.write_column(1, 0, reasons)?;
    worksheet.write_column(1, 1, numbers)?;
    worksheet.write_column_with_format(1, 2, percents, &percent_format)?;

    // Widen the columns for visibility.
    worksheet.set_column_width(0, 15)?;
    worksheet.set_column_width(1, 10)?;
    worksheet.set_column_width(2, 10)?;

    //
    // Create a new Column chart. This will be the primary chart.
    //
    let mut column_chart = Chart::new(ChartType::Column);

    // Configure a series on the primary axis.
    column_chart
        .add_series()
        .set_categories("Sheet1!$A$2:$A$7")
        .set_values("Sheet1!$B$2:$B$7");

    // Add a chart title.
    column_chart.title().set_name("Reasons for lateness");

    // Turn off the chart legend.
    column_chart.legend().set_hidden();

    // Set the  name and scale of the Y axes. Note, the secondary axis is set
    // from the primary chart.
    column_chart
        .y_axis()
        .set_name("Respondents (number)")
        .set_min(0)
        .set_max(120);

    column_chart.y2_axis().set_max(1);

    //
    // Create a new Line chart. This will be the secondary chart.
    //
    let mut line_chart = Chart::new(ChartType::Line);

    // Add a series on the secondary axis.
    line_chart
        .add_series()
        .set_categories("Sheet1!$A$2:$A$7")
        .set_values("Sheet1!$C$2:$C$7")
        .set_secondary_axis(true);

    // Combine the charts.
    column_chart.combine(&line_chart);

    // Add the chart to the worksheet.
    worksheet.insert_chart(1, 5, &column_chart)?;

    workbook.save("chart_pareto.xlsx")?;

    Ok(())
}
Chart: Clustered categories
Example of creating a clustered Excel chart where there are two levels of category on the X axis.
The categories in clustered charts are 2D ranges, instead of the more normal 1D ranges.
Image of the output file:
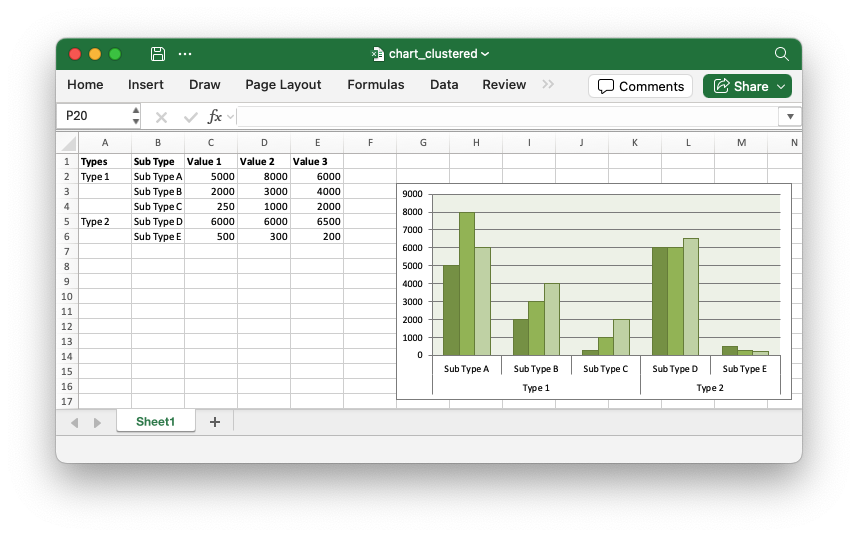
Code to generate the output file:
// SPDX-License-Identifier: MIT OR Apache-2.0
//
// Copyright 2022-2026, John McNamara, jmcnamara@cpan.org

//! A demo of a clustered category chart using rust_xlsxwriter.

use rust_xlsxwriter::{Chart, ChartType, Format, Workbook, XlsxError};

fn main() -> Result<(), XlsxError> {
    let mut workbook = Workbook::new();
    let worksheet = workbook.add_worksheet();
    let bold = Format::new().set_bold();

    // Add the worksheet data that the charts will refer to.
    worksheet.write_with_format(0, 0, "Types", &bold)?;
    worksheet.write_with_format(0, 1, "Sub Type", &bold)?;
    worksheet.write_with_format(0, 2, "Value 1", &bold)?;
    worksheet.write_with_format(0, 3, "Value 2", &bold)?;
    worksheet.write_with_format(0, 4, "Value 3", &bold)?;

    worksheet.write(1, 0, "Type 1")?;
    worksheet.write(1, 1, "Sub Type A")?;
    worksheet.write(2, 1, "Sub Type B")?;
    worksheet.write(3, 1, "Sub Type C")?;

    worksheet.write(4, 0, "Type 2")?;
    worksheet.write(4, 1, "Sub Type D")?;
    worksheet.write(5, 1, "Sub Type E")?;

    worksheet.write(1, 2, 5000)?;
    worksheet.write(2, 2, 2000)?;
    worksheet.write(3, 2, 250)?;
    worksheet.write(4, 2, 6000)?;
    worksheet.write(5, 2, 500)?;

    worksheet.write(1, 3, 8000)?;
    worksheet.write(2, 3, 3000)?;
    worksheet.write(3, 3, 1000)?;
    worksheet.write(4, 4, 6500)?;
    worksheet.write(5, 3, 300)?;

    worksheet.write(1, 4, 6000)?;
    worksheet.write(2, 4, 4000)?;
    worksheet.write(3, 4, 2000)?;
    worksheet.write(4, 3, 6000)?;
    worksheet.write(5, 4, 200)?;

    // Create a new chart object.
    let mut chart = Chart::new(ChartType::Column);

    // Configure the series. Note, that the categories are 2D ranges (from
    // column A to column B). This creates the clusters.
    chart
        .add_series()
        .set_categories("Sheet1!$A$2:$B$6")
        .set_values("Sheet1!$C$2:$C$6");

    chart
        .add_series()
        .set_categories("Sheet1!$A$2:$B$6")
        .set_values("Sheet1!$D$2:$D$6");

    chart
        .add_series()
        .set_categories("Sheet1!$A$2:$B$6")
        .set_values("Sheet1!$E$2:$E$6");

    // Set the Excel chart style.
    chart.set_style(37);

    // Turn off the legend.
    chart.legend().set_hidden();

    // Insert the chart into the worksheet.
    worksheet.insert_chart(2, 6, &chart)?;

    workbook.save("chart_clustered.xlsx")?;

    Ok(())
}
Chart: Pattern Fill: Example of a chart with Pattern Fill
A example of creating column charts with fill patterns using the ChartFormat
and ChartPatternFill structs.
Image of the output file:
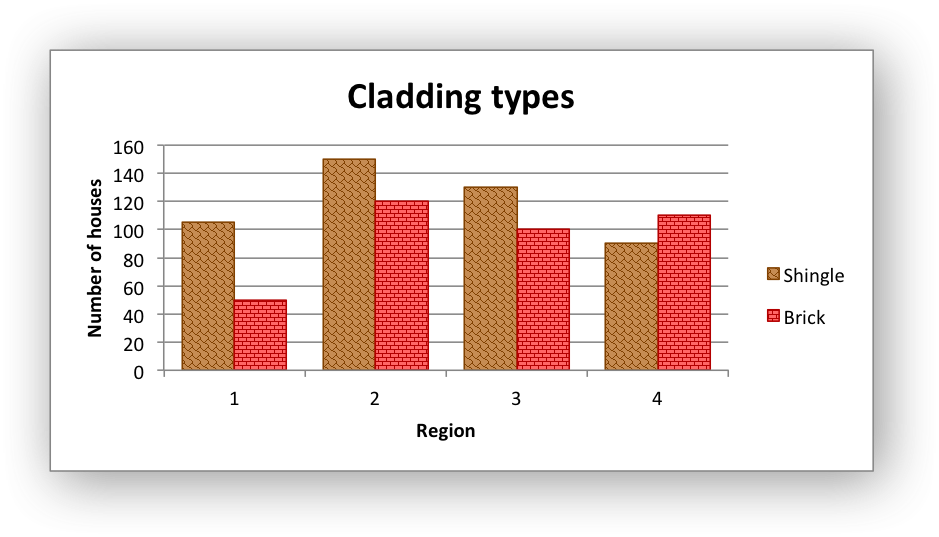
Code to generate the output file:
// SPDX-License-Identifier: MIT OR Apache-2.0
//
// Copyright 2022-2026, John McNamara, jmcnamara@cpan.org

//! An example of creating column charts with fill patterns using the
//! `rust_xlsxwriter` library.

use rust_xlsxwriter::*;

fn main() -> Result<(), XlsxError> {
    let mut workbook = Workbook::new();
    let worksheet = workbook.add_worksheet();
    let bold = Format::new().set_bold();

    // Add the worksheet data that the charts will refer to.
    worksheet.write_with_format(0, 0, "Shingle", &bold)?;
    worksheet.write_with_format(0, 1, "Brick", &bold)?;

    let data = [[105, 150, 130, 90], [50, 120, 100, 110]];
    for (col_num, col_data) in data.iter().enumerate() {
        for (row_num, row_data) in col_data.iter().enumerate() {
            worksheet.write(row_num as u32 + 1, col_num as u16, *row_data)?;
        }
    }

    // Create a new column chart.
    let mut chart = Chart::new(ChartType::Column);

    // Configure the first data series and add fill patterns.
    chart
        .add_series()
        .set_name("Sheet1!$A$1")
        .set_values("Sheet1!$A$2:$A$5")
        .set_gap(70)
        .set_format(
            ChartFormat::new()
                .set_pattern_fill(
                    ChartPatternFill::new()
                        .set_pattern(ChartPatternFillType::Shingle)
                        .set_foreground_color("#804000")
                        .set_background_color("#C68C53"),
                )
                .set_border(ChartLine::new().set_color("#804000")),
        );

    chart
        .add_series()
        .set_name("Sheet1!$B$1")
        .set_values("Sheet1!$B$2:$B$5")
        .set_format(
            ChartFormat::new()
                .set_pattern_fill(
                    ChartPatternFill::new()
                        .set_pattern(ChartPatternFillType::HorizontalBrick)
                        .set_foreground_color("#B30000")
                        .set_background_color("#FF6666"),
                )
                .set_border(ChartLine::new().set_color("#B30000")),
        );

    // Add a chart title and some axis labels.
    chart.title().set_name("Cladding types");
    chart.x_axis().set_name("Region");
    chart.y_axis().set_name("Number of houses");

    // Add the chart to the worksheet.
    worksheet.insert_chart(1, 3, &chart)?;

    workbook.save("chart_pattern.xlsx")?;

    Ok(())
}
Chart: Gradient Fill: Example of a chart with Gradient Fill
A example of creating column charts with fill gradients using the
ChartFormat and ChartGradientFill structs.
Image of the output file:
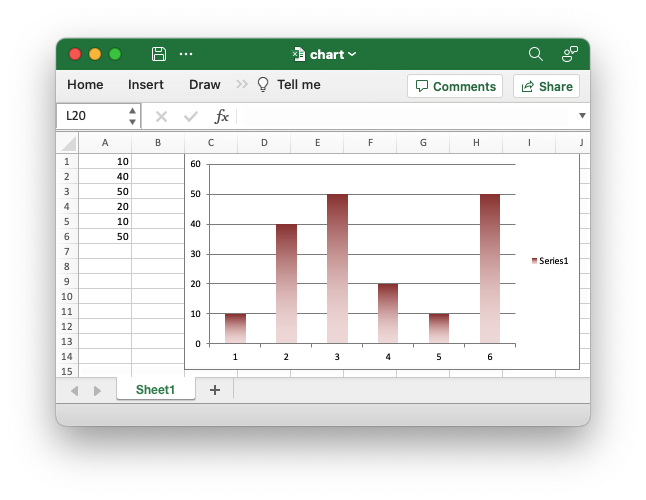
Code to generate the output file:
// SPDX-License-Identifier: MIT OR Apache-2.0
//
// Copyright 2022-2026, John McNamara, jmcnamara@cpan.org

//! An example of creating a chart with gradient fills using the `rust_xlsxwriter`
//! library.

use rust_xlsxwriter::{
    Chart, ChartGradientFill, ChartGradientStop, ChartType, Format, Workbook, XlsxError,
};

fn main() -> Result<(), XlsxError> {
    let mut workbook = Workbook::new();
    let worksheet = workbook.add_worksheet();
    let bold = Format::new().set_bold();

    // Add the worksheet data that the charts will refer to.
    worksheet.write_with_format(0, 0, "Number", &bold)?;
    worksheet.write_with_format(0, 1, "Batch 1", &bold)?;
    worksheet.write_with_format(0, 2, "Batch 2", &bold)?;

    let data = [
        [2, 3, 4, 5, 6, 7],
        [10, 40, 50, 20, 10, 50],
        [30, 60, 70, 50, 40, 30],
    ];
    for (col_num, col_data) in data.iter().enumerate() {
        for (row_num, row_data) in col_data.iter().enumerate() {
            worksheet.write(row_num as u32 + 1, col_num as u16, *row_data)?;
        }
    }

    // Create a new column chart.
    let mut chart = Chart::new(ChartType::Column);

    //
    // Create a gradient profile to the first series.
    //
    chart
        .add_series()
        .set_categories("Sheet1!$A$2:$A$7")
        .set_values("Sheet1!$B$2:$B$7")
        .set_name("Sheet1!$B$1")
        .set_format(ChartGradientFill::new().set_gradient_stops(&[
            ChartGradientStop::new("#963735", 0),
            ChartGradientStop::new("#F1DCDB", 100),
        ]));

    //
    // Create a gradient profile to the second series.
    //
    chart
        .add_series()
        .set_categories("Sheet1!$A$2:$A$7")
        .set_values("Sheet1!$C$2:$C$7")
        .set_name("Sheet1!$C$1")
        .set_format(ChartGradientFill::new().set_gradient_stops(&[
            ChartGradientStop::new("#E36C0A", 0),
            ChartGradientStop::new("#FCEADA", 100),
        ]));

    //
    // Create a gradient profile and add it to chart plot area.
    //
    chart
        .plot_area()
        .set_format(ChartGradientFill::new().set_gradient_stops(&[
            ChartGradientStop::new("#FFEFD1", 0),
            ChartGradientStop::new("#F0EBD5", 50),
            ChartGradientStop::new("#B69F66", 100),
        ]));

    // Add some axis labels.
    chart.x_axis().set_name("Test number");
    chart.y_axis().set_name("Sample length (mm)");

    // Turn off the chart legend.
    chart.legend().set_hidden();

    // Add the chart to the worksheet.
    worksheet.insert_chart_with_offset(0, 3, &chart, 25, 10)?;

    workbook.save("chart_gradient.xlsx")?;

    Ok(())
}
Chart: Chart data table
An example of creating Excel Column charts with data tables using the
rust_xlsxwriter library.
Image of the output file:
Chart 1 in the following code is a Column chart with a default chart data table.
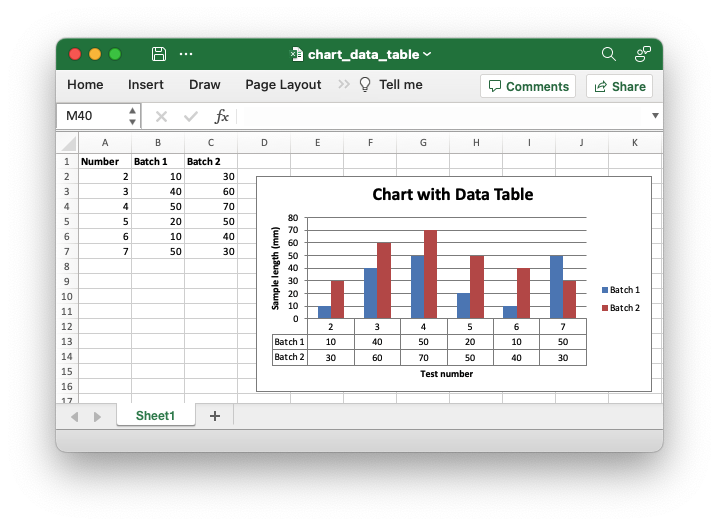
Chart 2 in the following code is a Column chart with a chart data table with legend keys.
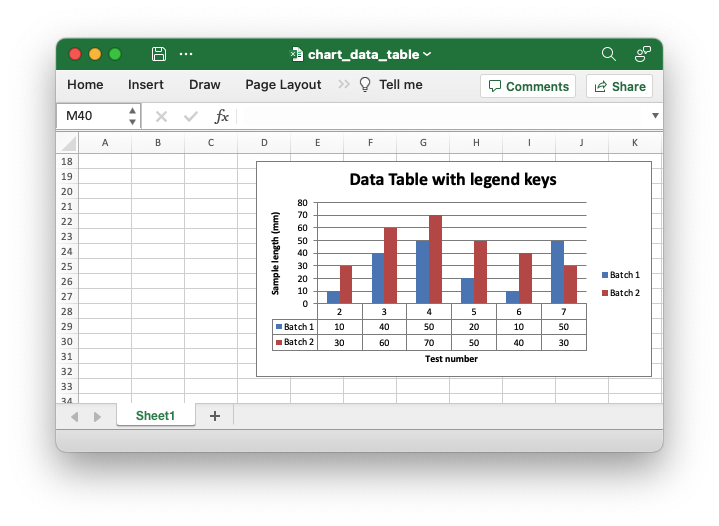
Code to generate the output file:
// SPDX-License-Identifier: MIT OR Apache-2.0
//
// Copyright 2022-2026, John McNamara, jmcnamara@cpan.org

//! An example of creating Excel Column charts with data tables using the
//! `rust_xlsxwriter` library.

use rust_xlsxwriter::{Chart, ChartDataTable, ChartType, Format, Workbook, XlsxError};

fn main() -> Result<(), XlsxError> {
    let mut workbook = Workbook::new();
    let worksheet = workbook.add_worksheet();
    let bold = Format::new().set_bold();

    // Add the worksheet data that the charts will refer to.
    worksheet.write_with_format(0, 0, "Number", &bold)?;
    worksheet.write_with_format(0, 1, "Batch 1", &bold)?;
    worksheet.write_with_format(0, 2, "Batch 2", &bold)?;

    let data = [
        [2, 3, 4, 5, 6, 7],
        [10, 40, 50, 20, 10, 50],
        [30, 60, 70, 50, 40, 30],
    ];
    for (col_num, col_data) in data.iter().enumerate() {
        for (row_num, row_data) in col_data.iter().enumerate() {
            worksheet.write(row_num as u32 + 1, col_num as u16, *row_data)?;
        }
    }

    // -----------------------------------------------------------------------
    // Create a column chart with a data table.
    // -----------------------------------------------------------------------

    // Create a new Column chart.
    let mut chart = Chart::new(ChartType::Column);

    // Configure some data series.
    chart
        .add_series()
        .set_name("Sheet1!$B$1")
        .set_categories("Sheet1!$A$2:$A$7")
        .set_values("Sheet1!$B$2:$B$7");

    chart
        .add_series()
        .set_name("Sheet1!$C$1")
        .set_categories("Sheet1!$A$2:$A$7")
        .set_values("Sheet1!$C$2:$C$7");

    // Add a chart title and some axis labels.
    chart.title().set_name("Chart with Data Table");
    chart.x_axis().set_name("Test number");
    chart.y_axis().set_name("Sample length (mm)");

    // Set a default data table on the X-Axis.
    let table = ChartDataTable::default();
    chart.set_data_table(&table);

    // Add the chart to the worksheet.
    worksheet.insert_chart_with_offset(1, 3, &chart, 25, 10)?;

    // -----------------------------------------------------------------------
    // Create a column chart with a data table and legend keys.
    // -----------------------------------------------------------------------

    // Create a new Column chart.
    let mut chart = Chart::new(ChartType::Column);

    // Configure some data series.
    chart
        .add_series()
        .set_name("Sheet1!$B$1")
        .set_categories("Sheet1!$A$2:$A$7")
        .set_values("Sheet1!$B$2:$B$7");

    chart
        .add_series()
        .set_name("Sheet1!$C$1")
        .set_categories("Sheet1!$A$2:$A$7")
        .set_values("Sheet1!$C$2:$C$7");

    // Add a chart title and some axis labels.
    chart.title().set_name("Data Table with legend keys");
    chart.x_axis().set_name("Test number");
    chart.y_axis().set_name("Sample length (mm)");

    // Set a data table on the X-Axis with the legend keys shown.
    let table = ChartDataTable::new().show_legend_keys(true);
    chart.set_data_table(&table);

    // Add the chart to the worksheet.
    worksheet.insert_chart_with_offset(17, 3, &chart, 25, 10)?;

    // -----------------------------------------------------------------------
    // Save and close the file.
    // -----------------------------------------------------------------------
    workbook.save("chart_data_table.xlsx")?;

    Ok(())
}
Chart: Chart data tools
A demo of the various Excel chart data tools that are available via the
rust_xlsxwriter library.
Image of the output file:
Chart 1 in the following code is a trendline chart:
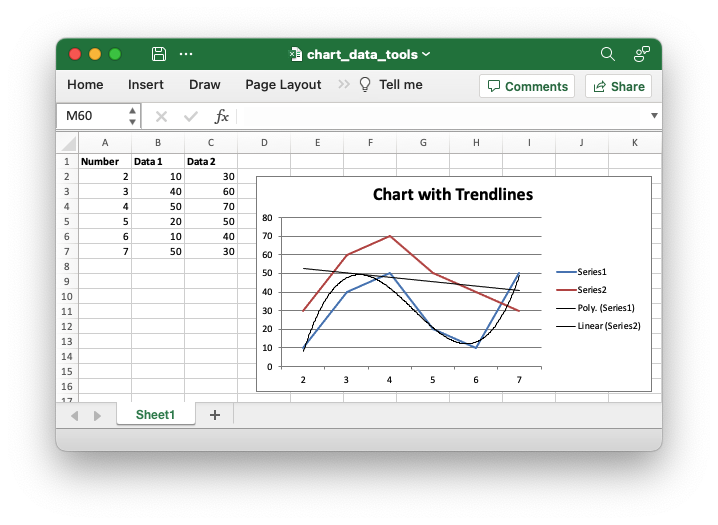
Chart 2 in the following code is an example of a chart with data labels and markers:
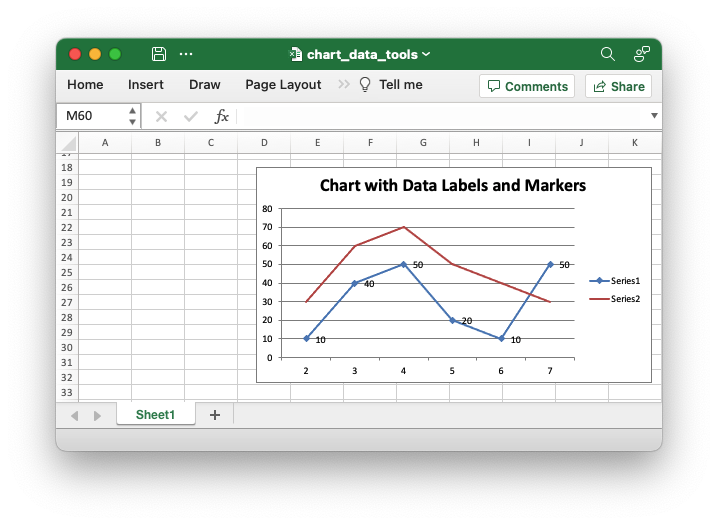
Chart 3 in the following code is an example of a chart with error bars:
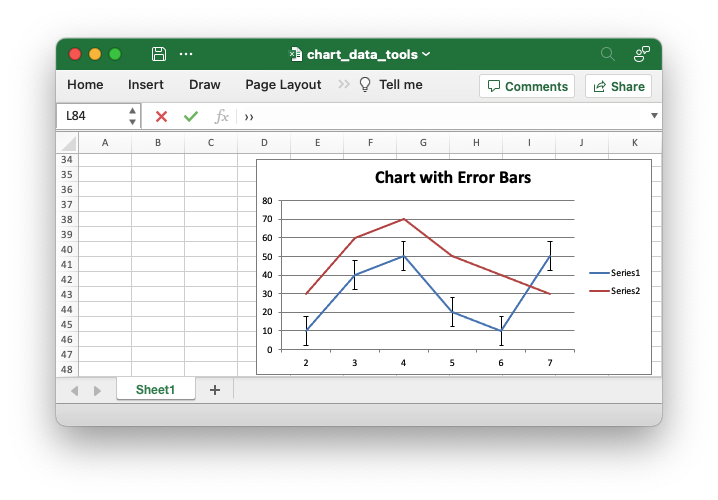
Chart 4 in the following code is an example of a chart with up-down bars:
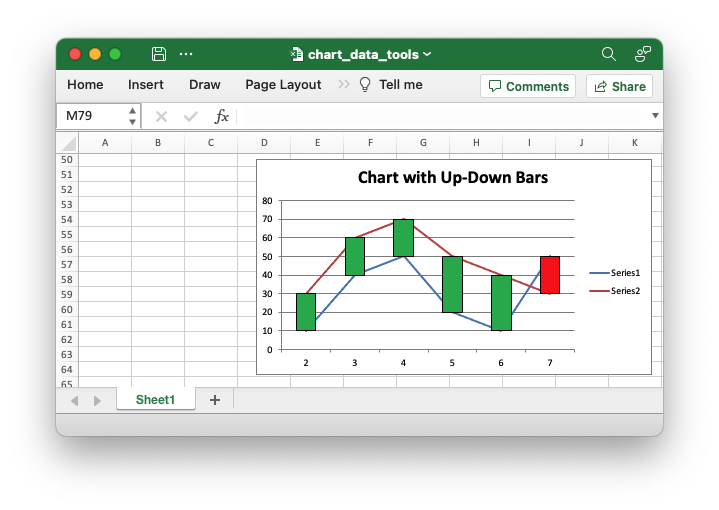
Chart 5 in the following code is an example of a chart with high-low lines:
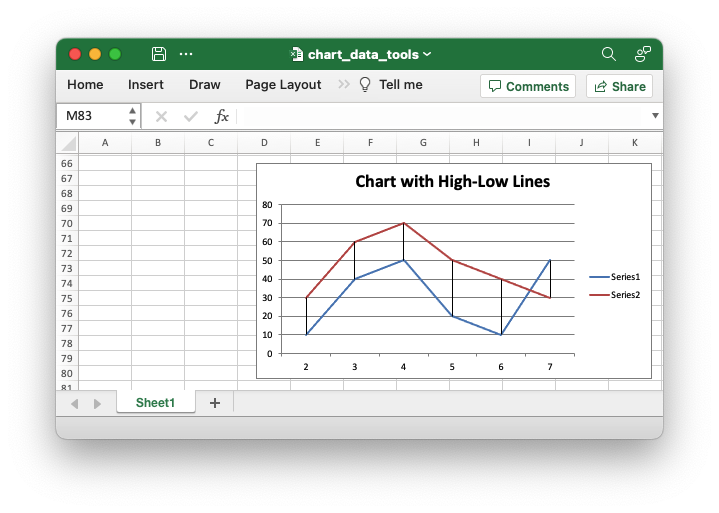
Chart 6 in the following code is an example of a chart with drop lines:
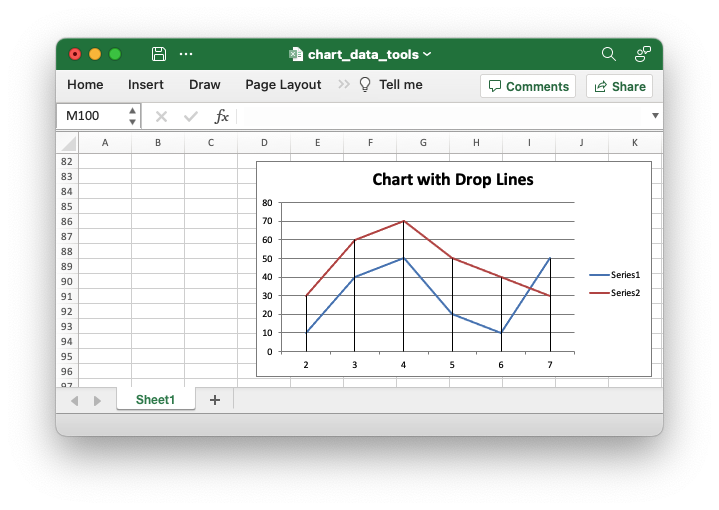
Code to generate the output file:
// SPDX-License-Identifier: MIT OR Apache-2.0
//
// Copyright 2022-2026, John McNamara, jmcnamara@cpan.org

//! A demo of the various Excel chart data tools that are available via the
//! `rust_xlsxwriter` library.

use rust_xlsxwriter::{
    Chart, ChartDataLabel, ChartErrorBars, ChartErrorBarsType, ChartMarker, ChartSolidFill,
    ChartTrendline, ChartTrendlineType, ChartType, Format, Workbook, XlsxError,
};

fn main() -> Result<(), XlsxError> {
    let mut workbook = Workbook::new();
    let worksheet = workbook.add_worksheet();
    let bold = Format::new().set_bold();

    // Add the worksheet data that the charts will refer to.
    worksheet.write_with_format(0, 0, "Number", &bold)?;
    worksheet.write_with_format(0, 1, "Data 1", &bold)?;
    worksheet.write_with_format(0, 2, "Data 2", &bold)?;

    let data = [
        [2, 3, 4, 5, 6, 7],
        [10, 40, 50, 20, 10, 50],
        [30, 60, 70, 50, 40, 30],
    ];
    for (col_num, col_data) in data.iter().enumerate() {
        for (row_num, row_data) in col_data.iter().enumerate() {
            worksheet.write(row_num as u32 + 1, col_num as u16, *row_data)?;
        }
    }

    // -----------------------------------------------------------------------
    // Trendline example
    // -----------------------------------------------------------------------

    // Create a new Line chart.
    let mut chart = Chart::new(ChartType::Line);

    // Configure the first series with a polynomial trendline.
    chart
        .add_series()
        .set_categories("Sheet1!$A$2:$A$7")
        .set_values("Sheet1!$B$2:$B$7")
        .set_trendline(ChartTrendline::new().set_type(ChartTrendlineType::Polynomial(3)));

    // Configure the second series with a linear trendline.
    chart
        .add_series()
        .set_categories("Sheet1!$A$2:$A$7")
        .set_values("Sheet1!$C$2:$C$7")
        .set_trendline(ChartTrendline::new().set_type(ChartTrendlineType::Linear));

    // Add a chart title.
    chart.title().set_name("Chart with Trendlines");

    // Add the chart to the worksheet.
    worksheet.insert_chart_with_offset(1, 3, &chart, 25, 10)?;

    // -----------------------------------------------------------------------
    // Data Labels and Markers example.
    // -----------------------------------------------------------------------

    // Create a new Line chart.
    let mut chart = Chart::new(ChartType::Line);

    // Configure the first series with data labels and markers.
    chart
        .add_series()
        .set_categories("Sheet1!$A$2:$A$7")
        .set_values("Sheet1!$B$2:$B$7")
        .set_data_label(ChartDataLabel::new().show_value())
        .set_marker(ChartMarker::new().set_automatic());

    // Configure the second series as default.
    chart
        .add_series()
        .set_categories("Sheet1!$A$2:$A$7")
        .set_values("Sheet1!$C$2:$C$7");

    // Add a chart title.
    chart.title().set_name("Chart with Data Labels and Markers");

    // Add the chart to the worksheet.
    worksheet.insert_chart_with_offset(17, 3, &chart, 25, 10)?;

    // -----------------------------------------------------------------------
    // Error Bar example.
    // -----------------------------------------------------------------------

    // Create a new Line chart.
    let mut chart = Chart::new(ChartType::Line);

    // Configure the first series with error bars.
    chart
        .add_series()
        .set_categories("Sheet1!$A$2:$A$7")
        .set_values("Sheet1!$B$2:$B$7")
        .set_y_error_bars(ChartErrorBars::new().set_type(ChartErrorBarsType::StandardError));

    // Configure the second series as default.
    chart
        .add_series()
        .set_categories("Sheet1!$A$2:$A$7")
        .set_values("Sheet1!$C$2:$C$7");

    // Add a chart title.
    chart.title().set_name("Chart with Error Bars");

    // Add the chart to the worksheet.
    worksheet.insert_chart_with_offset(33, 3, &chart, 25, 10)?;

    // -----------------------------------------------------------------------
    // Up-Down Bar example.
    // -----------------------------------------------------------------------

    // Create a new Line chart.
    let mut chart = Chart::new(ChartType::Line);

    // Configure the first series.
    chart
        .add_series()
        .set_categories("Sheet1!$A$2:$A$7")
        .set_values("Sheet1!$B$2:$B$7");

    // Configure the second series.
    chart
        .add_series()
        .set_categories("Sheet1!$A$2:$A$7")
        .set_values("Sheet1!$C$2:$C$7");

    // Add the chart up-down bars.
    chart
        .set_up_down_bars(true)
        .set_up_bar_format(ChartSolidFill::new().set_color("#00B050"))
        .set_down_bar_format(ChartSolidFill::new().set_color("#FF0000"));

    // Add a chart title.
    chart.title().set_name("Chart with Up-Down Bars");

    // Add the chart to the worksheet.
    worksheet.insert_chart_with_offset(49, 3, &chart, 25, 10)?;

    // -----------------------------------------------------------------------
    // High-Low Lines example.
    // -----------------------------------------------------------------------

    // Create a new Line chart.
    let mut chart = Chart::new(ChartType::Line);

    // Configure the first series.
    chart
        .add_series()
        .set_categories("Sheet1!$A$2:$A$7")
        .set_values("Sheet1!$B$2:$B$7");

    // Configure the second series.
    chart
        .add_series()
        .set_categories("Sheet1!$A$2:$A$7")
        .set_values("Sheet1!$C$2:$C$7");

    // Add the chart High-Low lines.
    chart.set_high_low_lines(true);

    // Add a chart title.
    chart.title().set_name("Chart with High-Low Lines");

    // Add the chart to the worksheet.
    worksheet.insert_chart_with_offset(65, 3, &chart, 25, 10)?;

    // -----------------------------------------------------------------------
    // Drop Lines example.
    // -----------------------------------------------------------------------

    // Create a new Line chart.
    let mut chart = Chart::new(ChartType::Line);

    // Configure the first series.
    chart
        .add_series()
        .set_categories("Sheet1!$A$2:$A$7")
        .set_values("Sheet1!$B$2:$B$7");

    // Configure the second series.
    chart
        .add_series()
        .set_categories("Sheet1!$A$2:$A$7")
        .set_values("Sheet1!$C$2:$C$7");

    // Add the chart Drop lines.
    chart.set_drop_lines(true);

    // Add a chart title.
    chart.title().set_name("Chart with Drop Lines");

    // Add the chart to the worksheet.
    worksheet.insert_chart_with_offset(81, 3, &chart, 25, 10)?;

    // -----------------------------------------------------------------------
    // Save and close the file.
    // -----------------------------------------------------------------------
    workbook.save("chart_data_tools.xlsx")?;

    Ok(())
}
Chart: Gauge Chart
A Gauge Chart isn't a native chart type in Excel. It is constructed by combining a doughnut chart and a pie chart and by using some non-filled elements to hide parts of the default charts. This example follows the following online example of how to create a Gauge Chart in Excel.
Image of the output file:
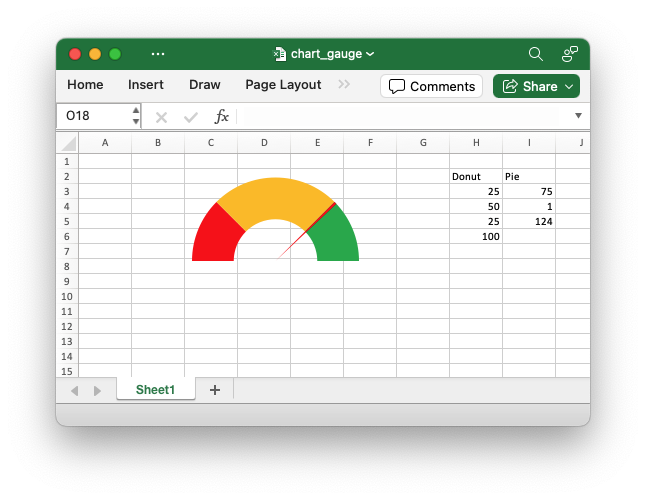
Code to generate the output file:
// SPDX-License-Identifier: MIT OR Apache-2.0
//
// Copyright 2022-2026, John McNamara, jmcnamara@cpan.org

//! An example of creating a Gauge Chart in Excel using the `rust_xlsxwriter`
//! library.
//!
//! A Gauge Chart isn't a native chart type in Excel. It is constructed by
//! combining a doughnut chart and a pie chart and by using some non-filled
//! elements to hide parts of the default charts. This example follows the
//! following online example of how to create a [Gauge Chart] in Excel.
//!
//! [Gauge Chart]: https://www.excel-easy.com/examples/gauge-chart.html
//!

use rust_xlsxwriter::{
    Chart, ChartFormat, ChartPoint, ChartSolidFill, ChartType, Workbook, XlsxError,
};

fn main() -> Result<(), XlsxError> {
    let mut workbook = Workbook::new();

    let worksheet = workbook.add_worksheet();

    // Add some data for the Doughnut and Pie charts. This is set up so the
    // gauge goes from 0-100. It is initially set at 75%.
    worksheet.write(1, 7, "Donut")?;
    worksheet.write(1, 8, "Pie")?;
    worksheet.write_column(2, 7, [25, 50, 25, 100])?;
    worksheet.write_column(2, 8, [75, 1, 124])?;

    // Configure the doughnut chart as the background for the gauge. We add some
    // custom colors for the Red-Orange-Green of the dial and one non-filled segment.
    let mut chart_doughnut = Chart::new(ChartType::Doughnut);

    let points = vec![
        ChartPoint::new().set_format(
            ChartFormat::new().set_solid_fill(ChartSolidFill::new().set_color("#FF0000")),
        ),
        ChartPoint::new().set_format(
            ChartFormat::new().set_solid_fill(ChartSolidFill::new().set_color("#FFC000")),
        ),
        ChartPoint::new().set_format(
            ChartFormat::new().set_solid_fill(ChartSolidFill::new().set_color("#00B050")),
        ),
        ChartPoint::new().set_format(ChartFormat::new().set_no_fill()),
    ];

    // Add the chart series.
    chart_doughnut
        .add_series()
        .set_values(("Sheet1", 2, 7, 5, 7))
        .set_name(("Sheet1", 1, 7))
        .set_points(&points);

    // Turn off the chart legend.
    chart_doughnut.legend().set_hidden();

    // Rotate chart so the gauge parts are above the horizontal.
    chart_doughnut.set_rotation(270);

    // Turn off the chart fill and border.
    chart_doughnut
        .chart_area()
        .set_format(ChartFormat::new().set_no_fill().set_no_border());

    // Configure a pie chart as the needle for the gauge.
    let mut chart_pie = Chart::new(ChartType::Pie);
    let points = vec![
        ChartPoint::new().set_format(ChartFormat::new().set_no_fill()),
        ChartPoint::new().set_format(
            ChartFormat::new().set_solid_fill(ChartSolidFill::new().set_color("#FF0000")),
        ),
        ChartPoint::new().set_format(ChartFormat::new().set_no_fill()),
    ];

    // Add the chart series.
    chart_pie
        .add_series()
        .set_values(("Sheet1", 2, 8, 5, 8))
        .set_name(("Sheet1", 1, 8))
        .set_points(&points);

    // Rotate the pie chart/needle to align with the doughnut/gauge.
    chart_pie.set_rotation(270);

    // Combine the pie and doughnut charts.
    chart_doughnut.combine(&chart_pie);

    // Insert the chart into the worksheet.
    worksheet.insert_chart(0, 0, &chart_doughnut)?;

    workbook.save("chart_gauge.xlsx")?;

    Ok(())
}
Chart: Chartsheet
In Excel a chartsheet is a type of worksheet that it used primarily to display one chart. It also supports some other worksheet display options such as headers and footers, margins, tab selection and print properties
Image of the output file:
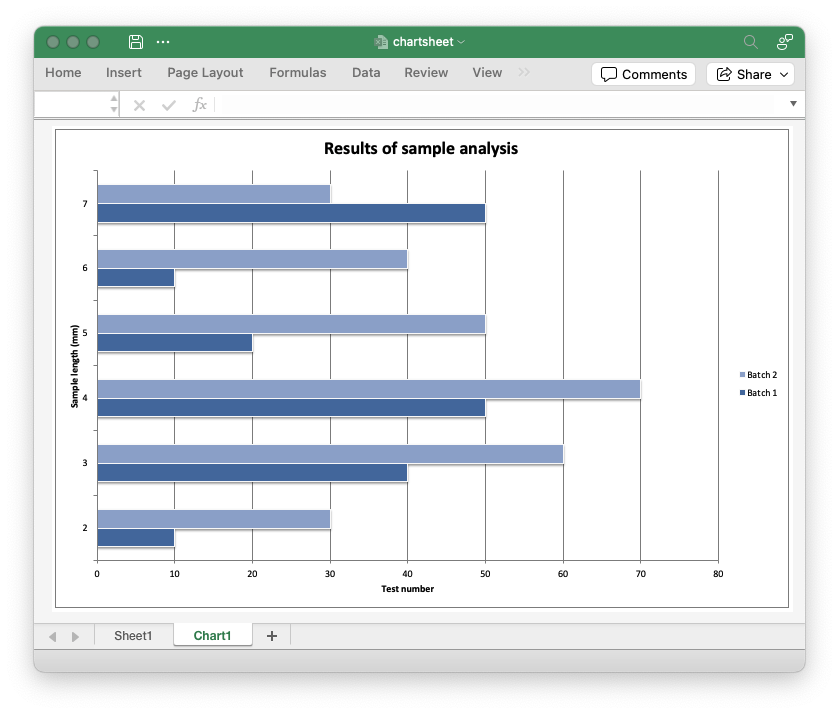
Code to generate the output file:
// SPDX-License-Identifier: MIT OR Apache-2.0
//
// Copyright 2022-2026, John McNamara, jmcnamara@cpan.org

//! An example of creating a chartsheet style chart using the `rust_xlsxwriter` library.

use rust_xlsxwriter::{Chart, ChartType, Format, Workbook, XlsxError};

fn main() -> Result<(), XlsxError> {
    let mut workbook = Workbook::new();
    let worksheet = workbook.add_worksheet();
    let bold = Format::new().set_bold();

    // Add the worksheet data that the chart will refer to.
    worksheet.write_with_format(0, 0, "Number", &bold)?;
    worksheet.write_with_format(0, 1, "Batch 1", &bold)?;
    worksheet.write_with_format(0, 2, "Batch 2", &bold)?;

    let data = [
        [2, 3, 4, 5, 6, 7],
        [10, 40, 50, 20, 10, 50],
        [30, 60, 70, 50, 40, 30],
    ];
    for (col_num, col_data) in data.iter().enumerate() {
        for (row_num, row_data) in col_data.iter().enumerate() {
            worksheet.write(row_num as u32 + 1, col_num as u16, *row_data)?;
        }
    }

    // Create a new bar chart.
    let mut chart = Chart::new(ChartType::Bar);

    // Configure the data series for the chart.
    chart
        .add_series()
        .set_categories("Sheet1!$A$2:$A$7")
        .set_values("Sheet1!$B$2:$B$7")
        .set_name("Sheet1!$B$1");

    chart
        .add_series()
        .set_categories("Sheet1!$A$2:$A$7")
        .set_values("Sheet1!$C$2:$C$7")
        .set_name("Sheet1!$C$1");

    // Add a chart title and some axis labels.
    chart.title().set_name("Results of sample analysis");
    chart.x_axis().set_name("Test number");
    chart.y_axis().set_name("Sample length (mm)");

    // Set an Excel chart style.
    chart.set_style(11);

    // Create a chartsheet.
    let chartsheet = workbook.add_chartsheet();

    // Add the chart to the chartsheet. The row/col position is ignored.
    chartsheet.insert_chart(0, 0, &chart)?;

    // Make the chartsheet the first sheet visible in the workbook.
    chartsheet.set_active(true);

    workbook.save("chartsheet.xlsx")?;

    Ok(())
}
Macros: Adding macros to a workbook
An example of adding macros to an rust_xlsxwriter file using a VBA macros
file extracted from an existing Excel xlsm file.
The vba_extract utility can be used to
extract the vbaProject.bin file.
Image of the output file:
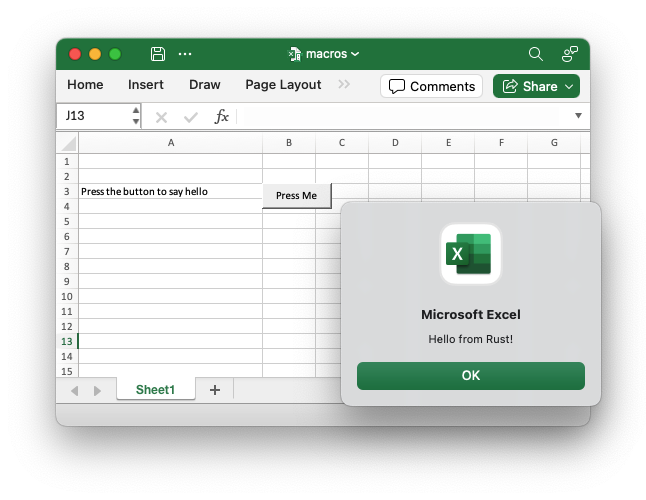
use rust_xlsxwriter::{Button, Workbook, XlsxError};

fn main() -> Result<(), XlsxError> {
    // Create a new Excel file object.
    let mut workbook = Workbook::new();

    // Add the VBA macro file.
    workbook.add_vba_project("examples/vbaProject.bin")?;

    // Add a worksheet and some text.
    let worksheet = workbook.add_worksheet();

    // Widen the first column for clarity.
    worksheet.set_column_width(0, 30)?;

    worksheet.write(2, 0, "Press the button to say hello:")?;

    // Add a button tied to a macro in the VBA project.
    let button = Button::new()
        .set_caption("Press Me")
        .set_macro("say_hello")
        .set_width(80)
        .set_height(30);

    worksheet.insert_button(2, 1, &button)?;

    // Save the file to disk. Note the `.xlsm` extension. This is required by
    // Excel or it will raise a warning.
    workbook.save("macros.xlsm")?;

    Ok(())
}
Sparklines: simple example
Example of adding sparklines to an Excel spreadsheet using the rust_xlsxwriter
library.
Sparklines are small charts that fit in a single cell and are used to show trends in data. This example shows the basic sparkline types.
Image of the output file:
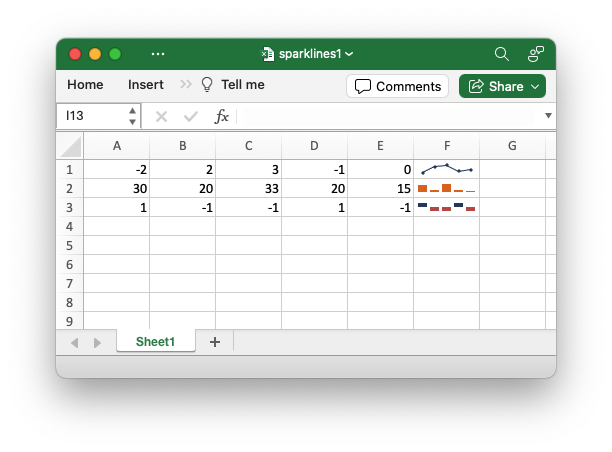
Code to generate the output file:
// SPDX-License-Identifier: MIT OR Apache-2.0
//
// Copyright 2022-2026, John McNamara, jmcnamara@cpan.org

//! Example of adding sparklines to an Excel spreadsheet using the
//! `rust_xlsxwriter` library.
//!
//! Sparklines are small charts that fit in a single cell and are used to show
//! trends in data.

use rust_xlsxwriter::{Sparkline, SparklineType, Workbook, XlsxError};

fn main() -> Result<(), XlsxError> {
    // Create a new Excel file object.
    let mut workbook = Workbook::new();

    // Add a worksheet to the workbook.
    let worksheet = workbook.add_worksheet();

    // Some sample data to plot.
    let data = [[-2, 2, 3, -1, 0], [30, 20, 33, 20, 15], [1, -1, -1, 1, -1]];

    worksheet.write_row_matrix(0, 0, data)?;

    // Add a line sparkline (the default) with markers.
    let sparkline1 = Sparkline::new()
        .set_range(("Sheet1", 0, 0, 0, 4))
        .show_markers(true);

    worksheet.add_sparkline(0, 5, &sparkline1)?;

    // Add a column sparkline with a non-default style.
    let sparkline2 = Sparkline::new()
        .set_range(("Sheet1", 1, 0, 1, 4))
        .set_type(SparklineType::Column)
        .set_style(12);

    worksheet.add_sparkline(1, 5, &sparkline2)?;

    // Add a win/loss sparkline with negative values highlighted.
    let sparkline3 = Sparkline::new()
        .set_range(("Sheet1", 2, 0, 2, 4))
        .set_type(SparklineType::WinLose)
        .show_negative_points(true);

    worksheet.add_sparkline(2, 5, &sparkline3)?;

    // Save the file to disk.
    workbook.save("sparklines1.xlsx")?;

    Ok(())
}
Sparklines: advanced example
Example of adding sparklines to an Excel spreadsheet using the
rust_xlsxwriter library.
Sparklines are small charts that fit in a single cell and are used to show trends in data. This example shows the majority of options that can be applied to sparklines.
Image of the output file:
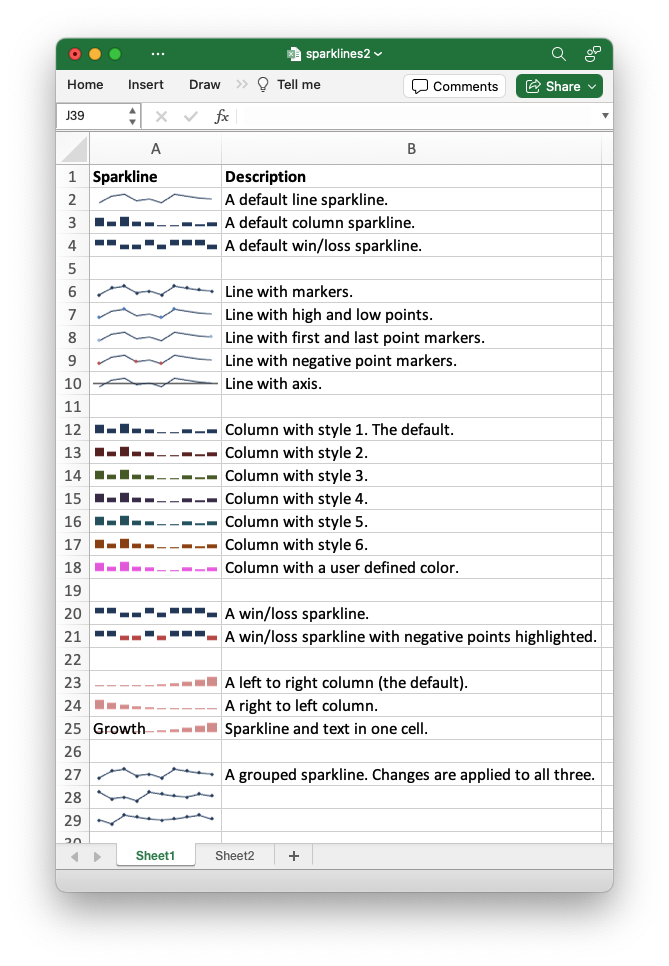
Code to generate the output file:
// SPDX-License-Identifier: MIT OR Apache-2.0
//
// Copyright 2022-2026, John McNamara, jmcnamara@cpan.org

//! Example of adding sparklines to an Excel spreadsheet using the
//! `rust_xlsxwriter` library.
//!
//! Sparklines are small charts that fit in a single cell and are used to show
//! trends in data. This example shows the majority of the properties that can
//! applied to sparklines.

use rust_xlsxwriter::{Format, Sparkline, SparklineType, Workbook, XlsxError};

fn main() -> Result<(), XlsxError> {
    // Create a new Excel file object.
    let mut workbook = Workbook::new();

    // Add a worksheet to the workbook.
    let worksheet1 = workbook.add_worksheet();
    let mut row = 1;

    // Set the columns widths to make the output clearer.
    worksheet1.set_column_width(0, 14)?;
    worksheet1.set_column_width(1, 50)?;
    worksheet1.set_zoom(150);

    // Add some headings.
    let bold = Format::new().set_bold();
    worksheet1.write_with_format(0, 0, "Sparkline", &bold)?;
    worksheet1.write_with_format(0, 1, "Description", &bold)?;

    //
    // Add a default line sparkline.
    //
    let text = "A default line sparkline.";
    worksheet1.write(row, 1, text)?;

    let sparkline = Sparkline::new().set_range(("Sheet2", 0, 0, 0, 9));

    worksheet1.add_sparkline(row, 0, &sparkline)?;
    row += 1;

    //
    // Add a default column sparkline.
    //
    let text = "A default column sparkline.";
    worksheet1.write(row, 1, text)?;

    let sparkline = Sparkline::new()
        .set_range(("Sheet2", 1, 0, 1, 9))
        .set_type(SparklineType::Column);

    worksheet1.add_sparkline(row, 0, &sparkline)?;
    row += 1;

    //
    // Add a default win/loss sparkline.
    //
    let text = "A default win/loss sparkline.";
    worksheet1.write(row, 1, text)?;

    let sparkline = Sparkline::new()
        .set_range(("Sheet2", 2, 0, 2, 9))
        .set_type(SparklineType::WinLose);

    worksheet1.add_sparkline(row, 0, &sparkline)?;
    row += 2;

    //
    // Add a line sparkline with markers.
    //
    let text = "Line with markers.";
    worksheet1.write(row, 1, text)?;

    let sparkline = Sparkline::new()
        .set_range(("Sheet2", 0, 0, 0, 9))
        .show_markers(true);

    worksheet1.add_sparkline(row, 0, &sparkline)?;
    row += 1;

    //
    // Add a line sparkline with high and low points.
    //
    let text = "Line with high and low points.";
    worksheet1.write(row, 1, text)?;

    let sparkline = Sparkline::new()
        .set_range(("Sheet2", 0, 0, 0, 9))
        .show_high_point(true)
        .show_low_point(true);

    worksheet1.add_sparkline(row, 0, &sparkline)?;
    row += 1;

    //
    // Add a line sparkline with first and last points.
    //
    let text = "Line with first and last point markers.";
    worksheet1.write(row, 1, text)?;

    let sparkline = Sparkline::new()
        .set_range(("Sheet2", 0, 0, 0, 9))
        .show_first_point(true)
        .show_last_point(true);

    worksheet1.add_sparkline(row, 0, &sparkline)?;
    row += 1;

    //
    // Add a line sparkline with negative point markers.
    //
    let text = "Line with negative point markers.";
    worksheet1.write(row, 1, text)?;

    let sparkline = Sparkline::new()
        .set_range(("Sheet2", 0, 0, 0, 9))
        .show_negative_points(true);

    worksheet1.add_sparkline(row, 0, &sparkline)?;
    row += 1;

    //
    // Add a line sparkline with axis.
    //
    let text = "Line with axis.";
    worksheet1.write(row, 1, text)?;

    let sparkline = Sparkline::new()
        .set_range(("Sheet2", 0, 0, 0, 9))
        .show_axis(true);

    worksheet1.add_sparkline(row, 0, &sparkline)?;
    row += 2;

    //
    // Add a column sparkline with style 1. The default style.
    //
    let text = "Column with style 1. The default.";
    worksheet1.write(row, 1, text)?;

    let sparkline = Sparkline::new()
        .set_range(("Sheet2", 1, 0, 1, 9))
        .set_type(SparklineType::Column)
        .set_style(1);

    worksheet1.add_sparkline(row, 0, &sparkline)?;
    row += 1;

    //
    // Add a column sparkline with style 2.
    //
    let text = "Column with style 2.";
    worksheet1.write(row, 1, text)?;

    let sparkline = Sparkline::new()
        .set_range(("Sheet2", 1, 0, 1, 9))
        .set_type(SparklineType::Column)
        .set_style(2);

    worksheet1.add_sparkline(row, 0, &sparkline)?;
    row += 1;

    //
    // Add a column sparkline with style 3.
    //
    let text = "Column with style 3.";
    worksheet1.write(row, 1, text)?;

    let sparkline = Sparkline::new()
        .set_range(("Sheet2", 1, 0, 1, 9))
        .set_type(SparklineType::Column)
        .set_style(3);

    worksheet1.add_sparkline(row, 0, &sparkline)?;
    row += 1;

    //
    // Add a column sparkline with style 4.
    //
    let text = "Column with style 4.";
    worksheet1.write(row, 1, text)?;

    let sparkline = Sparkline::new()
        .set_range(("Sheet2", 1, 0, 1, 9))
        .set_type(SparklineType::Column)
        .set_style(4);

    worksheet1.add_sparkline(row, 0, &sparkline)?;
    row += 1;

    //
    // Add a column sparkline with style 5.
    //
    let text = "Column with style 5.";
    worksheet1.write(row, 1, text)?;

    let sparkline = Sparkline::new()
        .set_range(("Sheet2", 1, 0, 1, 9))
        .set_type(SparklineType::Column)
        .set_style(5);

    worksheet1.add_sparkline(row, 0, &sparkline)?;
    row += 1;

    //
    // Add a column sparkline with style 6.
    //
    let text = "Column with style 6.";
    worksheet1.write(row, 1, text)?;

    let sparkline = Sparkline::new()
        .set_range(("Sheet2", 1, 0, 1, 9))
        .set_type(SparklineType::Column)
        .set_style(6);

    worksheet1.add_sparkline(row, 0, &sparkline)?;
    row += 1;

    //
    // Add a column sparkline with a user defined color.
    //
    let text = "Column with a user defined color.";
    worksheet1.write(row, 1, text)?;

    let sparkline = Sparkline::new()
        .set_range(("Sheet2", 1, 0, 1, 9))
        .set_type(SparklineType::Column)
        .set_sparkline_color("#E965E0");

    worksheet1.add_sparkline(row, 0, &sparkline)?;
    row += 2;

    //
    // Add a win/loss sparkline.
    //
    let text = "A win/loss sparkline.";
    worksheet1.write(row, 1, text)?;

    let sparkline = Sparkline::new()
        .set_range(("Sheet2", 2, 0, 2, 9))
        .set_type(SparklineType::WinLose);

    worksheet1.add_sparkline(row, 0, &sparkline)?;
    row += 1;

    //
    // Add a win/loss sparkline with negative points highlighted.
    //
    let text = "A win/loss sparkline with negative points highlighted.";
    worksheet1.write(row, 1, text)?;

    let sparkline = Sparkline::new()
        .set_range(("Sheet2", 2, 0, 2, 9))
        .set_type(SparklineType::WinLose)
        .show_negative_points(true);

    worksheet1.add_sparkline(row, 0, &sparkline)?;
    row += 2;

    //
    // Add a left to right (the default) sparkline.
    //
    let text = "A left to right column (the default).";
    worksheet1.write(row, 1, text)?;

    let sparkline = Sparkline::new()
        .set_range(("Sheet2", 3, 0, 3, 9))
        .set_type(SparklineType::Column)
        .set_style(20);

    worksheet1.add_sparkline(row, 0, &sparkline)?;
    row += 1;

    //
    // Add a right to left sparkline.
    //
    let text = "A right to left column.";
    worksheet1.write(row, 1, text)?;

    let sparkline = Sparkline::new()
        .set_range(("Sheet2", 3, 0, 3, 9))
        .set_type(SparklineType::Column)
        .set_style(20)
        .set_right_to_left(true);

    worksheet1.add_sparkline(row, 0, &sparkline)?;
    row += 1;

    //
    // Sparkline and text in one cell. This just requires writing text to the
    // same cell as the sparkline.
    //
    let text = "Sparkline and text in one cell.";
    worksheet1.write(row, 1, text)?;

    let sparkline = Sparkline::new()
        .set_range(("Sheet2", 3, 0, 3, 9))
        .set_type(SparklineType::Column)
        .set_style(20);

    worksheet1.add_sparkline(row, 0, &sparkline)?;
    worksheet1.write(row, 0, "Growth")?;
    row += 2;

    //
    // "A grouped sparkline. User changes are applied to all three. Not that the
    // sparkline range is a 2D range and the sparkline is positioned in a 1D
    // range of cells.
    //
    let text = "A grouped sparkline. Changes are applied to all three.";
    worksheet1.write(row, 1, text)?;

    let sparkline = Sparkline::new()
        .set_range(("Sheet2", 4, 0, 6, 9))
        .show_markers(true);

    worksheet1.add_sparkline_group(row, 0, row + 2, 0, &sparkline)?;

    //
    // Add a worksheet with the data to plot on a separate worksheet.
    //
    let worksheet2 = workbook.add_worksheet();

    // Some sample data to plot.
    let data = [
        // Simple line data.
        [-2, 2, 3, -1, 0, -2, 3, 2, 1, 0],
        // Simple column data.
        [30, 20, 33, 20, 15, 5, 5, 15, 10, 15],
        // Simple win/loss data.
        [1, 1, -1, -1, 1, -1, 1, 1, 1, -1],
        // Unbalanced histogram.
        [5, 6, 7, 10, 15, 20, 30, 50, 70, 100],
        // Data for the grouped sparkline example.
        [-2, 2, 3, -1, 0, -2, 3, 2, 1, 0],
        [3, -1, 0, -2, 3, 2, 1, 0, 2, 1],
        [0, -2, 3, 2, 1, 0, 1, 2, 3, 1],
    ];

    worksheet2.write_row_matrix(0, 0, data)?;

    // Save the file to disk.
    workbook.save("sparklines2.xlsx")?;

    Ok(())
}
Insert images: Add images to a worksheet
This is an example of a program to insert images into a worksheet.
Image of the output file:
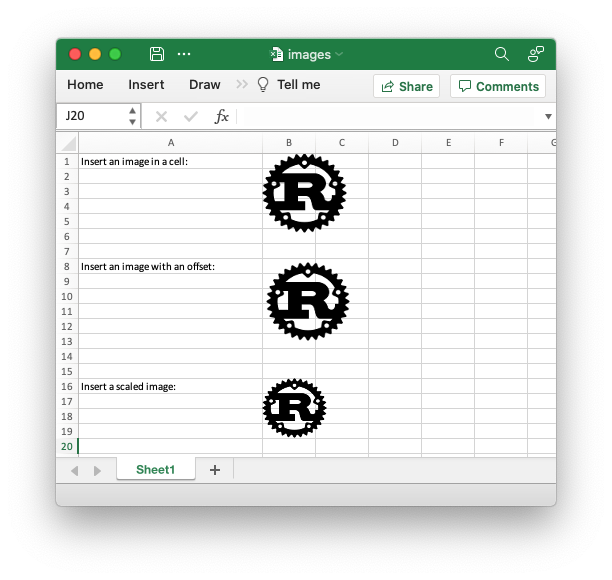
Code to generate the output file:
// SPDX-License-Identifier: MIT OR Apache-2.0
//
// Copyright 2022-2026, John McNamara, jmcnamara@cpan.org

//! An example of inserting images into a worksheet using `rust_xlsxwriter`.

use rust_xlsxwriter::{Image, Workbook, XlsxError};

fn main() -> Result<(), XlsxError> {
    // Create a new Excel file object.
    let mut workbook = Workbook::new();

    // Add a worksheet to the workbook.
    let worksheet = workbook.add_worksheet();

    // Widen the first column to make the text clearer.
    worksheet.set_column_width(0, 30)?;

    // Create a new image object.
    let mut image = Image::new("examples/rust_logo.png")?;

    // Insert the image.
    worksheet.write_string(0, 0, "Insert an image in a cell:")?;
    worksheet.insert_image(0, 1, &image)?;

    // Insert an image offset in the cell.
    worksheet.write_string(7, 0, "Insert an image with an offset:")?;
    worksheet.insert_image_with_offset(7, 1, &image, 5, 5)?;

    // Insert an image with scaling.
    worksheet.write_string(15, 0, "Insert a scaled image:")?;
    image = image.set_scale_width(0.75).set_scale_height(0.75);
    worksheet.insert_image(15, 1, &image)?;

    // Save the file to disk.
    workbook.save("images.xlsx")?;

    Ok(())
}
Insert images: Embedding an image in a cell
An example of embedding images into a worksheet cells using rust_xlsxwriter.
This image scales to size of the cell and moves with it.
This approach can be useful if you are building up a spreadsheet of products with a column of images for each product.
This is the equivalent of Excel's menu option to insert an image using the
option to "Place in Cell" which is only available in Excel 365 versions from
2023 onwards. For older versions of Excel a #VALUE! error is displayed.
Image of the output file:
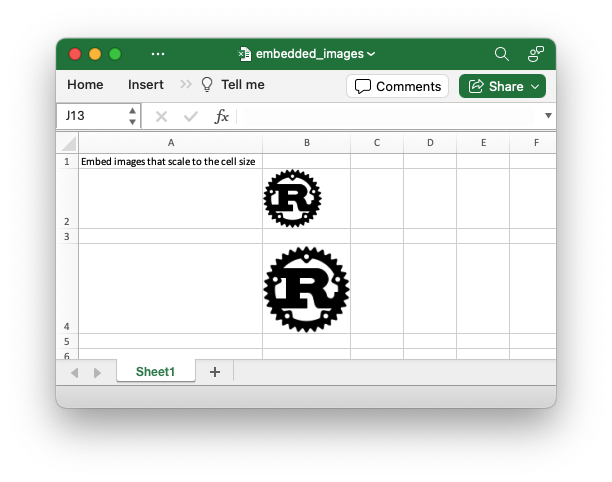
Code to generate the output file:
// SPDX-License-Identifier: MIT OR Apache-2.0
//
// Copyright 2022-2026, John McNamara, jmcnamara@cpan.org
//! An example of embedding images into a worksheet cells using `rust_xlsxwriter`.
//! This image scales to size of the cell and moves with it.
//!
//! This approach can be useful if you are building up a spreadsheet of products
//! with a column of images for each product.
//!
//! This is the equivalent of Excel's menu option to insert an image using the
//! option to "Place in Cell" which is only available in Excel 365 versions from
//! 2023 onwards. For older versions of Excel a `#VALUE!` error is displayed.
//!
use rust_xlsxwriter::{Format, FormatAlign, Image, Workbook, XlsxError};
fn main() -> Result<(), XlsxError> {
// Create a new Excel file object.
let mut workbook = Workbook::new();
// Create some formats to use in the example.
let vertical_center = Format::new().set_align(FormatAlign::VerticalCenter);
let center = Format::new().set_align(FormatAlign::Center);
// Add a worksheet to the workbook.
let worksheet = workbook.add_worksheet();
// Create a new image object.
let image = Image::new("examples/rust_logo.png")?;
// Widen the first column to make the captions clearer.
worksheet.set_column_width(0, 30)?;
// Change cell widths/heights to demonstrate the image differences.
worksheet.set_column_width(1, 14)?;
worksheet.set_row_height(1, 60)?;
worksheet.set_row_height(3, 60)?;
worksheet.set_row_height(5, 90)?;
// Embed an image in a cell. The height and width scale automatically.
worksheet.write_with_format(1, 0, "Embed image in cell:", &vertical_center)?;
worksheet.embed_image(1, 1, &image)?;
// Embed and center an image in a cell.
worksheet.write_with_format(3, 0, "Embed and center image:", &vertical_center)?;
worksheet.embed_image_with_format(3, 1, &image, ¢er)?;
// Embed an image in a larger cell.
worksheet.write_with_format(5, 0, "Embed image in larger cell:", &vertical_center)?;
worksheet.embed_image(5, 1, &image)?;
// Save the file to disk.
workbook.save("embedded_images.xlsx")?;
Ok(())
}Insert images: Inserting images to fit a cell
An example of inserting images into a worksheet using rust_xlsxwriterso that
they are scaled to a cell. This approach can be useful if you are building up a
spreadsheet of products with a column of images for each product.
See the Embedding images in cells example that shows a better approach for newer versions of Excel.
Image of the output file:
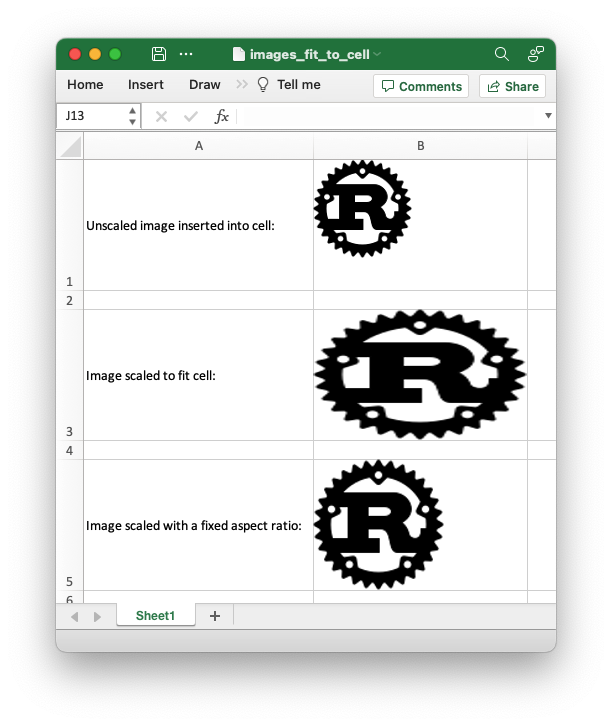
Code to generate the output file:
// SPDX-License-Identifier: MIT OR Apache-2.0
//
// Copyright 2022-2026, John McNamara, jmcnamara@cpan.org
//! An example of inserting images into a worksheet using `rust_xlsxwriter` so
//! that they are scaled to a cell. This approach can be useful if you are
//! building a spreadsheet of products with a column of images for each product.
//!
//! See also the `app_embedded_image.rs` example that shows a better approach
//! for newer versions of Excel.
use rust_xlsxwriter::{Format, FormatAlign, Image, Workbook, XlsxError};
fn main() -> Result<(), XlsxError> {
// Create a new Excel file object.
let mut workbook = Workbook::new();
let center = Format::new().set_align(FormatAlign::VerticalCenter);
// Add a worksheet to the workbook.
let worksheet = workbook.add_worksheet();
// Widen the first column to make the text clearer.
worksheet.set_column_width_pixels(0, 250)?;
// Set larger cells to accommodate the images.
worksheet.set_column_width_pixels(1, 200)?;
worksheet.set_row_height_pixels(0, 140)?;
worksheet.set_row_height_pixels(2, 140)?;
worksheet.set_row_height_pixels(4, 140)?;
worksheet.set_row_height_pixels(6, 140)?;
// Create a new image object.
let image = Image::new("examples/rust_logo.png")?;
// Insert the image as standard, without scaling.
worksheet.write_with_format(0, 0, "Unscaled image inserted into cell:", ¢er)?;
worksheet.insert_image(0, 1, &image)?;
// Insert the image and scale it to fit the entire cell.
worksheet.write_with_format(2, 0, "Image scaled to fit cell:", ¢er)?;
worksheet.insert_image_fit_to_cell(2, 1, &image, false)?;
// Insert the image and scale it to the cell while maintaining the aspect ratio.
// In this case it is scaled to the smaller of the width or height scales.
worksheet.write_with_format(4, 0, "Image scaled with a fixed aspect ratio:", ¢er)?;
worksheet.insert_image_fit_to_cell(4, 1, &image, true)?;
// Insert the image and scale it to the cell while keeping it centered. This
// also maintains the aspect ratio.
worksheet.write_with_format(6, 0, "Image scaled and centered:", ¢er)?;
worksheet.insert_image_fit_to_cell_centered(6, 1, &image)?;
// Save the file to disk.
workbook.save("images_fit_to_cell.xlsx")?;
Ok(())
}Textbox: Inserting Checkboxes in worksheets
Example of inserting boolean checkboxes into a worksheet.
Image of the output file:
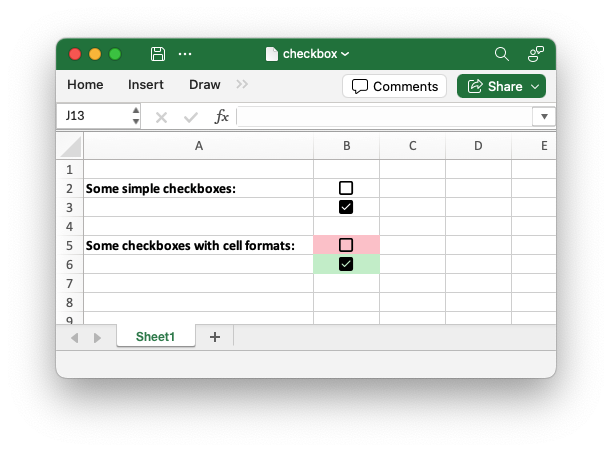
Code to generate the output file:
// SPDX-License-Identifier: MIT OR Apache-2.0
//
// Copyright 2022-2026, John McNamara, jmcnamara@cpan.org

//! An example of adding checkbox boolean values to a worksheet using the
//! `rust_xlsxwriter` library.

use rust_xlsxwriter::{Format, Workbook, XlsxError};

fn main() -> Result<(), XlsxError> {
    // Create a new Excel file object.
    let mut workbook = Workbook::new();

    // Create some formats to use in the worksheet.
    let bold = Format::new().set_bold();
    let light_red = Format::new().set_background_color("FFC7CE");
    let light_green = Format::new().set_background_color("C6EFCE");

    // Add a worksheet to the workbook.
    let worksheet = workbook.add_worksheet();

    // Set the column width for clarity.
    worksheet.set_column_width(0, 30)?;

    // Write some descriptions.
    worksheet.write_with_format(1, 0, "Some simple checkboxes:", &bold)?;
    worksheet.write_with_format(4, 0, "Some checkboxes with cell formats:", &bold)?;

    // Insert some boolean checkboxes to the worksheet.
    worksheet.insert_checkbox(1, 1, false)?;
    worksheet.insert_checkbox(2, 1, true)?;

    // Insert some checkboxes with cell formats.
    worksheet.insert_checkbox_with_format(4, 1, false, &light_red)?;
    worksheet.insert_checkbox_with_format(5, 1, true, &light_green)?;

    // Save the file to disk.
    workbook.save("checkbox.xlsx")?;

    Ok(())
}
Textbox: Inserting Textboxes in worksheets
Example of inserting a textbox shape into a worksheet.
Image of the output file:
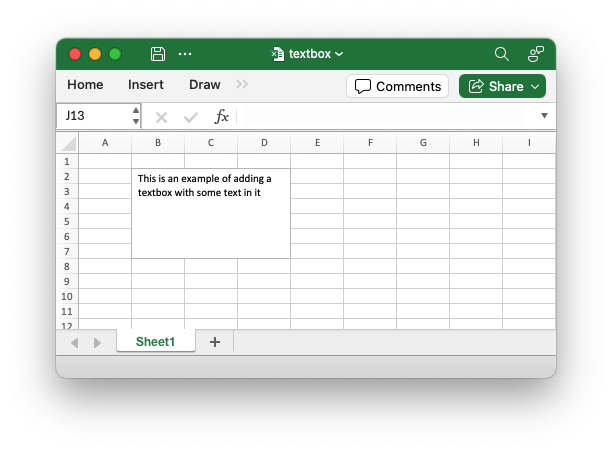
Code to generate the output file:
// SPDX-License-Identifier: MIT OR Apache-2.0
//
// Copyright 2022-2026, John McNamara, jmcnamara@cpan.org

//! Demonstrate adding a Textbox to a worksheet using the `rust_xlsxwriter`
//! library.

use rust_xlsxwriter::{Shape, Workbook, XlsxError};

fn main() -> Result<(), XlsxError> {
    // Create a new Excel file object.
    let mut workbook = Workbook::new();

    // Add a worksheet to the workbook.
    let worksheet = workbook.add_worksheet();

    // Some text to add to the text box.
    let text = "This is an example of adding a textbox with some text in it";

    // Create a textbox shape and add the text.
    let textbox = Shape::textbox().set_text(text);

    // Insert a textbox in a cell.
    worksheet.insert_shape(1, 1, &textbox)?;

    // Save the file to disk.
    workbook.save("textbox.xlsx")?;

    Ok(())
}
Textbox: Ignore Excel cell errors
An example of turning off worksheet cells errors/warnings.
Image of the output file:
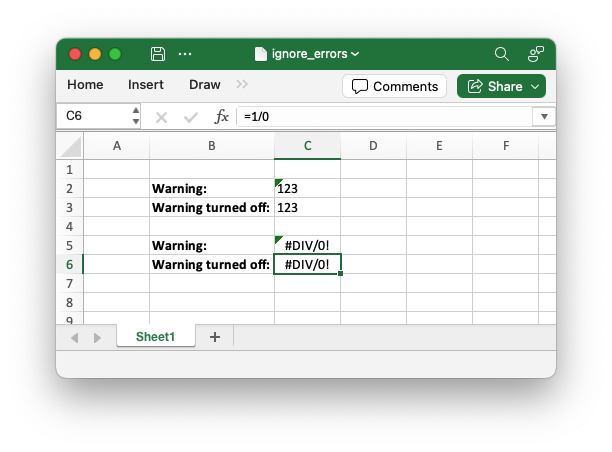
Code to generate the output file:
// SPDX-License-Identifier: MIT OR Apache-2.0
//
// Copyright 2022-2026, John McNamara, jmcnamara@cpan.org

//! An example of turning off worksheet cells errors/warnings using using the
//! `rust_xlsxwriter` library.

use rust_xlsxwriter::{Format, IgnoreError, Workbook, XlsxError};

fn main() -> Result<(), XlsxError> {
    // Create a new Excel file object.
    let mut workbook = Workbook::new();

    // Add a worksheet to the workbook.
    let worksheet = workbook.add_worksheet();

    // Create a format to use in descriptions.gs
    let bold = Format::new().set_bold();

    // Make the column wider for clarity.
    worksheet.set_column_width(1, 16)?;

    // Write some descriptions for the cells.
    worksheet.write_with_format(1, 1, "Warning:", &bold)?;
    worksheet.write_with_format(2, 1, "Warning turned off:", &bold)?;
    worksheet.write_with_format(4, 1, "Warning:", &bold)?;
    worksheet.write_with_format(5, 1, "Warning turned off:", &bold)?;

    // Write strings that looks like numbers. This will cause an Excel warning.
    worksheet.write_string(1, 2, "123")?;
    worksheet.write_string(2, 2, "123")?;

    // Write a divide by zero formula. This will also cause an Excel warning.
    worksheet.write_formula(4, 2, "=1/0")?;
    worksheet.write_formula(5, 2, "=1/0")?;

    // Turn off some of the warnings:
    worksheet.ignore_error(2, 2, IgnoreError::NumberStoredAsText)?;
    worksheet.ignore_error(5, 2, IgnoreError::FormulaError)?;

    // Save the file to disk.
    workbook.save("ignore_errors.xlsx")?;

    Ok(())
}
Grouped Rows: Create a grouped row outline
An example of how to group rows into outlines with the rust_xlsxwriter
library.
In Excel an outline is a group of rows or columns that can be collapsed or
expanded to simplify hierarchical data. It is often used with the SUBTOTAL()
function.
Image of the output file:
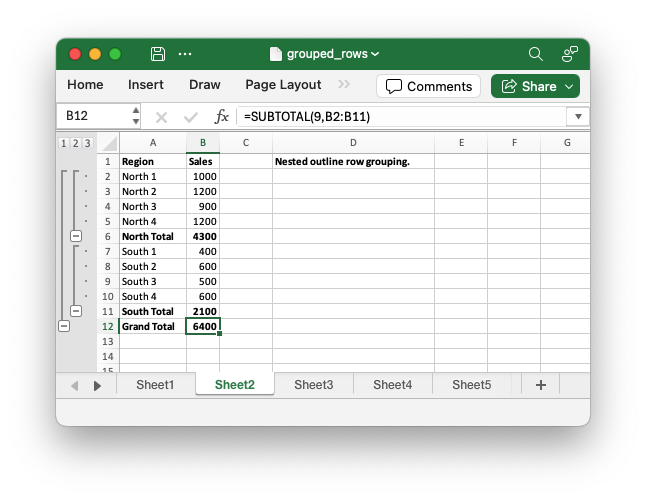
Code to generate the output file:
// SPDX-License-Identifier: MIT OR Apache-2.0
//
// Copyright 2022-2026, John McNamara, jmcnamara@cpan.org

//! An example of how to group rows into outlines with the `rust_xlsxwriter`
//! library.
//!
//! In Excel an outline is a group of rows or columns that can be collapsed or
//! expanded to simplify hierarchical data. It is often used with the
//! `SUBTOTAL()` function.

use rust_xlsxwriter::{Format, Workbook, Worksheet, XlsxError};

fn main() -> Result<(), XlsxError> {
    // Create a new Excel file object.
    let mut workbook = Workbook::new();

    // Add a format to use in headings.
    let bold = Format::new().set_bold();

    // -----------------------------------------------------------------------
    // 1. Add an outline row group with sub-total.
    // -----------------------------------------------------------------------

    // Add a worksheet with some sample data.
    let worksheet = workbook.add_worksheet();
    let description = "Simple outline row grouping.";
    populate_worksheet_data(worksheet, description, &bold)?;

    // Add grouping for the over the sub-total range.
    worksheet.group_rows(1, 10)?;

    // -----------------------------------------------------------------------
    // 2. Add nested outline row groups with sub-totals.
    // -----------------------------------------------------------------------

    // Add a worksheet with some sample data.
    let worksheet = workbook.add_worksheet();
    let description = "Nested outline row grouping.";
    populate_worksheet_data(worksheet, description, &bold)?;

    // Add grouping for the over the sub-total range.
    worksheet.group_rows(1, 10)?;

    // Add secondary groups within the first range.
    worksheet.group_rows(1, 4)?;
    worksheet.group_rows(6, 9)?;

    // -----------------------------------------------------------------------
    // 3. Add a collapsed inner outline row groups.
    // -----------------------------------------------------------------------

    // Add a worksheet with some sample data.
    let worksheet = workbook.add_worksheet();
    let description = "Collapsed inner row grouping.";
    populate_worksheet_data(worksheet, description, &bold)?;

    // Add grouping for the over the sub-total range.
    worksheet.group_rows(1, 10)?;

    // Add collapsed secondary groups within the first range.
    worksheet.group_rows_collapsed(1, 4)?;
    worksheet.group_rows_collapsed(6, 9)?;

    // -----------------------------------------------------------------------
    // 4. Add a collapsed outer row group.
    // -----------------------------------------------------------------------

    // Add a worksheet with some sample data.
    let worksheet = workbook.add_worksheet();
    let description = "Collapsed outer row grouping.";
    populate_worksheet_data(worksheet, description, &bold)?;

    // Add collapsed grouping for the over the sub-total range.
    worksheet.group_rows_collapsed(1, 10)?;

    // Add secondary groups within the first range.
    worksheet.group_rows(1, 4)?;
    worksheet.group_rows(6, 9)?;

    // -----------------------------------------------------------------------
    // 5. Row groups with outline symbols on top.
    // -----------------------------------------------------------------------

    // Add a worksheet with some sample data.
    let worksheet = workbook.add_worksheet();
    let description = "Outline row grouping symbols on top.";
    populate_worksheet_data(worksheet, description, &bold)?;

    // Add outline row groups.
    worksheet.group_rows(1, 4)?;
    worksheet.group_rows(6, 9)?;

    // Change the worksheet group setting so the outline symbols are on top.
    worksheet.group_symbols_above(true);

    // -----------------------------------------------------------------------
    // 6. Demonstrate all group levels.
    // -----------------------------------------------------------------------

    // Add a worksheet with some sample data.
    let worksheet = workbook.add_worksheet();
    let description = "Excel outline levels.";
    let levels = [
        "Level 1", "Level 2", "Level 3", "Level 4", //
        "Level 5", "Level 6", "Level 7", "Level 6", //
        "Level 5", "Level 4", "Level 3", "Level 2", //
        "Level 1",
    ];
    worksheet.write_column(0, 0, levels)?;
    worksheet.write_with_format(0, 3, description, &bold)?;

    // Add outline row groups from outer to inner.
    worksheet.group_rows(0, 12)?;
    worksheet.group_rows(1, 11)?;
    worksheet.group_rows(2, 10)?;
    worksheet.group_rows(3, 9)?;
    worksheet.group_rows(4, 8)?;
    worksheet.group_rows(5, 7)?;
    worksheet.group_rows(6, 6)?;

    // Save the file to disk.
    workbook.save("grouped_rows.xlsx")?;

    Ok(())
}

// Generate worksheet data.
pub fn populate_worksheet_data(
    worksheet: &mut Worksheet,
    description: &str,
    bold: &Format,
) -> Result<(), XlsxError> {
    worksheet.write_with_format(0, 3, description, bold)?;

    worksheet.write_with_format(0, 0, "Region", bold)?;
    worksheet.write(1, 0, "North 1")?;
    worksheet.write(2, 0, "North 2")?;
    worksheet.write(3, 0, "North 3")?;
    worksheet.write(4, 0, "North 4")?;
    worksheet.write_with_format(5, 0, "North Total", bold)?;

    worksheet.write_with_format(0, 1, "Sales", bold)?;
    worksheet.write(1, 1, 1000)?;
    worksheet.write(2, 1, 1200)?;
    worksheet.write(3, 1, 900)?;
    worksheet.write(4, 1, 1200)?;
    worksheet.write_formula_with_format(5, 1, "=SUBTOTAL(9,B2:B5)", bold)?;

    worksheet.write(6, 0, "South 1")?;
    worksheet.write(7, 0, "South 2")?;
    worksheet.write(8, 0, "South 3")?;
    worksheet.write(9, 0, "South 4")?;
    worksheet.write_with_format(10, 0, "South Total", bold)?;

    worksheet.write(6, 1, 400)?;
    worksheet.write(7, 1, 600)?;
    worksheet.write(8, 1, 500)?;
    worksheet.write(9, 1, 600)?;
    worksheet.write_formula_with_format(10, 1, "=SUBTOTAL(9,B7:B10)", bold)?;

    worksheet.write_with_format(11, 0, "Grand Total", bold)?;
    worksheet.write_formula_with_format(11, 1, "=SUBTOTAL(9,B2:B11)", bold)?;

    // Autofit the columns for clarity.
    worksheet.autofit();

    Ok(())
}
Grouped Columns: Create a grouped column outline
An example of how to group columns into outlines with the rust_xlsxwriter
library.
In Excel an outline is a group of rows or columns that can be collapsed or
expanded to simplify hierarchical data. It is often used with the SUBTOTAL()
function.
Image of the output file:
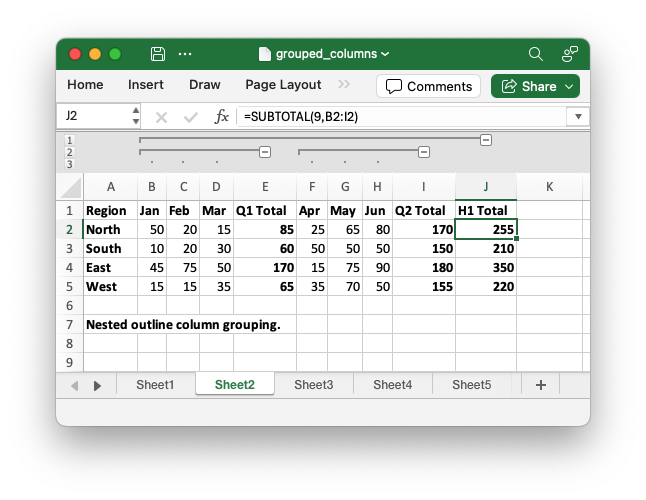
Code to generate the output file:
// SPDX-License-Identifier: MIT OR Apache-2.0
//
// Copyright 2022-2026, John McNamara, jmcnamara@cpan.org

//! An example of how to group columns into outlines with the `rust_xlsxwriter`
//! library.
//!
//! In Excel an outline is a group of rows or columns that can be collapsed or
//! expanded to simplify hierarchical data. It is often used with the
//! `SUBTOTAL()` function.

use rust_xlsxwriter::{Format, Workbook, Worksheet, XlsxError};

fn main() -> Result<(), XlsxError> {
    // Create a new Excel file object.
    let mut workbook = Workbook::new();

    // Add a format to use in headings.
    let bold = Format::new().set_bold();

    // -----------------------------------------------------------------------
    // 1. Add an outline column group with sub-total.
    // -----------------------------------------------------------------------

    // Add a worksheet with some sample data.
    let worksheet = workbook.add_worksheet();
    let description = "Simple outline column grouping.";
    populate_worksheet_data(worksheet, description, &bold)?;

    // Add grouping for the over the sub-total range.
    worksheet.group_columns(1, 8)?;

    // -----------------------------------------------------------------------
    // 2. Add nested outline column groups with sub-totals.
    // -----------------------------------------------------------------------

    // Add a worksheet with some sample data.
    let worksheet = workbook.add_worksheet();
    let description = "Nested outline column grouping.";
    populate_worksheet_data(worksheet, description, &bold)?;

    // Add grouping for the over the sub-total range.
    worksheet.group_columns(1, 8)?;

    // Add secondary groups within the first range.
    worksheet.group_columns(1, 3)?;
    worksheet.group_columns(5, 7)?;

    // -----------------------------------------------------------------------
    // 3. Add a collapsed inner outline column groups.
    // -----------------------------------------------------------------------

    // Add a worksheet with some sample data.
    let worksheet = workbook.add_worksheet();
    let description = "Collapsed inner column grouping.";
    populate_worksheet_data(worksheet, description, &bold)?;

    // Add grouping for the over the sub-total range.
    worksheet.group_columns(1, 8)?;

    // Add collapsed secondary groups within the first range.
    worksheet.group_columns_collapsed(1, 3)?;
    worksheet.group_columns_collapsed(5, 7)?;

    // -----------------------------------------------------------------------
    // 4. Add a collapsed outer column group.
    // -----------------------------------------------------------------------

    // Add a worksheet with some sample data.
    let worksheet = workbook.add_worksheet();
    let description = "Collapsed outer column grouping.";
    populate_worksheet_data(worksheet, description, &bold)?;

    // Add collapsed grouping for the over the sub-total range.
    worksheet.group_columns_collapsed(1, 8)?;

    // Add secondary groups within the first range.
    worksheet.group_columns(1, 3)?;
    worksheet.group_columns(5, 7)?;

    // -----------------------------------------------------------------------
    // 5. Column groups with outline symbols on top.
    // -----------------------------------------------------------------------

    // Add a worksheet with some sample data.
    let worksheet = workbook.add_worksheet();
    let description = "Outline column grouping symbols to the left.";
    populate_worksheet_data(worksheet, description, &bold)?;

    // Add outline column groups.
    worksheet.group_columns(1, 3)?;
    worksheet.group_columns(5, 7)?;

    // Change the worksheet group setting so outline symbols are to the left.
    worksheet.group_symbols_to_left(true);

    // -----------------------------------------------------------------------
    // 6. Demonstrate all group levels.
    // -----------------------------------------------------------------------

    // Add a worksheet with some sample data.
    let worksheet = workbook.add_worksheet();
    let description = "Excel outline levels.";
    let levels = [
        "Level 1", "Level 2", "Level 3", "Level 4", //
        "Level 5", "Level 6", "Level 7", "Level 6", //
        "Level 5", "Level 4", "Level 3", "Level 2", //
        "Level 1",
    ];
    worksheet.write_row(0, 0, levels)?;
    worksheet.write_with_format(2, 0, description, &bold)?;

    // Add outline column groups from outer to inner.
    worksheet.group_columns(0, 12)?;
    worksheet.group_columns(1, 11)?;
    worksheet.group_columns(2, 10)?;
    worksheet.group_columns(3, 9)?;
    worksheet.group_columns(4, 8)?;
    worksheet.group_columns(5, 7)?;
    worksheet.group_columns(6, 6)?;

    // Save the file to disk.
    workbook.save("grouped_columns.xlsx")?;

    Ok(())
}

// Generate worksheet data.
pub fn populate_worksheet_data(
    worksheet: &mut Worksheet,
    description: &str,
    bold: &Format,
) -> Result<(), XlsxError> {
    worksheet.write_with_format(0, 0, "Region", bold)?;
    worksheet.write_with_format(1, 0, "North", bold)?;
    worksheet.write_with_format(2, 0, "South", bold)?;
    worksheet.write_with_format(3, 0, "East", bold)?;
    worksheet.write_with_format(4, 0, "West", bold)?;

    worksheet.write_with_format(0, 1, "Jan", bold)?;
    worksheet.write(1, 1, 50)?;
    worksheet.write(2, 1, 10)?;
    worksheet.write(3, 1, 45)?;
    worksheet.write(4, 1, 15)?;

    worksheet.write_with_format(0, 2, "Feb", bold)?;
    worksheet.write(1, 2, 20)?;
    worksheet.write(2, 2, 20)?;
    worksheet.write(3, 2, 75)?;
    worksheet.write(4, 2, 15)?;

    worksheet.write_with_format(0, 3, "Mar", bold)?;
    worksheet.write(1, 3, 15)?;
    worksheet.write(2, 3, 30)?;
    worksheet.write(3, 3, 50)?;
    worksheet.write(4, 3, 35)?;

    worksheet.write_with_format(0, 4, "Q1 Total", bold)?;
    worksheet.write_formula_with_format(1, 4, "=SUBTOTAL(9,B2:D2)", bold)?;
    worksheet.write_formula_with_format(2, 4, "=SUBTOTAL(9,B3:D3)", bold)?;
    worksheet.write_formula_with_format(3, 4, "=SUBTOTAL(9,B4:D4)", bold)?;
    worksheet.write_formula_with_format(4, 4, "=SUBTOTAL(9,B5:D5)", bold)?;

    worksheet.write_with_format(0, 5, "Apr", bold)?;
    worksheet.write(1, 5, 25)?;
    worksheet.write(2, 5, 50)?;
    worksheet.write(3, 5, 15)?;
    worksheet.write(4, 5, 35)?;

    worksheet.write_with_format(0, 6, "May", bold)?;
    worksheet.write(1, 6, 65)?;
    worksheet.write(2, 6, 50)?;
    worksheet.write(3, 6, 75)?;
    worksheet.write(4, 6, 70)?;

    worksheet.write_with_format(0, 7, "Jun", bold)?;
    worksheet.write(1, 7, 80)?;
    worksheet.write(2, 7, 50)?;
    worksheet.write(3, 7, 90)?;
    worksheet.write(4, 7, 50)?;

    worksheet.write_with_format(0, 8, "Q2 Total", bold)?;
    worksheet.write_formula_with_format(1, 8, "=SUBTOTAL(9,F2:H2)", bold)?;
    worksheet.write_formula_with_format(2, 8, "=SUBTOTAL(9,F3:H3)", bold)?;
    worksheet.write_formula_with_format(3, 8, "=SUBTOTAL(9,F4:H4)", bold)?;
    worksheet.write_formula_with_format(4, 8, "=SUBTOTAL(9,F5:H5)", bold)?;

    worksheet.write_with_format(0, 9, "H1 Total", bold)?;
    worksheet.write_formula_with_format(1, 9, "=SUBTOTAL(9,B2:I2)", bold)?;
    worksheet.write_formula_with_format(2, 9, "=SUBTOTAL(9,B3:I3)", bold)?;
    worksheet.write_formula_with_format(3, 9, "=SUBTOTAL(9,B4:I4)", bold)?;
    worksheet.write_formula_with_format(4, 9, "=SUBTOTAL(9,B5:I5)", bold)?;

    // Autofit the columns for clarity.
    worksheet.autofit();

    worksheet.write_with_format(6, 0, description, bold)?;

    Ok(())
}
Right to left display: Set a worksheet into right to left display mode
This is an example of using rust_xlsxwriterto create a workbook with the
default worksheet and cell text direction changed from left-to-right to
right-to-left, as required by some middle eastern versions of Excel.
Image of the output file:
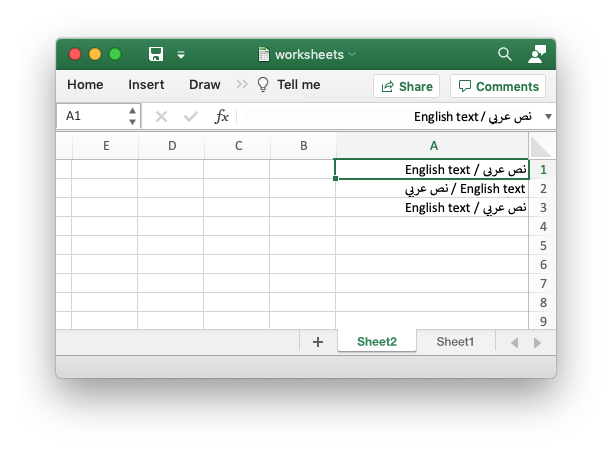
Code to generate the output file:
// SPDX-License-Identifier: MIT OR Apache-2.0
//
// Copyright 2022-2026, John McNamara, jmcnamara@cpan.org

//! Example of using `rust_xlsxwriter` to create a workbook with the default
//! worksheet and cell text direction changed from left-to-right to
//! right-to-left, as required by some middle eastern versions of Excel.

use rust_xlsxwriter::{Format, Workbook, XlsxError};

fn main() -> Result<(), XlsxError> {
    // Create a new Excel file object.
    let mut workbook = Workbook::new();

    // Add the cell formats.
    let format_left_to_right = Format::new().set_reading_direction(1);
    let format_right_to_left = Format::new().set_reading_direction(2);

    // Add a worksheet in the standard left to right direction.
    let worksheet1 = workbook.add_worksheet();

    // Make the column wider for clarity.
    worksheet1.set_column_width(0, 25)?;

    // Standard direction:         | A1 | B1 | C1 | ...
    worksheet1.write(0, 0, "نص عربي / English text")?;
    worksheet1.write_with_format(1, 0, "نص عربي / English text", &format_left_to_right)?;
    worksheet1.write_with_format(2, 0, "نص عربي / English text", &format_right_to_left)?;

    // Add a worksheet and change it to right to left direction.
    let worksheet2 = workbook.add_worksheet();
    worksheet2.set_right_to_left(true);

    // Make the column wider for clarity.
    worksheet2.set_column_width(0, 25)?;

    // Right to left direction:    ... | C1 | B1 | A1 |
    worksheet2.write(0, 0, "نص عربي / English text")?;
    worksheet2.write_with_format(1, 0, "نص عربي / English text", &format_left_to_right)?;
    worksheet2.write_with_format(2, 0, "نص عربي / English text", &format_right_to_left)?;

    workbook.save("right_to_left.xlsx")?;

    Ok(())
}
Defined names: using user defined variable names in worksheets
Example of how to create defined names using the rust_xlsxwriter library.
This functionality is used to define user friendly variable names to represent a value, a single cell, or a range of cells in a workbook.
Images of the output file:
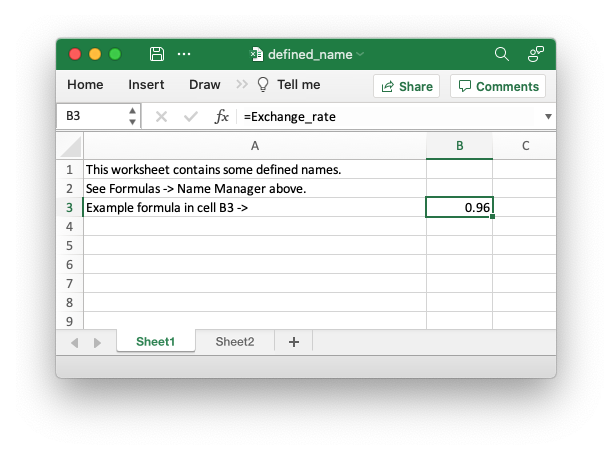
Here is the output in the Excel Name Manager. Note that there is a Global/Workbook "Sales" variable name and a Local/Worksheet version.
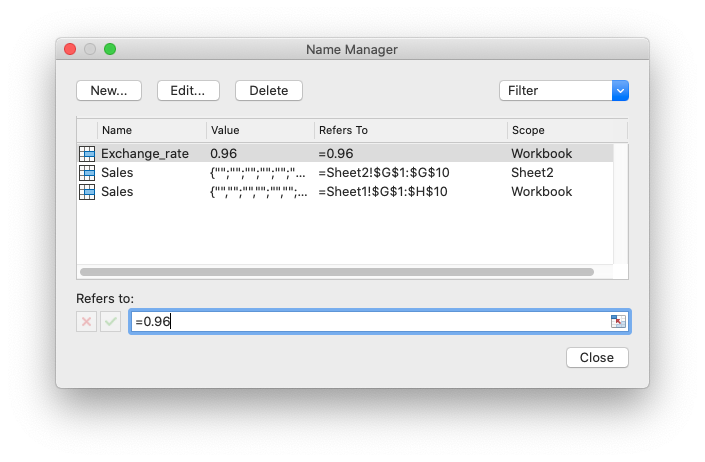
Code to generate the output file:
// SPDX-License-Identifier: MIT OR Apache-2.0
//
// Copyright 2022-2026, John McNamara, jmcnamara@cpan.org

//! Example of how to create defined names using the `rust_xlsxwriter` library.
//!
//! This functionality is used to define user friendly variable names to
//! represent a value, a single cell,  or a range of cells in a workbook.

use rust_xlsxwriter::{Workbook, XlsxError};

fn main() -> Result<(), XlsxError> {
    // Create a new Excel file object.
    let mut workbook = Workbook::new();

    // Add two worksheets to the workbook.
    let _worksheet1 = workbook.add_worksheet();
    let _worksheet2 = workbook.add_worksheet();

    // Define some global/workbook names.
    workbook.define_name("Exchange_rate", "=0.96")?;
    workbook.define_name("Sales", "=Sheet1!$G$1:$H$10")?;

    // Define a local/worksheet name. Over-rides the "Sales" name above.
    workbook.define_name("Sheet2!Sales", "=Sheet2!$G$1:$G$10")?;

    // Write some text in the file and one of the defined names in a formula.
    for worksheet in workbook.worksheets_mut() {
        worksheet.set_column_width(0, 45)?;
        worksheet.write_string(0, 0, "This worksheet contains some defined names.")?;
        worksheet.write_string(1, 0, "See Formulas -> Name Manager above.")?;
        worksheet.write_string(2, 0, "Example formula in cell B3 ->")?;

        worksheet.write_formula(2, 1, "=Exchange_rate")?;
    }

    // Save the file to disk.
    workbook.save("defined_name.xlsx")?;

    Ok(())
}
Dynamic array formulas: Examples of dynamic arrays and formulas
An example of how to use the rust_xlsxwriterlibrary to write formulas and
functions that create dynamic arrays. These functions are new to Excel
365. The examples mirror the examples in the Excel documentation for these
functions.
Images of the output file:
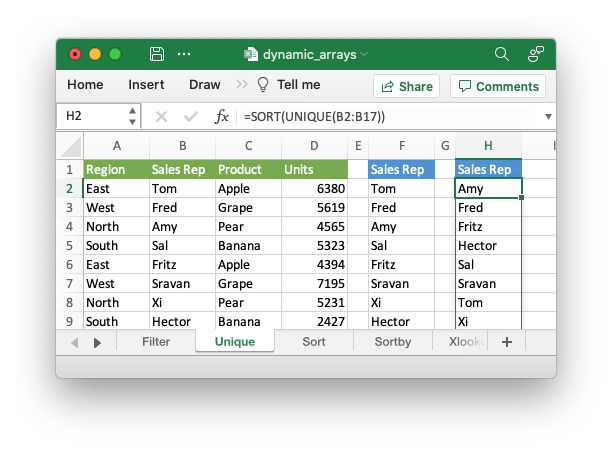
Here is another example:

Code to generate the output file:
// SPDX-License-Identifier: MIT OR Apache-2.0
//
// Copyright 2022-2026, John McNamara, jmcnamara@cpan.org

//! An example of how to use the `rust_xlsxwriter` library to write formulas and
//! functions that create dynamic arrays. These functions are new to Excel
//! 365. The examples mirror the examples in the Excel documentation for these
//! functions.
use rust_xlsxwriter::{Color, Format, Workbook, Worksheet, XlsxError};

fn main() -> Result<(), XlsxError> {
    // Create a new Excel file object.
    let mut workbook = Workbook::new();

    // Create some header formats to use in the worksheets.
    let header1 = Format::new()
        .set_foreground_color(Color::RGB(0x74AC4C))
        .set_font_color(Color::RGB(0xFFFFFF));

    let header2 = Format::new()
        .set_foreground_color(Color::RGB(0x528FD3))
        .set_font_color(Color::RGB(0xFFFFFF));

    // -----------------------------------------------------------------------
    // Example of using the FILTER() function.
    // -----------------------------------------------------------------------
    let worksheet1 = workbook.add_worksheet().set_name("Filter")?;

    worksheet1.write_dynamic_formula(1, 5, "=FILTER(A1:D17,C1:C17=K2)")?;

    // Write the data the function will work on.
    worksheet1.write_string_with_format(0, 10, "Product", &header2)?;
    worksheet1.write_string(1, 10, "Apple")?;
    worksheet1.write_string_with_format(0, 5, "Region", &header2)?;
    worksheet1.write_string_with_format(0, 6, "Sales Rep", &header2)?;
    worksheet1.write_string_with_format(0, 7, "Product", &header2)?;
    worksheet1.write_string_with_format(0, 8, "Units", &header2)?;

    // Add sample worksheet data to work on.
    write_worksheet_data(worksheet1, &header1)?;
    worksheet1.set_column_width_pixels(4, 20)?;
    worksheet1.set_column_width_pixels(9, 20)?;

    // -----------------------------------------------------------------------
    // Example of using the UNIQUE() function.
    // -----------------------------------------------------------------------
    let worksheet2 = workbook.add_worksheet().set_name("Unique")?;

    worksheet2.write_dynamic_formula(1, 5, "=UNIQUE(B2:B17)")?;

    // A more complex example combining SORT and UNIQUE.
    worksheet2.write_dynamic_formula(1, 7, "SORT(UNIQUE(B2:B17))")?;

    // Write the data the function will work on.
    worksheet2.write_string_with_format(0, 5, "Sales Rep", &header2)?;
    worksheet2.write_string_with_format(0, 7, "Sales Rep", &header2)?;

    // Add sample worksheet data to work on.
    write_worksheet_data(worksheet2, &header1)?;
    worksheet2.set_column_width_pixels(4, 20)?;
    worksheet2.set_column_width_pixels(6, 20)?;

    // -----------------------------------------------------------------------
    // Example of using the SORT() function.
    // -----------------------------------------------------------------------
    let worksheet3 = workbook.add_worksheet().set_name("Sort")?;

    // A simple SORT example.
    worksheet3.write_dynamic_formula(1, 5, "=SORT(B2:B17)")?;

    // A more complex example combining SORT and FILTER.
    worksheet3.write_dynamic_formula(1, 7, r#"=SORT(FILTER(C2:D17,D2:D17>5000,""),2,1)"#)?;

    // Write the data the function will work on.
    worksheet3.write_string_with_format(0, 5, "Sales Rep", &header2)?;
    worksheet3.write_string_with_format(0, 7, "Product", &header2)?;
    worksheet3.write_string_with_format(0, 8, "Units", &header2)?;

    // Add sample worksheet data to work on.
    write_worksheet_data(worksheet3, &header1)?;
    worksheet3.set_column_width_pixels(4, 20)?;
    worksheet3.set_column_width_pixels(6, 20)?;

    // -----------------------------------------------------------------------
    // Example of using the SORTBY() function.
    // -----------------------------------------------------------------------
    let worksheet4 = workbook.add_worksheet().set_name("Sortby")?;

    worksheet4.write_dynamic_formula(1, 3, "=SORTBY(A2:B9,B2:B9)")?;

    // Write the data the function will work on.
    worksheet4.write_string_with_format(0, 0, "Name", &header1)?;
    worksheet4.write_string_with_format(0, 1, "Age", &header1)?;

    worksheet4.write_string(1, 0, "Tom")?;
    worksheet4.write_string(2, 0, "Fred")?;
    worksheet4.write_string(3, 0, "Amy")?;
    worksheet4.write_string(4, 0, "Sal")?;
    worksheet4.write_string(5, 0, "Fritz")?;
    worksheet4.write_string(6, 0, "Srivan")?;
    worksheet4.write_string(7, 0, "Xi")?;
    worksheet4.write_string(8, 0, "Hector")?;

    worksheet4.write_number(1, 1, 52)?;
    worksheet4.write_number(2, 1, 65)?;
    worksheet4.write_number(3, 1, 22)?;
    worksheet4.write_number(4, 1, 73)?;
    worksheet4.write_number(5, 1, 19)?;
    worksheet4.write_number(6, 1, 39)?;
    worksheet4.write_number(7, 1, 19)?;
    worksheet4.write_number(8, 1, 66)?;

    worksheet4.write_string_with_format(0, 3, "Name", &header2)?;
    worksheet4.write_string_with_format(0, 4, "Age", &header2)?;

    worksheet4.set_column_width_pixels(2, 20)?;

    // -----------------------------------------------------------------------
    // Example of using the XLOOKUP() function.
    // -----------------------------------------------------------------------
    let worksheet5 = workbook.add_worksheet().set_name("Xlookup")?;

    worksheet5.write_dynamic_formula(0, 5, "=XLOOKUP(E1,A2:A9,C2:C9)")?;

    // Write the data the function will work on.
    worksheet5.write_string_with_format(0, 0, "Country", &header1)?;
    worksheet5.write_string_with_format(0, 1, "Abr", &header1)?;
    worksheet5.write_string_with_format(0, 2, "Prefix", &header1)?;

    worksheet5.write_string(1, 0, "China")?;
    worksheet5.write_string(2, 0, "India")?;
    worksheet5.write_string(3, 0, "United States")?;
    worksheet5.write_string(4, 0, "Indonesia")?;
    worksheet5.write_string(5, 0, "Brazil")?;
    worksheet5.write_string(6, 0, "Pakistan")?;
    worksheet5.write_string(7, 0, "Nigeria")?;
    worksheet5.write_string(8, 0, "Bangladesh")?;

    worksheet5.write_string(1, 1, "CN")?;
    worksheet5.write_string(2, 1, "IN")?;
    worksheet5.write_string(3, 1, "US")?;
    worksheet5.write_string(4, 1, "ID")?;
    worksheet5.write_string(5, 1, "BR")?;
    worksheet5.write_string(6, 1, "PK")?;
    worksheet5.write_string(7, 1, "NG")?;
    worksheet5.write_string(8, 1, "BD")?;

    worksheet5.write_number(1, 2, 86)?;
    worksheet5.write_number(2, 2, 91)?;
    worksheet5.write_number(3, 2, 1)?;
    worksheet5.write_number(4, 2, 62)?;
    worksheet5.write_number(5, 2, 55)?;
    worksheet5.write_number(6, 2, 92)?;
    worksheet5.write_number(7, 2, 234)?;
    worksheet5.write_number(8, 2, 880)?;

    worksheet5.write_string_with_format(0, 4, "Brazil", &header2)?;

    worksheet5.set_column_width_pixels(0, 100)?;
    worksheet5.set_column_width_pixels(3, 20)?;

    // -----------------------------------------------------------------------
    // Example of using the XMATCH() function.
    // -----------------------------------------------------------------------
    let worksheet6 = workbook.add_worksheet().set_name("Xmatch")?;

    worksheet6.write_dynamic_formula(1, 3, "=XMATCH(C2,A2:A6)")?;

    // Write the data the function will work on.
    worksheet6.write_string_with_format(0, 0, "Product", &header1)?;

    worksheet6.write_string(1, 0, "Apple")?;
    worksheet6.write_string(2, 0, "Grape")?;
    worksheet6.write_string(3, 0, "Pear")?;
    worksheet6.write_string(4, 0, "Banana")?;
    worksheet6.write_string(5, 0, "Cherry")?;

    worksheet6.write_string_with_format(0, 2, "Product", &header2)?;
    worksheet6.write_string_with_format(0, 3, "Position", &header2)?;
    worksheet6.write_string(1, 2, "Grape")?;

    worksheet6.set_column_width_pixels(1, 20)?;

    // -----------------------------------------------------------------------
    // Example of using the RANDARRAY() function.
    // -----------------------------------------------------------------------
    let worksheet7 = workbook.add_worksheet().set_name("Randarray")?;

    worksheet7.write_dynamic_formula(0, 0, "=RANDARRAY(5,3,1,100, TRUE)")?;

    // -----------------------------------------------------------------------
    // Example of using the SEQUENCE() function.
    // -----------------------------------------------------------------------
    let worksheet8 = workbook.add_worksheet().set_name("Sequence")?;

    worksheet8.write_dynamic_formula(0, 0, "=SEQUENCE(4,5)")?;

    // -----------------------------------------------------------------------
    // Example of using the Spill range operator.
    // -----------------------------------------------------------------------
    let worksheet9 = workbook.add_worksheet().set_name("Spill ranges")?;

    worksheet9.write_dynamic_formula(1, 7, "=ANCHORARRAY(F2)")?;

    worksheet9.write_dynamic_formula(1, 9, "=COUNTA(ANCHORARRAY(F2))")?;

    // Write the data the to work on.
    worksheet9.write_dynamic_formula(1, 5, "=UNIQUE(B2:B17)")?;
    worksheet9.write_string_with_format(0, 5, "Unique", &header2)?;
    worksheet9.write_string_with_format(0, 7, "Spill", &header2)?;
    worksheet9.write_string_with_format(0, 9, "Spill", &header2)?;

    // Add sample worksheet data to work on.
    write_worksheet_data(worksheet9, &header1)?;
    worksheet9.set_column_width_pixels(4, 20)?;
    worksheet9.set_column_width_pixels(6, 20)?;
    worksheet9.set_column_width_pixels(8, 20)?;

    // -----------------------------------------------------------------------
    // Example of using dynamic ranges with older Excel functions.
    // -----------------------------------------------------------------------
    let worksheet10 = workbook.add_worksheet().set_name("Older functions")?;

    worksheet10.write_dynamic_array_formula(0, 1, 2, 1, "=LEN(A1:A3)")?;

    // Write the data the to work on.
    worksheet10.write_string(0, 0, "Foo")?;
    worksheet10.write_string(1, 0, "Food")?;
    worksheet10.write_string(2, 0, "Frood")?;

    workbook.save("dynamic_arrays.xlsx")?;

    Ok(())
}

// A simple function and data structure to populate some of the worksheets.
fn write_worksheet_data(worksheet: &mut Worksheet, header: &Format) -> Result<(), XlsxError> {
    let worksheet_data = vec![
        ("East", "Tom", "Apple", 6380),
        ("West", "Fred", "Grape", 5619),
        ("North", "Amy", "Pear", 4565),
        ("South", "Sal", "Banana", 5323),
        ("East", "Fritz", "Apple", 4394),
        ("West", "Sravan", "Grape", 7195),
        ("North", "Xi", "Pear", 5231),
        ("South", "Hector", "Banana", 2427),
        ("East", "Tom", "Banana", 4213),
        ("West", "Fred", "Pear", 3239),
        ("North", "Amy", "Grape", 6520),
        ("South", "Sal", "Apple", 1310),
        ("East", "Fritz", "Banana", 6274),
        ("West", "Sravan", "Pear", 4894),
        ("North", "Xi", "Grape", 7580),
        ("South", "Hector", "Apple", 9814),
    ];

    worksheet.write_string_with_format(0, 0, "Region", header)?;
    worksheet.write_string_with_format(0, 1, "Sales Rep", header)?;
    worksheet.write_string_with_format(0, 2, "Product", header)?;
    worksheet.write_string_with_format(0, 3, "Units", header)?;

    let mut row = 1;
    for data in worksheet_data.iter() {
        worksheet.write_string(row, 0, data.0)?;
        worksheet.write_string(row, 1, data.1)?;
        worksheet.write_string(row, 2, data.2)?;
        worksheet.write_number(row, 3, data.3)?;
        row += 1;
    }

    Ok(())
}
Excel LAMBDA() function: Example of using the Excel 365 LAMBDA() function
An example of using the new Excel LAMBDA() function with therust_xlsxwriter
library.
See also The Excel 365 LAMBDA() function.
Image of the output file:

Code to generate the output file:
// SPDX-License-Identifier: MIT OR Apache-2.0
//
// Copyright 2022-2026, John McNamara, jmcnamara@cpan.org

//! An example of using the new Excel LAMBDA() function with the `rust_xlsxwriter`
//! library.

use rust_xlsxwriter::{Workbook, XlsxError};

fn main() -> Result<(), XlsxError> {
    // Create a new Excel file object.
    let mut workbook = Workbook::new();

    // Write a Lambda function to convert Fahrenheit to Celsius to a cell as a
    // defined name and use that to calculate a value.
    //
    // Note that the formula name is prefixed with "_xlfn." (this is normally
    // converted automatically by write_formula*() but isn't for defined names)
    // and note that the lambda function parameters are prefixed with "_xlpm.".
    // These prefixes won't show up in Excel.
    workbook.define_name(
        "ToCelsius",
        "=_xlfn.LAMBDA(_xlpm.temp, (5/9) * (_xlpm.temp-32))",
    )?;

    // Add a worksheet to the workbook.
    let worksheet = workbook.add_worksheet();

    // Write the same Lambda function as a cell formula.
    //
    // Note that the lambda function parameters must be prefixed with "_xlpm.".
    // These prefixes won't show up in Excel.
    worksheet.write_formula(0, 0, "=LAMBDA(_xlpm.temp, (5/9) * (_xlpm.temp-32))(32)")?;

    // The user defined name needs to be written explicitly as a dynamic array
    // formula.
    worksheet.write_dynamic_formula(1, 0, "=ToCelsius(212)")?;

    // Save the file to disk.
    workbook.save("lambda.xlsx")?;

    Ok(())
}
Headers and Footers: Shows how to set headers and footers
This program shows several examples of how to set up worksheet headers and footers.
Here are some examples from the code and the relevant Excel output.
Some simple text:
// SPDX-License-Identifier: MIT OR Apache-2.0
//
// Copyright 2022-2026, John McNamara, jmcnamara@cpan.org

//! An example of setting headers and footers in worksheets using the
//! `rust_xlsxwriter` library.

use rust_xlsxwriter::{HeaderImagePosition, Image, Workbook, XlsxError};

fn main() -> Result<(), XlsxError> {
    // Create a new Excel file object.
    let mut workbook = Workbook::new();

    // -----------------------------------------------------------------------
    // A simple example to start.
    // -----------------------------------------------------------------------
    let worksheet1 = workbook.add_worksheet().set_name("Simple")?;

    // Set page layout view so the headers/footers are visible.
    worksheet1.set_view_page_layout();

    // Add some sample text.
    worksheet1.write_string(0, 0, "Some text")?;

    worksheet1.set_header("&CHere is some centered text.");
    worksheet1.set_footer("&LHere is some left aligned text.");

    // -----------------------------------------------------------------------
    // This is an example of some of the header/footer variables.
    // -----------------------------------------------------------------------
    let worksheet2 = workbook.add_worksheet().set_name("Variables")?;
    worksheet2.set_view_page_layout();
    worksheet2.write_string(0, 0, "Some text")?;

    // Note the sections separators "&L" (left) "&C" (center) and "&R" (right).
    worksheet2.set_header("&LPage &[Page] of &[Pages]&CFilename: &[File]&RSheetname: &[Tab]");
    worksheet2.set_footer("&LCurrent date: &D&RCurrent time: &T");

    // -----------------------------------------------------------------------
    // This is an example of setting a header image.
    // -----------------------------------------------------------------------
    let worksheet3 = workbook.add_worksheet().set_name("Images")?;
    worksheet3.set_view_page_layout();
    worksheet3.write_string(0, 0, "Some text")?;

    let image = Image::new("examples/rust_logo.png")?
        .set_scale_height(0.5)
        .set_scale_width(0.5);

    worksheet3.set_header("&L&[Picture]");
    worksheet3.set_header_image(&image, HeaderImagePosition::Left)?;

    // Increase the top margin to 1.2 for clarity. The -1.0 values are ignored.
    worksheet3.set_margins(-1.0, -1.0, 1.2, -1.0, -1.0, -1.0);

    // -----------------------------------------------------------------------
    // This example shows how to use more than one font.
    // -----------------------------------------------------------------------
    let worksheet4 = workbook.add_worksheet().set_name("Mixed fonts")?;
    worksheet4.set_view_page_layout();
    worksheet4.write_string(0, 0, "Some text")?;

    worksheet4.set_header(r#"&C&"Courier New,Bold"Hello &"Arial,Italic"World"#);
    worksheet4.set_footer(r#"&C&"Symbol"e&"Arial" = mc&X2"#);

    // -----------------------------------------------------------------------
    // Example of line wrapping.
    // -----------------------------------------------------------------------
    let worksheet5 = workbook.add_worksheet().set_name("Word wrap")?;
    worksheet5.set_view_page_layout();
    worksheet5.write_string(0, 0, "Some text")?;

    worksheet5.set_header("&CHeading 1\nHeading 2");

    // -----------------------------------------------------------------------
    // Example of inserting a literal ampersand &.
    // -----------------------------------------------------------------------
    let worksheet6 = workbook.add_worksheet().set_name("Ampersand")?;
    worksheet6.set_view_page_layout();
    worksheet6.write_string(0, 0, "Some text")?;

    worksheet6.set_header("&CCuriouser && Curiouser - Attorneys at Law");

    workbook.save("headers_footers.xlsx")?;

    Ok(())
}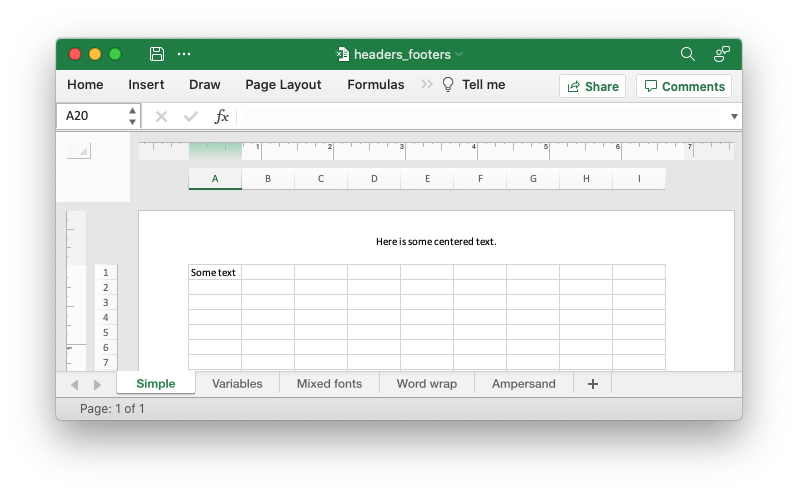
An example with variables:
// SPDX-License-Identifier: MIT OR Apache-2.0
//
// Copyright 2022-2026, John McNamara, jmcnamara@cpan.org

//! An example of setting headers and footers in worksheets using the
//! `rust_xlsxwriter` library.

use rust_xlsxwriter::{HeaderImagePosition, Image, Workbook, XlsxError};

fn main() -> Result<(), XlsxError> {
    // Create a new Excel file object.
    let mut workbook = Workbook::new();

    // -----------------------------------------------------------------------
    // A simple example to start.
    // -----------------------------------------------------------------------
    let worksheet1 = workbook.add_worksheet().set_name("Simple")?;

    // Set page layout view so the headers/footers are visible.
    worksheet1.set_view_page_layout();

    // Add some sample text.
    worksheet1.write_string(0, 0, "Some text")?;

    worksheet1.set_header("&CHere is some centered text.");
    worksheet1.set_footer("&LHere is some left aligned text.");

    // -----------------------------------------------------------------------
    // This is an example of some of the header/footer variables.
    // -----------------------------------------------------------------------
    let worksheet2 = workbook.add_worksheet().set_name("Variables")?;
    worksheet2.set_view_page_layout();
    worksheet2.write_string(0, 0, "Some text")?;

    // Note the sections separators "&L" (left) "&C" (center) and "&R" (right).
    worksheet2.set_header("&LPage &[Page] of &[Pages]&CFilename: &[File]&RSheetname: &[Tab]");
    worksheet2.set_footer("&LCurrent date: &D&RCurrent time: &T");

    // -----------------------------------------------------------------------
    // This is an example of setting a header image.
    // -----------------------------------------------------------------------
    let worksheet3 = workbook.add_worksheet().set_name("Images")?;
    worksheet3.set_view_page_layout();
    worksheet3.write_string(0, 0, "Some text")?;

    let image = Image::new("examples/rust_logo.png")?
        .set_scale_height(0.5)
        .set_scale_width(0.5);

    worksheet3.set_header("&L&[Picture]");
    worksheet3.set_header_image(&image, HeaderImagePosition::Left)?;

    // Increase the top margin to 1.2 for clarity. The -1.0 values are ignored.
    worksheet3.set_margins(-1.0, -1.0, 1.2, -1.0, -1.0, -1.0);

    // -----------------------------------------------------------------------
    // This example shows how to use more than one font.
    // -----------------------------------------------------------------------
    let worksheet4 = workbook.add_worksheet().set_name("Mixed fonts")?;
    worksheet4.set_view_page_layout();
    worksheet4.write_string(0, 0, "Some text")?;

    worksheet4.set_header(r#"&C&"Courier New,Bold"Hello &"Arial,Italic"World"#);
    worksheet4.set_footer(r#"&C&"Symbol"e&"Arial" = mc&X2"#);

    // -----------------------------------------------------------------------
    // Example of line wrapping.
    // -----------------------------------------------------------------------
    let worksheet5 = workbook.add_worksheet().set_name("Word wrap")?;
    worksheet5.set_view_page_layout();
    worksheet5.write_string(0, 0, "Some text")?;

    worksheet5.set_header("&CHeading 1\nHeading 2");

    // -----------------------------------------------------------------------
    // Example of inserting a literal ampersand &.
    // -----------------------------------------------------------------------
    let worksheet6 = workbook.add_worksheet().set_name("Ampersand")?;
    worksheet6.set_view_page_layout();
    worksheet6.write_string(0, 0, "Some text")?;

    worksheet6.set_header("&CCuriouser && Curiouser - Attorneys at Law");

    workbook.save("headers_footers.xlsx")?;

    Ok(())
}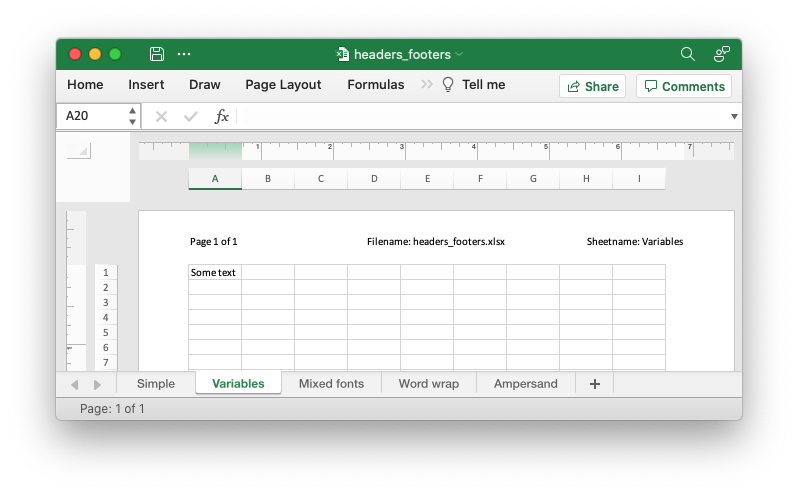
An example of setting a header image:
// SPDX-License-Identifier: MIT OR Apache-2.0
//
// Copyright 2022-2026, John McNamara, jmcnamara@cpan.org

//! An example of setting headers and footers in worksheets using the
//! `rust_xlsxwriter` library.

use rust_xlsxwriter::{HeaderImagePosition, Image, Workbook, XlsxError};

fn main() -> Result<(), XlsxError> {
    // Create a new Excel file object.
    let mut workbook = Workbook::new();

    // -----------------------------------------------------------------------
    // A simple example to start.
    // -----------------------------------------------------------------------
    let worksheet1 = workbook.add_worksheet().set_name("Simple")?;

    // Set page layout view so the headers/footers are visible.
    worksheet1.set_view_page_layout();

    // Add some sample text.
    worksheet1.write_string(0, 0, "Some text")?;

    worksheet1.set_header("&CHere is some centered text.");
    worksheet1.set_footer("&LHere is some left aligned text.");

    // -----------------------------------------------------------------------
    // This is an example of some of the header/footer variables.
    // -----------------------------------------------------------------------
    let worksheet2 = workbook.add_worksheet().set_name("Variables")?;
    worksheet2.set_view_page_layout();
    worksheet2.write_string(0, 0, "Some text")?;

    // Note the sections separators "&L" (left) "&C" (center) and "&R" (right).
    worksheet2.set_header("&LPage &[Page] of &[Pages]&CFilename: &[File]&RSheetname: &[Tab]");
    worksheet2.set_footer("&LCurrent date: &D&RCurrent time: &T");

    // -----------------------------------------------------------------------
    // This is an example of setting a header image.
    // -----------------------------------------------------------------------
    let worksheet3 = workbook.add_worksheet().set_name("Images")?;
    worksheet3.set_view_page_layout();
    worksheet3.write_string(0, 0, "Some text")?;

    let image = Image::new("examples/rust_logo.png")?
        .set_scale_height(0.5)
        .set_scale_width(0.5);

    worksheet3.set_header("&L&[Picture]");
    worksheet3.set_header_image(&image, HeaderImagePosition::Left)?;

    // Increase the top margin to 1.2 for clarity. The -1.0 values are ignored.
    worksheet3.set_margins(-1.0, -1.0, 1.2, -1.0, -1.0, -1.0);

    // -----------------------------------------------------------------------
    // This example shows how to use more than one font.
    // -----------------------------------------------------------------------
    let worksheet4 = workbook.add_worksheet().set_name("Mixed fonts")?;
    worksheet4.set_view_page_layout();
    worksheet4.write_string(0, 0, "Some text")?;

    worksheet4.set_header(r#"&C&"Courier New,Bold"Hello &"Arial,Italic"World"#);
    worksheet4.set_footer(r#"&C&"Symbol"e&"Arial" = mc&X2"#);

    // -----------------------------------------------------------------------
    // Example of line wrapping.
    // -----------------------------------------------------------------------
    let worksheet5 = workbook.add_worksheet().set_name("Word wrap")?;
    worksheet5.set_view_page_layout();
    worksheet5.write_string(0, 0, "Some text")?;

    worksheet5.set_header("&CHeading 1\nHeading 2");

    // -----------------------------------------------------------------------
    // Example of inserting a literal ampersand &.
    // -----------------------------------------------------------------------
    let worksheet6 = workbook.add_worksheet().set_name("Ampersand")?;
    worksheet6.set_view_page_layout();
    worksheet6.write_string(0, 0, "Some text")?;

    worksheet6.set_header("&CCuriouser && Curiouser - Attorneys at Law");

    workbook.save("headers_footers.xlsx")?;

    Ok(())
}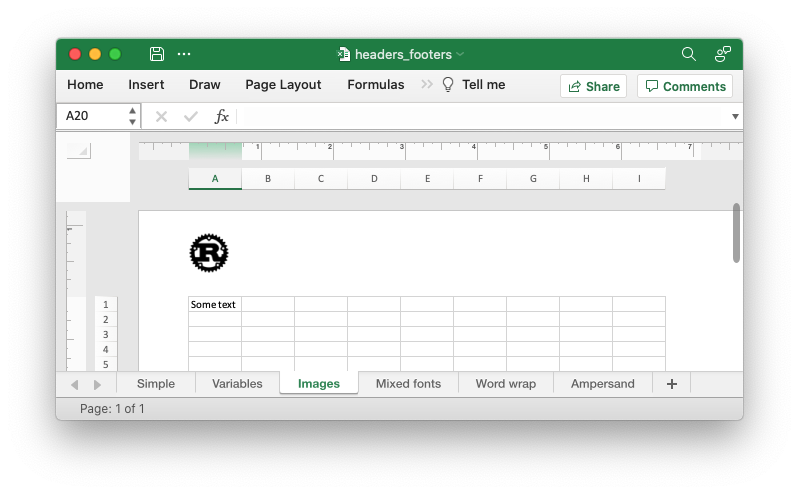
An example of how to use more than one font:
// SPDX-License-Identifier: MIT OR Apache-2.0
//
// Copyright 2022-2026, John McNamara, jmcnamara@cpan.org

//! An example of setting headers and footers in worksheets using the
//! `rust_xlsxwriter` library.

use rust_xlsxwriter::{HeaderImagePosition, Image, Workbook, XlsxError};

fn main() -> Result<(), XlsxError> {
    // Create a new Excel file object.
    let mut workbook = Workbook::new();

    // -----------------------------------------------------------------------
    // A simple example to start.
    // -----------------------------------------------------------------------
    let worksheet1 = workbook.add_worksheet().set_name("Simple")?;

    // Set page layout view so the headers/footers are visible.
    worksheet1.set_view_page_layout();

    // Add some sample text.
    worksheet1.write_string(0, 0, "Some text")?;

    worksheet1.set_header("&CHere is some centered text.");
    worksheet1.set_footer("&LHere is some left aligned text.");

    // -----------------------------------------------------------------------
    // This is an example of some of the header/footer variables.
    // -----------------------------------------------------------------------
    let worksheet2 = workbook.add_worksheet().set_name("Variables")?;
    worksheet2.set_view_page_layout();
    worksheet2.write_string(0, 0, "Some text")?;

    // Note the sections separators "&L" (left) "&C" (center) and "&R" (right).
    worksheet2.set_header("&LPage &[Page] of &[Pages]&CFilename: &[File]&RSheetname: &[Tab]");
    worksheet2.set_footer("&LCurrent date: &D&RCurrent time: &T");

    // -----------------------------------------------------------------------
    // This is an example of setting a header image.
    // -----------------------------------------------------------------------
    let worksheet3 = workbook.add_worksheet().set_name("Images")?;
    worksheet3.set_view_page_layout();
    worksheet3.write_string(0, 0, "Some text")?;

    let image = Image::new("examples/rust_logo.png")?
        .set_scale_height(0.5)
        .set_scale_width(0.5);

    worksheet3.set_header("&L&[Picture]");
    worksheet3.set_header_image(&image, HeaderImagePosition::Left)?;

    // Increase the top margin to 1.2 for clarity. The -1.0 values are ignored.
    worksheet3.set_margins(-1.0, -1.0, 1.2, -1.0, -1.0, -1.0);

    // -----------------------------------------------------------------------
    // This example shows how to use more than one font.
    // -----------------------------------------------------------------------
    let worksheet4 = workbook.add_worksheet().set_name("Mixed fonts")?;
    worksheet4.set_view_page_layout();
    worksheet4.write_string(0, 0, "Some text")?;

    worksheet4.set_header(r#"&C&"Courier New,Bold"Hello &"Arial,Italic"World"#);
    worksheet4.set_footer(r#"&C&"Symbol"e&"Arial" = mc&X2"#);

    // -----------------------------------------------------------------------
    // Example of line wrapping.
    // -----------------------------------------------------------------------
    let worksheet5 = workbook.add_worksheet().set_name("Word wrap")?;
    worksheet5.set_view_page_layout();
    worksheet5.write_string(0, 0, "Some text")?;

    worksheet5.set_header("&CHeading 1\nHeading 2");

    // -----------------------------------------------------------------------
    // Example of inserting a literal ampersand &.
    // -----------------------------------------------------------------------
    let worksheet6 = workbook.add_worksheet().set_name("Ampersand")?;
    worksheet6.set_view_page_layout();
    worksheet6.write_string(0, 0, "Some text")?;

    worksheet6.set_header("&CCuriouser && Curiouser - Attorneys at Law");

    workbook.save("headers_footers.xlsx")?;

    Ok(())
}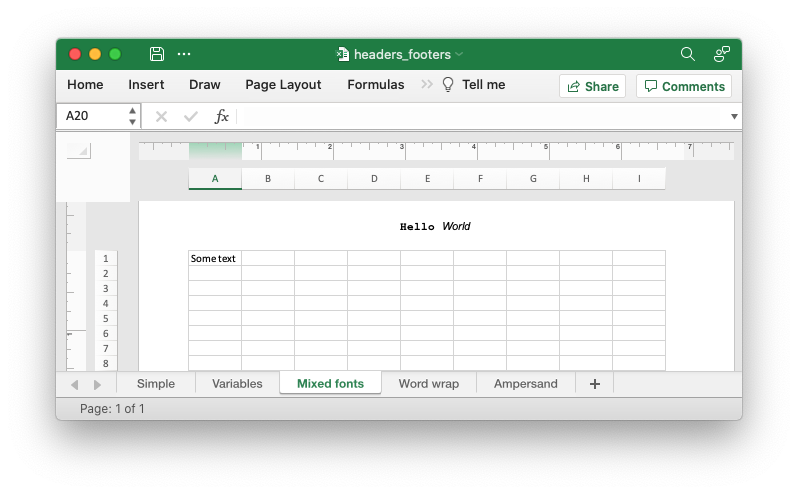
An example of line wrapping:
// SPDX-License-Identifier: MIT OR Apache-2.0
//
// Copyright 2022-2026, John McNamara, jmcnamara@cpan.org

//! An example of setting headers and footers in worksheets using the
//! `rust_xlsxwriter` library.

use rust_xlsxwriter::{HeaderImagePosition, Image, Workbook, XlsxError};

fn main() -> Result<(), XlsxError> {
    // Create a new Excel file object.
    let mut workbook = Workbook::new();

    // -----------------------------------------------------------------------
    // A simple example to start.
    // -----------------------------------------------------------------------
    let worksheet1 = workbook.add_worksheet().set_name("Simple")?;

    // Set page layout view so the headers/footers are visible.
    worksheet1.set_view_page_layout();

    // Add some sample text.
    worksheet1.write_string(0, 0, "Some text")?;

    worksheet1.set_header("&CHere is some centered text.");
    worksheet1.set_footer("&LHere is some left aligned text.");

    // -----------------------------------------------------------------------
    // This is an example of some of the header/footer variables.
    // -----------------------------------------------------------------------
    let worksheet2 = workbook.add_worksheet().set_name("Variables")?;
    worksheet2.set_view_page_layout();
    worksheet2.write_string(0, 0, "Some text")?;

    // Note the sections separators "&L" (left) "&C" (center) and "&R" (right).
    worksheet2.set_header("&LPage &[Page] of &[Pages]&CFilename: &[File]&RSheetname: &[Tab]");
    worksheet2.set_footer("&LCurrent date: &D&RCurrent time: &T");

    // -----------------------------------------------------------------------
    // This is an example of setting a header image.
    // -----------------------------------------------------------------------
    let worksheet3 = workbook.add_worksheet().set_name("Images")?;
    worksheet3.set_view_page_layout();
    worksheet3.write_string(0, 0, "Some text")?;

    let image = Image::new("examples/rust_logo.png")?
        .set_scale_height(0.5)
        .set_scale_width(0.5);

    worksheet3.set_header("&L&[Picture]");
    worksheet3.set_header_image(&image, HeaderImagePosition::Left)?;

    // Increase the top margin to 1.2 for clarity. The -1.0 values are ignored.
    worksheet3.set_margins(-1.0, -1.0, 1.2, -1.0, -1.0, -1.0);

    // -----------------------------------------------------------------------
    // This example shows how to use more than one font.
    // -----------------------------------------------------------------------
    let worksheet4 = workbook.add_worksheet().set_name("Mixed fonts")?;
    worksheet4.set_view_page_layout();
    worksheet4.write_string(0, 0, "Some text")?;

    worksheet4.set_header(r#"&C&"Courier New,Bold"Hello &"Arial,Italic"World"#);
    worksheet4.set_footer(r#"&C&"Symbol"e&"Arial" = mc&X2"#);

    // -----------------------------------------------------------------------
    // Example of line wrapping.
    // -----------------------------------------------------------------------
    let worksheet5 = workbook.add_worksheet().set_name("Word wrap")?;
    worksheet5.set_view_page_layout();
    worksheet5.write_string(0, 0, "Some text")?;

    worksheet5.set_header("&CHeading 1\nHeading 2");

    // -----------------------------------------------------------------------
    // Example of inserting a literal ampersand &.
    // -----------------------------------------------------------------------
    let worksheet6 = workbook.add_worksheet().set_name("Ampersand")?;
    worksheet6.set_view_page_layout();
    worksheet6.write_string(0, 0, "Some text")?;

    worksheet6.set_header("&CCuriouser && Curiouser - Attorneys at Law");

    workbook.save("headers_footers.xlsx")?;

    Ok(())
}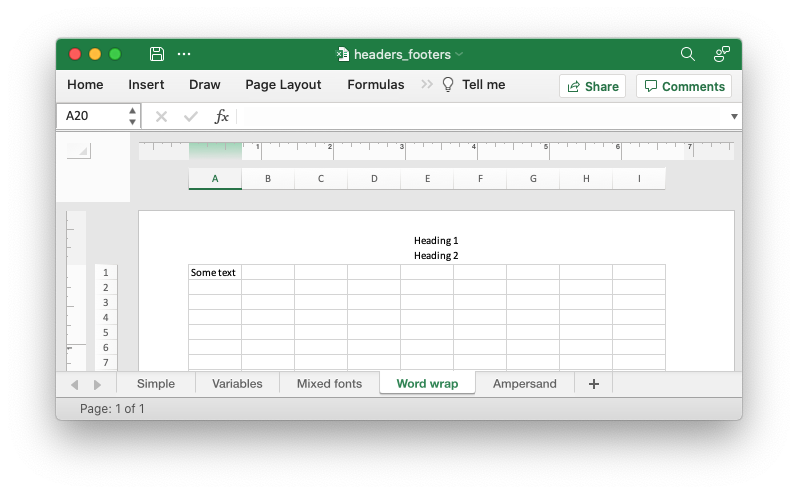
An example of inserting a literal ampersand &:
// SPDX-License-Identifier: MIT OR Apache-2.0
//
// Copyright 2022-2026, John McNamara, jmcnamara@cpan.org

//! An example of setting headers and footers in worksheets using the
//! `rust_xlsxwriter` library.

use rust_xlsxwriter::{HeaderImagePosition, Image, Workbook, XlsxError};

fn main() -> Result<(), XlsxError> {
    // Create a new Excel file object.
    let mut workbook = Workbook::new();

    // -----------------------------------------------------------------------
    // A simple example to start.
    // -----------------------------------------------------------------------
    let worksheet1 = workbook.add_worksheet().set_name("Simple")?;

    // Set page layout view so the headers/footers are visible.
    worksheet1.set_view_page_layout();

    // Add some sample text.
    worksheet1.write_string(0, 0, "Some text")?;

    worksheet1.set_header("&CHere is some centered text.");
    worksheet1.set_footer("&LHere is some left aligned text.");

    // -----------------------------------------------------------------------
    // This is an example of some of the header/footer variables.
    // -----------------------------------------------------------------------
    let worksheet2 = workbook.add_worksheet().set_name("Variables")?;
    worksheet2.set_view_page_layout();
    worksheet2.write_string(0, 0, "Some text")?;

    // Note the sections separators "&L" (left) "&C" (center) and "&R" (right).
    worksheet2.set_header("&LPage &[Page] of &[Pages]&CFilename: &[File]&RSheetname: &[Tab]");
    worksheet2.set_footer("&LCurrent date: &D&RCurrent time: &T");

    // -----------------------------------------------------------------------
    // This is an example of setting a header image.
    // -----------------------------------------------------------------------
    let worksheet3 = workbook.add_worksheet().set_name("Images")?;
    worksheet3.set_view_page_layout();
    worksheet3.write_string(0, 0, "Some text")?;

    let image = Image::new("examples/rust_logo.png")?
        .set_scale_height(0.5)
        .set_scale_width(0.5);

    worksheet3.set_header("&L&[Picture]");
    worksheet3.set_header_image(&image, HeaderImagePosition::Left)?;

    // Increase the top margin to 1.2 for clarity. The -1.0 values are ignored.
    worksheet3.set_margins(-1.0, -1.0, 1.2, -1.0, -1.0, -1.0);

    // -----------------------------------------------------------------------
    // This example shows how to use more than one font.
    // -----------------------------------------------------------------------
    let worksheet4 = workbook.add_worksheet().set_name("Mixed fonts")?;
    worksheet4.set_view_page_layout();
    worksheet4.write_string(0, 0, "Some text")?;

    worksheet4.set_header(r#"&C&"Courier New,Bold"Hello &"Arial,Italic"World"#);
    worksheet4.set_footer(r#"&C&"Symbol"e&"Arial" = mc&X2"#);

    // -----------------------------------------------------------------------
    // Example of line wrapping.
    // -----------------------------------------------------------------------
    let worksheet5 = workbook.add_worksheet().set_name("Word wrap")?;
    worksheet5.set_view_page_layout();
    worksheet5.write_string(0, 0, "Some text")?;

    worksheet5.set_header("&CHeading 1\nHeading 2");

    // -----------------------------------------------------------------------
    // Example of inserting a literal ampersand &.
    // -----------------------------------------------------------------------
    let worksheet6 = workbook.add_worksheet().set_name("Ampersand")?;
    worksheet6.set_view_page_layout();
    worksheet6.write_string(0, 0, "Some text")?;

    worksheet6.set_header("&CCuriouser && Curiouser - Attorneys at Law");

    workbook.save("headers_footers.xlsx")?;

    Ok(())
}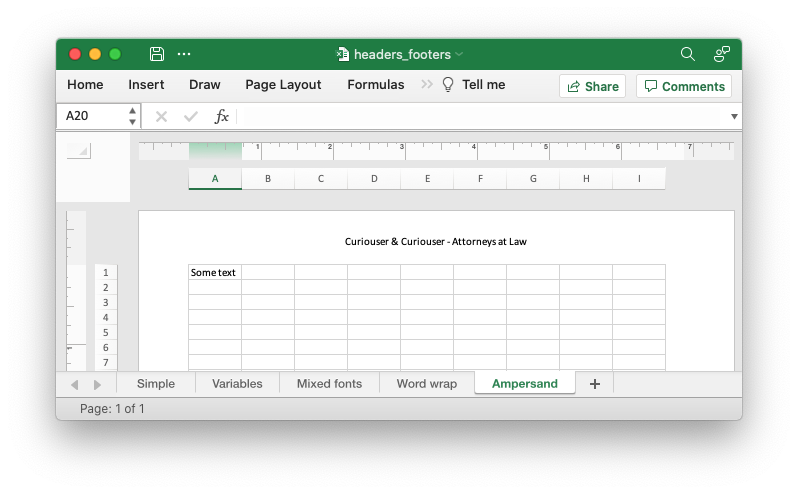
And here is the full code for the example:
// SPDX-License-Identifier: MIT OR Apache-2.0
//
// Copyright 2022-2026, John McNamara, jmcnamara@cpan.org

//! An example of setting headers and footers in worksheets using the
//! `rust_xlsxwriter` library.

use rust_xlsxwriter::{HeaderImagePosition, Image, Workbook, XlsxError};

fn main() -> Result<(), XlsxError> {
    // Create a new Excel file object.
    let mut workbook = Workbook::new();

    // -----------------------------------------------------------------------
    // A simple example to start.
    // -----------------------------------------------------------------------
    let worksheet1 = workbook.add_worksheet().set_name("Simple")?;

    // Set page layout view so the headers/footers are visible.
    worksheet1.set_view_page_layout();

    // Add some sample text.
    worksheet1.write_string(0, 0, "Some text")?;

    worksheet1.set_header("&CHere is some centered text.");
    worksheet1.set_footer("&LHere is some left aligned text.");

    // -----------------------------------------------------------------------
    // This is an example of some of the header/footer variables.
    // -----------------------------------------------------------------------
    let worksheet2 = workbook.add_worksheet().set_name("Variables")?;
    worksheet2.set_view_page_layout();
    worksheet2.write_string(0, 0, "Some text")?;

    // Note the sections separators "&L" (left) "&C" (center) and "&R" (right).
    worksheet2.set_header("&LPage &[Page] of &[Pages]&CFilename: &[File]&RSheetname: &[Tab]");
    worksheet2.set_footer("&LCurrent date: &D&RCurrent time: &T");

    // -----------------------------------------------------------------------
    // This is an example of setting a header image.
    // -----------------------------------------------------------------------
    let worksheet3 = workbook.add_worksheet().set_name("Images")?;
    worksheet3.set_view_page_layout();
    worksheet3.write_string(0, 0, "Some text")?;

    let image = Image::new("examples/rust_logo.png")?
        .set_scale_height(0.5)
        .set_scale_width(0.5);

    worksheet3.set_header("&L&[Picture]");
    worksheet3.set_header_image(&image, HeaderImagePosition::Left)?;

    // Increase the top margin to 1.2 for clarity. The -1.0 values are ignored.
    worksheet3.set_margins(-1.0, -1.0, 1.2, -1.0, -1.0, -1.0);

    // -----------------------------------------------------------------------
    // This example shows how to use more than one font.
    // -----------------------------------------------------------------------
    let worksheet4 = workbook.add_worksheet().set_name("Mixed fonts")?;
    worksheet4.set_view_page_layout();
    worksheet4.write_string(0, 0, "Some text")?;

    worksheet4.set_header(r#"&C&"Courier New,Bold"Hello &"Arial,Italic"World"#);
    worksheet4.set_footer(r#"&C&"Symbol"e&"Arial" = mc&X2"#);

    // -----------------------------------------------------------------------
    // Example of line wrapping.
    // -----------------------------------------------------------------------
    let worksheet5 = workbook.add_worksheet().set_name("Word wrap")?;
    worksheet5.set_view_page_layout();
    worksheet5.write_string(0, 0, "Some text")?;

    worksheet5.set_header("&CHeading 1\nHeading 2");

    // -----------------------------------------------------------------------
    // Example of inserting a literal ampersand &.
    // -----------------------------------------------------------------------
    let worksheet6 = workbook.add_worksheet().set_name("Ampersand")?;
    worksheet6.set_view_page_layout();
    worksheet6.write_string(0, 0, "Some text")?;

    worksheet6.set_header("&CCuriouser && Curiouser - Attorneys at Law");

    workbook.save("headers_footers.xlsx")?;

    Ok(())
}
Document Properties: Setting document metadata properties for a workbook
An example of setting workbook document properties for a file created using the
rust_xlsxwriter library.
Image of the output file:
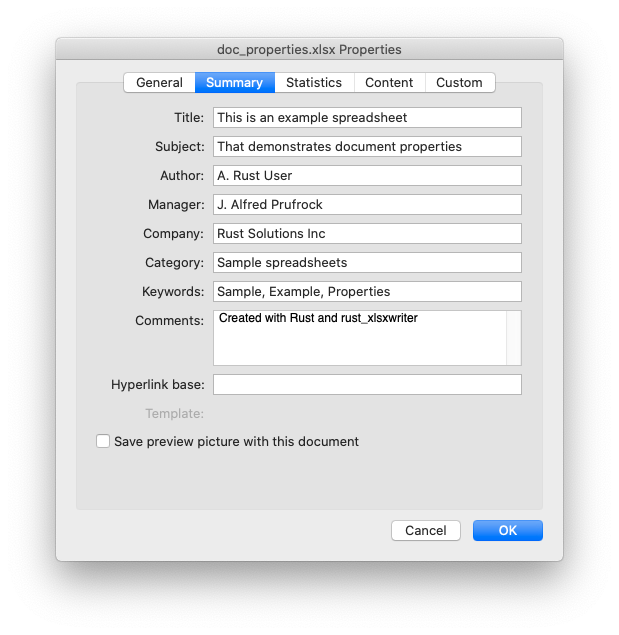
Code to generate the output file:
// SPDX-License-Identifier: MIT OR Apache-2.0
//
// Copyright 2022-2026, John McNamara, jmcnamara@cpan.org

//! An example of setting workbook document properties for a file created using
//! the `rust_xlsxwriter` library.

use rust_xlsxwriter::{DocProperties, Workbook, XlsxError};

fn main() -> Result<(), XlsxError> {
    let mut workbook = Workbook::new();

    let properties = DocProperties::new()
        .set_title("This is an example spreadsheet")
        .set_subject("That demonstrates document properties")
        .set_author("A. Rust User")
        .set_manager("J. Alfred Prufrock")
        .set_company("Rust Solutions Inc")
        .set_category("Sample spreadsheets")
        .set_keywords("Sample, Example, Properties")
        .set_comment("Created with Rust and rust_xlsxwriter");

    workbook.set_properties(&properties);

    let worksheet = workbook.add_worksheet();

    worksheet.set_column_width(0, 30)?;
    worksheet.write_string(0, 0, "See File -> Info -> Properties")?;

    workbook.save("doc_properties.xlsx")?;

    Ok(())
}
Document Properties: Setting the Sensitivity Label
Sensitivity Labels are a property that can be added to an Office 365 document to indicate that it is compliant with a company's information protection policies. Sensitivity Labels have designations like "Confidential", "Internal use only", or "Public" depending on the policies implemented by the company. They are generally only enabled for enterprise versions of Office.
See the following Microsoft documentation on how to Apply sensitivity labels to your files and email.
Sensitivity Labels are generally stored as custom document properties so they
can be enabled using DocProperties::set_custom_property(). However, since
the metadata differs from company to company you will need to extract some of
the required metadata from sample files.
The first step is to create a new file in Excel and set a non-encrypted
sensitivity label. Then unzip the file by changing the extension from .xlsx to
.zip or by using a command line utility like this:
$ unzip myfile.xlsx -d myfile
Archive:  myfile.xlsx
  inflating: myfile/[Content_Types].xml
  inflating: myfile/docProps/app.xml
  inflating: myfile/docProps/custom.xml
  inflating: myfile/docProps/core.xml
  inflating: myfile/_rels/.rels
  inflating: myfile/xl/workbook.xml
  inflating: myfile/xl/worksheets/sheet1.xml
  inflating: myfile/xl/styles.xml
  inflating: myfile/xl/theme/theme1.xml
  inflating: myfile/xl/_rels/workbook.xml.rels
Then examine the docProps/custom.xml file from the unzipped xlsx file. The
file doesn't contain newlines so it is best to view it in an editor that can
handle XML or use a commandline utility like libxml’s xmllint to format the
XML for clarity:
$ xmllint --format myfile/docProps/custom.xml
<?xml version="1.0" encoding="UTF-8" standalone="yes"?>
<Properties
    xmlns="http://schemas.openxmlformats.org/officeDocument/2006/custom-properties"
    xmlns:vt="http://schemas.openxmlformats.org/officeDocument/2006/docPropsVTypes">
  <property fmtid="{D5CDD505-2E9C-101B-9397-08002B2CF9AE}"
            pid="2"
            name="MSIP_Label_2096f6a2-d2f7-48be-b329-b73aaa526e5d_Enabled">
    <vt:lpwstr>true</vt:lpwstr>
  </property>
  <property fmtid="{D5CDD505-2E9C-101B-9397-08002B2CF9AE}"
            pid="3"
            name="MSIP_Label_2096f6a2-d2f7-48be-b329-b73aaa526e5d_SetDate">
    <vt:lpwstr>2024-01-01T12:00:00Z</vt:lpwstr>
  </property>
  <property fmtid="{D5CDD505-2E9C-101B-9397-08002B2CF9AE}"
            pid="4"
            name="MSIP_Label_2096f6a2-d2f7-48be-b329-b73aaa526e5d_Method">
    <vt:lpwstr>Privileged</vt:lpwstr>
  </property>
  <property fmtid="{D5CDD505-2E9C-101B-9397-08002B2CF9AE}"
            pid="5"
            name="MSIP_Label_2096f6a2-d2f7-48be-b329-b73aaa526e5d_Name">
    <vt:lpwstr>Confidential</vt:lpwstr>
  </property>
  <property fmtid="{D5CDD505-2E9C-101B-9397-08002B2CF9AE}"
            pid="6"
            name="MSIP_Label_2096f6a2-d2f7-48be-b329-b73aaa526e5d_SiteId">
    <vt:lpwstr>cb46c030-1825-4e81-a295-151c039dbf02</vt:lpwstr>
  </property>
  <property fmtid="{D5CDD505-2E9C-101B-9397-08002B2CF9AE}"
            pid="7"
            name="MSIP_Label_2096f6a2-d2f7-48be-b329-b73aaa526e5d_ActionId">
    <vt:lpwstr>88124cf5-1340-457d-90e1-0000a9427c99</vt:lpwstr>
  </property>
  <property fmtid="{D5CDD505-2E9C-101B-9397-08002B2CF9AE}"
            pid="8"
            name="MSIP_Label_2096f6a2-d2f7-48be-b329-b73aaa526e5d_ContentBits">
    <vt:lpwstr>2</vt:lpwstr>
  </property>
</Properties>
The MSIP (Microsoft Information Protection) labels in the name attributes
contain a GUID that is unique to each company. The SiteId field will also be
unique to your company/location. The meaning of each of these fields is
explained in the the following Microsoft document on Microsoft Information
Protection SDK - Metadata. Once you have identified the necessary metadata you
can add it to a new document as shown below.
Note, some sensitivity labels require that the document is encrypted. In order to extract the required metadata you will need to unencrypt the file which may remove the sensitivity label. In that case you may need to use a third party tool such as msoffice-crypt.
Image of the output file:
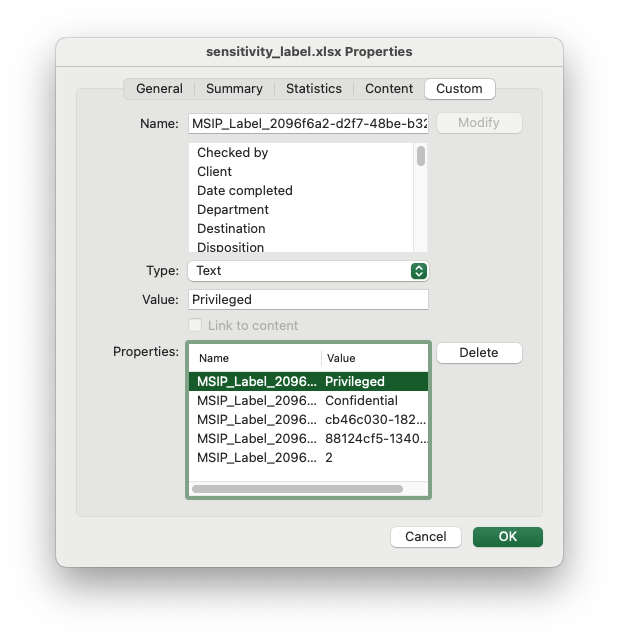
Code to generate the output file:
// SPDX-License-Identifier: MIT OR Apache-2.0
//
// Copyright 2022-2026, John McNamara, jmcnamara@cpan.org

//! An example adding a Sensitivity Label to an Excel file using custom document
//! properties. See the main docs for an explanation of how to extract the
//! metadata.

use rust_xlsxwriter::{DocProperties, Workbook, XlsxError};

fn main() -> Result<(), XlsxError> {
    let mut workbook = Workbook::new();

    // Metadata extracted from a company specific file.
    let site_id = "cb46c030-1825-4e81-a295-151c039dbf02";
    let action_id = "88124cf5-1340-457d-90e1-0000a9427c99";
    let company_guid = "2096f6a2-d2f7-48be-b329-b73aaa526e5d";

    // Add the document properties. Note that these should all be in text format.
    let properties = DocProperties::new()
        .set_custom_property(format!("MSIP_Label_{company_guid}_Method"), "Privileged")
        .set_custom_property(format!("MSIP_Label_{company_guid}_Name"), "Confidential")
        .set_custom_property(format!("MSIP_Label_{company_guid}_SiteId"), site_id)
        .set_custom_property(format!("MSIP_Label_{company_guid}_ActionId"), action_id)
        .set_custom_property(format!("MSIP_Label_{company_guid}_ContentBits"), "2");

    workbook.set_properties(&properties);

    workbook.save("sensitivity_label.xlsx")?;

    Ok(())
}
Internal links: Creating a Table of Contents
This is an example of creating a "Table of Contents" worksheet with links to other worksheets in the workbook.
Image of the output file:
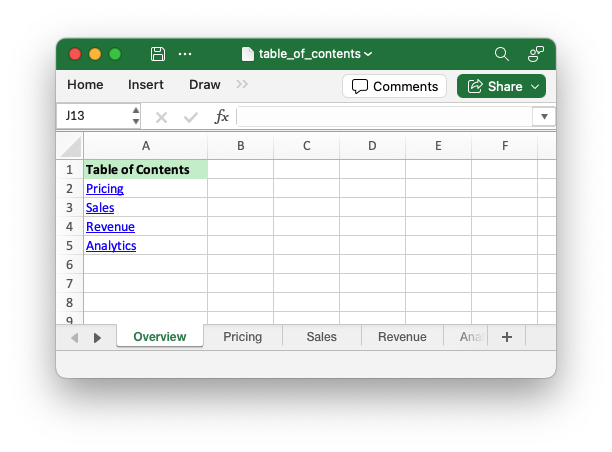
Code to generate the output file:
// SPDX-License-Identifier: MIT OR Apache-2.0
//
// Copyright 2022-2026, John McNamara, jmcnamara@cpan.org

//! This is an example of creating a "Table of Contents" worksheet with links to
//! other worksheets in the workbook.

use rust_xlsxwriter::{utility::quote_sheet_name, Format, Url, Workbook, XlsxError};

fn main() -> Result<(), XlsxError> {
    // Create a new Excel file object.
    let mut workbook = Workbook::new();

    // Create a table of contents worksheet at the start. If the worksheet names
    // are known in advance you can do add them here. For the sake of this
    // example we will assume that they aren't known and/or are created
    // dynamically.
    let _ = workbook.add_worksheet().set_name("Overview")?;

    // Add some worksheets.
    let _ = workbook.add_worksheet().set_name("Pricing")?;
    let _ = workbook.add_worksheet().set_name("Sales")?;
    let _ = workbook.add_worksheet().set_name("Revenue")?;
    let _ = workbook.add_worksheet().set_name("Analytics")?;

    // If the sheet names aren't known in advance we can find them as follows:
    let mut worksheet_names = workbook
        .worksheets()
        .iter()
        .map(|worksheet| worksheet.name())
        .collect::<Vec<_>>();

    // Remove the "Overview" worksheet name.
    worksheet_names.remove(0);

    // Get the "Overview" worksheet to add the table of contents.
    let worksheet = workbook.worksheet_from_name("Overview")?;

    // Write a header.
    let header = Format::new().set_bold().set_background_color("C6EFCE");
    worksheet.write_string_with_format(0, 0, "Table of Contents", &header)?;

    // Write the worksheet names with links.
    for (i, name) in worksheet_names.iter().enumerate() {
        let sheet_name = quote_sheet_name(name);
        let link = format!("internal:{sheet_name}!A1");
        let url = Url::new(link).set_text(name);

        worksheet.write_url(i as u32 + 1, 0, &url)?;
    }

    // Autofit the data for clarity.
    worksheet.autofit();

    // Save the file to disk.
    workbook.save("table_of_contents.xlsx")?;

    Ok(())
}
Adding a watermark: Adding a watermark to a worksheet by adding an image to the header
An example of adding a worksheet watermark image. This is based on the method of putting an image in the worksheet header as suggested in the Microsoft documentation.
Image of the output file:
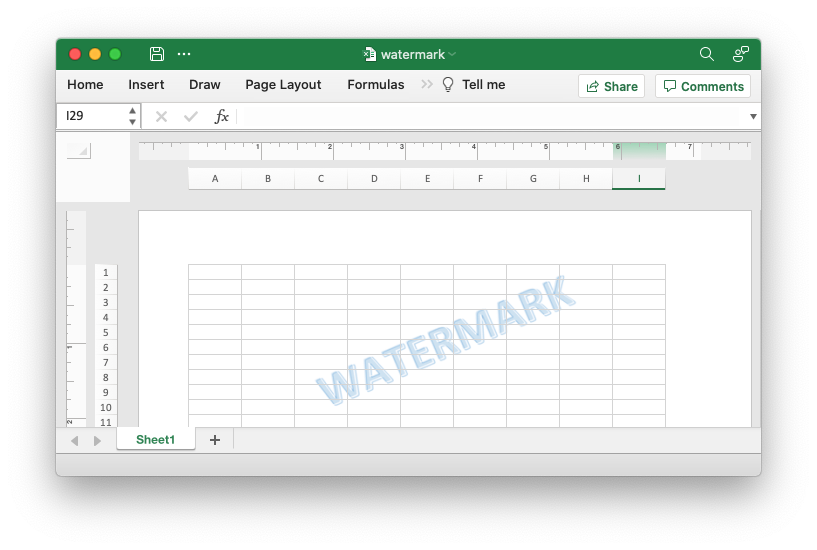
Code to generate the output file:
// SPDX-License-Identifier: MIT OR Apache-2.0
//
// Copyright 2022-2026, John McNamara, jmcnamara@cpan.org

//! An example of adding a worksheet watermark image using the `rust_xlsxwriter`
//! library. This is based on the method of putting an image in the worksheet
//! header as suggested in the Microsoft documentation.

use rust_xlsxwriter::{HeaderImagePosition, Image, Workbook, XlsxError};

fn main() -> Result<(), XlsxError> {
    // Create a new Excel file object.
    let mut workbook = Workbook::new();

    // Add a worksheet to the workbook.
    let worksheet = workbook.add_worksheet();

    let image = Image::new("examples/watermark.png")?;

    // Insert the watermark image in the header.
    worksheet.set_header("&C&[Picture]");
    worksheet.set_header_image(&image, HeaderImagePosition::Center)?;

    // Set Page View mode so the watermark is visible.
    worksheet.set_view_page_layout();

    // Save the file to disk.
    workbook.save("watermark.xlsx")?;

    Ok(())
}
Adding a watermark: Adding a watermark to a worksheet by adding a background image
An example of adding a background image to a worksheet. In this case it is used as a watermark.
See also the previous example where a watermark is created by putting an image in the worksheet header.
Image of the output file:
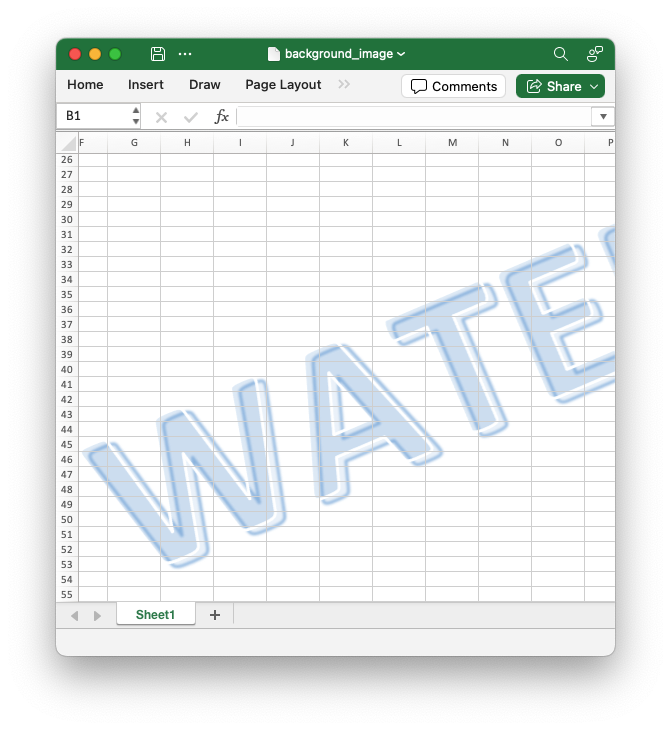
Code to generate the output file:
// SPDX-License-Identifier: MIT OR Apache-2.0
//
// Copyright 2022-2026, John McNamara, jmcnamara@cpan.org

//! An example of inserting a background image into a worksheet using
//! `rust_xlsxwriter`.
//!
//! See also the `app_watermark.rs` example which shows how to set a watermark
//! via the header image of a worksheet. That is the way that the Microsoft
//! documentation recommends to set a watermark in Excel.

use rust_xlsxwriter::{Image, Workbook, XlsxError};

fn main() -> Result<(), XlsxError> {
    // Create a new Excel file object.
    let mut workbook = Workbook::new();

    // Add a worksheet to the workbook.
    let worksheet = workbook.add_worksheet();

    // The image may not be visible unless the view is large.
    worksheet.write(0, 0, "Scroll down and right to see the background image")?;

    // Create a new image object.
    let image = Image::new("examples/watermark.png")?;

    // Insert the background image.
    worksheet.insert_background_image(&image);

    // Save the file to disk.
    workbook.save("background_image.xlsx")?;

    Ok(())
}
Freeze Panes: Example of setting freeze panes in worksheets
An example of setting some "freeze" panes in worksheets to split the worksheet into scrolling and non-scrolling areas. This is generally used to have one or more row or column to the top or left of the worksheet area that stays fixed when a user scrolls.
Image of the output file:
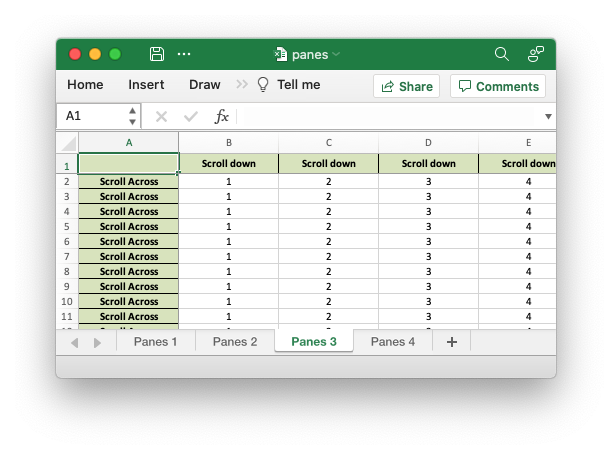
Code to generate the output file:
// SPDX-License-Identifier: MIT OR Apache-2.0
//
// Copyright 2022-2026, John McNamara, jmcnamara@cpan.org
//! A simple example of setting some "freeze" panes in worksheets using the
//! `rust_xlsxwriter` library.
use rust_xlsxwriter::{Color, Format, FormatAlign, FormatBorder, Workbook, XlsxError};
fn main() -> Result<(), XlsxError> {
// Create a new Excel file object.
let mut workbook = Workbook::new();
// Create some formats to use in the worksheet.
let header_format = Format::new()
.set_bold()
.set_align(FormatAlign::Center)
.set_align(FormatAlign::VerticalCenter)
.set_foreground_color(Color::RGB(0xD7E4BC))
.set_border(FormatBorder::Thin);
let center_format = Format::new().set_align(FormatAlign::Center);
// Some range limits to use in this example.
let max_row = 50;
let max_col = 26;
// -----------------------------------------------------------------------
// Example 1. Freeze pane on the top row.
// -----------------------------------------------------------------------
let worksheet1 = workbook.add_worksheet().set_name("Panes 1")?;
// Freeze the top row only.
worksheet1.set_freeze_panes(1, 0)?;
// Add some data and formatting to the worksheet.
worksheet1.set_row_height(0, 20)?;
for col in 0..max_col {
worksheet1.write_string_with_format(0, col, "Scroll down", &header_format)?;
worksheet1.set_column_width(col, 16)?;
}
for row in 1..max_row {
for col in 0..max_col {
worksheet1.write_number_with_format(row, col, row + 1, ¢er_format)?;
}
}
// -----------------------------------------------------------------------
// Example 2. Freeze pane on the left column.
// -----------------------------------------------------------------------
let worksheet2 = workbook.add_worksheet().set_name("Panes 2")?;
// Freeze the leftmost column only.
worksheet2.set_freeze_panes(0, 1)?;
// Add some data and formatting to the worksheet.
worksheet2.set_column_width(0, 16)?;
for row in 0..max_row {
worksheet2.write_string_with_format(row, 0, "Scroll Across", &header_format)?;
for col in 1..max_col {
worksheet2.write_number_with_format(row, col, col, ¢er_format)?;
}
}
// -----------------------------------------------------------------------
// Example 3. Freeze pane on the top row and leftmost column.
// -----------------------------------------------------------------------
let worksheet3 = workbook.add_worksheet().set_name("Panes 3")?;
// Freeze the top row and leftmost column.
worksheet3.set_freeze_panes(1, 1)?;
// Add some data and formatting to the worksheet.
worksheet3.set_row_height(0, 20)?;
worksheet3.set_column_width(0, 16)?;
worksheet3.write_blank(0, 0, &header_format)?;
for col in 1..max_col {
worksheet3.write_string_with_format(0, col, "Scroll down", &header_format)?;
worksheet3.set_column_width(col, 16)?;
}
for row in 1..max_row {
worksheet3.write_string_with_format(row, 0, "Scroll Across", &header_format)?;
for col in 1..max_col {
worksheet3.write_number_with_format(row, col, col, ¢er_format)?;
}
}
// -----------------------------------------------------------------------
// Example 4. Freeze pane on the top row and leftmost column, with
// scrolling area shifted.
// -----------------------------------------------------------------------
let worksheet4 = workbook.add_worksheet().set_name("Panes 4")?;
// Freeze the top row and leftmost column.
worksheet4.set_freeze_panes(1, 1)?;
// Shift the scrolled area in the scrolling pane.
worksheet4.set_freeze_panes_top_cell(20, 12)?;
// Add some data and formatting to the worksheet.
worksheet4.set_row_height(0, 20)?;
worksheet4.set_column_width(0, 16)?;
worksheet4.write_blank(0, 0, &header_format)?;
for col in 1..max_col {
worksheet4.write_string_with_format(0, col, "Scroll down", &header_format)?;
worksheet4.set_column_width(col, 16)?;
}
for row in 1..max_row {
worksheet4.write_string_with_format(row, 0, "Scroll Across", &header_format)?;
for col in 1..max_col {
worksheet4.write_number_with_format(row, col, col, ¢er_format)?;
}
}
// Save the file to disk.
workbook.save("panes.xlsx")?;
Ok(())
}Cell Protection: Setting cell protection in a worksheet
Example of cell locking and formula hiding in an Excel worksheet using worksheet protection.
Image of the output file:

Code to generate the output file:
// SPDX-License-Identifier: MIT OR Apache-2.0
//
// Copyright 2022-2026, John McNamara, jmcnamara@cpan.org

//! Example of cell locking and formula hiding in an Excel worksheet
//! `rust_xlsxwriter` library.

use rust_xlsxwriter::{Format, Workbook, XlsxError};

fn main() -> Result<(), XlsxError> {
    // Create a new Excel file object.
    let mut workbook = Workbook::new();

    // Add a worksheet to the workbook.
    let worksheet = workbook.add_worksheet();

    // Create some format objects.
    let unlocked = Format::new().set_unlocked();
    let hidden = Format::new().set_hidden();

    // Protect the worksheet to turn on cell locking.
    worksheet.protect();

    // Examples of cell locking and hiding.
    worksheet.write_string(0, 0, "Cell B1 is locked. It cannot be edited.")?;
    worksheet.write_formula(0, 1, "=1+2")?; // Locked by default.

    worksheet.write_string(1, 0, "Cell B2 is unlocked. It can be edited.")?;
    worksheet.write_formula_with_format(1, 1, "=1+2", &unlocked)?;

    worksheet.write_string(2, 0, "Cell B3 is hidden. The formula isn't visible.")?;
    worksheet.write_formula_with_format(2, 1, "=1+2", &hidden)?;

    worksheet.write_string(4, 0, "Use Menu -> Review -> Unprotect Sheet")?;
    worksheet.write_string(5, 0, "to remove the worksheet protection.")?;

    worksheet.autofit();

    // Save the file to disk.
    workbook.save("worksheet_protection.xlsx")?;

    Ok(())
}
Performance
The rust_xlsxwriter library has sister libraries written in C
(libxlsxwriter), Python (XlsxWriter) and Perl (Excel::Writer::XLSX).
A hyperfine performance comparison between the C, Rust and Python versions is shown below. The Perl performance is similar to the Python library so it has been omitted.
The rust_xlsxwriter library also has an optional compilation "feature" called
zlib which will allow it (via ZipWriter) to use compression from a native C
library. This improves the performance on large files significantly and even
beats the C/libxlsxwriter version:
$ hyperfine ./rust_perf_test_with_zlib \
            ./c_perf_test              \
            ./rust_perf_test           \
            "python py_perf_test.py"   \
            --warmup 3 --sort command

Benchmark 1: ./rust_perf_test_with_zlib
  Time (mean ± σ):     152.6 ms ±   3.5 ms    [User: 134.3 ms, System: 16.4 ms]
  Range (min … max):   147.0 ms … 158.9 ms    17 runs

Benchmark 2: ./c_perf_test
  Time (mean ± σ):     210.9 ms ±   4.2 ms    [User: 171.9 ms, System: 34.1 ms]
  Range (min … max):   204.1 ms … 219.2 ms    13 runs

Benchmark 3: ./rust_perf_test
  Time (mean ± σ):     240.8 ms ±   4.5 ms    [User: 222.4 ms, System: 16.6 ms]
  Range (min … max):   233.8 ms … 250.9 ms    12 runs

Benchmark 4: python py_perf_test.py
  Time (mean ± σ):     919.1 ms ±  17.0 ms    [User: 870.2 ms, System: 43.4 ms]
  Range (min … max):   885.6 ms … 938.2 ms    10 runs

Relative speed comparison
        1.00          ./rust_perf_test_with_zlib
        1.38 ±  0.04  ./c_perf_test
        1.58 ±  0.05  ./rust_perf_test
        6.02 ±  0.18  python py_perf_test.py
This shows that the rust_xlsxwriter with zlib version is the fastest version
and that it is 1.38 times faster than the C version, 1.58 times faster than the
standard rust_xlsxwriter version and 6 times faster than the Python version.
Here is the relative performance of the C, standard rust_xlsxwriter and Python versions:
$ hyperfine ./c_perf_test             \
            ./rust_perf_test          \
            "python py_perf_test.py"  \
            --warmup 3 --sort command
...

Relative speed comparison
        1.00          ./c_perf_test
        1.14 ±  0.03  ./rust_perf_test
        4.44 ±  0.13  python py_perf_test.py
And the relative performance of the rust_xlsxwriter and Python versions:
$ hyperfine ./rust_perf_test "python py_perf_test.py" --warmup 3 --sort command

...

Relative speed comparison
        1.00          ./rust_perf_test
        3.88 ±  0.10  python py_perf_test.py
As with any performance test there are a lot of factors that may affect the results, however these results are indicative of the relative performance.
The programs used to generate these results are shown below.
Rust
use rust_xlsxwriter::{Workbook, XlsxError};

fn main() -> Result<(), XlsxError> {

    let col_max = 50;
    let row_max = 4_000;

    let mut workbook = Workbook::new();
    let worksheet = workbook.add_worksheet();

    for row in 0..row_max {
        for col in 0..col_max {
            if col % 2 == 1 {
                worksheet.write_string(row, col, "Foo")?;
            } else {
                worksheet.write_number(row, col, 12345.0)?;
            }
        }
    }
    workbook.save("rust_perf_test.xlsx")?;

    Ok(())
}
C
#include "xlsxwriter.h"

int main() {

    int max_row = 4000;
    int max_col = 50;

    lxw_workbook  *workbook  = workbook_new("c_perf_test.xlsx");
    lxw_worksheet *worksheet = workbook_add_worksheet(workbook, NULL);

    for (int row_num = 0; row_num < max_row; row_num++) {
        for (int col_num = 0; col_num < max_col; col_num++) {
            if (col_num % 2)
                worksheet_write_string(worksheet, row_num, col_num, "Foo", NULL);
            else
                worksheet_write_number(worksheet, row_num, col_num, 12345.0, NULL);

        }
    }

    workbook_close(workbook);

    return 0;
}
Python
import xlsxwriter

row_max = 4000
col_max = 50

workbook = xlsxwriter.Workbook('py_perf_test.xlsx')
worksheet = workbook.add_worksheet()

for row in range(0, row_max):
    for col in range(0, col_max):
        if col % 2:
            worksheet.write_string(row, col, "Foo")
        else:
            worksheet.write_number(row, col, 12345)

workbook.close()
Release Notes
This section show the feature additions, changes and bug fixes in rust_xlsxwriter.
[0.93.0] - 2026-01-27
Added
-
Added support for autofitting formatted numbers and dates like
$1,000,000.00orJanuary 1 2026. This requires the optionalssfmtcrate and is enabled by theenhanced_autofitfeature flag. For cells with number formats the width of the formatted number is now taken into account, like this example where the number 1 is formatted in different ways: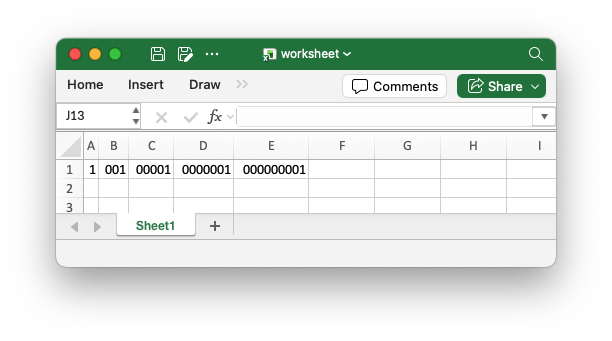
The previous behaviour, and the behaviour without the
enhanced_autofitfeature enabled, was to produce a file that looked like this: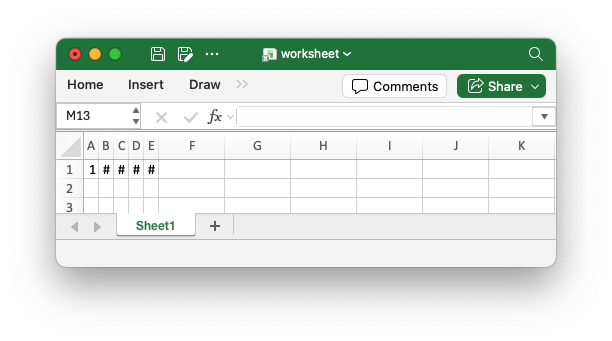
-
Added the
Worksheet::set_autofit_max_row()method to limit the number of rows processed when applyingWorksheet::autofit(). This is a performance workaround for autofitting large datasets where a value of 200-500 rows can be used to autofit the data in the visible row range of most users. -
Added the
Worksheet::set_autofit_max_width()method to enable an upper bound column width when autofitting long strings. This replaces the deprecatedWorksheet::autofit_to_max_width()method.
Deprecated
- Deprecated the
Worksheet::autofit_to_max_width()method. It is replaced withWorksheet::set_autofit_max_width()andWorksheet::autofit()
[0.92.4] - 2026-01-24
Fixed
-
Fixed issue where XML escape-like strings, such as
_x1234were being doubly escaped, inadvertently. -
Fixed/added escaping of invalid
\uFFFFand\uFFFEcharacters.
Added
- Updated
zipdependency to v7.0.
[0.92.3] - 2026-01-06
Fixed
-
Fixed floating-point precision issue in
Worksheet::insert_image_fit_to_cell_centered().
[0.92.2] - 2025-11-19
Added
- Added support for custom theme files using
.thmxand.xlsxfiles as well as the previously supportedtheme.xmlfile. SeeWorkbook::use_custom_theme().
[0.92.1] - 2025-11-17
Added
-
Updated
zipdependency to v6.0. This requires a MSRV of 1.83.0. -
Updated optional
polarsdependency to v0.52.
[0.92.0] - 2025-11-12
Added
This release adds several features related to setting themes and default fonts.
-
Added support for setting a custom theme using a
theme.xmlfile extracted from an XLSX file. SeeWorkbook::use_custom_theme().
-
Added support for setting the Excel 2023/Aptos default theme. See
Workbook::use_excel_2023_theme().
-
Added support for setting a custom default format and font. This allows to user to set a font other than "Calibri 11" as the default. This also takes the associated change in row height and column width into account to ensure that worksheet objects such as images and charts are positioned correctly. See
Workbook::set_default_format(). -
Added option to set a "Calibri 11" font that isn't part of the theme.
Fixed
-
Fixed issue where setting a custom row height in character units wasn't rounded to the nearest pixel.
[0.91.0] - 2025-10-29
Added
-
Added support for chart clustered/2D categories. See the Clustered Chart cookbook example.

-
Added support for non-contiguous chart ranges like
=(Sheet1!$A$1:$A$2,Sheet1!$A$4:$A$5). These can only be added as strings. -
Added
Table::set_alt_text()andTable::set_alt_text_title()methods to theTableobject to allow alternative text to be specified for screen readers.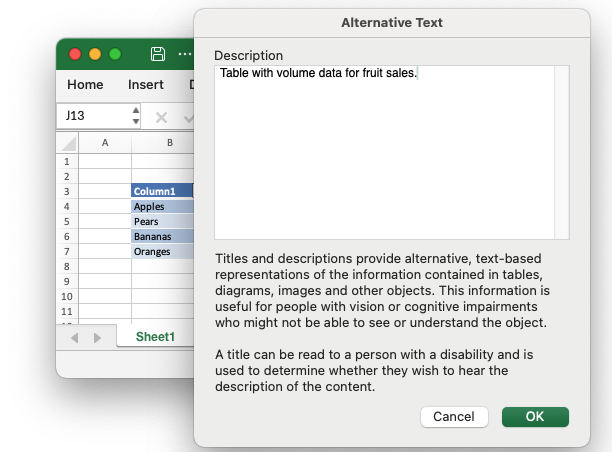
-
Added
Worksheet::insert_image_fit_to_cell_centered()method to fit an image to a cell and also center it.
[0.90.2] - 2025-09-26
Added
- Made
Formula::escape_table_functions()method public. This is to allow third party wrappers likepolars_excel_writerto escape table functions.
[0.90.1] - 2025-09-17
Added
-
Added the
Worksheet::set_zoom_to_fit()method for chartsheets. It ensures that a chartsheet is zoomed automatically by Excel when the window is resized.
- Updated optional
polarsdependency to v0.51.
[0.90.0] - 2025-08-13
Added
- Updated optional
polarsdependency to v0.50, mainly forpolar_excel_writer.
[0.89.1] - 2025-07-10
Fixed
-
Fixed issue where
Worksheet::set_selection()andWorksheet::set_freeze_panes()didn't work together.
[0.89.0] - 2025-06-29
Added
- Updated optional
polarsdependency to v0.49.
[0.88.1] - 2025-06-28
Fixed
- Fixed the way that the
zlibfeature is enabled. This doesn't affectrust_xlsxwriterbut fixes optional enabling via Cargo[features]for third party libraries such aspolars_excel_writer.
[0.88.0] - 2025-06-07
Added
-
Added
jifffeature flag to allow support forJiffcivil date and time types. SeeExcelDateTime. -
Updated
zipdependency to v4.0. This requires a MSRV of 1.75.0. -
Updated polars dependency to v0.48.
Deprecated
-
The
Utility::serialize_chrono_naive_to_excel()function has been deprecated and replaced byUtility::serialize_datetime_to_excel()which supports bothChronoandJiff. It will be removed in a future version. -
The
Utility::serialize_chrono_option_naive_to_excel()function has been deprecated and replaced byUtility::serialize_option_datetime_to_excel()which supports bothChronoandJiff. It will be removed in a future version.
[0.87.0] - 2025-05-15
Fixed
-
Fixed yanked zip.rs dependency.
[0.86.1] - 2025-04-25
Fixed
-
Fixed issue where the incorrect image was displayed when images were used in headers and in cells in separate worksheets.
[0.86.0] - 2025-04-17
Added
-
Enabled
syncfor the internal components ofWorksheetto allow it to bysyncwhen required.
[0.85.0] - 2025-03-26
Added
-
Added support for setting a custom temp file directory when using the
constant_memoryfeature. This can be useful if the default temp directory isn't accessible or if it is loaded in memory (which would negate the effect ofconstant_memorymode).
[0.84.2] - 2025-03-24
Fixed
-
Fixed issue when handling Unicode escapes in strings that don't occur at character boundaries.
Added
- Updated
zip.rsversion to v2.5.x.
[0.84.1] - 2025-03-17
Added
-
Added
serdeserialization support for enum values.Added serialization support for unit variant enum types like
enum Direction {Forward, Reverse, Park}and newtype variant enum types likeenum State {Temperature(i16), Pressure(u32)}.
[0.84.0] - 2025-02-10
Added
-
Added support for merging Formats via the
Format::merge()method.This also enables the automatic handling of implicit formats at the intersection of row and column formats, see Row and Column Formats.

-
Added additional utility/helper functions:
utility::quote_sheet_name()- Enclose a worksheet name in single quotes as required by Excel.utility::worksheet_range()- Convert a worksheet name and cell reference to an Excel "Sheet1!A1:B1" style range string.utility::worksheet_range_absolute()- Convert a worksheet name and cell reference to an Excel "Sheet1!$A$1:$B$1" style absolute range string.
[0.83.0] - 2025-02-04
Added
-
Added support for worksheet outline groupings.
In Excel an outline is a group of rows or columns that can be collapsed or expanded to simplify hierarchical data. It is often used with the
SUBTOTAL()function. For example: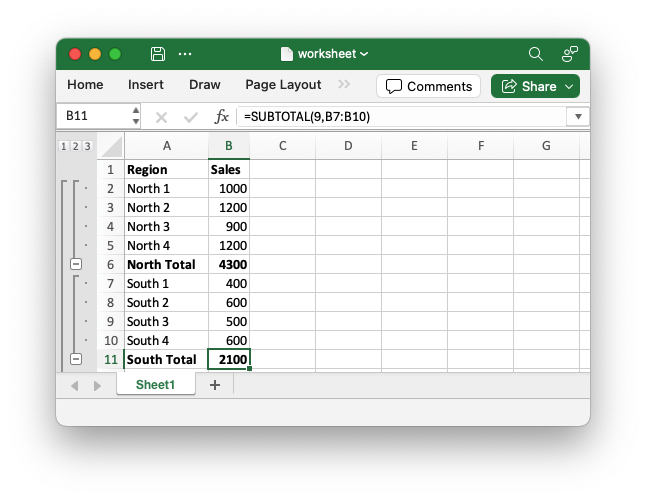
See Grouping and outlining data.
-
Added support for ignoring Excel worksheet cell errors.
Excel flags a number of data errors and inconsistencies with a a small green triangle in the top left hand corner of the cell:
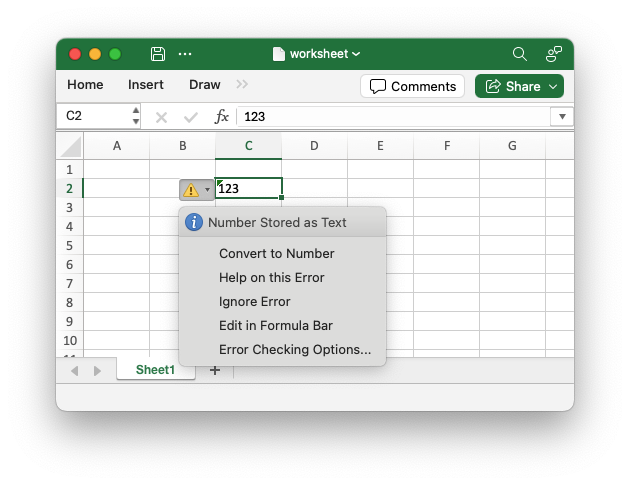
These warnings can be useful indicators that there is an issue in the spreadsheet but sometimes it is preferable to turn them off. At the file level these errors can be ignored by using
Worksheet::ignore_error()andWorksheet::ignore_error_range().
-
Added support for worksheet background images via the
Worksheet::insert_background_image()method.
[0.82.0] - 2025-01-29
Added
-
Added support for checkboxes via the
Worksheet::insert_checkbox()method.Checkboxes are a new feature added to Excel in the last year. They are a way of displaying a boolean value as a checkbox in a cell. The underlying value is still an Excel
TRUE/FALSEboolean value and can be used in formulas and in references.
-
Added support for overriding the default handling of NaN and Infinity numbers. These aren't supported by Excel so they are replaced with default or custom string values. See:
-
Updated
polarsdependency to 0.46 to pick up latest Polars additions forpolars_excel_writer.
[0.81.0] - 2025-01-18
Added
-
Added the optional crate feature
rust_decimalto allow writing theDecimaltype inWorksheet::write()viarust_decimal. This requires that theDecimalcan be represented as af64in Excel. -
Added the
Worksheet::autofit_to_max_width()method to enable autofitting long strings with an upper limit for readability. -
Updated
polarsdependency to 0.45 to pick up latest Polars additions forpolars_excel_writer. -
Added some code changes to prepare for Rust edition 2024.
[0.80.0] - 2024-12-07
Fixed
-
Fixed issue where unnecessary heap memory was being used to zip worksheets in
constant_memorymode. This version is a recommended upgrade for anyone using that mode/feature.
Added
-
Added the
utility::cell_autofit_width()function to allow users to calculate a string auto-fit width so that they can implement their own auto-fit functionality with additional logic. -
Updated
polarsdependency to 0.44 to pick up latest Polars additions forpolars_excel_writer.
[0.79.4] - 2024-11-18
Fixed
-
Fixed issue when handling PNG images with 0 DPI but with DPI units set.
[0.79.3] - 2024-11-15
Added
-
Made the
FilterData::new_string_and_criteria()andFilterData::new_number_and_criteria()functions public to allows users to implement theIntoFilterDatatrait.
Fixed
-
Fixed maximum cell width when autofitting columns. The maximum width is now constrained to the Excel limit of 255 characters/1790 pixels.
[0.79.2] - 2024-11-09
Added
-
Added support for adding multiple objects (charts, images, shapes and buttons) of the same type in the same cell, but with unique offset values. This allows the user to position multiple objects using the same cell reference and different offset values when using functions like
Worksheet::insert_chart_with_offset().
[0.79.1] - 2024-10-31
Fixed
-
Fixed issue where the precedence order of conditional formats wasn't being preserved and the rules were being sorted into row/column order instead of insertion order. This issue would only be visible with nested conditional formats and shouldn't affect most users.
[0.79.0] - 2024-10-04
Added
-
Added support for files larger than 4GB.
The
rust_xlsxwriterlibrary uses the zip.rs crate to provide the zip container for the xlsx file that it generates. The size limit for a standard zip file is 4GB for the overall container or for any of the uncompressed files within it. Anything greater than that requires ZIP64 support. In practice this would apply to worksheets with approximately 150 million cells, or more.
[0.78.0] - 2024-10-01
Added
-
Added support for constant memory mode to reduce memory usage when writing large worksheets.
The
constant_memorymode works by flushing the current row of data to disk when the user writes to a new row of data. This limits the overhead to one row of data stored in memory. Once this happens it is no longer possible to write to a previous row since the data in the Excel file must be in row order. As such this imposes the limitation of having to structure your code to write in row by row order. The benefit is that the required memory usage is very low, and effectively constant, regardless of the amount of data written.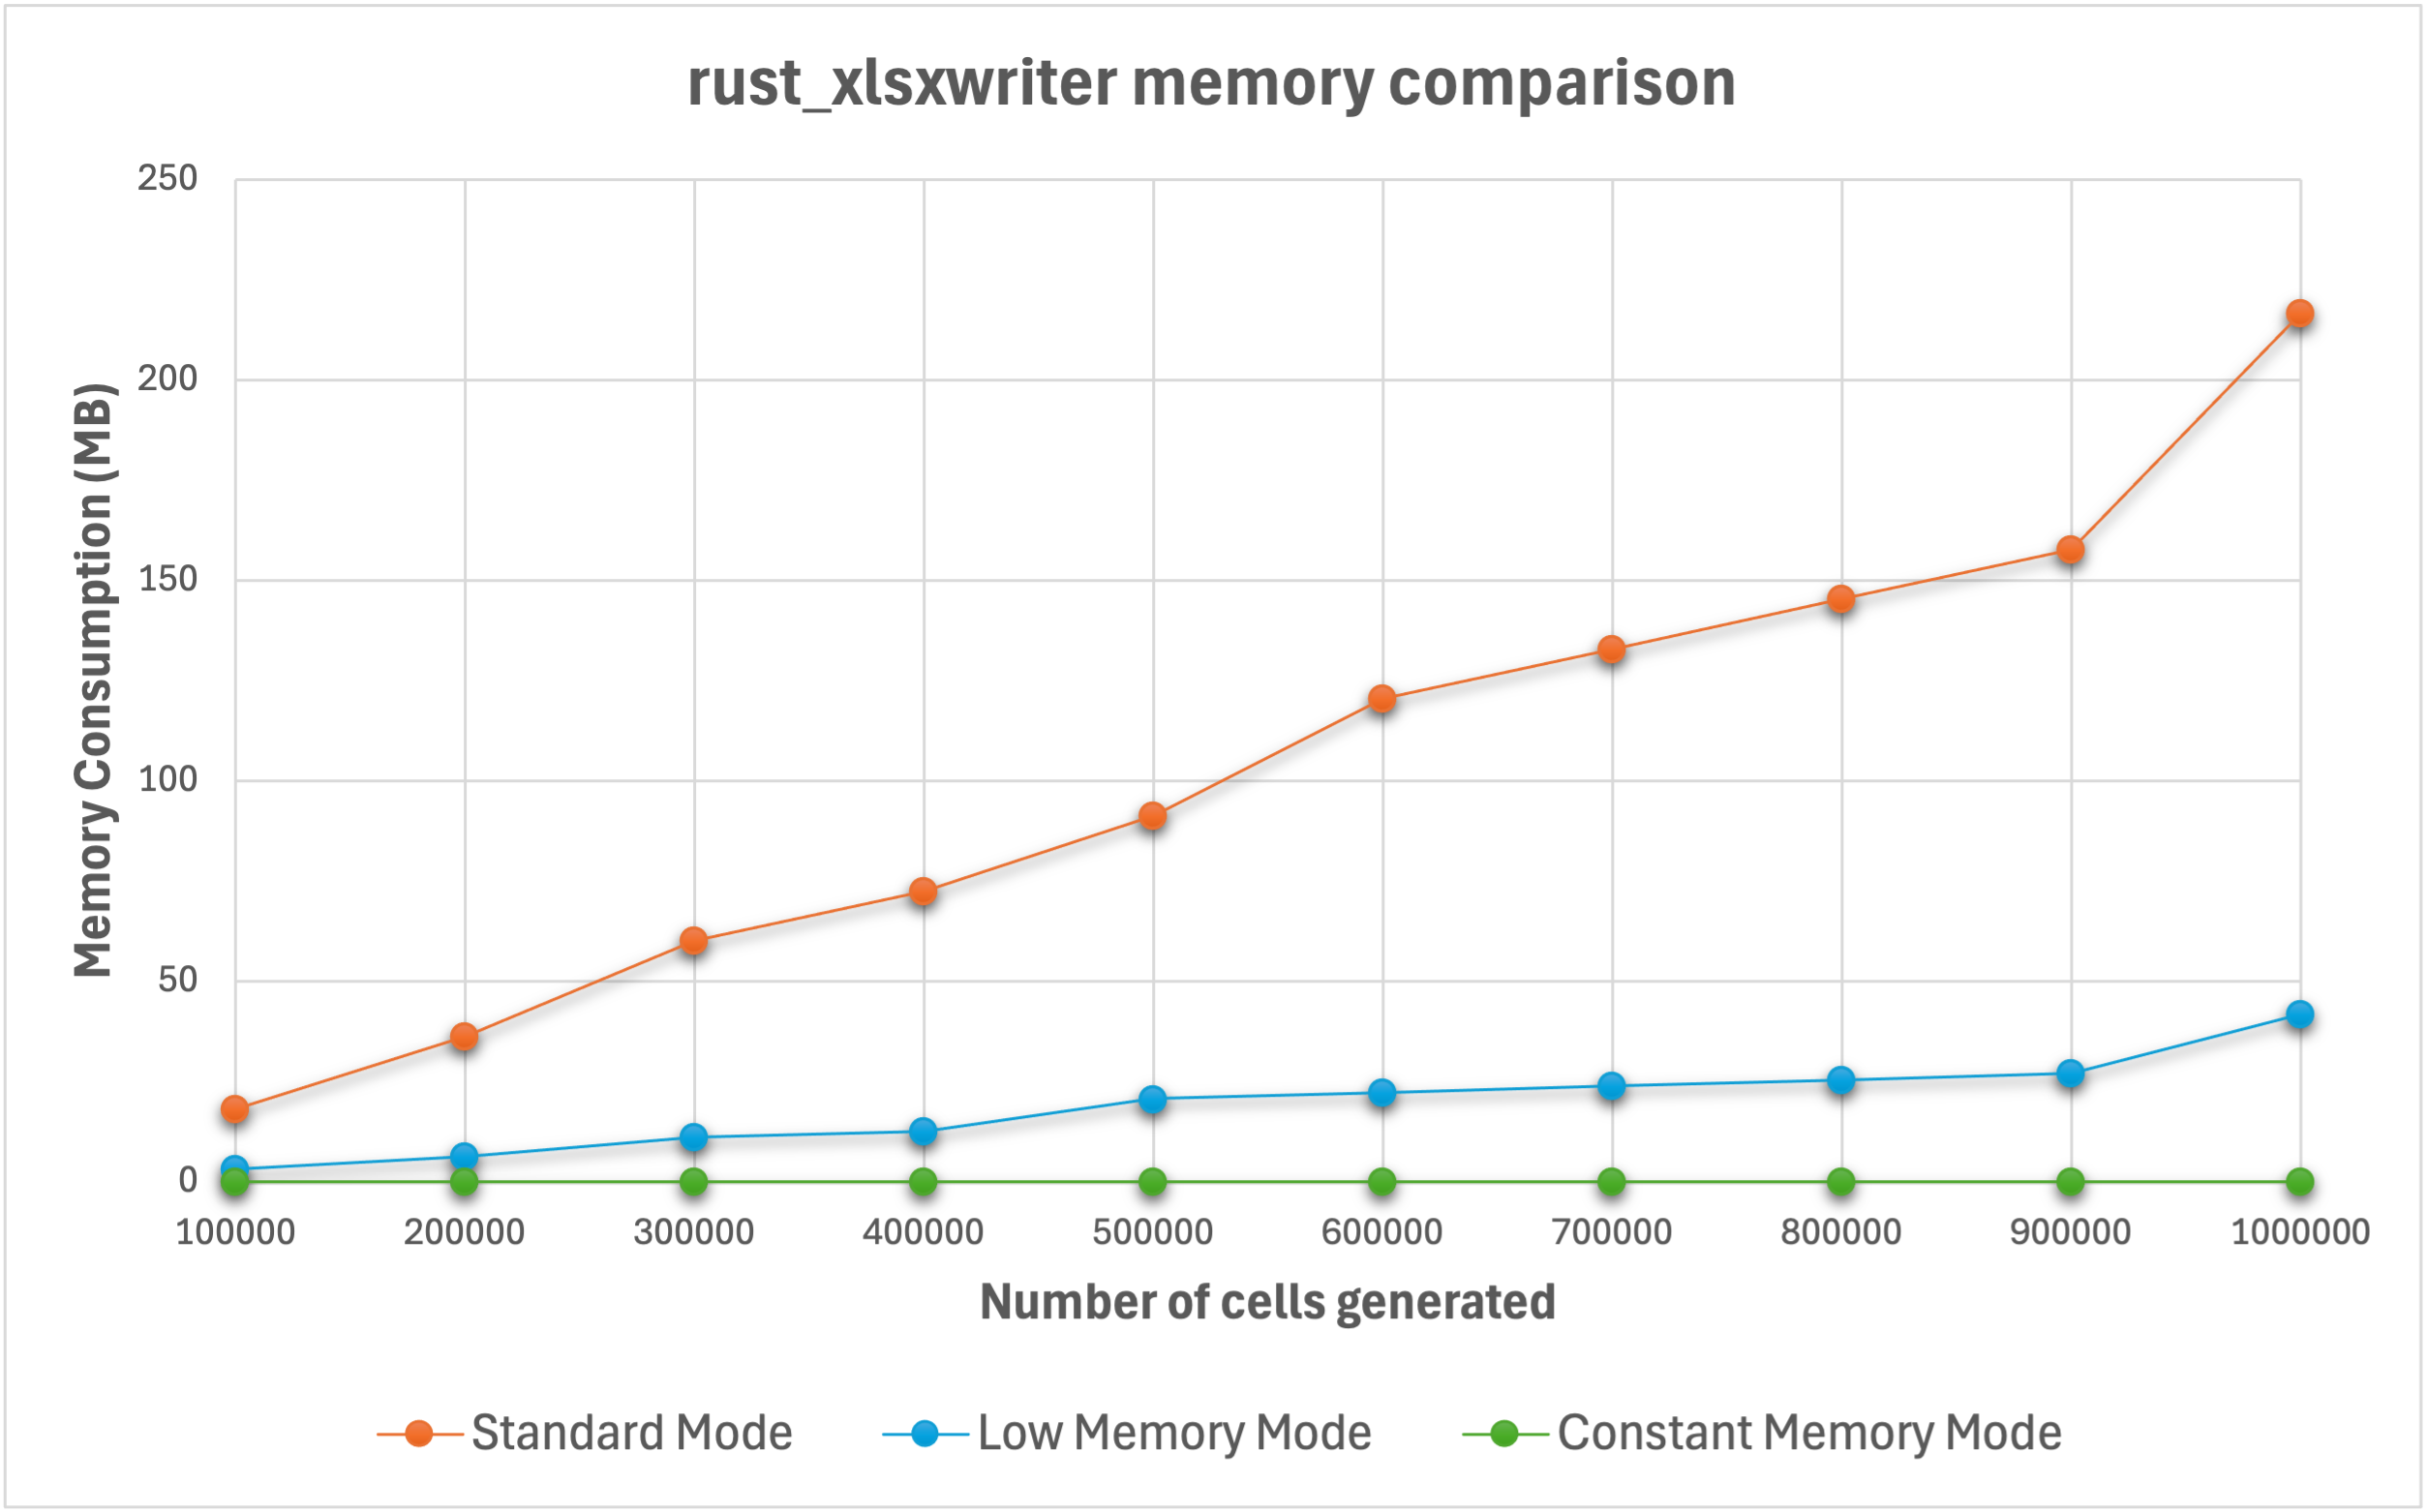
[0.77.0] - 2024-09-18
Added
-
Added support for Chartsheets.
A Chartsheet in Excel is a specialized type of worksheet that doesn't have cells but instead is used to display a single chart. It supports worksheet display options such as headers and footers, margins, tab selection and print properties.
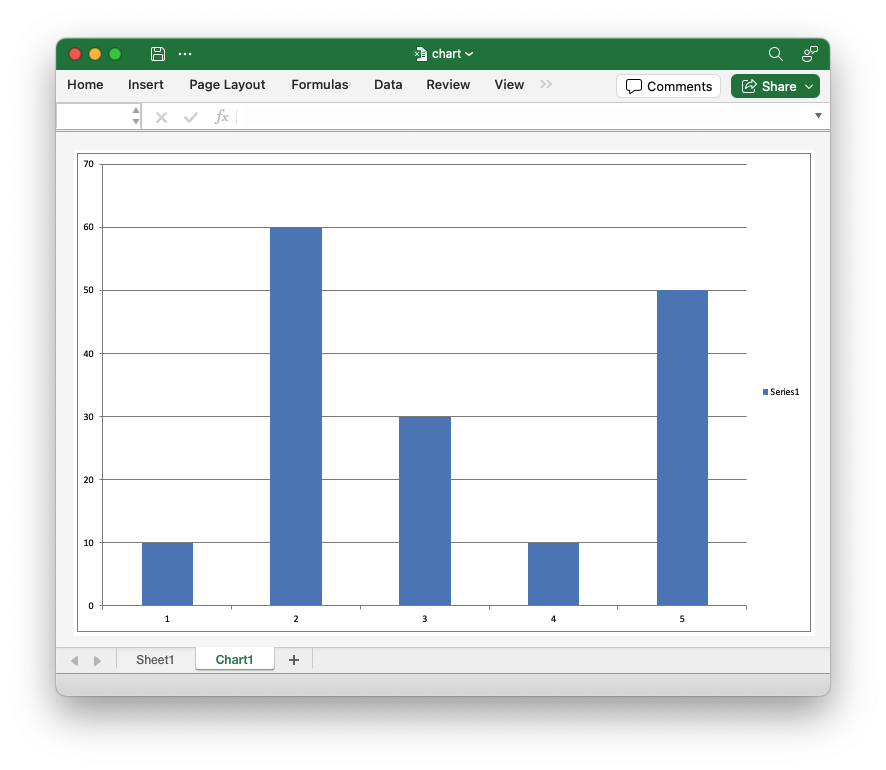
-
Updated
polarsdependency to 0.43 to pick up latest Polars additions forpolars_excel_writer.
[0.76.0] - 2024-09-11
Added
-
Added support for adding Textbox shapes to worksheets. See the documentation for
Shape.
[0.75.0] - 2024-09-02
Removed
-
Removed dependency on the
regex.rscrate for smaller binary sizes. The only non-optional dependency is nowzip.rs.An example of the size difference is shown below for one of the sample apps:
app_hello_worldv0.74.0 v0.75.0 Debug 9.2M 4.2M Release 3.4M 1.6M -
Removed the
Formula::use_future_functions()andFormula::use_table_functions()methods since there functionality is now handled automatically as a result of theregexchange.
[0.74.0] - 2024-08-24
Added
-
Add methods to format cells separately from the data writing functions.
In Excel the data in a worksheet cell is comprised of a type, a value and a format. When using
rust_xlsxwriterthe type is inferred and the value and format are generally written at the same time using methods likeWorksheet::write_with_format().However, if required you can write the data separately and then add the format using the new methods like
Worksheet::set_cell_format(),Worksheet::set_range_format()andWorksheet::set_range_format_with_border().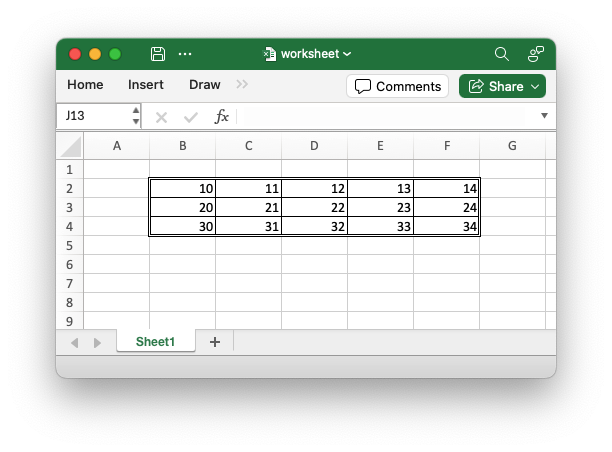
-
Replaced the
IntoColortrait withInto<Color>in all APIs. This doesn't require a change by the end user (unless they implementedIntoColorfor their own type). -
Updated
polarsdependency to 0.42.0 to pick up latest Polars additions forpolars_excel_writer.
[0.73.0] - 2024-08-02
Added
-
Added support for setting the default worksheet row height and also hiding all unused rows.
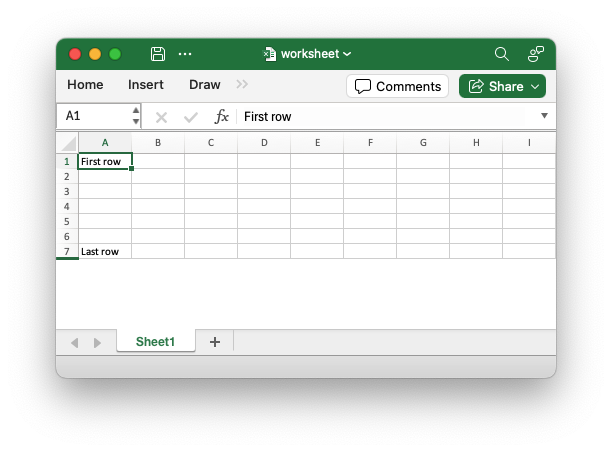
See
Worksheet::set_default_row_height()andWorksheet::hide_unused_rows().
[0.72.0] - 2024-07-26
Added
-
Added support for cell Notes (previously called Comments). See the documentation for
Note.A Note is a post-it style message that is revealed when the user mouses over a worksheet cell. The presence of a Note is indicated by a small red triangle in the upper right-hand corner of the cell.

In versions of Excel prior to Office 365 Notes were referred to as "Comments". The name Comment is now used for a newer style threaded comment and Note is used for the older non threaded version.
[0.71.0] - 2024-07-20
Added
-
Added support for adding VBA Macros to
rust_xlsxwriterusing files extracted from Excel files.An Excel
xlsmfile is structurally the same as anxlsxfile except that it contains an additionalvbaProject.binbinary file containing VBA functions and/or macros.Unlike other components of an xlsx/xlsm file this data isn't stored in an XML format. Instead the functions and macros as stored as a pre-parsed binary format. As such it wouldn't be feasible to programmatically define macros and create a
vbaProject.binfile from scratch (at least not in the remaining lifespan and interest levels of the author).Instead, as a workaround, the Rust
vba_extractutility is used to extractvbaProject.binfiles from existing xlsm files which can then be added torust_xlsxwriterfiles.
[0.70.0] - 2024-07-14
Added
-
Added support for adding Excel data validations to worksheet cells.
Data validation is a feature of Excel that allows you to restrict the data that a user enters in a cell and to display associated help and warning messages. It also allows you to restrict input to values in a dropdown list.
See
DataValidationfor details.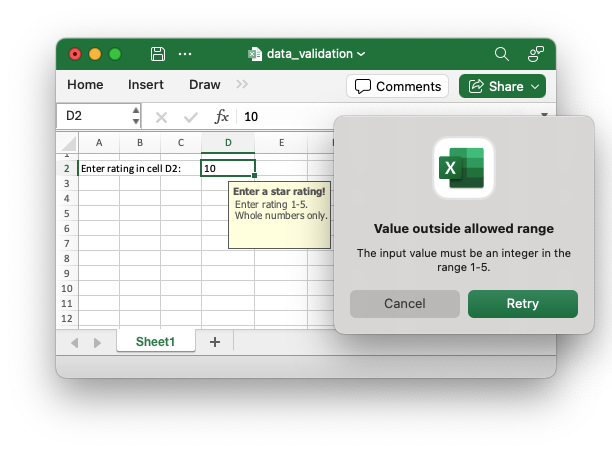
[0.69.0] - 2024-07-01
Added
- Added support for adjusting the layout position of chart elements: plot
area, legend, title, and axis labels. See
ChartLayout.
Fixed
-
Fixed issue where a worksheet name required quoting when used with
Worksheet::repeat_row(). There was some checks to handle this but they weren't comprehensive enough. Issue #95.
[0.68.0] - 2024-06-18
Added
-
Added support for urls in images. Feature Request #91.
Changed
- Changed the method signatures of the
Imagehelper methods from&mut selftomut selfto allow method chaining. This is an API/ABI break.
[0.67.0] - 2024-06-17
Added
-
Updated the default
zip.rsrequirement to v2+ to pick up a fix for zip-rs/zip2#100 when dealing with 64k+ internal files in an xlsx container. As a result of this,rust_xlsxwriternow has a matchingmsrv(Minimum Supported Rust Version) of v1.73.0. -
Replaced the dependency on
lazy_staticwithstd::cell::OnceLock. The only non-optional requirements are nowzipandregex. This was made possible by the abovemsrvupdate. See Feature Request #24. -
Added an optional dependency on the ryu crate to speed up writing large amounts of worksheet numeric data. The feature flag is
ryu.This feature has a benefit when writing more than 300,000 numeric data cells. When writing 5,000,000 numeric cells it can be 30% faster than the standard feature set. See the following performance analysis but also please test it for your own scenario when enabling it since a performance improvement is not guaranteed in all cases.
-
Added Excel Sensitivity Label cookbook example and explanation.
Sensitivity Labels are a property that can be added to an Office 365 document to indicate that it is compliant with a company’s information protection policies. Sensitivity Labels have designations like “Confidential”, “Internal use only”, or “Public” depending on the policies implemented by the company. They are generally only enabled for enterprise versions of Office.
-
Updated all dependency versions to the latest current values.
[0.66.0] - 2024-06-12
Added
- Added example of using a secondary X axis. See Chart Secondary Axes.
Changed
- Changed
ChartSeries::set_y2_axis()toChartSeries::set_secondary_axis()for API consistency.
[0.65.0] - 2024-06-11
Added
-
Added support for Chart Secondary Axes and Combined Charts.
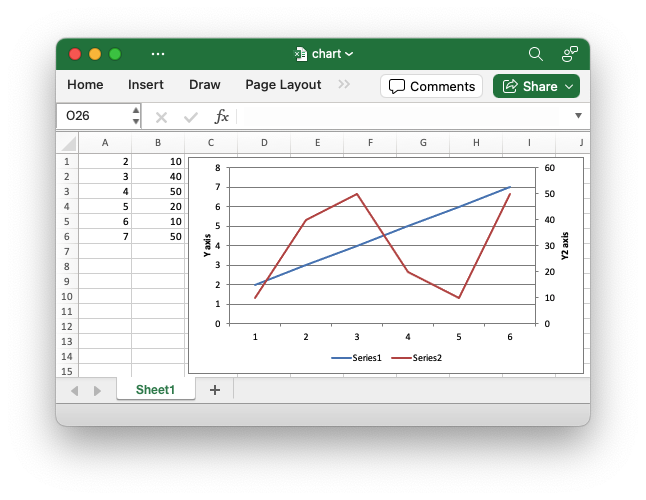
[0.64.2] - 2024-04-13
Fixed
- Fixed internal links in table of contents.
[0.64.1] - 2024-03-26
Added
- Added the
worksheet::set_screen_gridlines()method to turn on/offscreen gridlines.
- Added updated docs on Working with Workbooks and Working with Worksheets.
[0.64.0] - 2024-03-18
Added
-
Add support for worksheet sparklines. Sparklines are a feature of Excel 2010+ which allows you to add small charts to worksheet cells. These are useful for showing data trends in a compact visual format.

[0.63.0] - 2024-02-25
Added
-
Added support for embedding images into worksheets with
worksheet::embed_image()andworksheet::embed_image_with_format()and theImagestruct. See the Embedded Images example.This can be useful if you are building a spreadsheet of products with a column of images for each product. Embedded images move with the cell so they can be used in worksheet tables or data ranges that will be sorted or filtered.
This functionality is the equivalent of Excel's menu option to insert an image using the option to "Place in Cell" which is available in Excel 365 versions from 2023 onwards.
-
Updated
polarsdependency to 0.37.2 to pick up latest Polars additions forpolars_excel_writer. -
Added
utility::check_sheet_name()function to allow checking for valid worksheet names according to Excel's naming rules. This functionality was previouslypub(crate)private.
Removed
-
Removed unnecessary lifetime on
Formatobjects used in Worksheetwrite()methods. This allows the theIntoExcelDatatrait to be defined for user types and have them include a default format. See Feature Request #85.
[0.62.0] - 2024-01-24
Added
-
Added support for adding a worksheet
Tableas a serialization format. SeeSerializeFieldOptions::set_table(). -
Added
Worksheet::get_serialize_dimensions()andWorksheet::get_serialize_column_dimensions()methods to get dimensions from a serialized range. -
Updated
polarsdependency to 0.36.2 to pick up PolarsAnyDatachanges forpolars_excel_writer.
Changed
- Changed APIs for
Tableto returnTableinstead of&Tableto allow methods to be chained. This makes worksheet Table usage easier during serialization. Note that this is a backward incompatible change.
[0.61.0] - 2024-01-13
Added
-
Added support for a
XlsxSerializederive and struct attributes to control the formatting and options of the Excel output during serialization. These are similar in intention to Serde container/field attributes.See Controlling Excel output via
XlsxSerializeand struct attributes and Working with Serde. -
Added
XlsxError::CustomErroras a target error for external crates/apps.
[0.60.0] - 2024-01-02
Added
-
Added support for setting Serde headers using deserialization of a target struct type as well as the previous method of using serialization and an instance of the struct type. See Setting serialization headers.
-
Added additional support for serialization header and field options via
CustomSerializeField. -
Added support for writing
Result<T, E>withWorksheet::write()whenTandEare supported types.
[0.59.0] - 2023-12-15
Added
- Added
serialize_option_datetime_to_excel()to help serialization ofOptionChrono types. Feature Request #62.
[0.58.0] - 2023-12-11
Added
-
Added serialization support for
ExcelDateTimeandChronodate/time types. See Working with Serde - Serializing dates and times.
[0.57.0] - 2023-12-09
Added
-
Added support for Serde serialization. This requires the
serdefeature flag to be enabled. See Working with Serde. -
Added support for writing
u64andi64number within Excel's limitations. This implies a loss of precision outside Excel's integer range of +/- 999,999,999,999,999 (15 digits).
[0.56.0] - 2023-11-27
Added
-
Changed some of the Conditional Format interfaces introduced in the previous release to use extended enums. This is an API change with the version released earlier this week but it provides a cleaner interface.
-
Added support for
Option<T>wrapped types toWorksheet::write().
[0.55.0] - 2023-11-21
Added
- Added support for conditional formatting. See Working with Conditional Formats.
[0.54.0] - 2023-11-04
Added
-
Added option to add a chart data table to charts via the
Chart::set_data_table()andChartDataTable. -
Added option to set the display units on a Y-axis to units such as Thousands or Millions via the
ChartAxis::set_display_unit_type()method. -
Added option to set the crossing position of axes via the
ChartAxis::set_crossing()method. -
Added option to set the axes label alignment via the
ChartAxis::set_label_alignment()method. -
Added option to turn on/off line smoothing for Line and Scatter charts via the
ChartSeries::set_smooth()method.
[0.53.0] - 2023-10-30
Added
-
Added support for Excel Stock charts. See the Stock Chart cookbook example.
-
Added support to charts for:
- Up-Down bars via the
Chart::set_up_down_bars()struct and methods. - High-Low lines via the
Chart::set_high_low_lines()struct and methods. - Drop lines via the
Chart::set_high_low_lines()struct and methods. - Chart axis support for Date, Text, and Automatic axes via the
ChartAxis::set_date_axis(),ChartAxis::set_text_axis(), andChartAxis::set_automatic_axis()methods. - Chart axis support for minimum and maximum date values via the
ChartAxis::set_min_date()andChartAxis::set_max_date()methods.
- Up-Down bars via the
-
Add worksheet syntactic helper methods
Worksheet::write_row_with_format()andWorksheet::write_column_with_format().
[0.52.0] - 2023-10-20
Added
- Added support for chart series error bars via the
ChartErrorBarsstruct and methods.
Fixed
-
Fixed XML error in non-Pie charts.
[0.51.0] - 2023-10-15
Added
-
Added support for chart gradient fill formatting via the
ChartGradientFillstruct and methods. -
Added support for formatting the chart trendlines' data labels via the
ChartTrendline::set_label_fontandChartTrendline::set_label_formatmethods.
[0.50.0] - 2023-10-12
Added
-
Added support for chart trendlines (Linear, Polynomial, Moving Average, etc.) via the
ChartTrendlinestruct and methods. -
Added the
Worksheet::set_very_hidden()method to hide a worksheet similar to theWorksheet::set_hidden()method. The difference is that the worksheet can only be unhidden by VBA and cannot be unhidden in the the Excel user interface. -
Added support for leader lines to non-Pie charts.
Fixed
- Fixed handling of future functions in table formulas.
[0.49.0] - 2023-09-19
Added
-
Added chart options to control how non-data cells are displayed.
- Updated Polar's dependency and
PolarErrorimport to reflect changes in Polars v 0.33.2.
[0.48.0] - 2023-09-08
Added
- Added support for custom total formulas to
TableFunction.
[0.47.0] - 2023-09-02
Added
-
Added
wasmfeature flag to help compilation on Wasm/Javascript targets. Also added mapping from aXlsxErrorto aJsValueerror.See the rust_xlsx_wasm_example sample application that demonstrates accessing
rust_xlsxwritercode from JavaScript, Node.js, Deno and Wasmtime. -
Added
Workbook::save_to_writer()method to make it easier to interact with interfaces that implement the<W: Write>trait.
[0.46.0] - 2023-08-20
Added
-
Added
polarsfeature flag to help interoperability with Polars. Currently it only implementsPolarsErrorandXlsxErrormapping but other functionality may be added in the future. These changes are added to support thepolars_excel_writercrate.
[0.45.0] - 2023-08-12
Fixed
-
Fixed "multiply with overflow" issue when image locations in the worksheet were greater than the maximum
u32value.Related to GitHub Issue #51.
[0.44.0] - 2023-08-02
Added
- Added threading into the backend worksheet writing for increased performance with large multi-worksheet files.
[0.43.0] - 2023-07-27
Added
- Added support for worksheet
Tableheader and cell formatting via theTableColumn::set_format()andTableColumn::set_header_format()methods.
[0.42.0] - 2023-07-11
Changed
-
Made the
chronofeature optionally off instead of optionally on. Thechronofeature must now be explicitly enabled to allow support forChronotypes. -
Renamed the worksheet
write_datetime()method to the API consistentwrite_datetime_with_format()and introduced a newwrite_datetime()method that doesn't take a format. This is required to fix a error in the APIs that prevented an unformatted datetime from taking the row or column format.Note: This is a backwards incompatible change.
See GitHub Issue #47.
Added
-
Added a Tutorial and Cookbook section to the
doc.rsdocumentation. -
Added a check, and and error result, for case-insensitive duplicate sheet names. Also added sheet name validation to chart series.
See GitHub Issue #45.
-
Added cell range name handling utility functions:
column_number_to_name()- Convert a zero indexed column cell reference to a string like"A".column_name_to_number()- Convert a column string such as"A"to a zero indexed column reference.row_col_to_cell()- Convert zero indexed row and column cell numbers to aA1style string.row_col_to_cell_absolute()- Convert zero indexed row and column cell numbers to an absolute$A$1style range string.cell_range()- Convert zero indexed row and col cell numbers to aA1:B1style range string.cell_range_absolute()- Convert zero indexed row and col cell numbers to an absolute$A$1:$B$1
[0.41.0] - 2023-06-20
-
Added the native
ExcelDateTimestruct to allow handling of dates and times without a dependency on theChronolibrary. The Chrono library is now an optional feature/dependency. It is included by default in this release for compatibility with previous versions but it will be optionally off in the next and subsequent versions.All date/time APIs support both the native
ExcelDateTimeandChronotypes via theIntoExcelDateTimetrait.The
worksheet.write_date()andworksheet.write_time()methods have been moved to "undocumented" since the same functionality is available viaWorksheet::write_datetime(). This is a soft deprecation.
[0.40.0] - 2023-05-31
-
Added support for worksheet tables. See
Tableand theWorksheet::add_table()method. -
Added support for the
booltype in the genericWorksheet::write()method.
[0.39.0] - 2023-05-23
Added
-
Added
Worksheet::write_row(),Worksheet::write_column(),Worksheet::write_row_matrix()andWorksheet::write_column_matrix()methods to write arrays/iterators of data. -
Added
FormulaandUrltypes to use with genericWorksheet::write(). -
Make several string handling APIs more generic using
impl Into<String>. -
Renamed/refactored
XlsxColortoColorfor API consistency. TheXlsxColortype alias is still available for backward compatibility.
[0.38.0] - 2023-05-05
Added
-
Added several Chart axis and series methods:
ChartAxis::set_hidden()ChartAxis::set_label_interval()ChartAxis::set_label_position()ChartAxis::set_log_base()ChartAxis::set_major_gridlines()ChartAxis::set_major_gridlines_line()ChartAxis::set_major_tick_type()ChartAxis::set_major_unit()ChartAxis::set_max()ChartAxis::set_min()ChartAxis::set_minor_gridlines()ChartAxis::set_minor_gridlines_line()ChartAxis::set_minor_tick_type()ChartAxis::set_minor_unit()ChartAxis::set_position_between_ticks()ChartAxis::set_reverse()ChartAxis::set_tick_interval()ChartSeries::set_invert_if_negative()ChartSeries::set_invert_if_negative_color()
[0.37.0] - 2023-04-30
Added
-
Added font formatting support to chart titles, legends, axes and data labels via
ChartFontand variousset_font()methods. -
Made
Worksheet::write_string()andWorksheet::write()more generic viaimpl Into<String>to allow them to handle&str,&String,String, andCow<>types.
[0.36.1] - 2023-04-18
Fix cargo/release issue with 0.36.0 release.
[0.36.0] - 2023-04-18
Added
- Added performance improvement for applications that use a lot of
Formatobjects. GitHub Issue #30.
Fixed
- Fixed issue introduced in v0.34.0 where
Rc<>value was blockingSendin multithreaded applications. GitHub Issue #29.
[0.35.0] - 2023-04-16
Added
- Added support for Chart Series data labels including custom data labels. See
ChartDataLabel,Chart::series.set_data_label()andChart::series.set_custom_data_labels().
[0.34.0] - 2023-04-12
Added
Performance improvement release.
-
Added optimizations across the library. For larger files this version is 10% faster than previous versions.
These optimizations were provided by Adrián Delgado, see GitHub Issue #23.
-
Added crate feature
zlibwhich adds a dependency on zlib and a C compiler but is around 1.6x faster for larger files. With this feature enabled it is even faster than the native C version libxlsxwriter by around 1.4x for large files.See also the Performance section of the user guide.
[0.33.0] - 2023-04-10
Added
-
Added support for formatting and setting chart points via the
ChartPointstruct. This is mainly useful as the way of specifying segment colors in Pie charts.See the updated Pie Chart example in the user guide.
-
Added support for formatting and setting chart markers via the
ChartMarkerstruct. -
Added
Chart::set_rotation()andChart::set_hole_size()methods for Pie and Doughnut charts. -
Added support to differentiate between
Color::DefaultandColor::Automaticcolors for Excel elements. These are usually equivalent but there are some cases where the "Automatic" color, which can be set at a system level, is different from the Default color.
[0.32.0] - 2023-04-03
Added
- Added formatting for the chart title and axes via the the
ChartFormatstruct.
[0.31.0] - 2023-04-02
Added
- Added formatting for the chart area, plot area, and legend via the the
ChartFormatstruct.
[0.30.0] - 2023-03-31
Added
-
Added chart formatting for Lines, Borders, Solid fills and Pattern fills via the
ChartFormatstruct. This is currently only available for chart series but it will be extended in the next release for most other chart elements.See also the Chart Fill Pattern example in the user guide.
-
Added
IntoColortrait to allow syntactic shortcuts forColorparameters in methods. So now you can set a RGB color like thisobject.set_color("#FF7F50")instead of the more verboseobject.set_color(Color::RGB(0xFF7F50)). This addition doesn't require any API changes from the end user. -
Added
Worksheet::insert_image_fit_to_cell()method to add an image to a worksheet and scale it so that it fits in a cell. This method can be useful when creating a product spreadsheet with a column of images for each product.See also the insert_image_to_fit example in the user guide.
-
Added
Chart::series.set_gap()andChart::series.set_overlap()method to control layout of histogram style charts.
[0.29.0] - 2023-03-16
Added
-
Added support for resizing and object positioning to the
Chartstruct. -
Added handling for
chronodate/time types to the genericWorksheet::write()method.
[0.28.0] - 2023-03-14
Added
- Added support for positioning or hiding Chart legends. See
ChartLegend.
[0.27.0] - 2023-03-13
Added
-
Added support for Charts via the
Chartstruct and theWorksheet::insert_chart()method. See also the Chart Examples in the user guide. -
Added a generic
Worksheet::write()method that writes string or number types. This will be extended in an upcoming release to provide a singlewrite()method for all of the currently supported types.It also allows the user to extend
Worksheet::write()to handle user defined types via theIntoExcelDatatrait. See also the Writing Generic data example in the user guide.
[0.26.0] - 2023-02-03
Note: this version contains a major refactoring/renaming of some of the main data writing functions and some of the enums and secondary structs. This will require code changes from all current users but will allow more consistent APIs in future releases. Nevertheless, I apologize for this level of change.
Changed
-
The following worksheet functions have changed names to reflect their frequency of usage.
Previous name New name write_string_only()write_string()write_number_only()write_number()write_formula_only()write_formula()write_boolean_only()write_boolean()write_rich_string_only()write_rich_string()write_array_formula_only()write_array_formula()write_dynamic_array_formula_only()write_dynamic_array_formula()write_array_formula()write_array_formula_with_format()write_boolean()write_boolean_with_format()write_dynamic_array_formula()write_dynamic_array_formula_with_format()write_formula()write_formula_with_format()write_number()write_number_with_format()write_rich_string()write_rich_string_with_format()write_string()write_string_with_format() -
The following enums and structs have changed to a more logical naming:
Previous name New name XlsxAlignFormatAlignXlsxBorderFormatBorderXlsxDiagonalBorderFormatDiagonalBorderXlsxPatternFormatPatternXlsxScriptFormatScriptXlsxUnderlineFormatUnderlineXlsxObjectMovementObjectMovementXlsxImagePositionHeaderImagePositionProtectWorksheetOptionsProtectionOptionsPropertiesDocProperties -
The
DocProperties::set_custom_property()method replaces several type specific methods with a single trait based generic method.
[0.25.0] - 2023-01-30
Added
-
Added ability to filter columns in
Worksheet::autofilter()ranges viaWorksheet::filter_column()andFilterCondition.The library automatically hides any rows that don't match the supplied criteria. This is an additional feature that isn't available in the other language ports of "xlsxwriter".
See also the Working with Autofilters section of the Users Guide.
[0.24.0] - 2023-01-18
Added
- Added support for hiding rows and columns (to hide intermediate calculations)
via the
Worksheet::set_column_hidden()andWorksheet::set_row_hidden()methods. This is also a required precursor to adding autofilter conditions. - Added the ObjectMovement enum to control how a worksheet object, such a an image, moves when the cells underneath it are moved, resized or deleted.
[0.23.0] - 2023-01-16
Added
Added more page setup methods.
- Added
Worksheet::set_selection()method to select a cell or range of cells in a worksheet. - Added
Worksheet::set_top_left_cell()method to set the top and leftmost visible cell. - Added
Worksheet::set_page_breaks()method to add page breaks to a worksheet.
[0.22.0] - 2023-01-13
Added
-
Added support for worksheet protection via the
Worksheet::protect(),Worksheet::protect_with_password()andWorksheet::protect_with_options().See also the section on Worksheet protection in the user guide.
-
Add option to make the xlsx file read-only when opened by Excel via the
Workbook::read_only_recommended()method.
[0.21.0] - 2023-01-09
Added
- Added support for setting document metadata properties such as Author and
Creation Date. For more details see
DocPropertiesandworkbook::set_properties().
Changed
- Change date/time parameters to references in
Worksheet::write_datetime(),worksheet.write_date()andworksheet.write_time()for consistency.
[0.20.0] - 2023-01-06
Added
- Improved fitting algorithm for
Worksheet::autofit(). See also the app_autofit sample application.
Changed
- The
worksheet.set_autofit()method has been renamed toworksheet.autofit()for consistency with the other language versions of this library.
[0.19.0] - 2022-12-27
Added
-
Added support for created defined variable names at a workbook and worksheet level via
Workbook::define_name().See also Using defined names in the user guide.
-
Added initial support for autofilters via
Worksheet::autofilter().Note, adding filter criteria isn't currently supported. That will be added in an upcoming version. See also Adding Autofilters in the user guide.
[0.18.0] - 2022-12-19
Added
-
Added support for "rich" strings with multiple font formats via
Worksheet::write_rich_string()andWorksheet::write_rich_string_with_format(). For example, strings like "This is bold and this is italic".See also the Rich strings example in the user guide.
[0.17.1] - 2022-12-18
Fixed
- Fixes issue where header image files became corrupt during incremental saves. Also fixes similar issues in some formatting code.
[0.17.0] - 2022-12-17
Added
-
Added support for images in headers/footers via the
Worksheet::set_header_image()andWorksheet::set_footer_image()methods.See the Headers and Footers and Adding a watermark examples in the user guide.
[0.16.0] - 2022-12-09
Added
- Replicate the optimization used by Excel where it only stores one copy of a repeated/duplicate image in a workbook.
[0.15.0] - 2022-12-08
Added
-
Added support for images in buffers via
Image::new_from_buffer(). -
Added image accessibility features via
Image::set_alt_text()andImage::set_decorative().
[0.14.0] - 2022-12-05
Added
-
Added support for inserting images into worksheets with
Worksheet::insert_image()andWorksheet::insert_image_with_offset()and theImagestruct.See also the images example in the user guide.
Upcoming versions of the library will support additional image handling features such as EMF and WMF formats, removal of duplicate images, hyperlinks in images and images in headers/footers.
Removed
- The
Workbook::save()method has been extended to handle paths or strings. Theworkbook.save_to_path()method has been removed. See PR #15.
[0.13.0] - 2022-11-21
Added
-
Added support for writing hyperlinks in worksheets via the following methods:
Worksheet::write_url()to write a link with a default hyperlink format style.Worksheet::write_url_with_text()to add alternative text to the link.Worksheet::write_url_with_format()to add an alternative format to the link.
See also the hyperlinks example in the user guide.
[0.12.1] - 2022-11-09
Changed
-
Dependency changes to make WASM compilation easier:
- Reduced the
zipdependency to the minimum import only. - Removed dependency on
tempfile. The library now uses in memory files.
- Reduced the
[0.12.0] - 2022-11-06
Added
- Added
Worksheet::merge_range()method. - Added support for Theme colors to
Color. See also Working with Colors in the user guide.
[0.11.0] - 2022-11-04
Added
-
Added several worksheet methods for working with worksheet tabs:
Worksheet::set_active(): Set the active/visible worksheet.Worksheet::set_tab_color(): Set the tab color.Worksheet::set_hidden(): Hide a worksheet.Worksheet::set_selected(): Set a worksheet as selected.Worksheet::set_first_tab(): Set the first visible tab.
See also Working with worksheet tabs in the user guide.
[0.10.0] - 2022-11-03
Added
-
Added a simulated
Worksheet::autofit()method to automatically adjust the width of columns with data. See also the app_autofit sample application. -
Added the
Worksheet::set_freeze_panes()method to set "freeze" panes for worksheets. See also the app_panes example application.
[0.9.0] - 2022-10-31
Note, this version contains a major backward incompatible API change where it
restructures the Workbook constructor/destructor sequence and introduces a
save() method to replace close().
Changed
- The
Workbook::new()method no longer takes a filename. Instead the naming of the file has move to aWorkbook::save()method which replacesworkbook.close().
Added
-
Added new methods to get references to worksheet objects used by the workbook:
-
Made the
Worksheet::new()method public and added theWorkbook::push_worksheet()to add Worksheet instances to a Workbook. See also therust_xlsxwriterdocumentation on Creating Worksheets and working with the borrow checker.
[0.8.0] - 2022-10-28
Added
-
Added support for creating files from paths via
workbook.new_from_path(). -
Added support for creating file to a buffer via
workbook.new_from_buffer()andworkbook.close_to_buffer().
[0.7.0] - 2022-10-22
Added
-
Added an almost the complete set of Page Setup methods:
-
Page Setup - Page
-
Page Setup - Margins
-
Page Setup - Header/Footer
-
Page Setup - Sheet
Fixes
- Fix for cargo issue where chrono dependency had a RUSTSEC warning. GitHub Issue #6.
[0.6.0] - 2022-10-18
Added
-
Added more page setup methods:
See also the
rust_xlsxwriteruser documentation on Adding Headers and Footers.
[0.5.0] - 2022-10-16
Added
-
Added page setup methods:
[0.4.0] - 2022-10-10
Added
- Added support for array formulas and dynamic array formulas via
Worksheet::write_array()andWorksheet::write_dynamic_array_formula_with_format().
See also the rust_xlsxwriter user documentation on Dynamic Array support.
[0.3.1] - 2022-10-01
Fixed
- Fixed minor crate issue.
[0.3.0] - 2022-10-01
Added
- Added
Worksheet::write_boolean_with_format()method to support writing Excel boolean values.
[0.2.1] - 2022-09-22
Fixed
- Fixed some minor crate/publishing issues.
[0.2.0] - 2022-09-24
Added
- First functional version. Supports the main data types and formatting.
[0.1.0] - 2022-07-12
Added
- Initial, non-functional crate, to initiate namespace.
License
The rust_xlsxwriter library is licensed under the same terms as the Rust
language which is a dual license of either Version 2.0 of the Apache License, or
the MIT license, as shown below.
Apache 2.0
                             Apache License
                       Version 2.0, January 2004
                    http://www.apache.org/licenses/
TERMS AND CONDITIONS FOR USE, REPRODUCTION, AND DISTRIBUTION
-
Definitions.
"License" shall mean the terms and conditions for use, reproduction, and distribution as defined by Sections 1 through 9 of this document.
"Licensor" shall mean the copyright owner or entity authorized by the copyright owner that is granting the License.
"Legal Entity" shall mean the union of the acting entity and all other entities that control, are controlled by, or are under common control with that entity. For the purposes of this definition, "control" means (i) the power, direct or indirect, to cause the direction or management of such entity, whether by contract or otherwise, or (ii) ownership of fifty percent (50%) or more of the outstanding shares, or (iii) beneficial ownership of such entity.
"You" (or "Your") shall mean an individual or Legal Entity exercising permissions granted by this License.
"Source" form shall mean the preferred form for making modifications, including but not limited to software source code, documentation source, and configuration files.
"Object" form shall mean any form resulting from mechanical transformation or translation of a Source form, including but not limited to compiled object code, generated documentation, and conversions to other media types.
"Work" shall mean the work of authorship, whether in Source or Object form, made available under the License, as indicated by a copyright notice that is included in or attached to the work (an example is provided in the Appendix below).
"Derivative Works" shall mean any work, whether in Source or Object form, that is based on (or derived from) the Work and for which the editorial revisions, annotations, elaborations, or other modifications represent, as a whole, an original work of authorship. For the purposes of this License, Derivative Works shall not include works that remain separable from, or merely link (or bind by name) to the interfaces of, the Work and Derivative Works thereof.
"Contribution" shall mean any work of authorship, including the original version of the Work and any modifications or additions to that Work or Derivative Works thereof, that is intentionally submitted to Licensor for inclusion in the Work by the copyright owner or by an individual or Legal Entity authorized to submit on behalf of the copyright owner. For the purposes of this definition, "submitted" means any form of electronic, verbal, or written communication sent to the Licensor or its representatives, including but not limited to communication on electronic mailing lists, source code control systems, and issue tracking systems that are managed by, or on behalf of, the Licensor for the purpose of discussing and improving the Work, but excluding communication that is conspicuously marked or otherwise designated in writing by the copyright owner as "Not a Contribution."
"Contributor" shall mean Licensor and any individual or Legal Entity on behalf of whom a Contribution has been received by Licensor and subsequently incorporated within the Work.
-
Grant of Copyright License. Subject to the terms and conditions of this License, each Contributor hereby grants to You a perpetual, worldwide, non-exclusive, no-charge, royalty-free, irrevocable copyright license to reproduce, prepare Derivative Works of, publicly display, publicly perform, sublicense, and distribute the Work and such Derivative Works in Source or Object form.
-
Grant of Patent License. Subject to the terms and conditions of this License, each Contributor hereby grants to You a perpetual, worldwide, non-exclusive, no-charge, royalty-free, irrevocable (except as stated in this section) patent license to make, have made, use, offer to sell, sell, import, and otherwise transfer the Work, where such license applies only to those patent claims licensable by such Contributor that are necessarily infringed by their Contribution(s) alone or by combination of their Contribution(s) with the Work to which such Contribution(s) was submitted. If You institute patent litigation against any entity (including a cross-claim or counterclaim in a lawsuit) alleging that the Work or a Contribution incorporated within the Work constitutes direct or contributory patent infringement, then any patent licenses granted to You under this License for that Work shall terminate as of the date such litigation is filed.
-
Redistribution. You may reproduce and distribute copies of the Work or Derivative Works thereof in any medium, with or without modifications, and in Source or Object form, provided that You meet the following conditions:
(a) You must give any other recipients of the Work or Derivative Works a copy of this License; and
(b) You must cause any modified files to carry prominent notices stating that You changed the files; and
(c) You must retain, in the Source form of any Derivative Works that You distribute, all copyright, patent, trademark, and attribution notices from the Source form of the Work, excluding those notices that do not pertain to any part of the Derivative Works; and
(d) If the Work includes a "NOTICE" text file as part of its distribution, then any Derivative Works that You distribute must include a readable copy of the attribution notices contained within such NOTICE file, excluding those notices that do not pertain to any part of the Derivative Works, in at least one of the following places: within a NOTICE text file distributed as part of the Derivative Works; within the Source form or documentation, if provided along with the Derivative Works; or, within a display generated by the Derivative Works, if and wherever such third-party notices normally appear. The contents of the NOTICE file are for informational purposes only and do not modify the License. You may add Your own attribution notices within Derivative Works that You distribute, alongside or as an addendum to the NOTICE text from the Work, provided that such additional attribution notices cannot be construed as modifying the License.
You may add Your own copyright statement to Your modifications and may provide additional or different license terms and conditions for use, reproduction, or distribution of Your modifications, or for any such Derivative Works as a whole, provided Your use, reproduction, and distribution of the Work otherwise complies with the conditions stated in this License.
-
Submission of Contributions. Unless You explicitly state otherwise, any Contribution intentionally submitted for inclusion in the Work by You to the Licensor shall be under the terms and conditions of this License, without any additional terms or conditions. Notwithstanding the above, nothing herein shall supersede or modify the terms of any separate license agreement you may have executed with Licensor regarding such Contributions.
-
Trademarks. This License does not grant permission to use the trade names, trademarks, service marks, or product names of the Licensor, except as required for reasonable and customary use in describing the origin of the Work and reproducing the content of the NOTICE file.
-
Disclaimer of Warranty. Unless required by applicable law or agreed to in writing, Licensor provides the Work (and each Contributor provides its Contributions) on an "AS IS" BASIS, WITHOUT WARRANTIES OR CONDITIONS OF ANY KIND, either express or implied, including, without limitation, any warranties or conditions of TITLE, NON-INFRINGEMENT, MERCHANTABILITY, or FITNESS FOR A PARTICULAR PURPOSE. You are solely responsible for determining the appropriateness of using or redistributing the Work and assume any risks associated with Your exercise of permissions under this License.
-
Limitation of Liability. In no event and under no legal theory, whether in tort (including negligence), contract, or otherwise, unless required by applicable law (such as deliberate and grossly negligent acts) or agreed to in writing, shall any Contributor be liable to You for damages, including any direct, indirect, special, incidental, or consequential damages of any character arising as a result of this License or out of the use or inability to use the Work (including but not limited to damages for loss of goodwill, work stoppage, computer failure or malfunction, or any and all other commercial damages or losses), even if such Contributor has been advised of the possibility of such damages.
-
Accepting Warranty or Additional Liability. While redistributing the Work or Derivative Works thereof, You may choose to offer, and charge a fee for, acceptance of support, warranty, indemnity, or other liability obligations and/or rights consistent with this License. However, in accepting such obligations, You may act only on Your own behalf and on Your sole responsibility, not on behalf of any other Contributor, and only if You agree to indemnify, defend, and hold each Contributor harmless for any liability incurred by, or claims asserted against, such Contributor by reason of your accepting any such warranty or additional liability.
END OF TERMS AND CONDITIONS
APPENDIX: How to apply the Apache License to your work.
  To apply the Apache License to your work, attach the following
  boilerplate notice, with the fields enclosed by brackets "[]"
  replaced with your own identifying information. (Don't include
  the brackets!)  The text should be enclosed in the appropriate
  comment syntax for the file format. We also recommend that a
  file or class name and description of purpose be included on the
  same "printed page" as the copyright notice for easier
  identification within third-party archives.
Copyright 2022-2026 John McNamara jmcnamara@cpan.org
Licensed under the Apache License, Version 2.0 (the "License"); you may not use this file except in compliance with the License. You may obtain a copy of the License at
http://www.apache.org/licenses/LICENSE-2.0
Unless required by applicable law or agreed to in writing, software distributed under the License is distributed on an "AS IS" BASIS, WITHOUT WARRANTIES OR CONDITIONS OF ANY KIND, either express or implied. See the License for the specific language governing permissions and limitations under the License.
MIT License
Copyright 2022-2026 John McNamara jmcnamara@cpan.org
Permission is hereby granted, free of charge, to any person obtaining a copy of this software and associated documentation files (the "Software"), to deal in the Software without restriction, including without limitation the rights to use, copy, modify, merge, publish, distribute, sublicense, and/or sell copies of the Software, and to permit persons to whom the Software is furnished to do so, subject to the following conditions:
The above copyright notice and this permission notice shall be included in all copies or substantial portions of the Software.
THE SOFTWARE IS PROVIDED "AS IS", WITHOUT WARRANTY OF ANY KIND, EXPRESS OR IMPLIED, INCLUDING BUT NOT LIMITED TO THE WARRANTIES OF MERCHANTABILITY, FITNESS FOR A PARTICULAR PURPOSE AND NONINFRINGEMENT. IN NO EVENT SHALL THE AUTHORS OR COPYRIGHT HOLDERS BE LIABLE FOR ANY CLAIM, DAMAGES OR OTHER LIABILITY, WHETHER IN AN ACTION OF CONTRACT, TORT OR OTHERWISE, ARISING FROM, OUT OF OR IN CONNECTION WITH THE SOFTWARE OR THE USE OR OTHER DEALINGS IN THE SOFTWARE.
Author
rust_xlsxwriter was written by John McNamara, who also wrote: